Classic Cubby Series
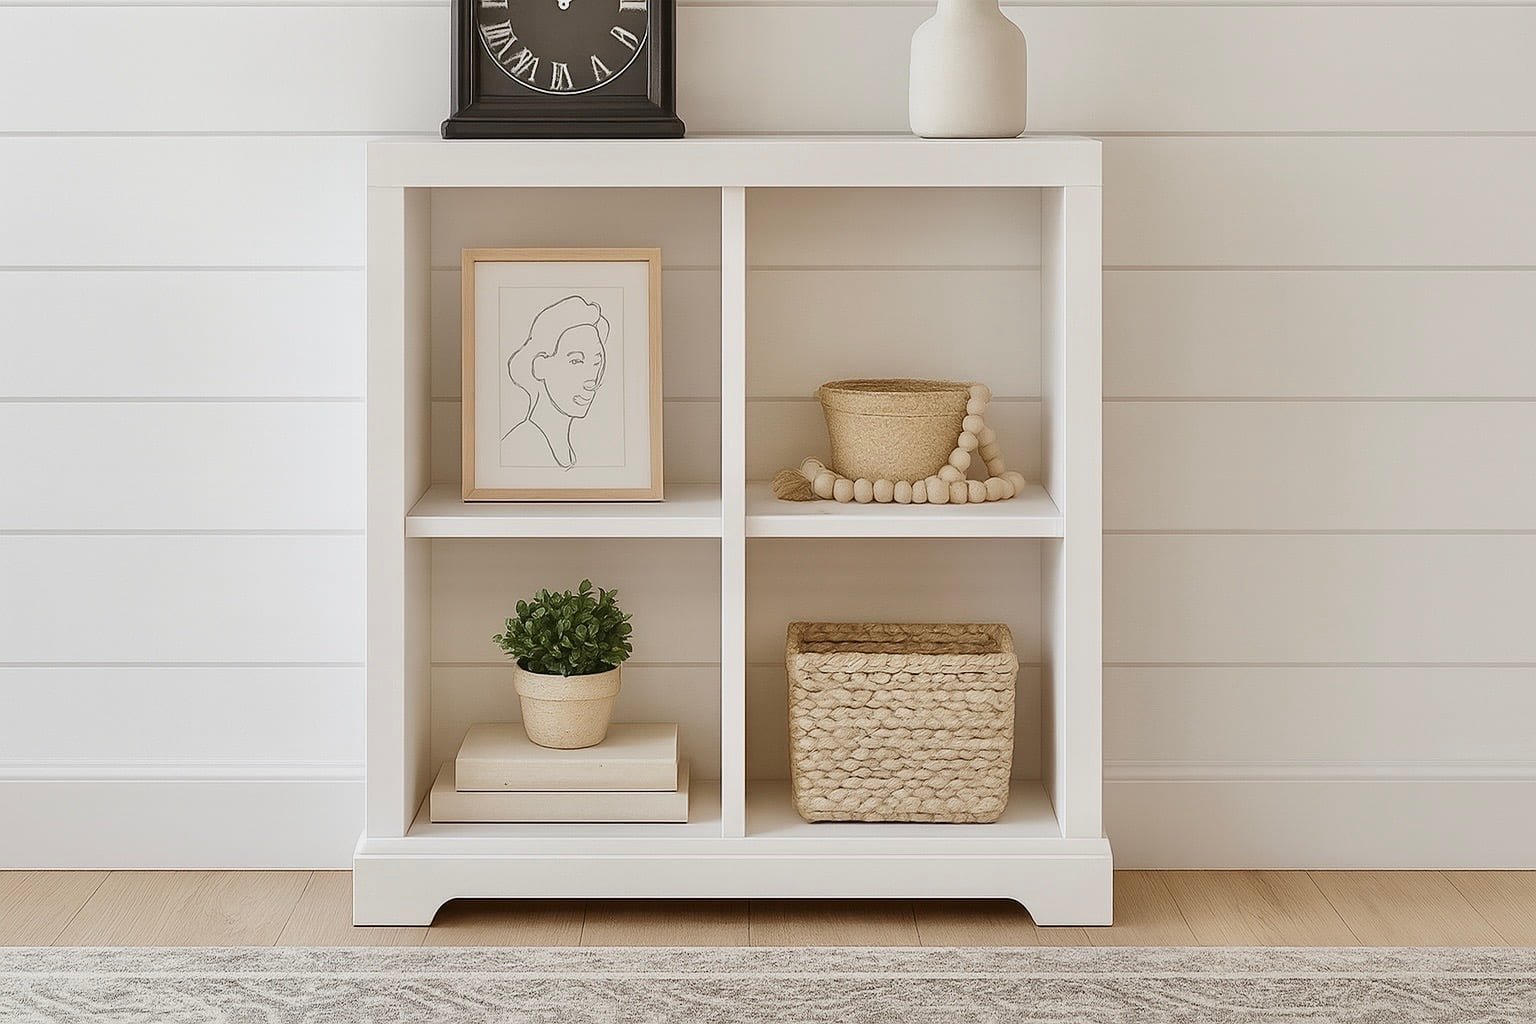
Build this versatile 4-cubby storage unit—perfect as a bookshelf, nightstand, or small organizer. Easy to customize and quick to assemble with basic woodworking tools and affordable lumber. Ideal for beginner woodworkers, this DIY cubby unit features a clean, classic style that matches any room decor. Make it your own with paint or stain. with diagrams, cut lists, and detailed instructions included. Features: • Beginner-friendly woodworking project • Versatile use: nightstand, bookshelf, or organizer • Easily customizable size and finish • Sturdy, simple construction using common lumber • Matches additional Classic Cubby Series units ( 6-cubby and 9-cubby versions available) •, shopping list, and cutting diagrams included
Specifications
| Project type | Bookshelf and Bookcase Plans |
|---|---|
| Room | Storage Solutions |
| Style | Farmhouse Furniture |
| Difficulty | Intermediate |
| Estimated cost | $20 - $50 |
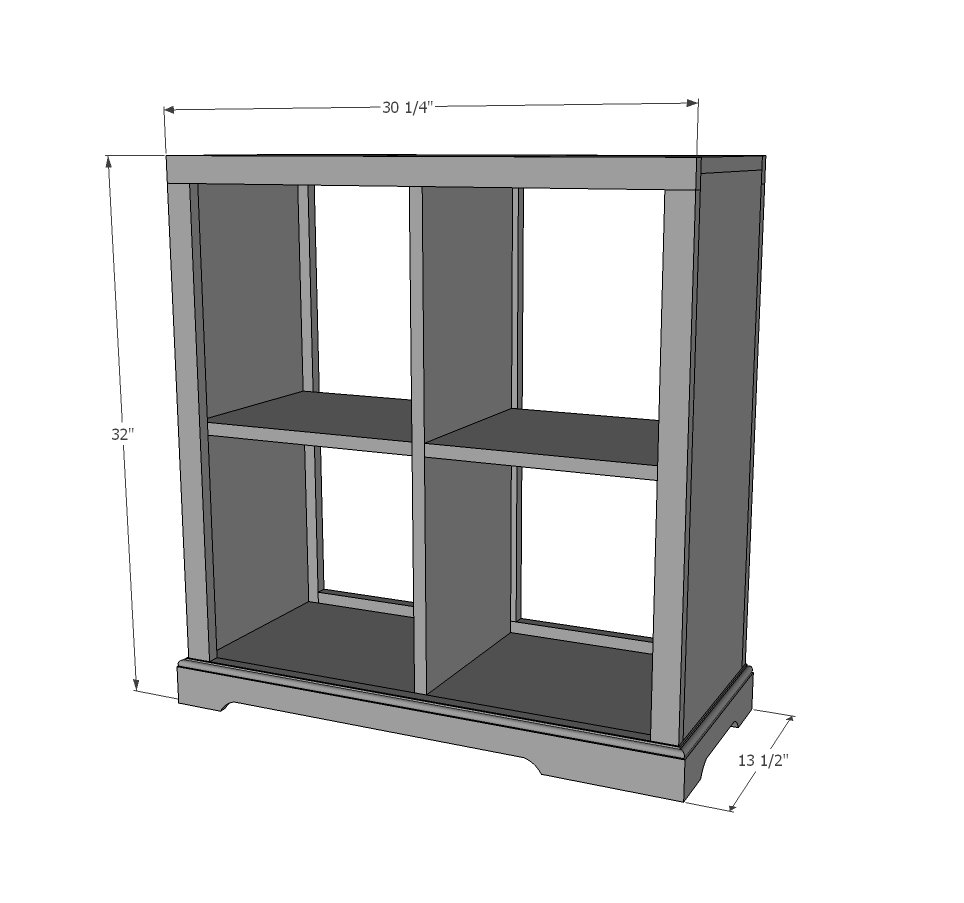
Dimensions
Use the size-specific shopping and cut lists below.
Shopping List
- 2 - 1x12 @ 8 feet long
- 3 - 1x2 @ 8 feet long
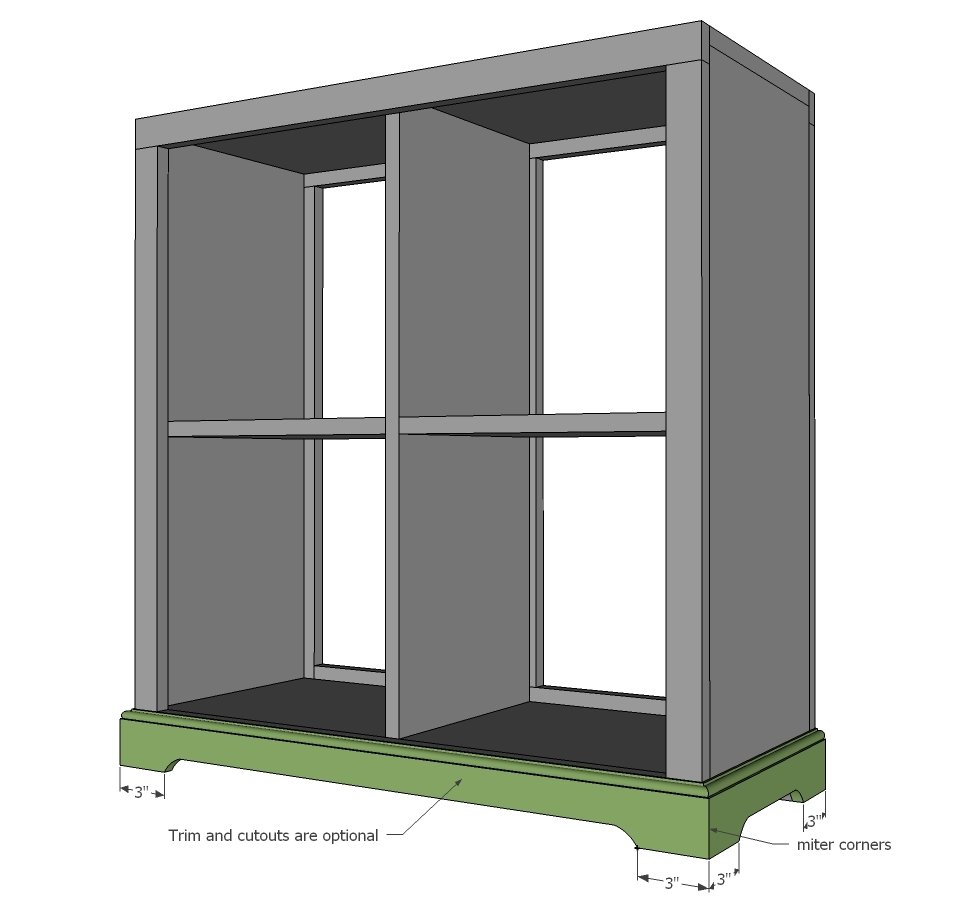
- Optional 2 1/4" base moulding (5 feet)
- Optional shelf pins for adjustable shelves
- Use either 1 1/4" pocket holes (with Kreg Jig) or 2" self tapping star bit screws
- Jigsaw is for decorative cuts
- Mitersaw is for mitered corners on decorative base moulding
Cut List
- 2 - 1x12 @ 31 1/4" (sides)
- 1 - 1x12 @ 28 1/2" (center divider)
- 1 - 1x12 @ 30 1/4" (top)
- 1 - 1x12 @ 28 3/4" (bottom shelf)
- 2 - 1x12 @ 14" (shelves)
FACE FRAMES
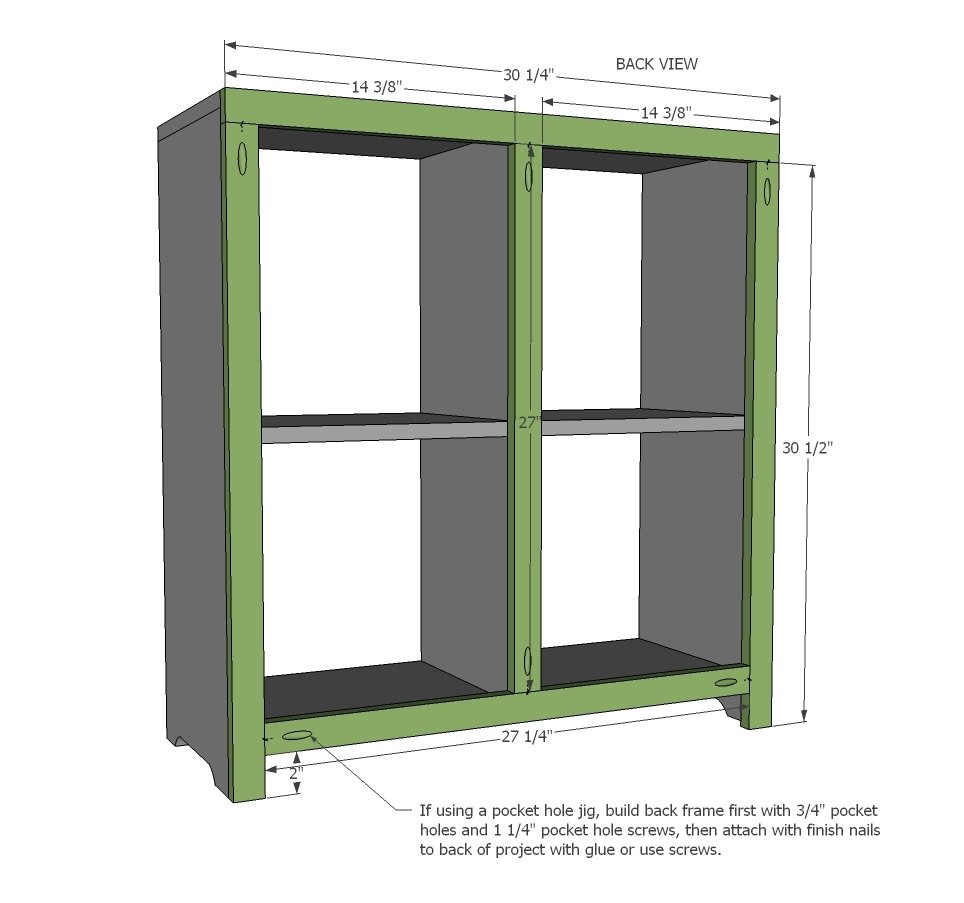
- 2 - 1x2 @ 30 1/4" (top)
- 4 - 1x2 @ 30 1/2" (sides)
- 2 - 1x2 @ 27 1/4" (bottom)
- 1 - 1x2 @ 27" (back, center - optional)
Tools
- measuring tape
- square
- pencil
- safety glasses
- hearing protection
- kreg-jig
- drill
- circular saw
- jigsaw
- compound miter saw
- nailer
- sander
- countersink drill bit
Step-by-step Instructions
Step 1
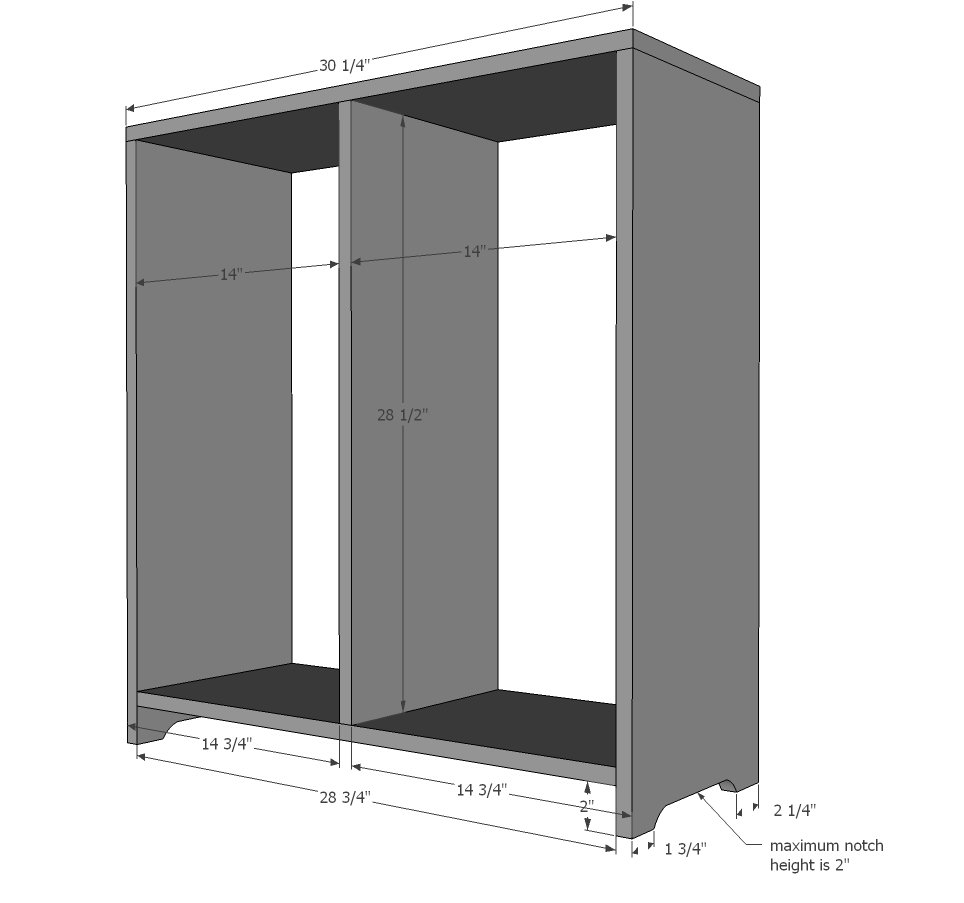
Start by building your box. You can either use 3/4" pocket holes and 1 1/4" pocket hole screws or 2" countersunk screws and glue.
Step 2
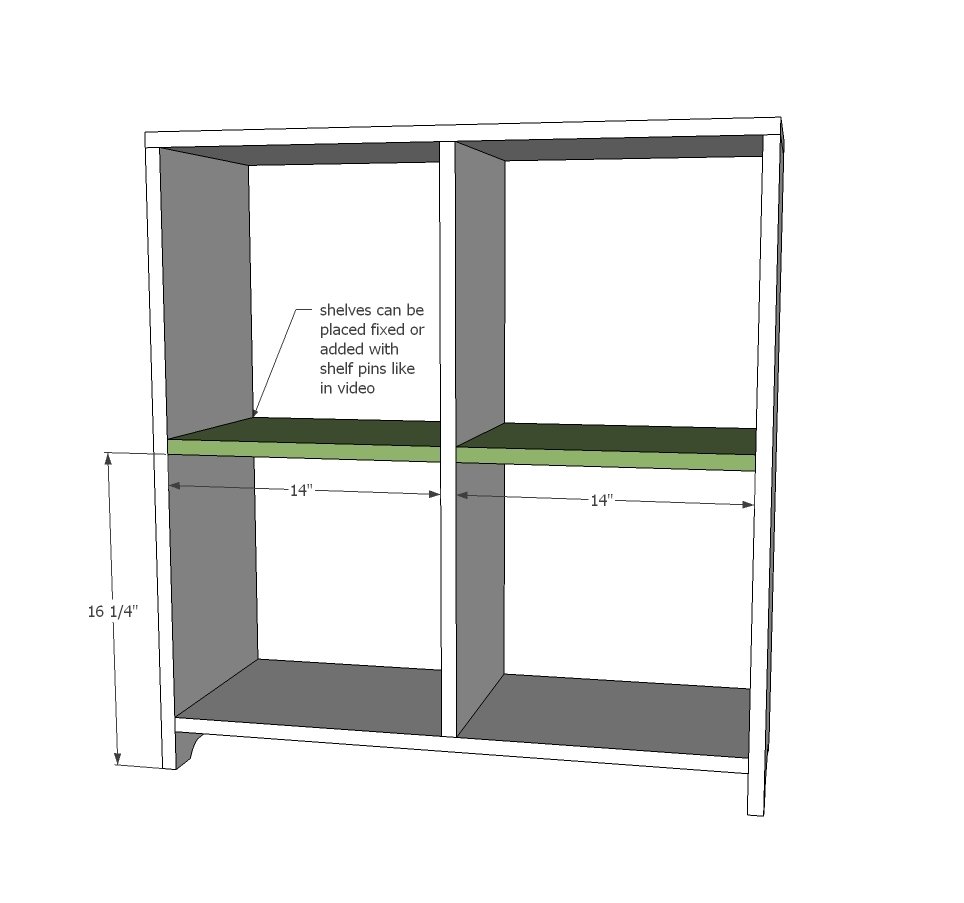
Shelves can be added fixed or added with shelf pins as done in the video. The side notch outs are optional, and you can actually do this later on as well.
Step 3
Add back face frame.
Step 4
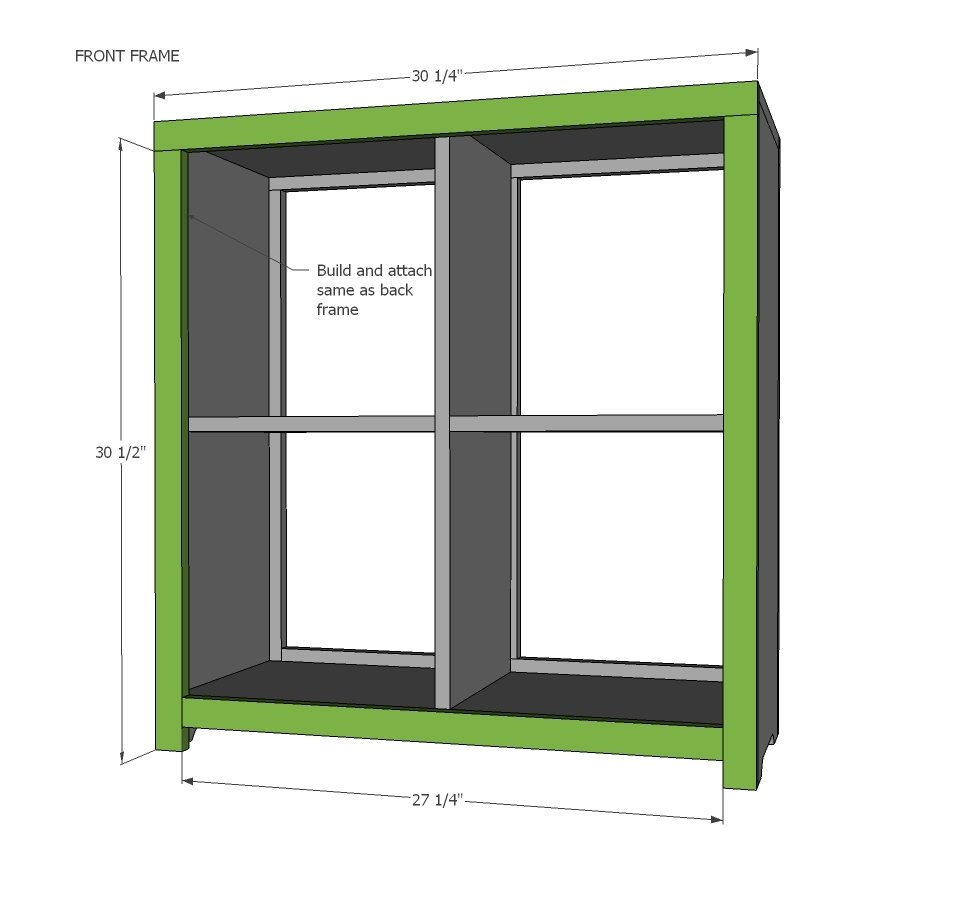
And then the front face frame. If your shelves are adjustable, do not nail to shelves.
Step 5
Finishing
Sand all surfaces, starting with a medium grit and finishing with fine. Wipe off the dust, fill any holes or gaps with wood filler, and sand smooth once dry. Apply primer if you're painting, then finish with your choice of paint or stain and seal with a durable clear topcoat. For outdoor projects, use exterior-rated primer, paint or stain, and sealer so the piece stands up to the weather.
Source (temporary): https://www.ana-white.com/woodworking-projects/classic-cubby-series-4-cubby-bookshelfnightstand