Classic Cubby Series
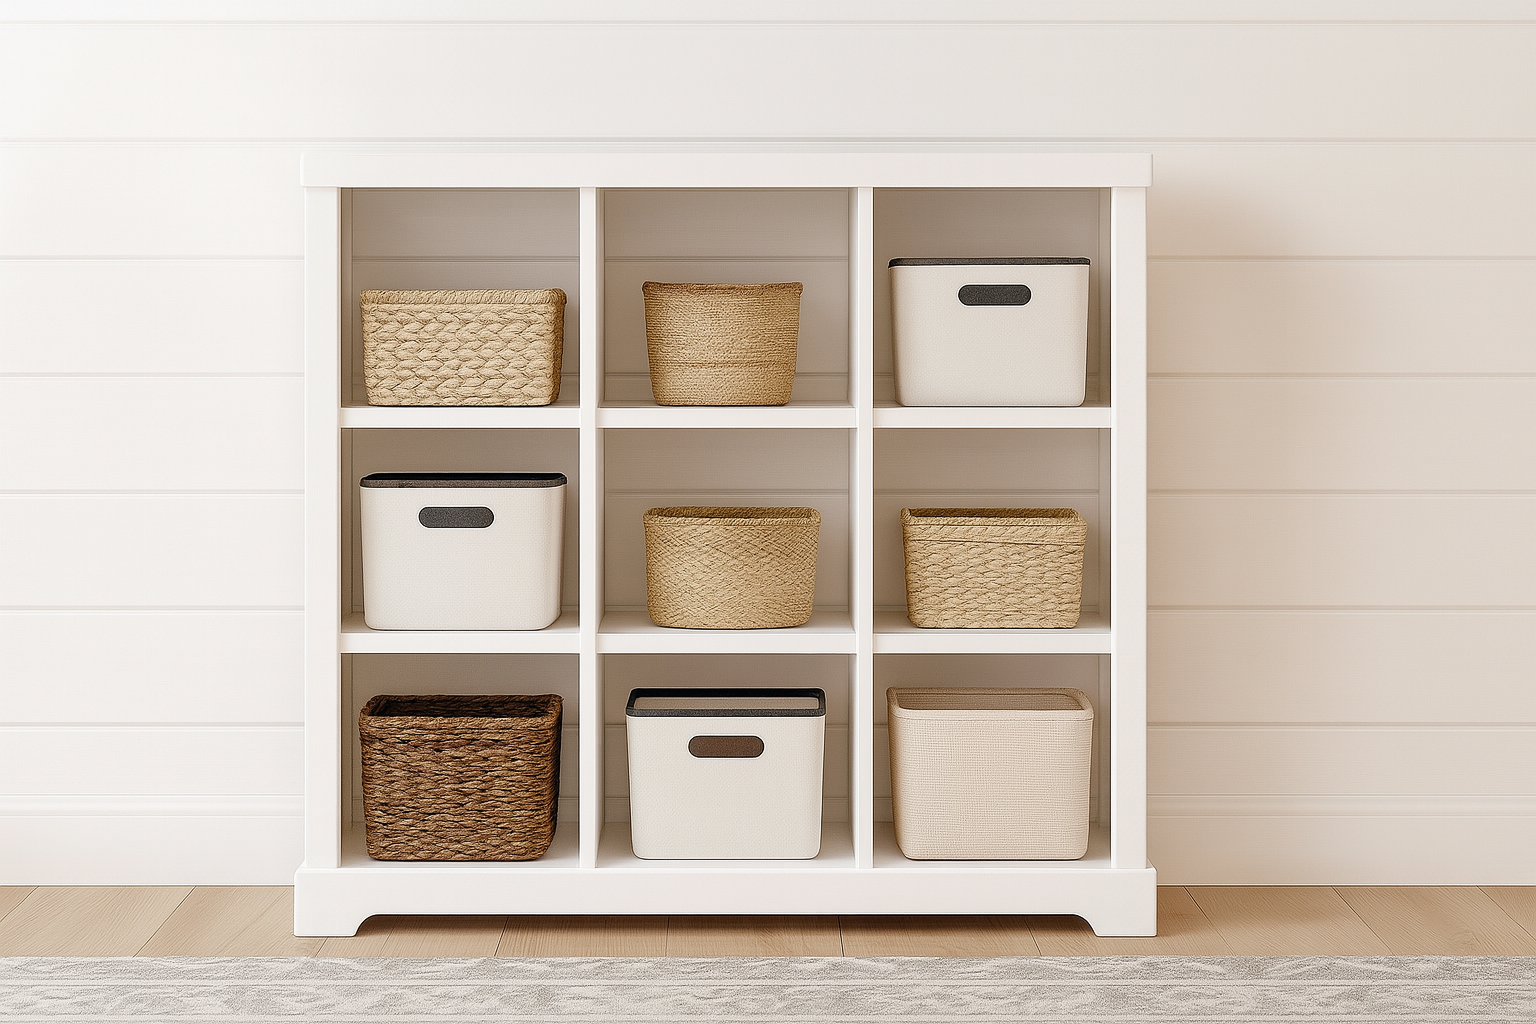
Organize your home beautifully with this easy-to-build 9-cubby bookshelf. Perfect for showcasing books, bins, decor, or toys, this beginner-friendly woodworking project offers ample storage with classic, clean lines. Constructed from affordable, readily available lumber using basic tools, it's easy to customize with your favorite paint or stain. Complete your set by pairing it with the matching 4-cubby or 6-cubby units. include detailed diagrams, step-by-step instructions, and shopping and cut lists. Features: • Beginner-friendly DIY woodworking project • Spacious storage for books, baskets, decor, and toys • Easily customizable dimensions and finish • Sturdy and durable construction with simple techniques • Coordinates seamlessly with the Classic Cubby Series ( 4-cubby and 6-cubby versions available) • with diagrams, cut lists, and instructions included
Specifications
| Project type | Bookshelf and Bookcase Plans |
|---|---|
| Room | Storage Solutions |
| Style | Children's and Kid's Room Furniture and Toy Plans |
| Difficulty | Intermediate |
| Estimated cost | $100-$150 |
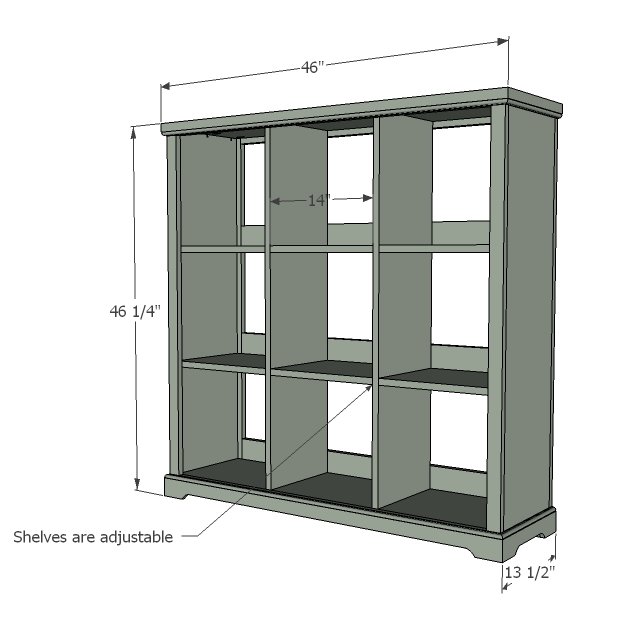
Dimensions
Use the size-specific shopping and cut lists below.
Shopping List
- 3 - 1x12 @ 8 feet long
- 5 - 1x2 @ 8 feet long optional moulding shelf pins
Cut List
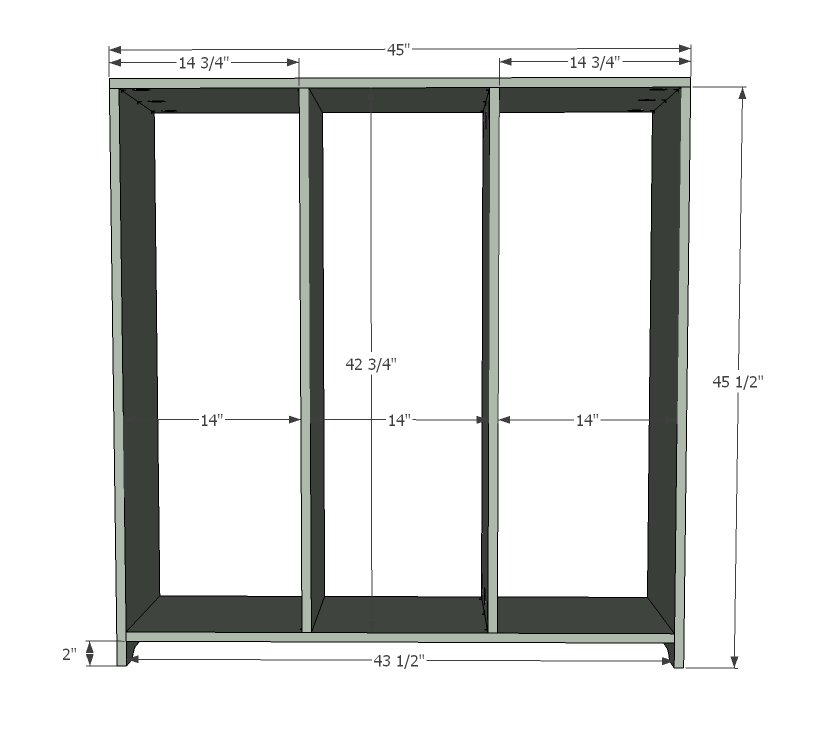
BOX 2 - 1x12 @ 45 1/2" (sides)
- 1 - 1x12 @ 45" (top)
- 1 - 1x12 @ 43 1/2" (bottom)
- 2 1 x 12 @ 42 3/4" (middle uprights)
- 6 - 1x12 @ 14" (shelves)
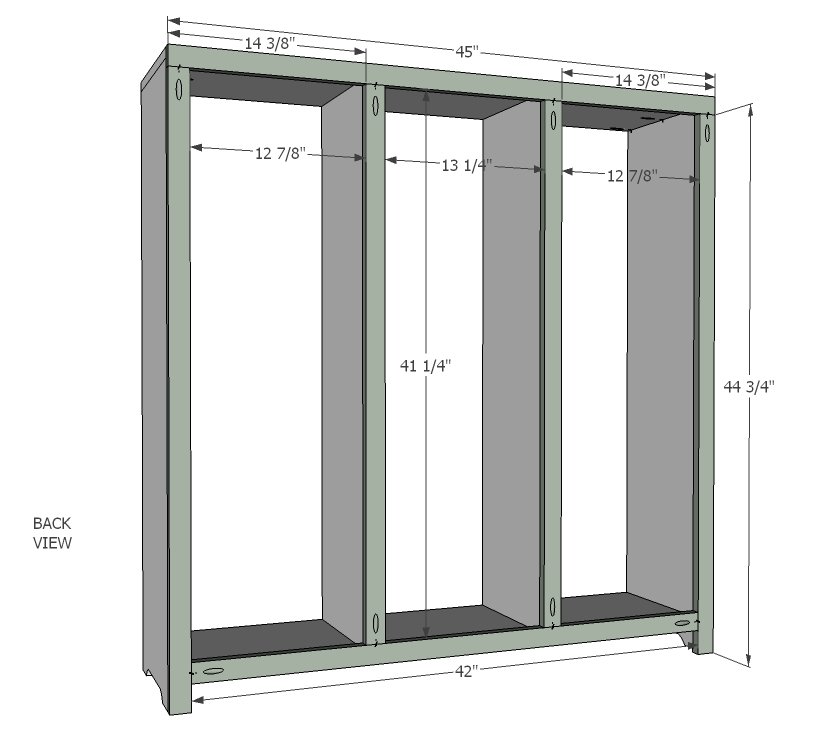
BACK FACE FRAME 2 - 1x2 @ 44 3/4"
- 1 - 1x2 @ 45"
- 1 - 1x2 @ 42"
- 2 - 1x2 @ 41 1/4"
FRONT FACE FRAME 1 - 1x2 @ 45"
- 2 - 1x2 @ 44 3/4"
- 1 - 1x2 @ 42"
- Optional moulding is cut to fit
Tools
- measuring tape
- square
- pencil
- hammer
- hearing protection
- kreg-jig
- drill
- circular saw
- nailer
- sander
Step-by-step Instructions
Step 1
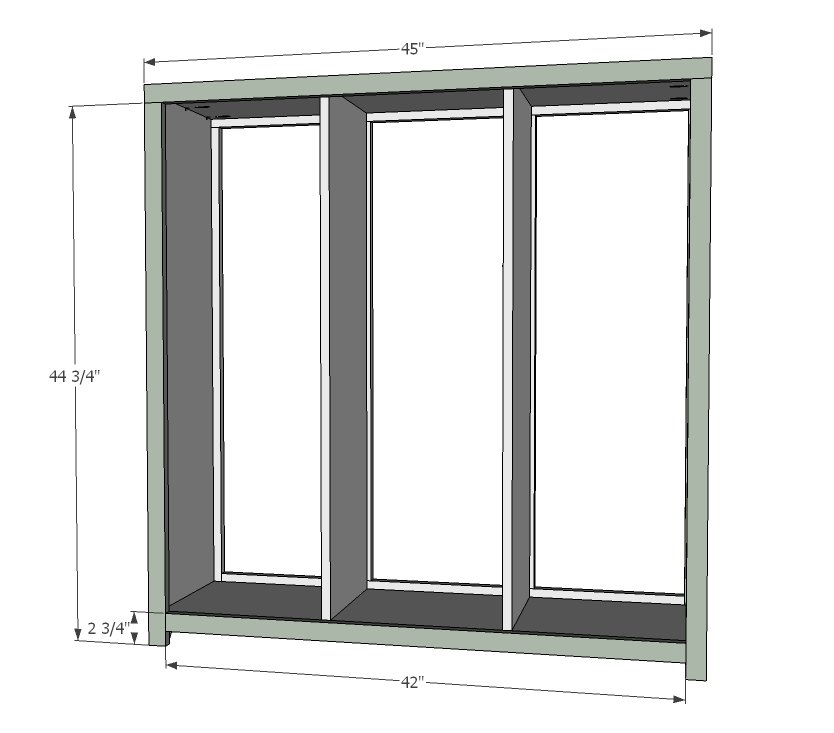
Build the box. I used 3/4" pocket holes and 1 1/4" pocket hole screws and glue.
Step 2
Build back face frame first with Kreg Jig, then attach with 1 1/4" finish nails and glue.
Step 3
Now build the front face frame as you did the back face frame, and attach with pocket holes to back with 1 1/4" finish nails and glue.
Step 4
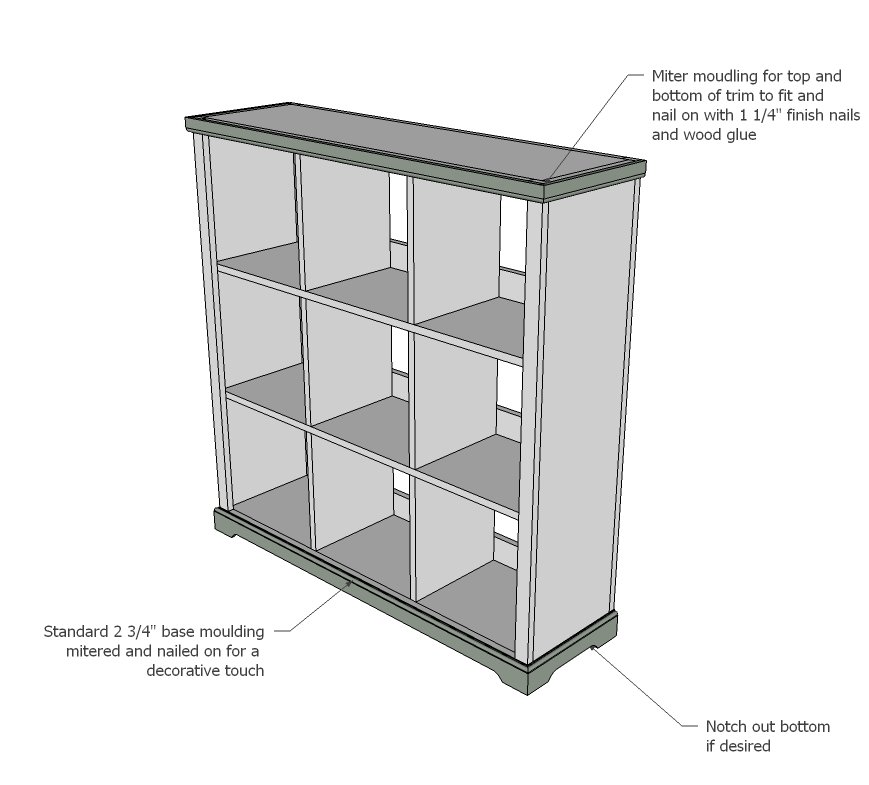
Add optional moulding if desired...
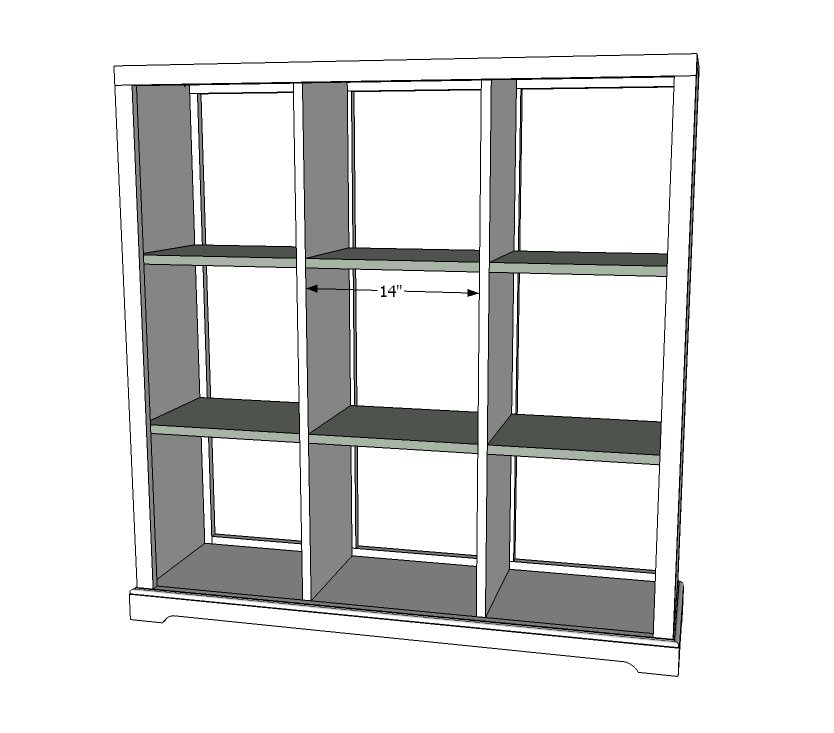
You can add the shelves with either pocket holes on the underside or using shelf pins.
If using pocket holes, drill two per end of each shelf (close to the outside edges) and attach with 1-1/4" pocket hole screws. If using the shelf pins, drill shelf pin holes using a shelf pin jig. Use shelf pins to set shelf in place.
Finishing
Sand all surfaces, starting with a medium grit and finishing with fine. Wipe off the dust, fill any holes or gaps with wood filler, and sand smooth once dry. Apply primer if you're painting, then finish with your choice of paint or stain and seal with a durable clear topcoat. For outdoor projects, use exterior-rated primer, paint or stain, and sealer so the piece stands up to the weather.
Source (temporary): https://www.ana-white.com/woodworking-projects/classic-cubby-series-9-cubby-bookshelf-free-diy-plans