Classic Storage Wall Glass Hutch Doors
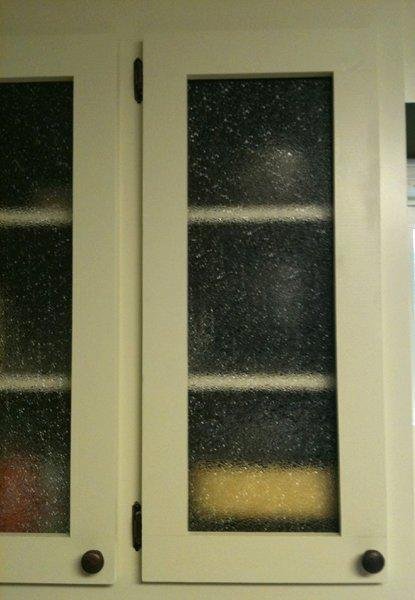
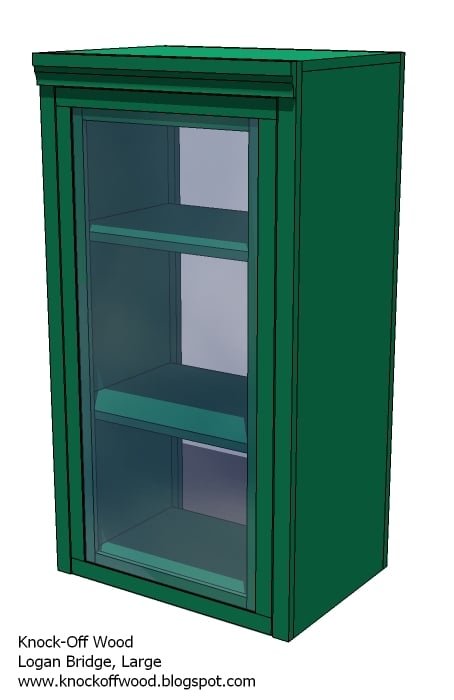
These glass doors are designed to fit the Classic Storage Wall, but Beth choose to use this plan to make new "glass" kitchen cabinets with this plan. She used florescent lighting plates for just $8 each instead of glass for a beautiful translucent door. This plan works with the Classic Storage Wall Hutch, but you can modify it to fit your needs, as Beth did.
Specifications
| Project type | Media and Entertainment Centers |
|---|---|
| Room | Storage Solutions |
| Style | Cottage Style Furniture Plans |
| Difficulty | Intermediate |
| Estimated cost | $20 - $50 |
Dimensions
Use the size-specific shopping and cut lists below.
Shopping List
3 - 4′ pieces of 1/2″ x 2 1/2″(this is actual dimensions) (craft board in your desired finish (ie maple, oak, or pine if you are painting) 3 – 4′ pieces of 1/4″ x 1 1/2″ (this is actual dimensions) (craft board in your desired finish (ie maple, oak, or pine if you are painitng) Acrylic sheet, less than 1/4″ thick like this sheet of Acrylic from Lowes, approximately $20 for a 2′x4′ sheet (as much as you need per each door) Gorrilla Glue or other multiple surface glue that DRIES CLEAR 5/8″ brad nails (if you have a nailer that fits 5/8″ nails) or tacks or staples you can pound in with a good ole hammer Knob Hinges for an inset door Wood Filler Sandpaper and Finishing Supplies Wood Beading or other wood trim for creating the “grid” on the face of the glass
Cut List
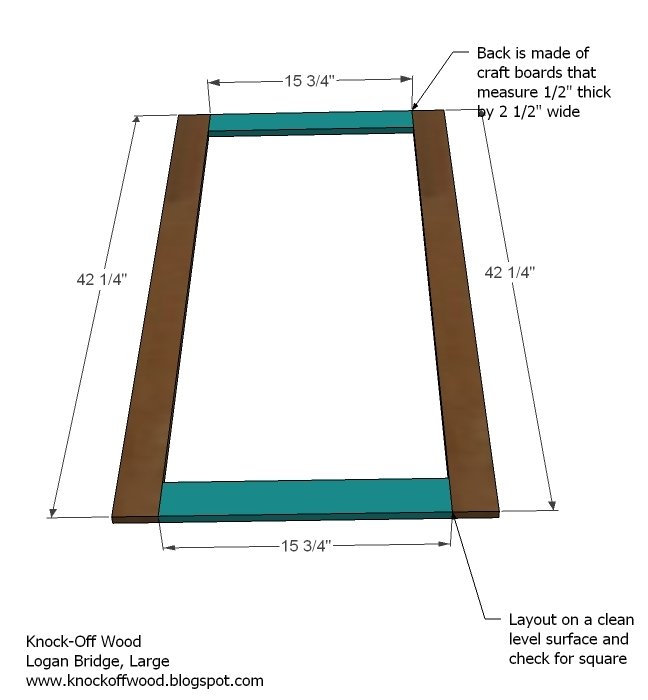
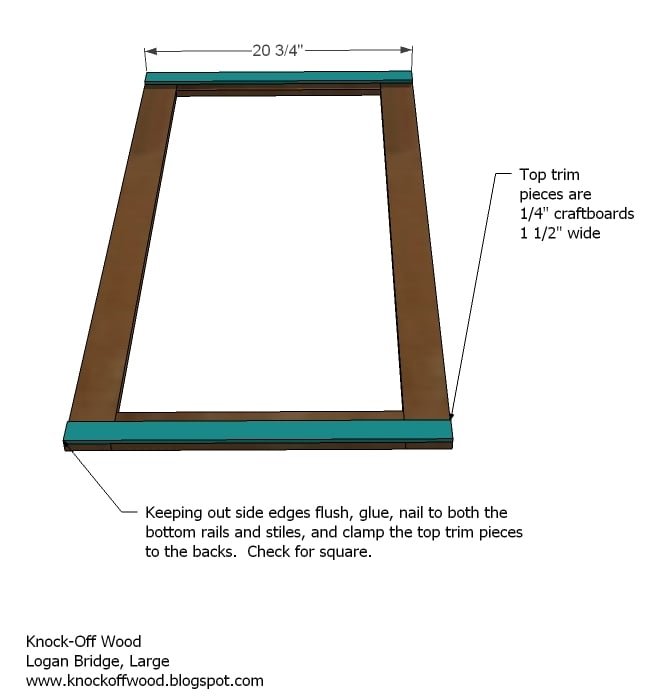
Cut List for the Door Backs 2 – 1/2″ x 2 1/2″ Craft Boards @ 42 1/4″ 2 – 1/2″ x 2 1/2″ Craft Boards @ 15 3/4″ Cut List for the Door Fronts 2- 1/2″ x 1 1/2″ Craft Boards @ 20 3/4″ 2 – 1/2″ x 1 1/2″ Craft Boards @ 39 1/4″ 1 – 1/4″ (or less) acrylic sheet @ 39 1/4″ x 17 3/4″ (glass)
Tools
- measuring tape
- square
- safety glasses
- hearing protection
- circular saw
- nailer
Step-by-step Instructions
Step 1
Back boards. Layout the boards that are 2 1/2″ wide as shown above. Square up your layout and make sure you are working on a clean level surface.
Step 2
Front Stiles. Attach the front stiles with glue, clamps and 5/8″ brad nails. Make sure you have added glue in the joint on the back trim too. Let dry according to glue directions.
Step 3
Front Rails. Measure and cut the front rails to fit the sides of the front. Dry fit. Then attach in the same method as you did the stiles from step 2.
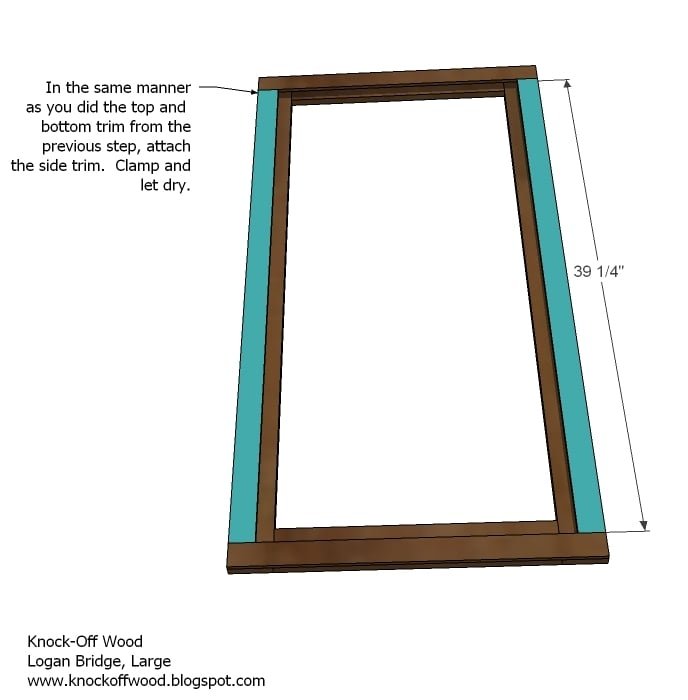
Step 4
Acrylic. Your hardware store may be willing to cut your acrylic for you. If not, cut your acrylic with a fine toothed metal cutting blade. Using multisurface clear drying glue (Gorilla Glue is a good one) glue the acrylic in place. You may wish to paint or stain your frame before applying the acrylic.
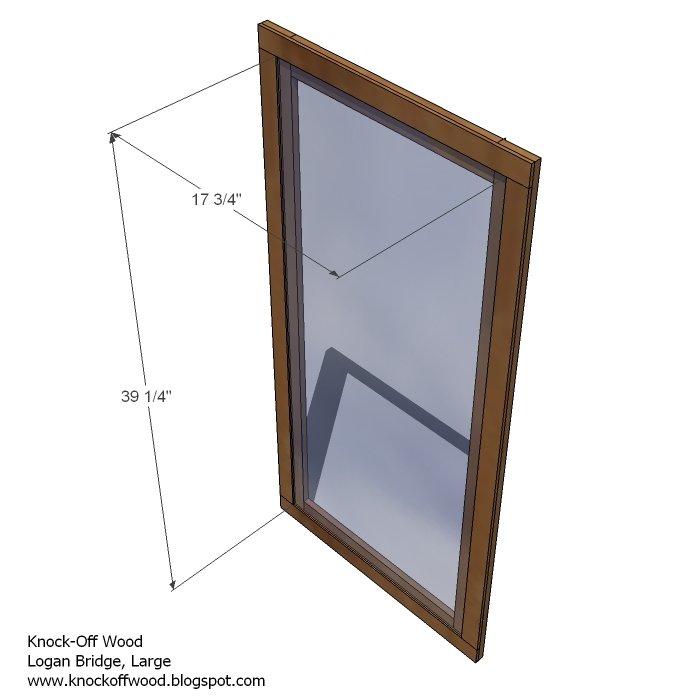
Finishing
Sand all surfaces, starting with a medium grit and finishing with fine. Wipe off the dust, fill any holes or gaps with wood filler, and sand smooth once dry. Apply primer if you're painting, then finish with your choice of paint or stain and seal with a durable clear topcoat. For outdoor projects, use exterior-rated primer, paint or stain, and sealer so the piece stands up to the weather.
Source (temporary): https://www.ana-white.com/woodworking-projects/classic-storage-wall-glass-hutch-doors