Classic Storage Wall Side Base Units
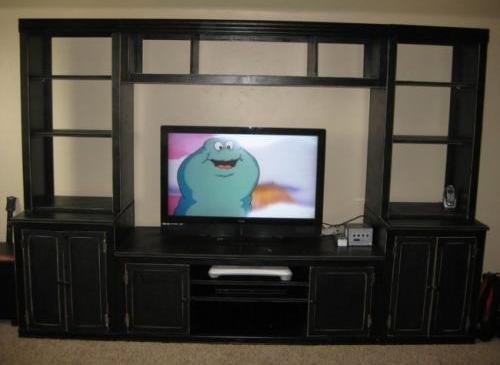
All the beauty and functionality of expensive built-ins, but none of the cost or limitations. Build this base cabinet to keep your media center both beautiful and organized. Features optional shelf and pullout drawer, two doors, and simple moulding details. Works with the rest of the Classic Storage Collection.
Specifications
| Project type | Media and Entertainment Centers |
|---|---|
| Room | Storage Solutions |
| Style | Farmhouse Furniture |
| Difficulty | Intermediate |
| Estimated cost | $50 - $100 |
Dimensions
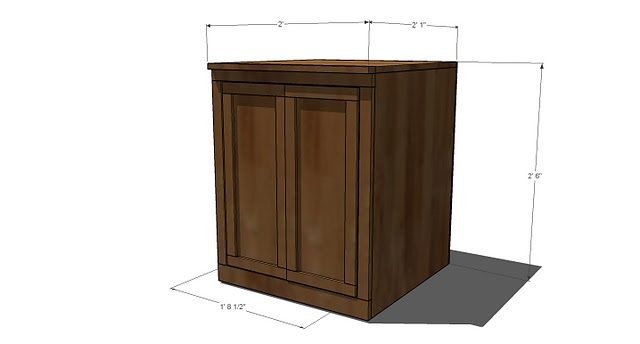
Use the size-specific shopping and cut lists below.
Shopping List
1 Sheet of 3/4″ MDF or Plywood, cut into 23 1/2″ Strips, 8′ long
1 – 1×6 (for the optional pull out drawer)
1 Sheet of 3/8″ MDF or Plywood for backs and doors
1 – 1×2
1- 1×3 (you will only need 24″)
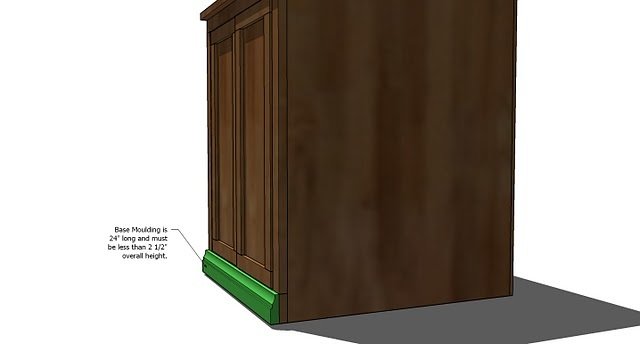
at least 24″ of 2 1/2″ high base moulding
2 – Sets of either butterfly hinges or Face Frame Euro Hinges
2 – Pulls or Knobs
4 - Shelf Pins
21″ Undermount Drawer Slides if you are building pullout drawers.
Edge Banding (If you are staining the project)
Cut List
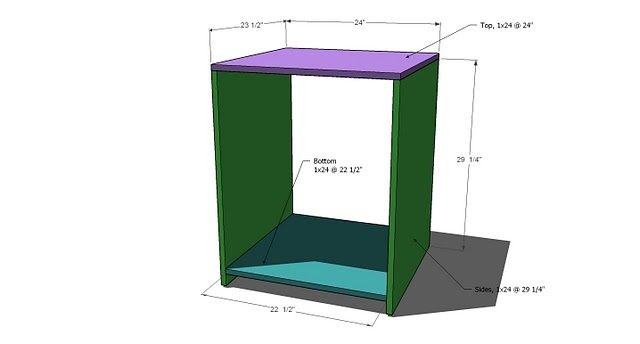
A) 2 – 1×24 @ 29 1/4″ (Sides)
B) 1 – 1×24 @ 22 1/2″ (Bottom)
C) 2 – 1×24 @ 24″ (Top)
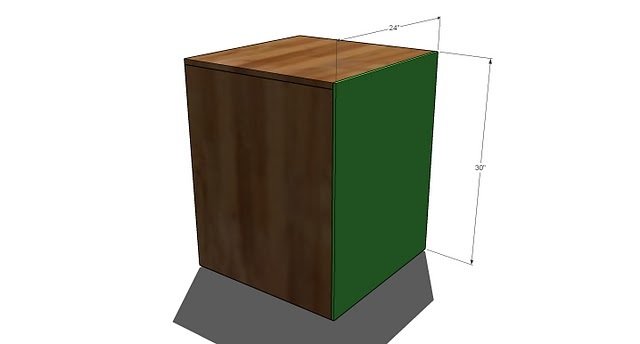
D) 1- 3/8″ Plywood or MDF @ 24″ x 30″ (Back)
E) 1- 1×3 @ 24″ (Bottom Trim)
F) 2 – 1×2 @ 24″ (Top Trim and Top Edge Trim)
G) 2 – 1×2 @ 25 1/4″ (Side Trim)
H) 1 - 1x 24 @ 22 1/2″ (Shelves) Optional Base Moulding, 2 1/2″ overall height, 24″ Long Door Cut List – Recommend measuring the opening in the drawer and building the drawer 1/4″ smaller thean the overall opening. Remember that the door will cover the middle partitions, as shown in the diagrams. These dimensions give are the ideal door dimensions.
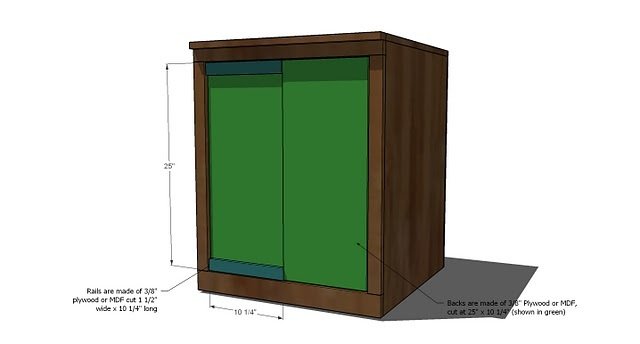
I) 2 – 3/8″ Plywood or MDF @ 10 1/4″ x 25″ (Backs of Doors)
J) 4 – 3/8″ Plywood or MDF @ 1 1/2″ x 10 1/4″ (Rails on the Doors)
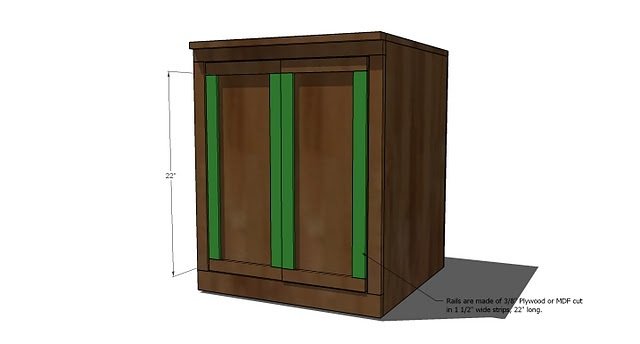
K) 4 – 3/8″ Plywood or MDF @ 1 1/2″ x 22″ (Stiles on the Doors) Optional Pull Out Drawer Cut List – Again, measure your opening and build your drawer to fit. These measurements are the ideal measurements.
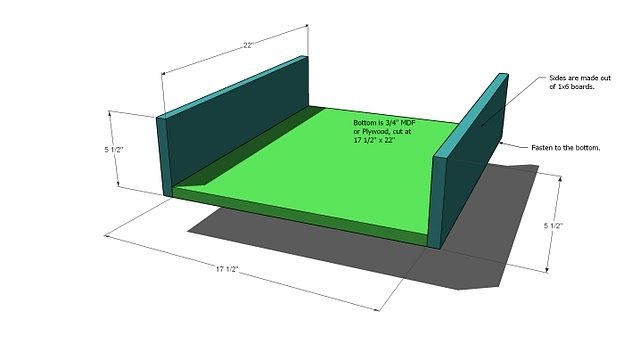
L) 1 – 3/4″ Plywood or MDF @ 17 1/2″ x 22″ (Bottom of pull out drawer)
M) 2- 1×6 @ 22″ (Sides)
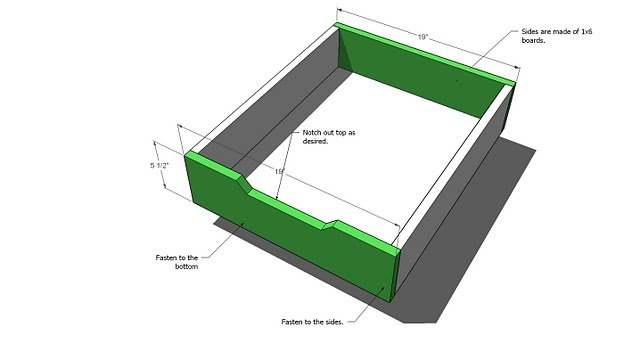
N) 2 – 1×6 @ 19″ (Front and Back)
Tools
- measuring tape
- square
- pencil
- safety glasses
- hearing protection
- kreg-jig
- drill
- circular saw
- jigsaw
- nailer
- sander
Step-by-step Instructions
Step 1
Build the box. Start by fastening the bottom to the sides. Make note that the top of the bottom is 2 1/2″ high, so there will be a 1 3/4″ clearance under the bottom shelf. Then add the top, shown in purple, fastening to the sides. Use 2″ fasteners.
Step 2
Back. TAKE A SQUARE of the project (see HOW-TO section). Then fasten the 3/8″ plywood to the back, as shown above. You can use 1 1/4″ fasteners.
Step 3
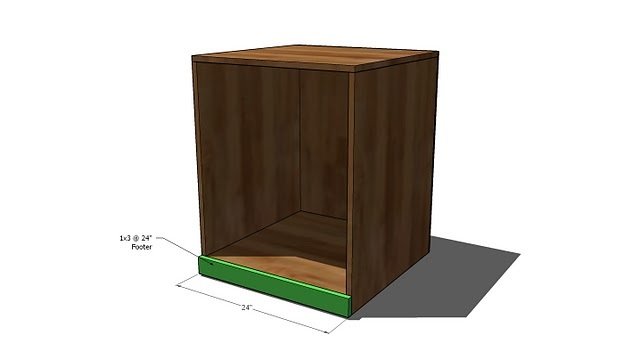
Footer. TAKE A SQUARE. Then add the footer to the front, as shown above. Use the 2″ fasteners.
Step 4
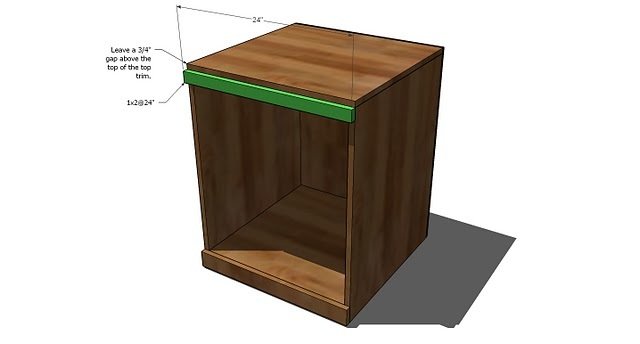
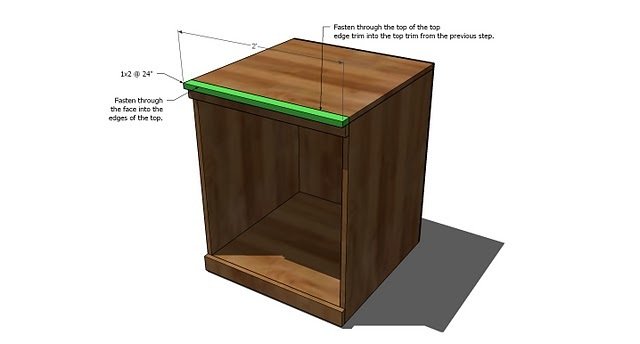
Top Trim. Again, make sure everything is square. Then fasten the top trim in place, as shown above. Keep outside edges flush. Use the 2″ fasteners.
Step 5
Step 6
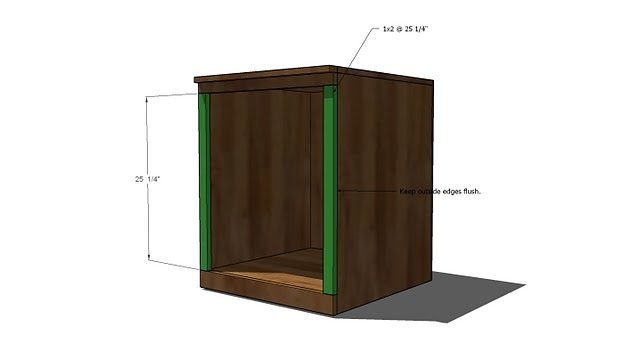
Side Trim. Fasten the side trim, as shown above. Keep outside edges flush. Use the 2″ fasteners.
Step 7
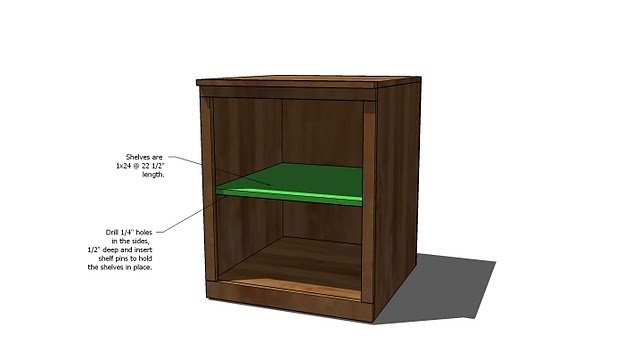
Shelves. Determine where the shelf will be placed and mark the bottom edge with a square. Then drill two holes 1″ from the ends with a 1/4″ bit, 1/2″ deep. You can make sure you are only drilling 1/2″ deep by setting the drill bit in your drill so only 1/2″ is exposed. Insert the shelf pins and add your shelf. You can move your shelf at any time. If you are building with A1 plywood, you will need to finish the front shelf edge with edge banding. See the HOW-TO section for a post on choosing your wood that talks about Edge Banding. Don’t be intimidated by edge banding. It’s cheap and easy and looks great – the odds are your kitchen cabinets are covered in it!
Step 8
Doors. Dryfit the 3/8″ plywood backs into the base unit. Make sure there is about 1/8″ gap around the door. Check to make sure the type of hinges you choose will als fit in the door. Trim the back if necessary. Then use 5/8 staples or brad nails and glue and clamps to add the rails to the tops and bottoms of the doors, keeping outside edges flush.
Step 9
Stiles on Doors. Add the stiles to the doors as shown above, using the directions in step 8. When the doors are finished, lay flat (you can stack) and then rest a piece of plywood on top, and then a heavy object. Let dry.
Step 10
Base Moulding. If you would like to dress up your base unit, add the base moulding to the foot of the cabinet. Use the 1 1/4″ fasteners.
Step 11
Pull Out Drawers. You might as well build the pullout drawers, because you will have a perfect sized scrap piece leftover. You will need to cut it to the size above. Then fasten the sides, the 1×6 boards cut at 22″ to the sides of the bottom.
Step 12
Face and Back of the Pull-Out Drawer. Notch out the front of the face as shown above. Then fasten to the sides and the bottom, as shown above. Use the bottom mount drawer slides to attach the drawers to the base of the cabinet.
Finishing
Sand all surfaces, starting with a medium grit and finishing with fine. Wipe off the dust, fill any holes or gaps with wood filler, and sand smooth once dry. Apply primer if you're painting, then finish with your choice of paint or stain and seal with a durable clear topcoat. For outdoor projects, use exterior-rated primer, paint or stain, and sealer so the piece stands up to the weather.
Source (temporary): https://www.ana-white.com/woodworking-projects/classic-storage-wall-side-base-units