Classic X-Back Sofa or Sectional with Cushions
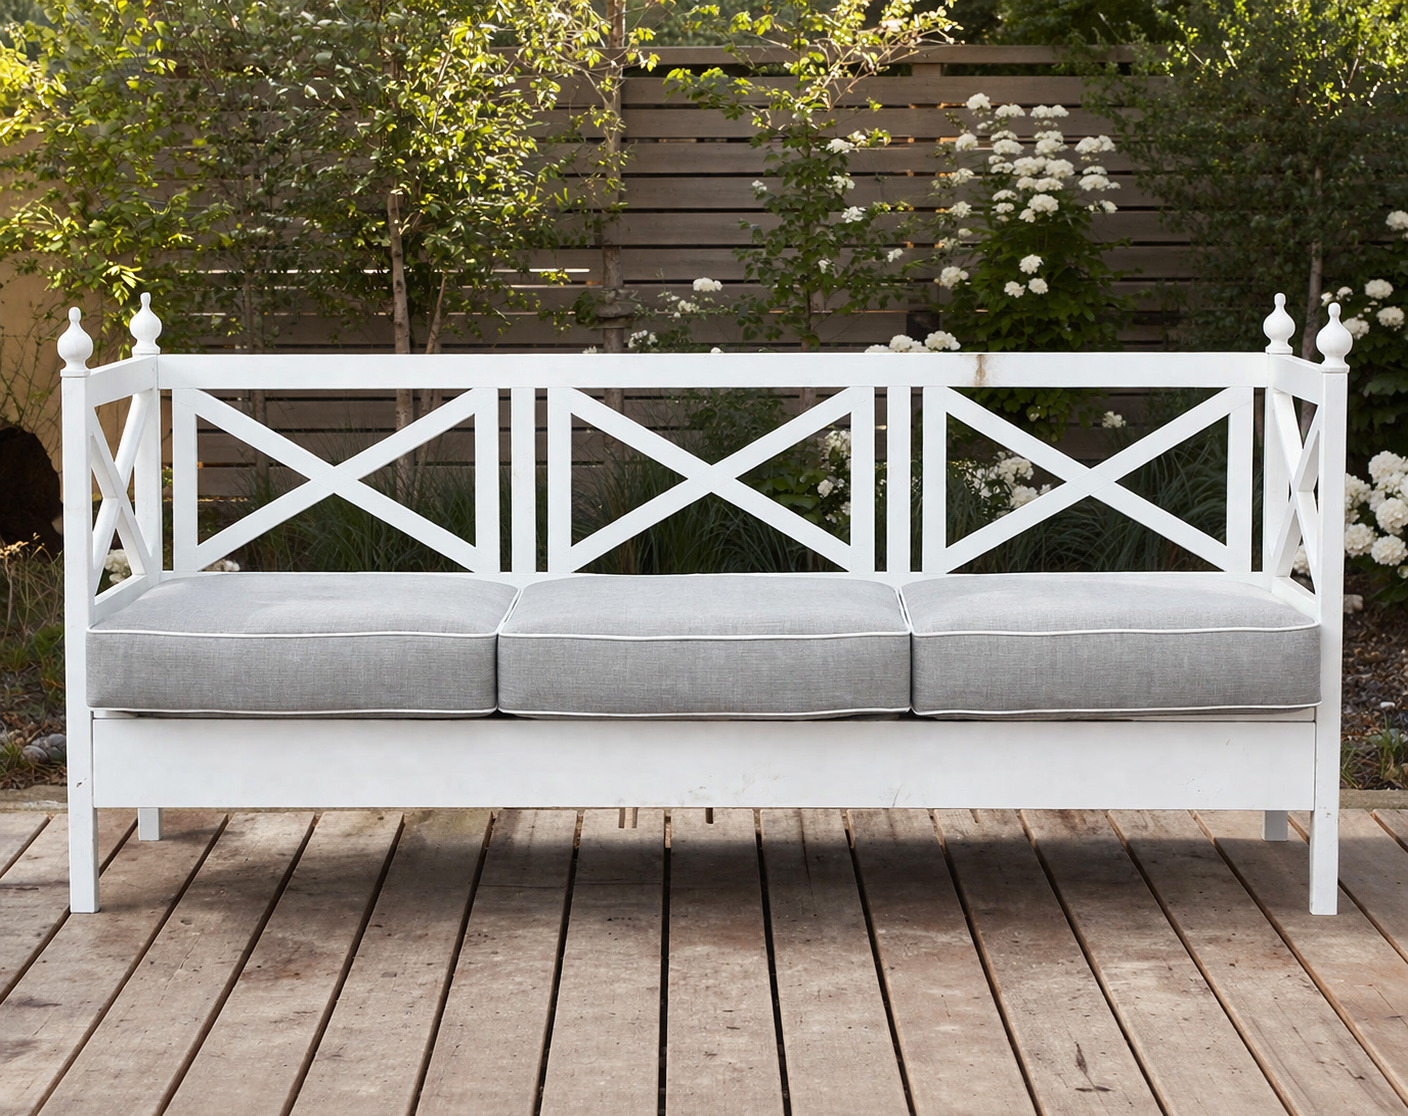
Build your own stylish outdoor sofa with. Featuring a timeless X-back design, sturdy construction, and full-size seating, this project is perfect for beginners and designed to fit standard cushions for a clean, high-end look. Add the sectional piece plan here to create a full sectional from this plan.
Specifications
| Project type | Outdoor Projects |
|---|---|
| Room | Outdoor |
| Style | Cottage Style Furniture Plans |
| Difficulty | Advanced |
| Estimated cost | $20 - $50 |
Dimensions
Use the size-specific shopping and cut lists below.
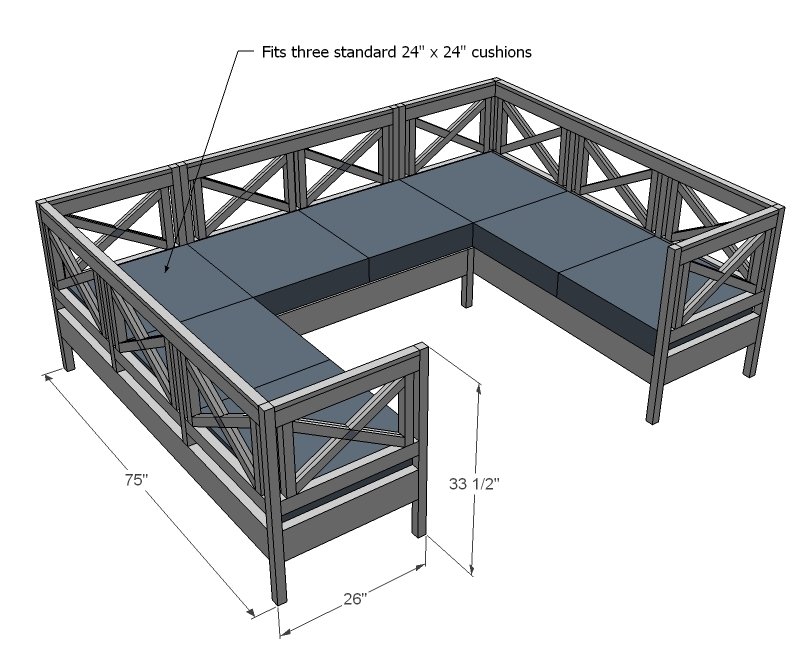
Shopping List
- 7 - 1x2 @ 8 feet long
- 7 - 2x2 @ 8 feet long
- 3 - 2x3 @ 8 feet long
- 2 - 2x6 @ 8 feet or stud length
- 4 - 1x3 @ 8 feet long
- 4 - Unfinished wood curtain rod finials
Cut List
- 10 - 1x2 @ 20 13/16" (Large X pieces - cut both ends at 30 degrees off square, ends PARALLEL to each other)
- 20 - 1x2 @ 10 3/8" (Small X Pieces - cut both ends at 30 degrees off square, ends NOT PARALLEL to each other, longest point to longest point measurement)
- 10 - 2x2 @ 12 1/8" (X Ends)
- 7 - 2x3 @ 23" (Tops/Bottom of X)
- 2 - 1x2 @ 23" (Top of Sides)
- 4 - 2x2 @ 33 1/2" (Legs)
- 2 - 2x6 @ 23" (Side Aprons)
- 2 - 2x6 @ 72" (Front/Back Aprons)
- 2 - 2x2 @ 17 1/4" (Back Centers)
- 1 - 2x3 @ 72" (Back Top)
- 1 - 1x2 @ 72" (Back Top Trim)
- 2 - 2x2 @ 72" (Cleats)
- 16 - 1x3 @ 23" (cut to fit - slats)
Tools
- measuring tape
- square
- pencil
- safety glasses
- hearing protection
- kreg-jig
- drill
- compound miter saw
- nailer
- sander
- level
- countersink drill bit
Step-by-step Instructions
Step 1
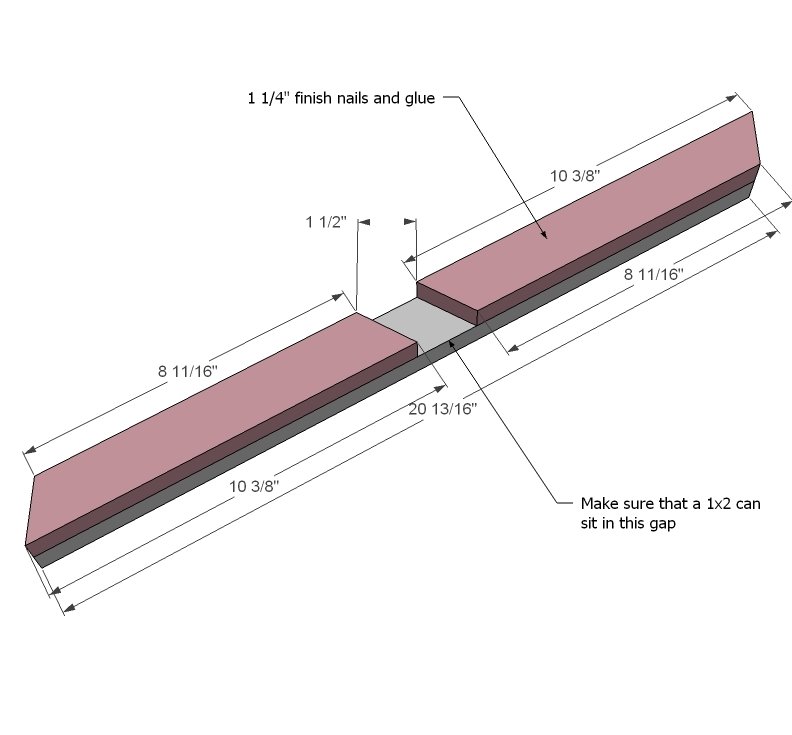
Start by nailing the shorter angled 1x2 pieces to the longer 1x2 pieces as shown above. Test to make sure that you can fit a 1x2 in the middle (see next step). You will need to build ten of these.
Step 2
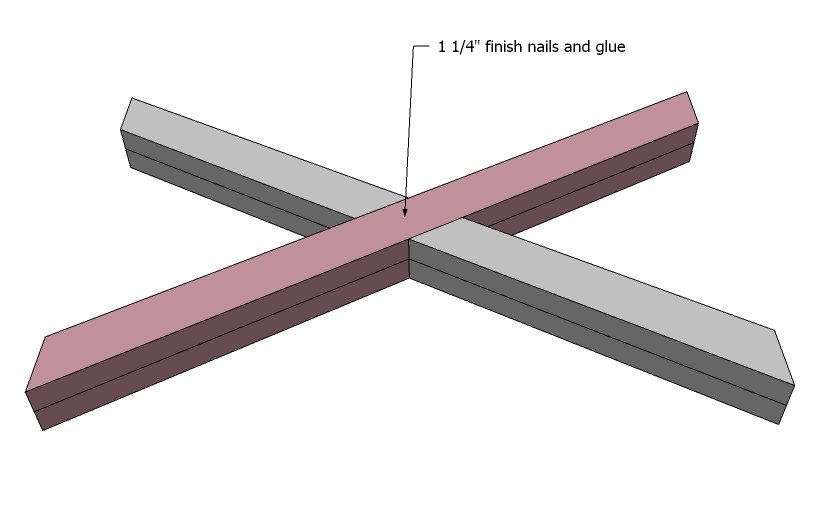
Then take the ten halves and make five big Xs as shown above. Lay the Xs on top of each other to make sure they match.
Step 3
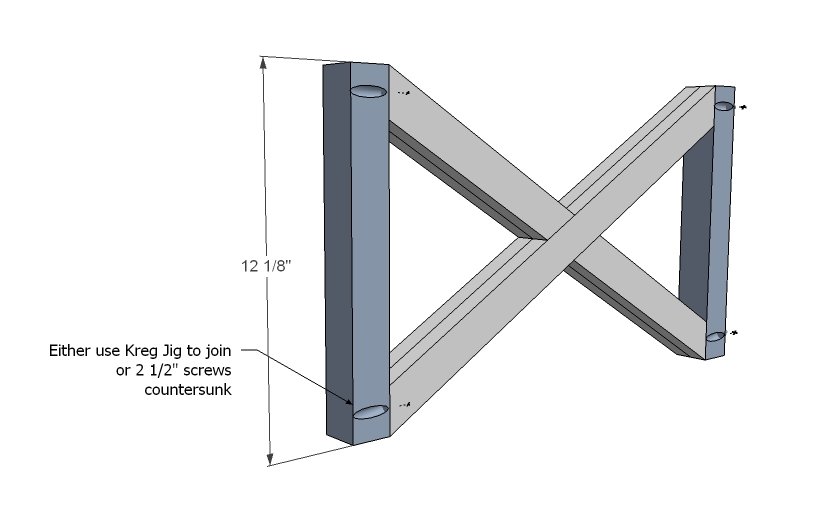
On all five of the Xs, attach the 2x2s @ 12 1/8" as shown above. You can either use the Kreg Jig™ (set for 3/4" stock and 1 1/4" pocket hole screws - it's okay if the pocket hole "hangs over" the edge of the board) or 2 1/2" screws or finish nails and glue to attach.
Step 4
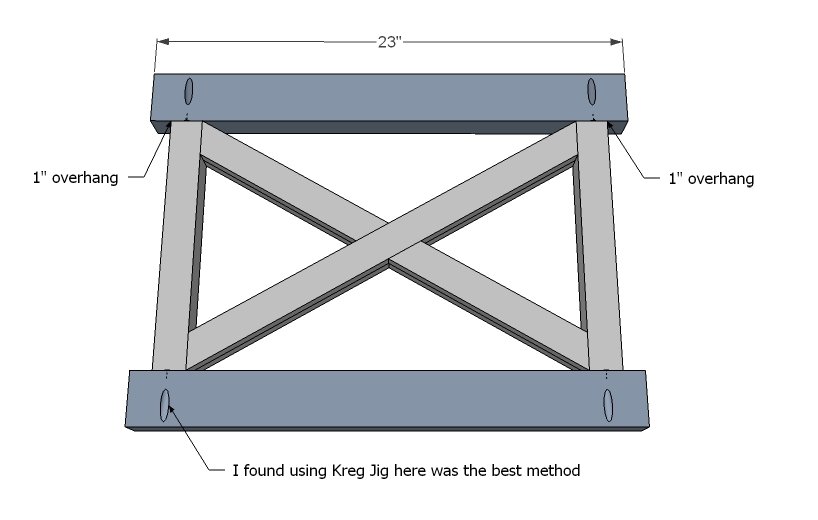
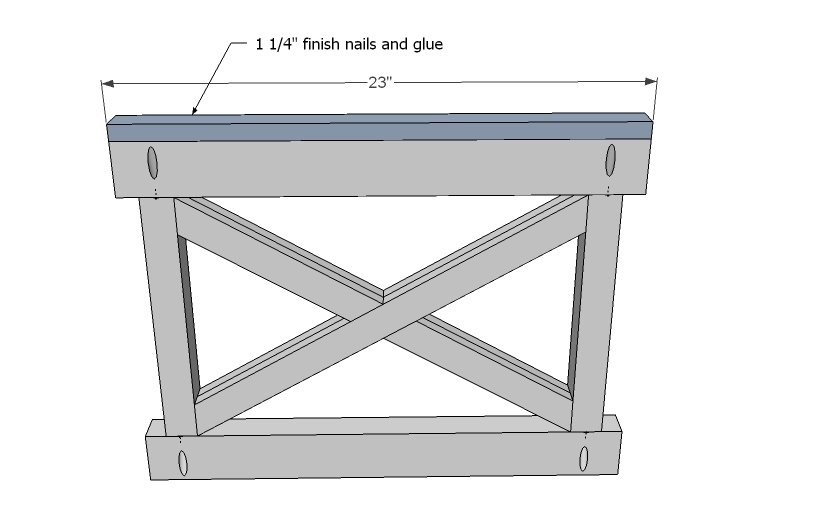
On two of the X pieces, attach tops and bottoms from 2x3s as shown above. I used the Kreg Jig™ as shown above.
Step 5
Step 6
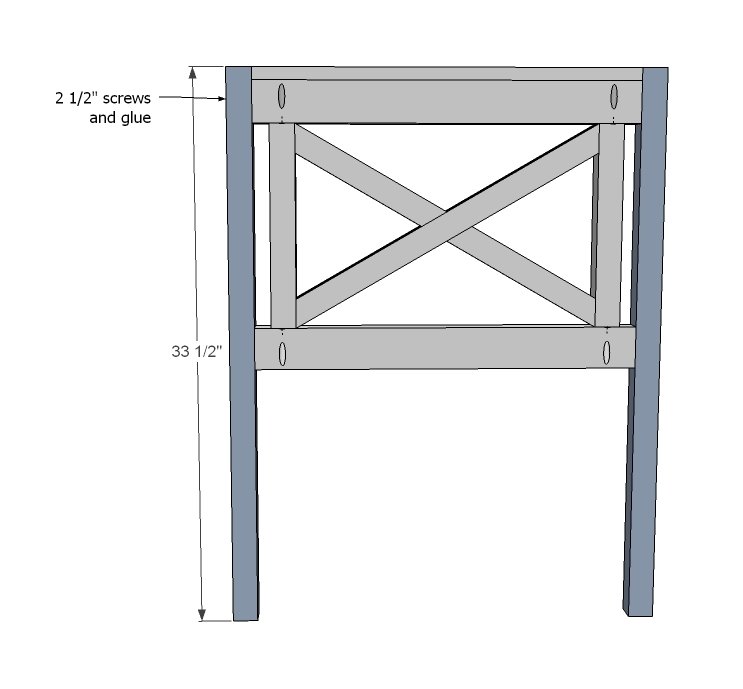
Now add legs to the two ends that you are working on as shown above.
Step 7
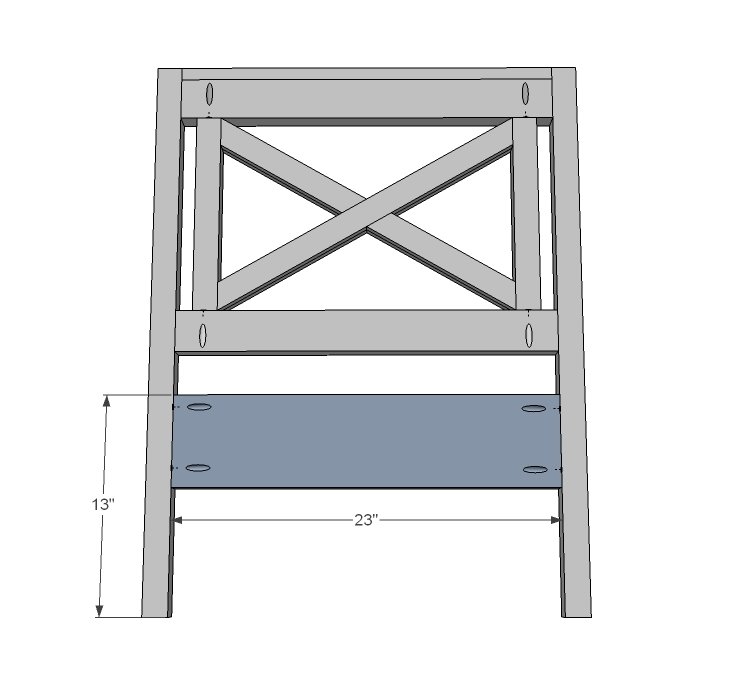
Finish the two ends by adding the 2x6 as shown above. You can either use the Kreg Jig™ or 2 1/2" screws countersunk from the outside. Set the two ends aside.
Step 8
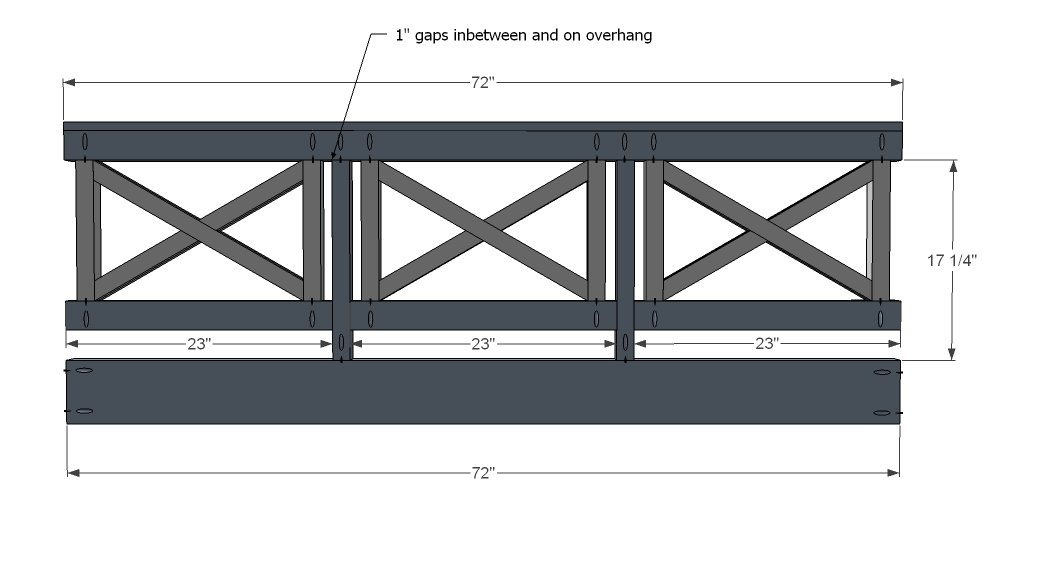
Next, you will need to construct the back. I laid all the pieces out and marked the joints, and drilled pocket holes with my Kreg Jig™ set for 1 1/2" stock, with 2 1/2" pocket hole screws. Check to make sure everything is square. This is definitely the longest step, but take your time - it's important to get this back right.
Step 9
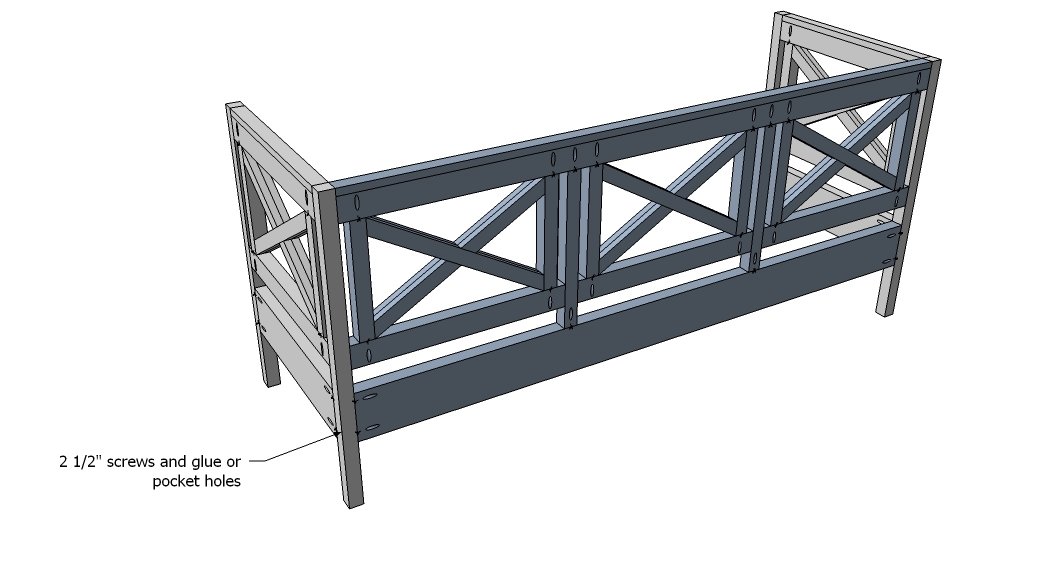
Once your back is finished, you can attach it to the sides. I used 2 1/2" screws and glue. Adjust for square.
Step 10
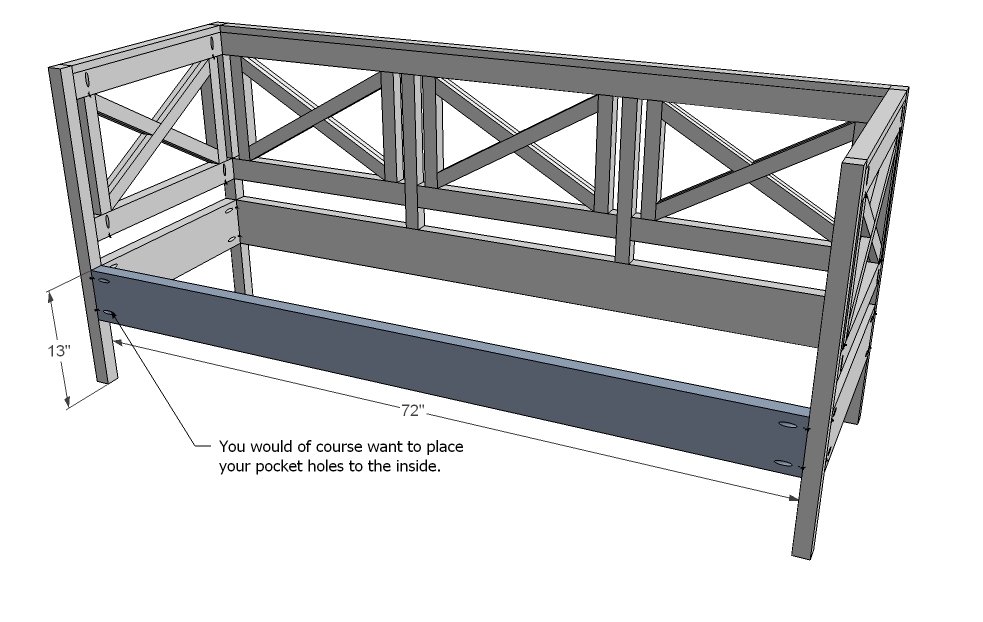
Finally, attach the front rail.
Step 11
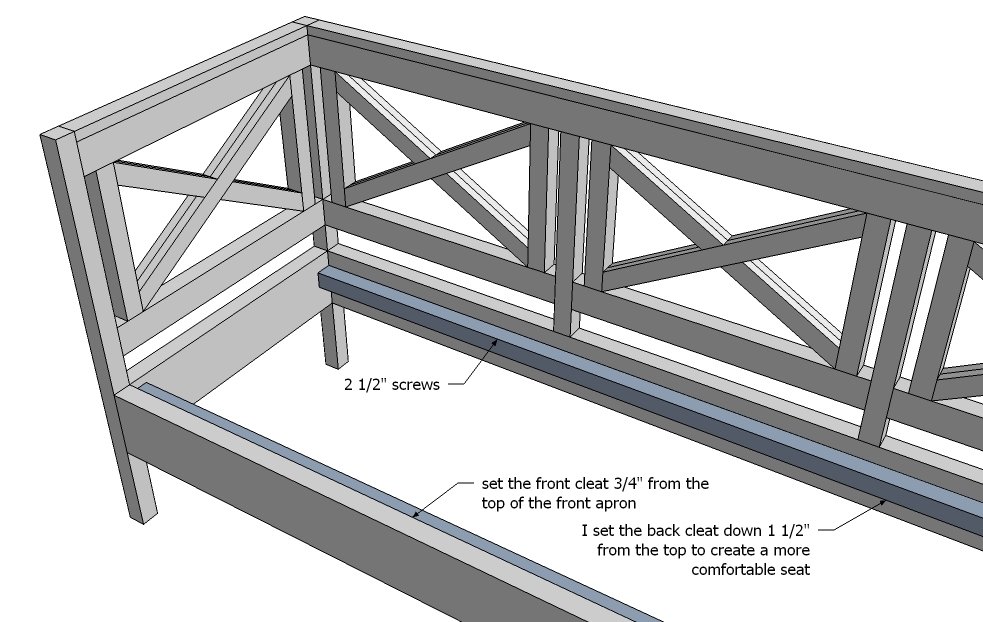
Now it's time for the cleats. One trick that I did different than the loveseat, I lowered the back cleat a tad, so the seat reclines slightly. I found this made the seat much more comfortable.
Step 12
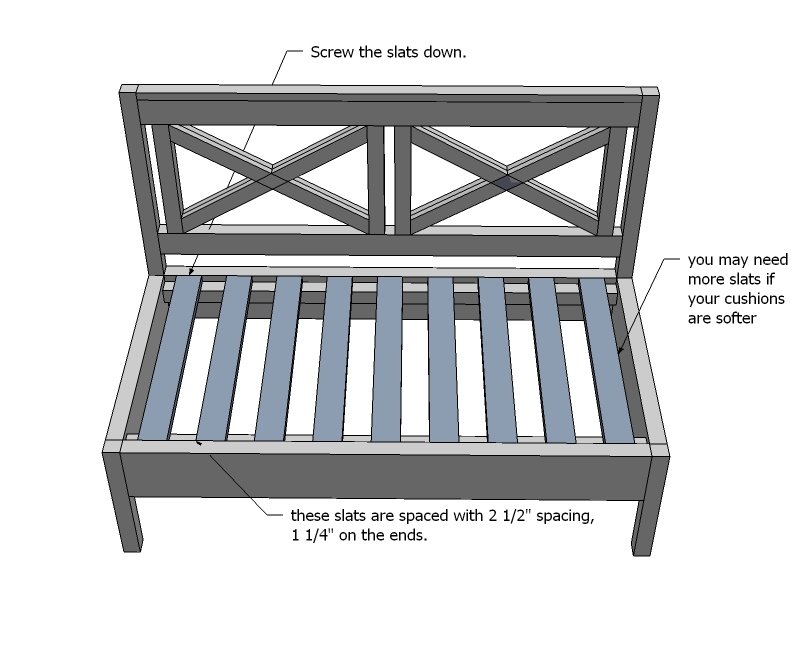
Now lay your seat slats. Screw down. (image from Loveseat) You may need to add more seat slats depending on the firmness (or softness) of your cushions.
Finishing
Sand all surfaces, starting with a medium grit and finishing with fine. Wipe off the dust, fill any holes or gaps with wood filler, and sand smooth once dry. Apply primer if you're painting, then finish with your choice of paint or stain and seal with a durable clear topcoat. For outdoor projects, use exterior-rated primer, paint or stain, and sealer so the piece stands up to the weather.
Source (temporary): https://www.ana-white.com/woodworking-projects/classic-x-back-sofa-or-sectional-cushions-free-outdoor-bench-plans