Closet Mudroom Bench with Hinge Up Boot Storage Compartment
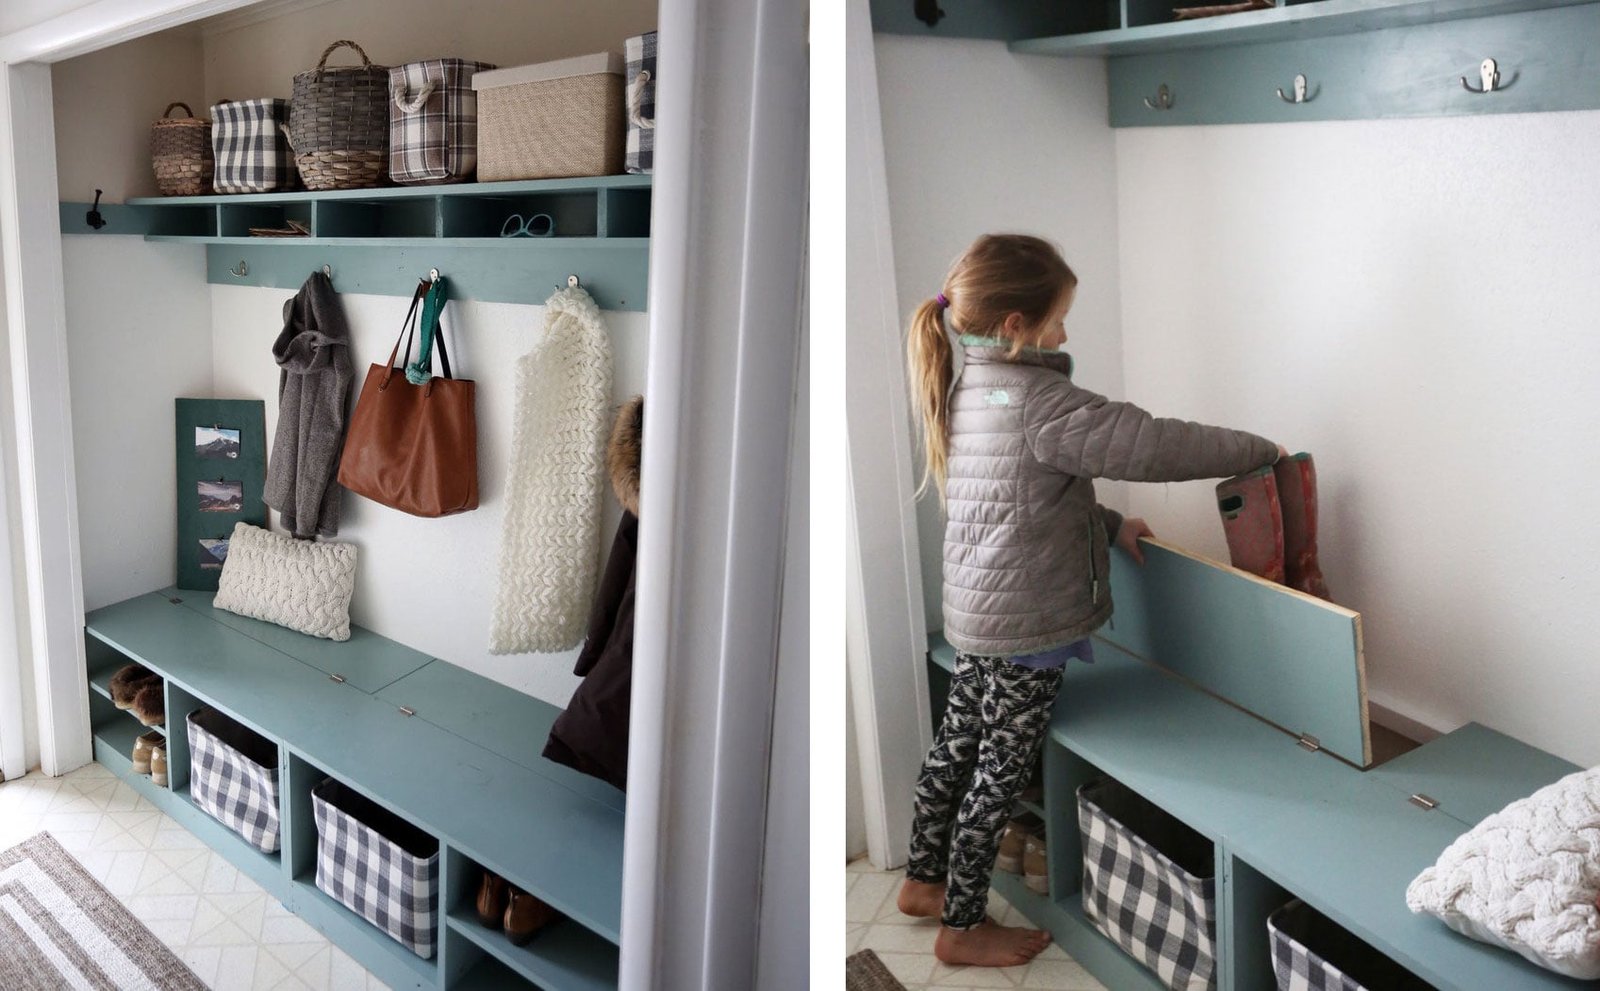
These clever and easy to build benches turn a closet into a mudroom with hidden boot storage. With shelves on the front for shoes, and a hinge up compartment on the back for boots, there's no wasted space and everything is accessible. Use off the shelf 1x12s to build the benches for an easy to build and inexpensive project to transform your entryway! Check out our free tutorial with diagrams and helpful tips and lots of build photos from
Specifications
| Project type | Bench |
|---|---|
| Room | Entryway and Mudroom |
| Style | Farmhouse Furniture |
| Difficulty | Beginner Projects |
| Estimated cost | $50 - $100 |
Dimensions
Use the size-specific shopping and cut lists below.
Shopping List
- 3 - 1x12@ the width of your closet plus 18" per leg
- 2 - 1x3 @ the width of your closet
- 1 - 2x2 @ the width of your closet
- 1/4" plywood for the backs of the benches
- Benches can be assembled with 2" self tapping screws or 1-1/4" pocket holes
- 3/4" brad nails for attach 1/4" plywood to the back
- 3" wood screws for attach the 2x2 cleat to the back wall
Cut List
See steps for cutting instruction
Tools
- measuring tape
- square
- pencil
- safety glasses
- hearing protection
- drill
- circular saw
- sander
Step-by-step Instructions
Step 1
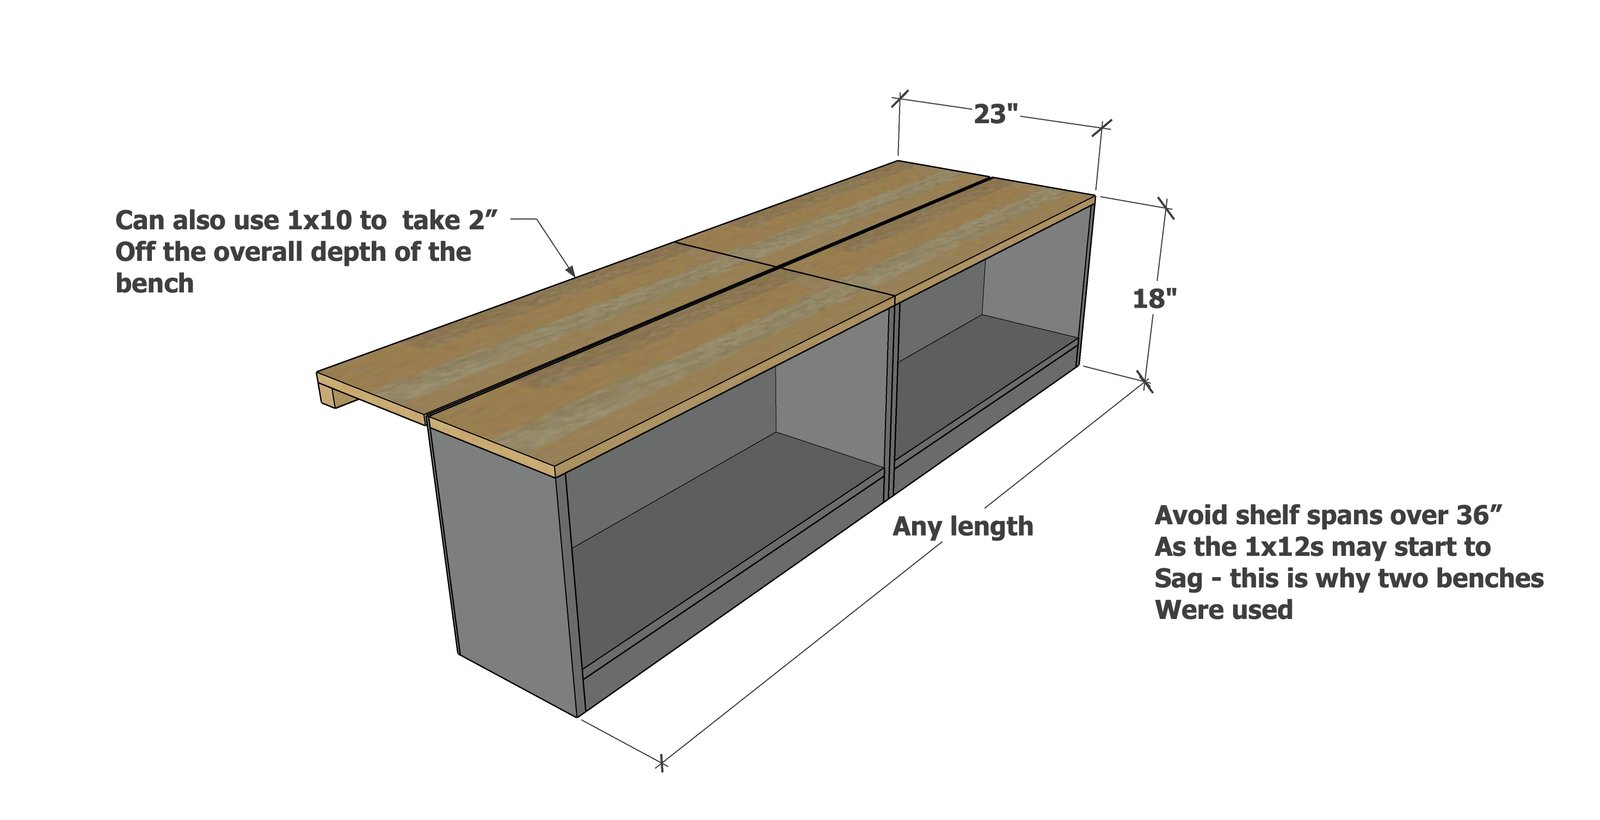
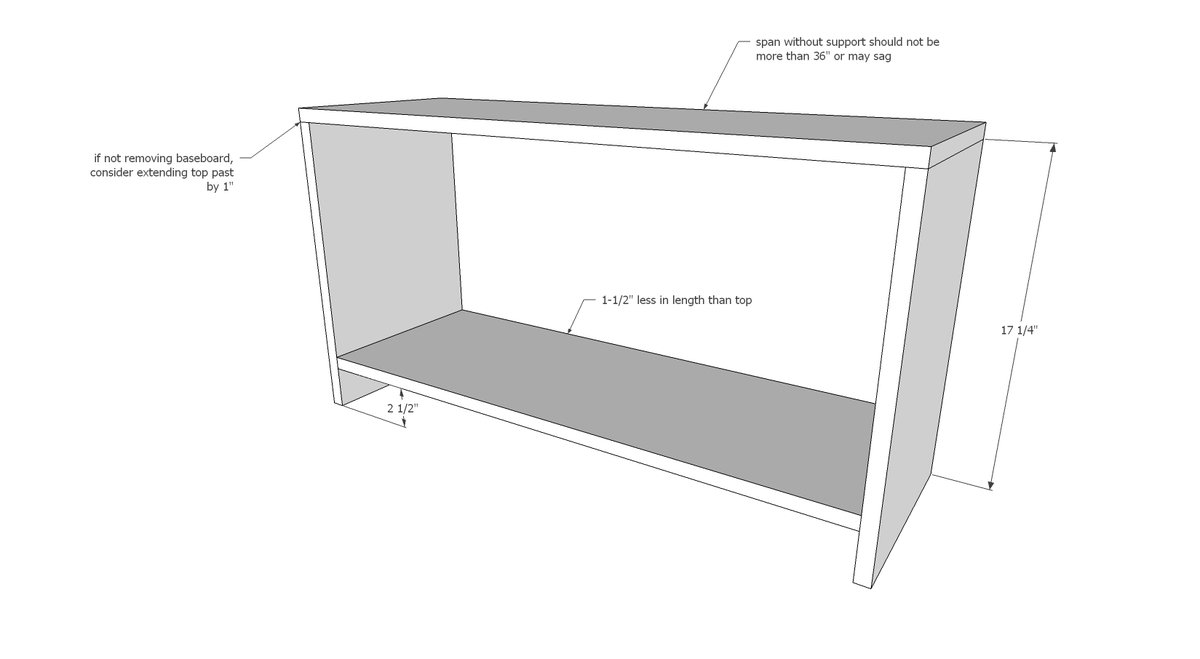
We recommend building two benches if longer than 40" (so shelves don't sag) or if you are trying to install inside a closet (so it's easy to place the benches in the closet). For benches inside the closet: Measure the overall width of your closet and divide by two. Subtract a 1/4" (so you have some "play") and cut the tops to this measurement. The bottom shelf is 1-1/2" smaller than the top. The legs are consistent regardless of width. Using 1x12s, build bench frame as shown in diagram. We used a Kreg Jig and 1-1/4" pocket hole screws, but predrilled wood screws (2" length) will work as well.
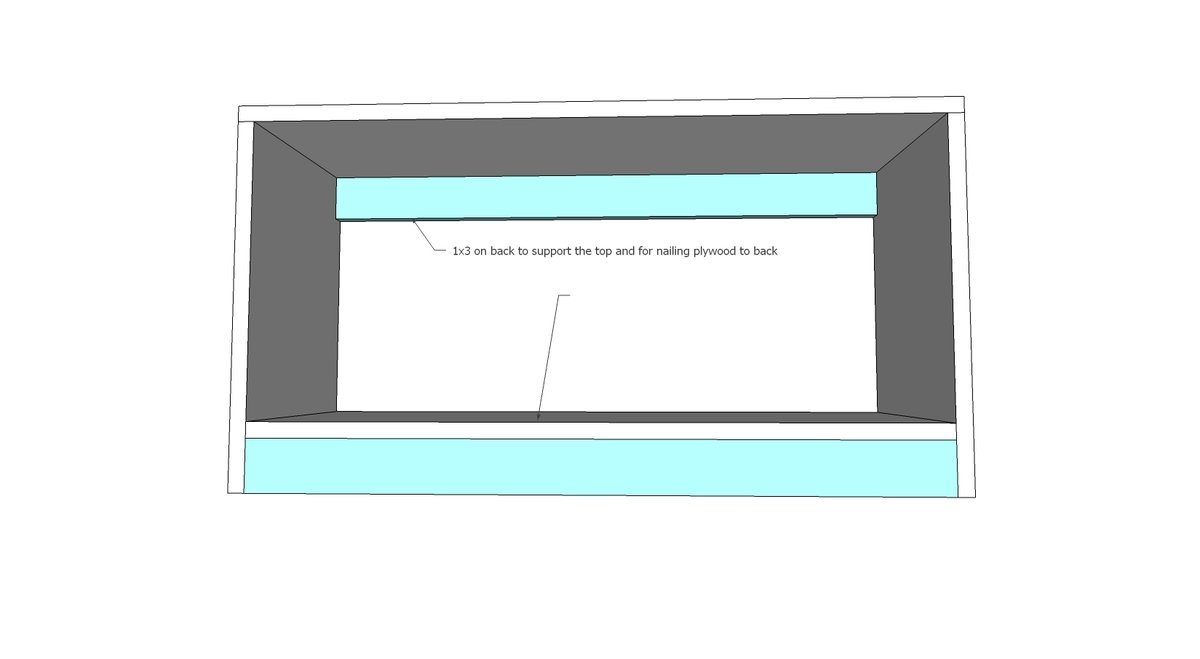
Cut two 1x3s the same length as the bottoms shelf.
1x3s are added to back top (inset in the cabinet) and front bottom (inset in the front bottom). Can be nailed (1-1/4" brad nails and glue) or screwed or Kreg Jigged in place.
Step 3
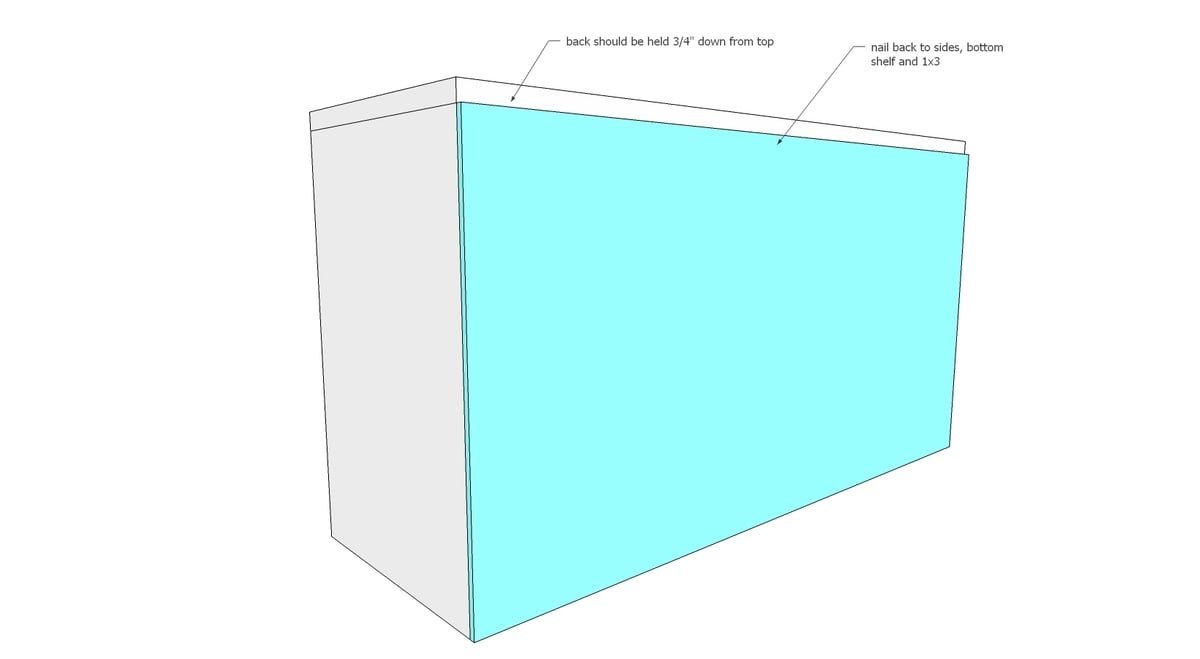
The back plywood needs to be held down 3/4" to allow for the hinged top. Nail to sides and 1x3 at top with 3/4" nails.
Step 4
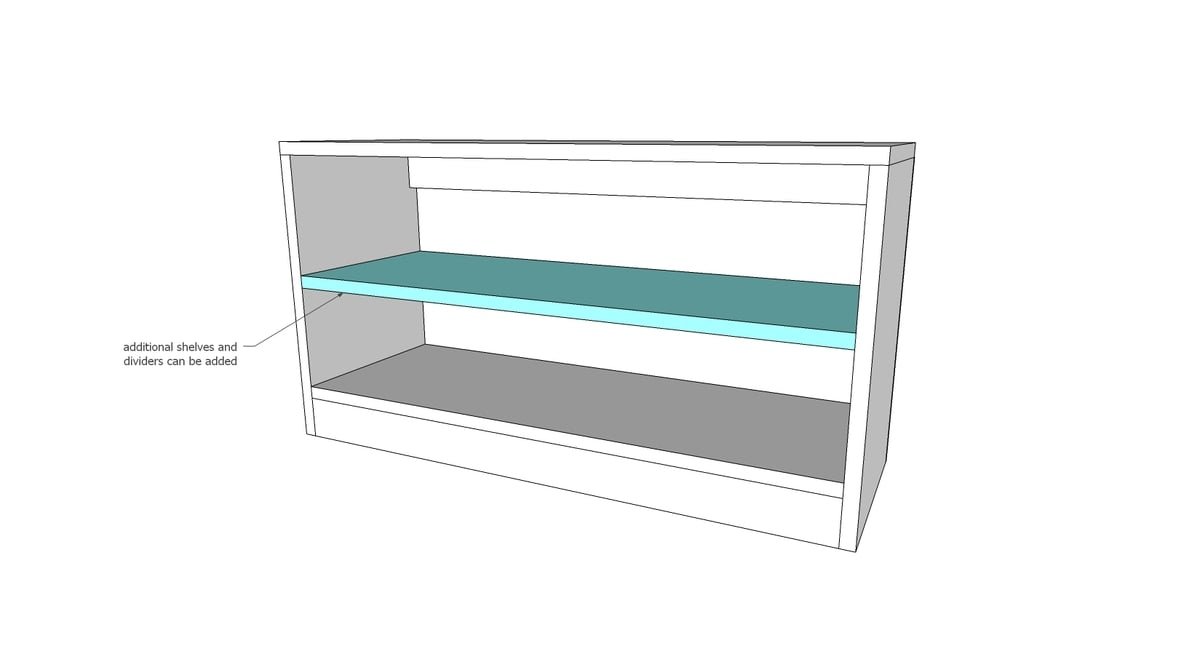
Additional shelves and vertical dividers can be added with pocket holes, screws or nails as you see fit. If adding vertical dividers, add before shelves. You will need to be notched out for the top back of the divider for the top 1x3 with a jigsaw.
Step 5
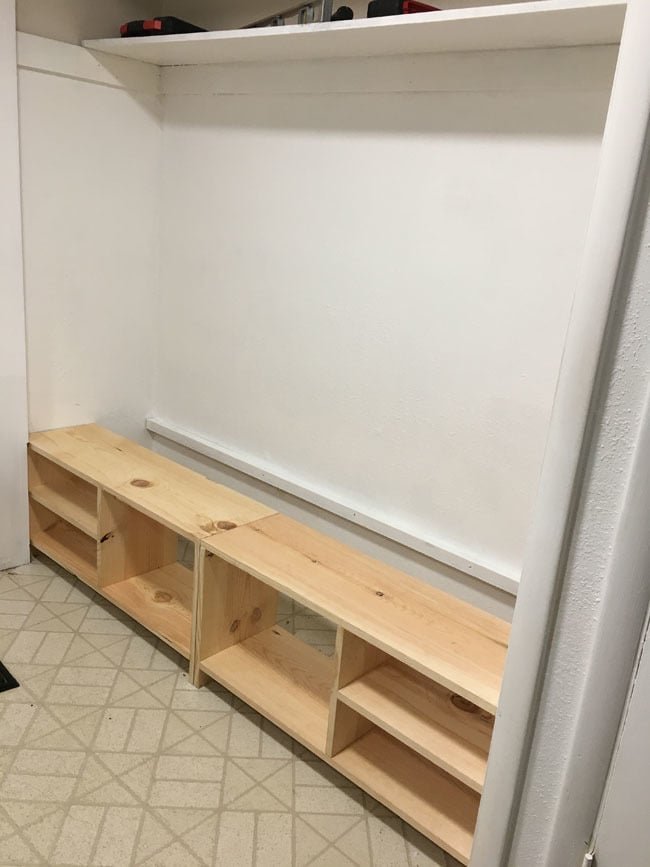
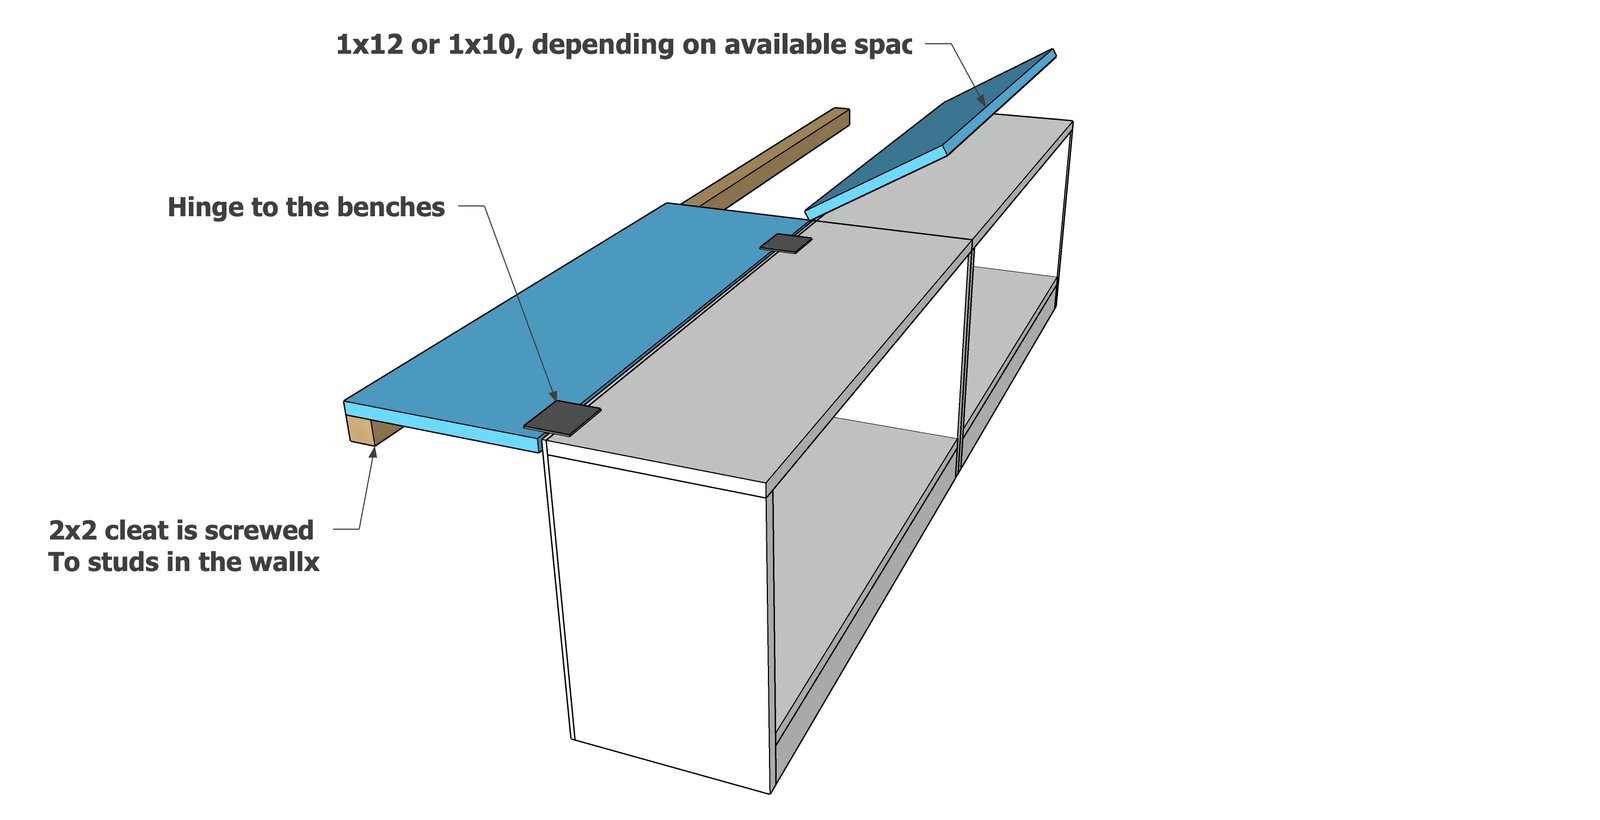
For install inside the closet, place the two benches inside the closet, at the front of the closet. Screw together. Place a 2x2 cleat at the same height as the plywood on the back of the benches on the back side of the closet. Measure the opening between the back closet wall and the back of the benches. Cut plywood or 1x12s to fit. Hinge to the back of the benches (so the tops rest on the cleats when closet).
Step 6
Diagram showing the hinge step.
Finishing
Sand all surfaces, starting with a medium grit and finishing with fine. Wipe off the dust, fill any holes or gaps with wood filler, and sand smooth once dry. Apply primer if you're painting, then finish with your choice of paint or stain and seal with a durable clear topcoat. For outdoor projects, use exterior-rated primer, paint or stain, and sealer so the piece stands up to the weather.
Source (temporary): https://www.ana-white.com/woodworking-projects/closet-mudroom-bench-hinge-boot-storage-compartment