Closet Organizer from One Sheet of Plywood
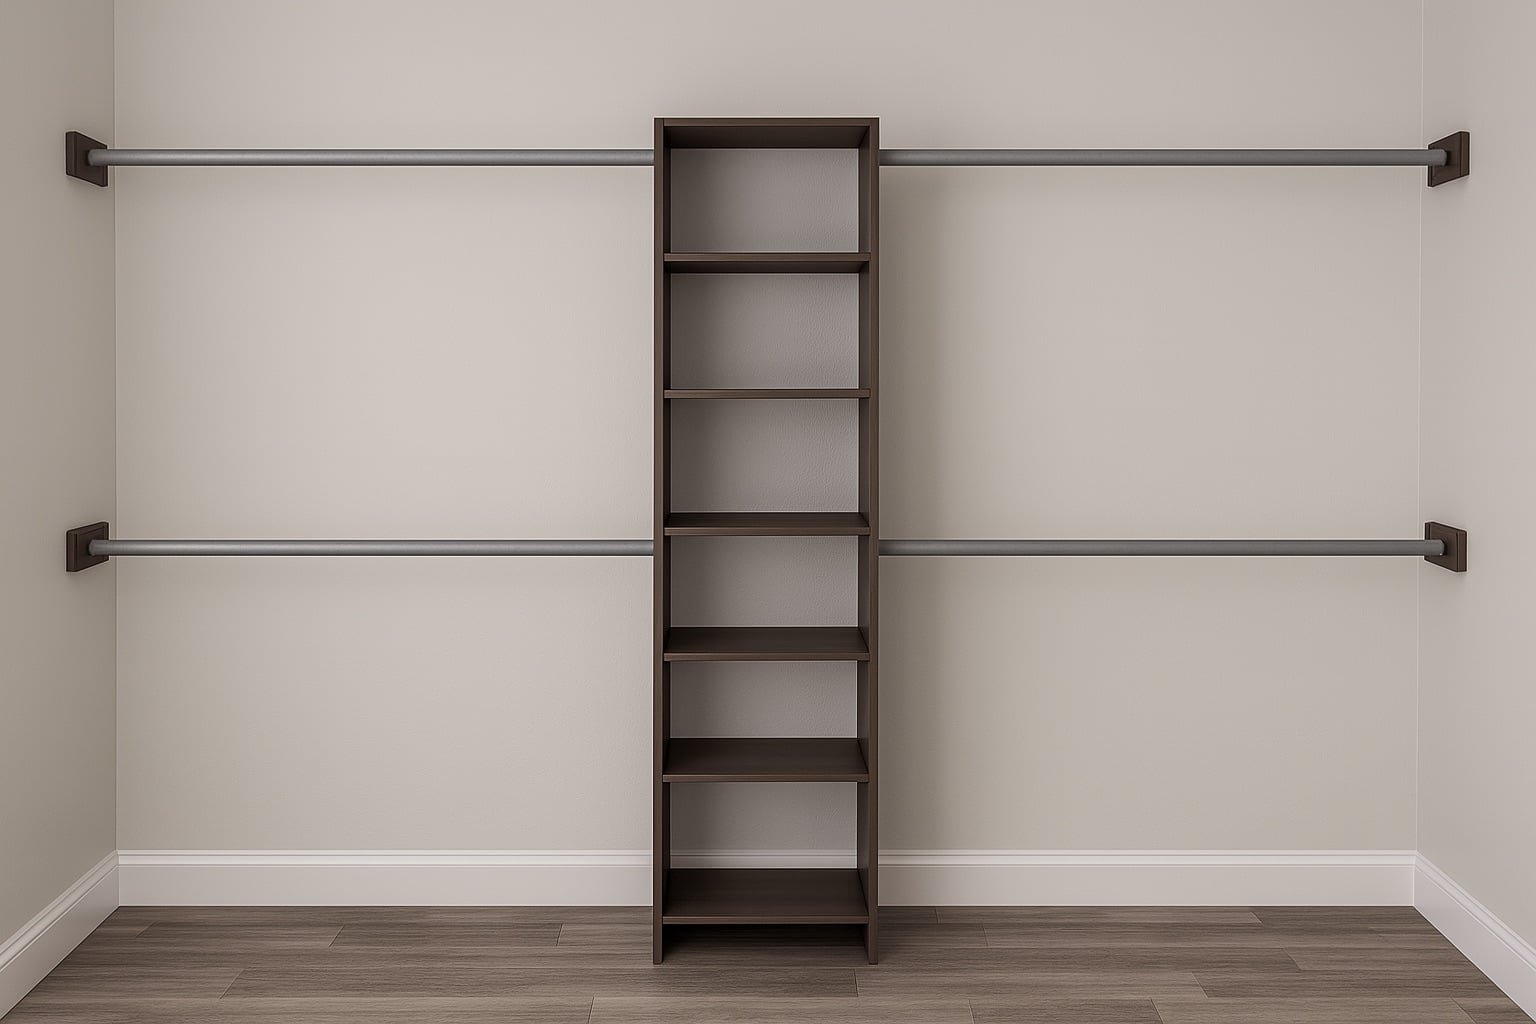
Build your own closet organizer with this easy DIY plan! Made from just one sheet of plywood, this design features adjustable shelves, plenty of hanging space, and fits in standard 4-foot wide closets. Step-by-step instructions, cut list, and detailed diagrams included— available now!
Specifications
| Project type | Built-In Woodworking Plans |
|---|---|
| Room | Closets |
| Style | Farmhouse Furniture |
| Difficulty | Beginner Projects |
Dimensions
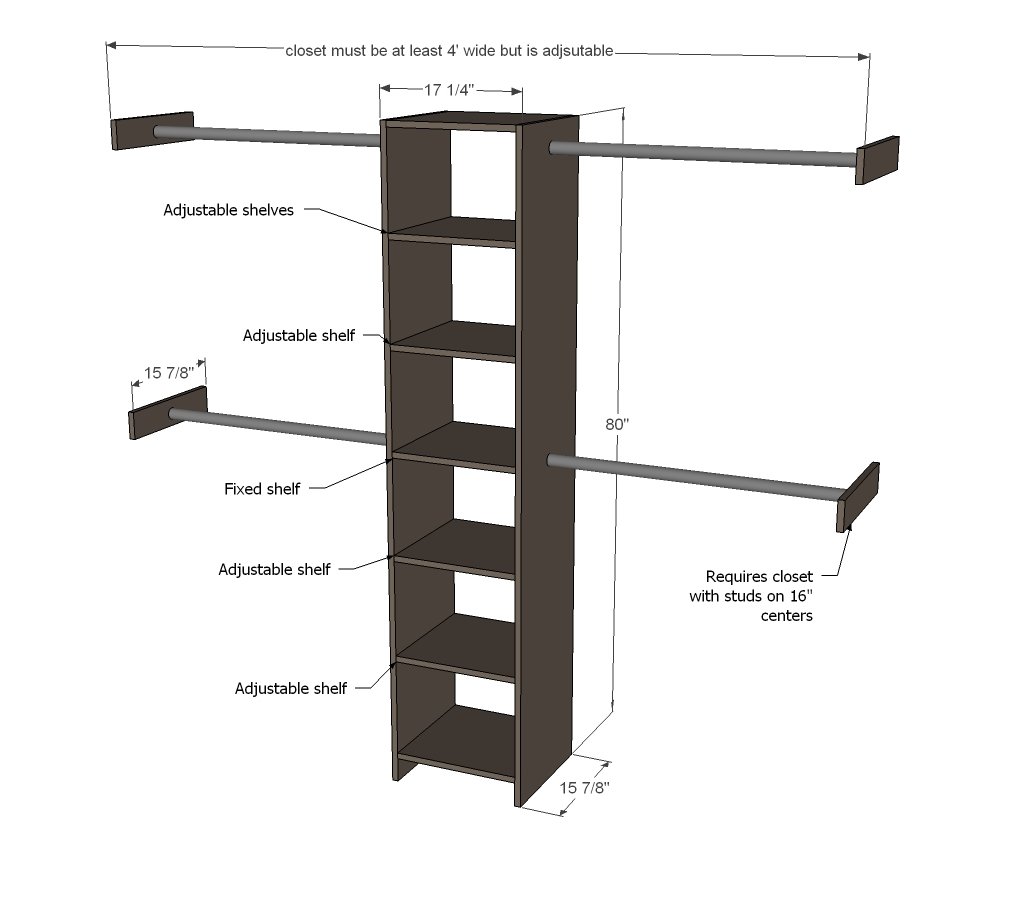
Use the size-specific shopping and cut lists below.
Shopping List
- 1 sheet ¾” plywood ripped into strips 15 7/8” wide, three strips each 8' long
- Wood glue
- 4 closet rod sockets
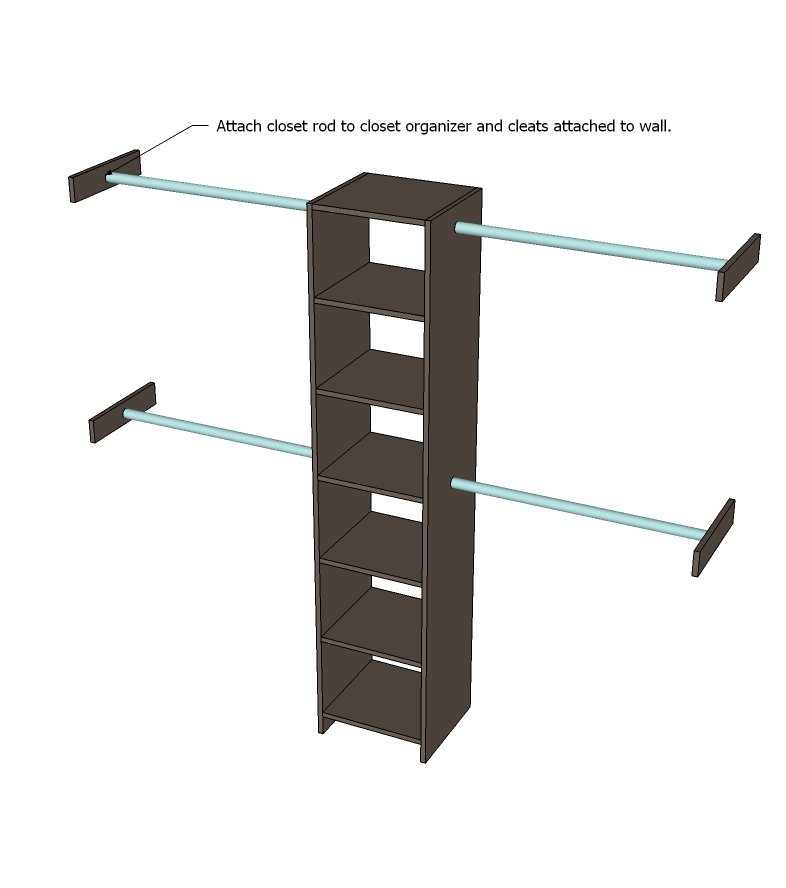
- 4 wood closet rods in lengths needed for closet
- 2” wood trim screws
- 3” wood screws
- Optional shelf pins for adjustable shelves
Cut List
- 2 – 1x16 @ 80” long (sides)
- 7 – 1x16 @ 15 ¾” (shelves)
- 5 – 1x16 @ 3” (wall cleats)
Tools
- measuring tape
- square
- pencil
- safety glasses
- hearing protection
- drill
- circular saw
- sander
- countersink drill bit
Step-by-step Instructions
Step 1
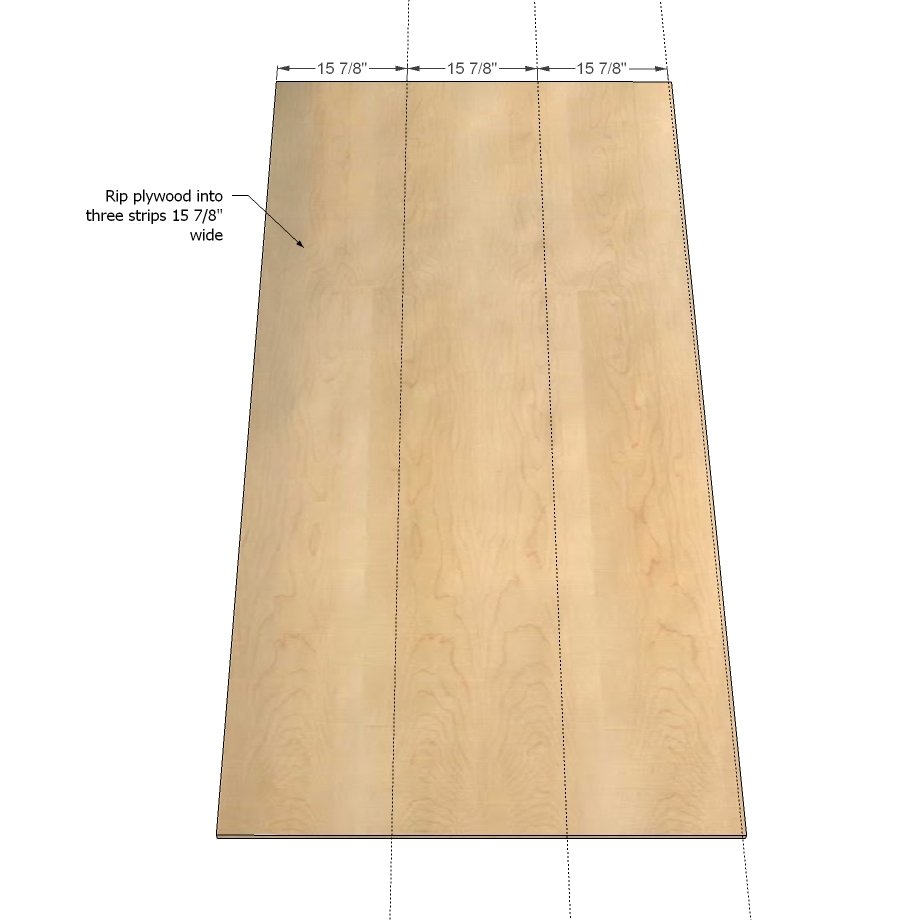
Either have your hardware store rip your plywood into three easy to manage strips 8 feet long x 15 7/8” wide or use a table saw to rip plywood into strips 15 7/8” wide. Then follow the cut list using a circular saw to cross cut the strips into the required lengths. If you'd like, you can finish the front edges with edge banding. Here is a video tutorial on how to do that.
Step 2
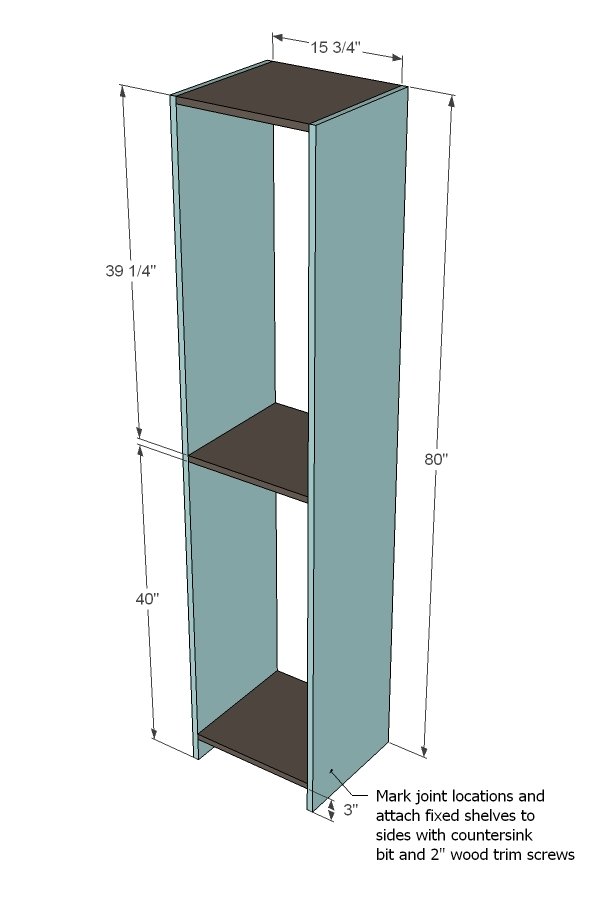
Mark joint locations on insides and outsides with measuring tape and square. Predrill holes with a countersink bit. Apply glue at joint and attach shelves to sides. Attach one cleat to top inside of closet, screwing through outsides and top to secure. When installing the closet, you can secure closet to wall by screwing through this cleat into a stud in the wall.
Step 3
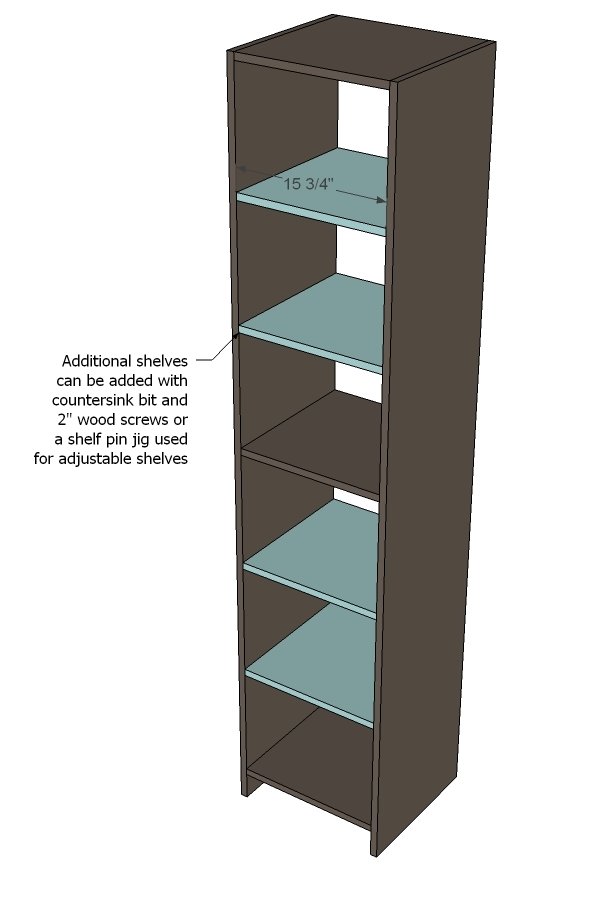
Additional shelves can be added same as main shelf OR a Shelf pin jig used to add adjustable shelves. If you go the shelf pin/adjustable shelf route, I recommend cutting the shelves down 1/4" so they fit inside easily.
Step 4
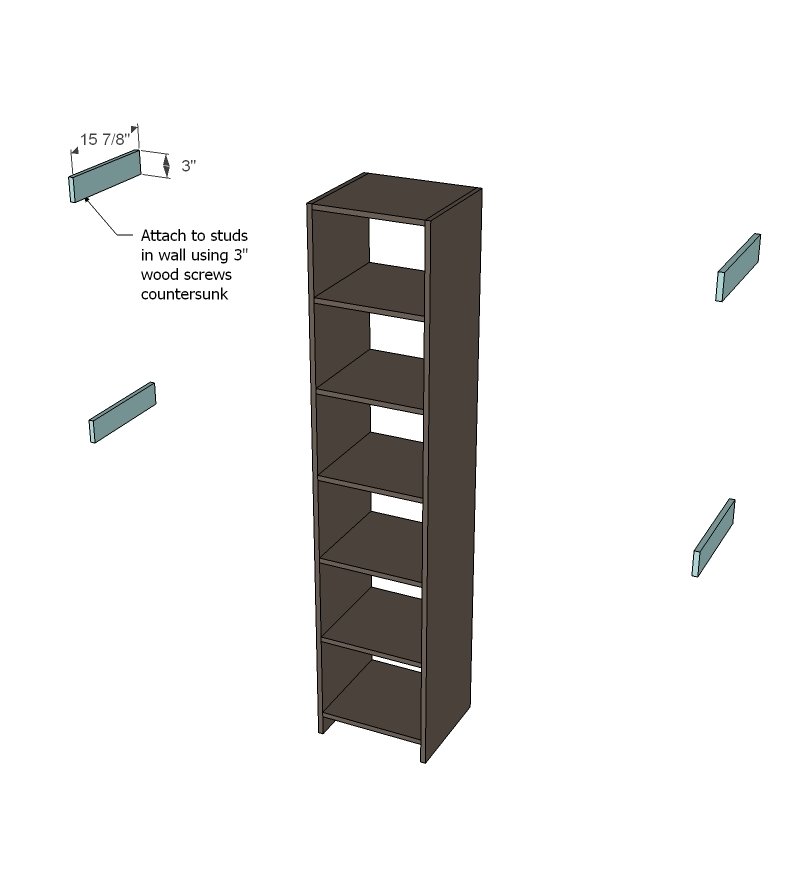
Locate studs in walls and mark. Attach wall cleats to wall using countersink bit and 3” screws, screwing into studs. NOTES: If closet has a baseboard, use a jigsaw to cut notch out of back of closet system for baseboard.
Step 5
Finishing
Sand all surfaces, starting with a medium grit and finishing with fine. Wipe off the dust, fill any holes or gaps with wood filler, and sand smooth once dry. Apply primer if you're painting, then finish with your choice of paint or stain and seal with a durable clear topcoat. For outdoor projects, use exterior-rated primer, paint or stain, and sealer so the piece stands up to the weather.
Source (temporary): https://www.ana-white.com/woodworking-projects/closet-organizer-one-sheet-plywood