Coat Rack from Scraps
Coat rack to hang coats, purses, hats, or as in my case- towels.
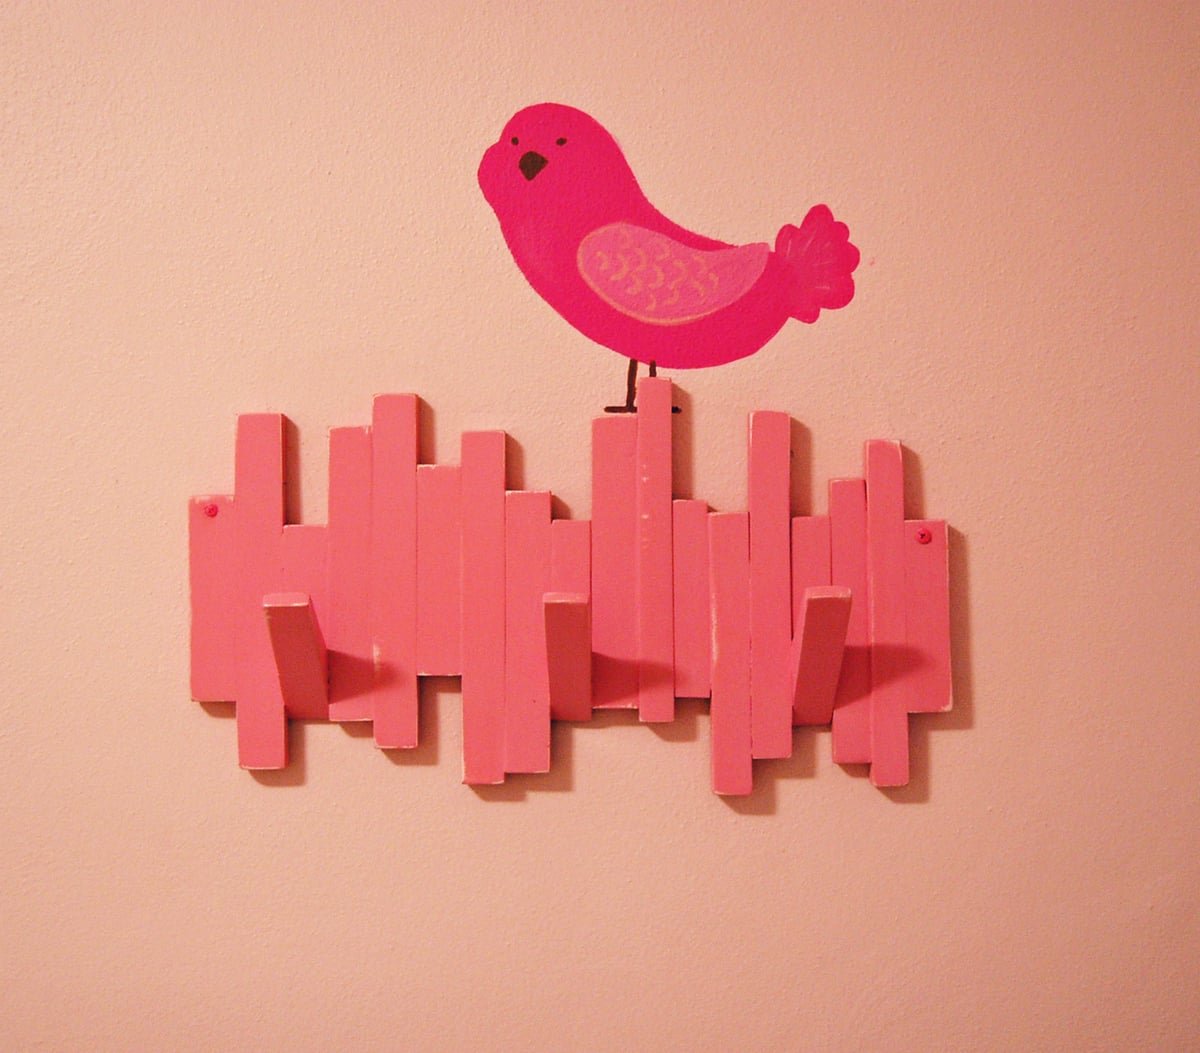
Specifications
| Project type | Wall Projects |
|---|---|
| Room | Storage Solutions |
| Style | Cottage Style Furniture Plans |
| Difficulty | Beginner Projects |
| Estimated cost | scraps |
Shopping List
Use your Scraps and adjust dimensions accordingly. No set rules.
Tools
- measuring tape
- square
- pencil
- hammer
- safety glasses
- jigsaw
- sander
- countersink drill bit
Step-by-step Instructions
Step 1
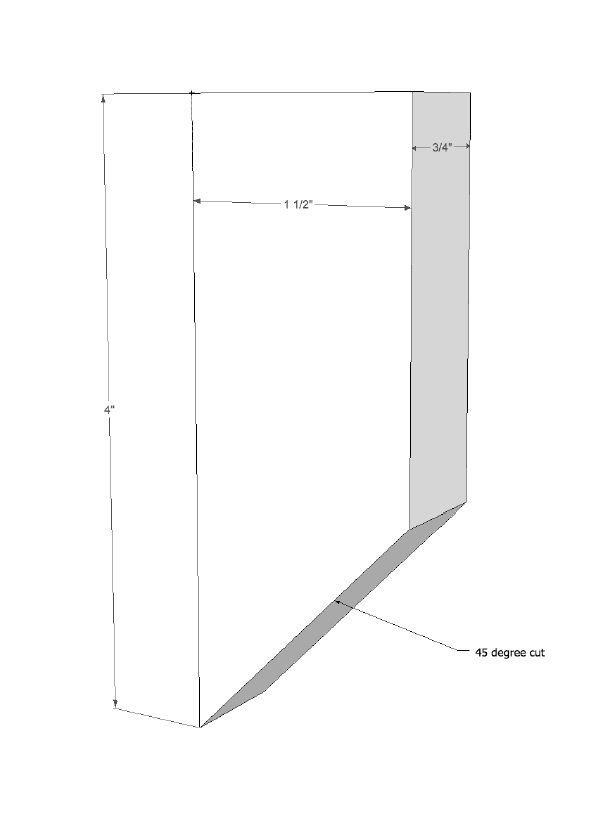
To Creat the hooks, start with a rectangular piece of wood that is approximately 3/4" by 1 1/2" and about 4" in length. Cut bottom at 45 degree angle.
Step 2
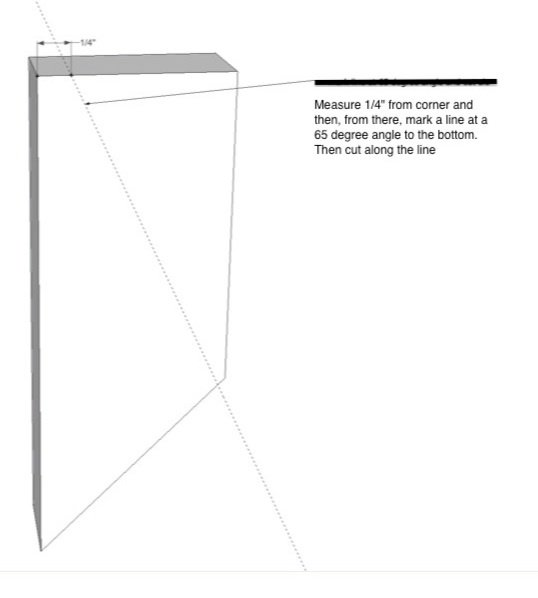
Measure 1/4" from top corner and, from there, draw a line at a 65 degree angle. Use a jig saw to cut along the marked line.
Step 3
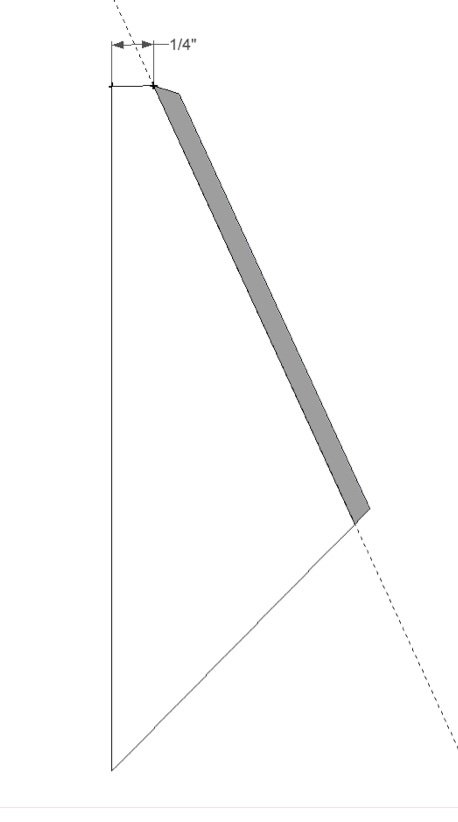
Use a jig saw to cut along the marked line.
Step 4
Make sure the piece you chose for behind the hook is the same width as that of the hook. (See Picture)
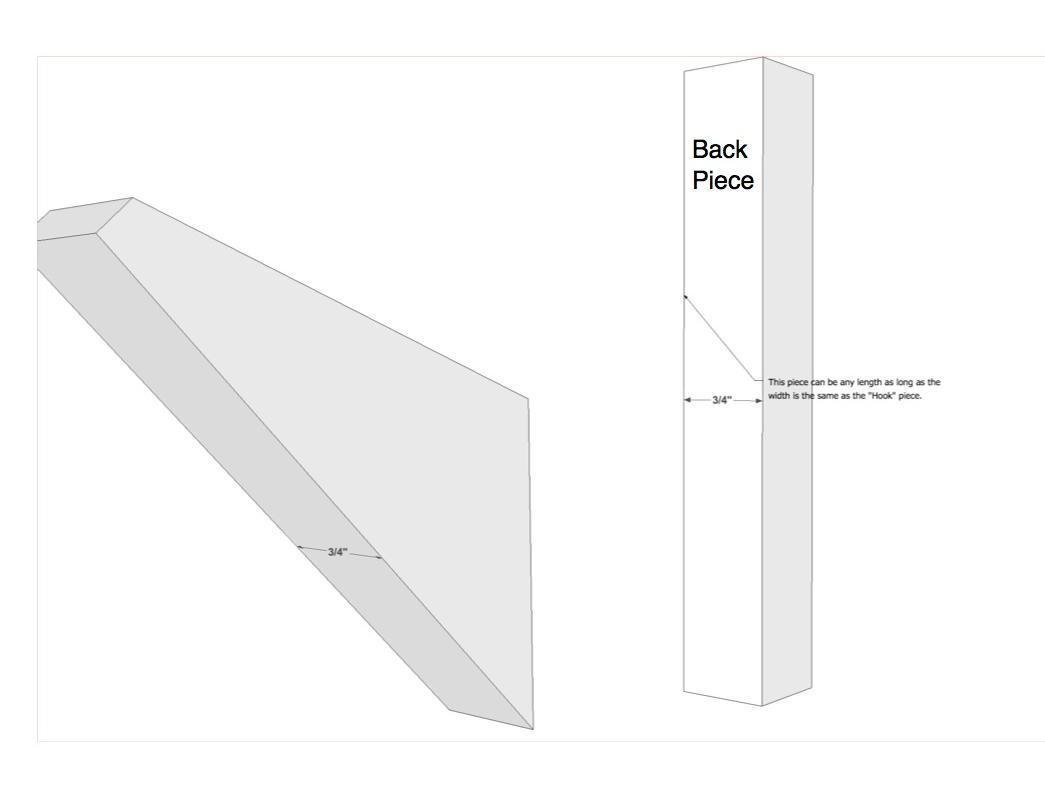
Step 5
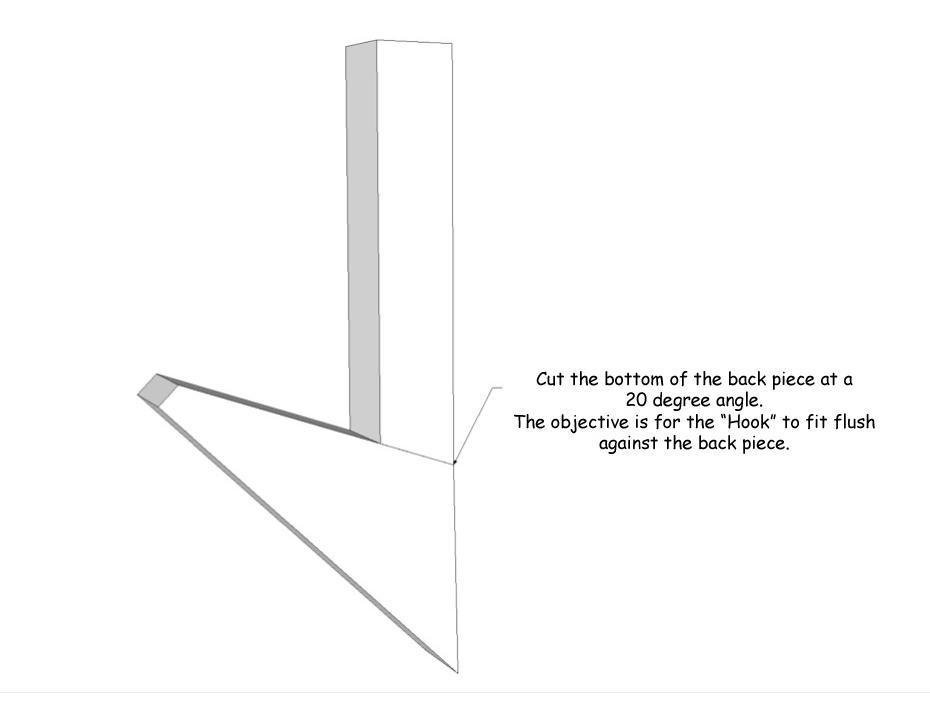
Step 6
Lay your scraps alongside each other and play with the sizes and patterns until you are happy with the way it looks. Then, use wood and nails or screws to join, being careful not to split the wood. Also make sure not to overlap location of screws. See Picture. Again, Im sure there is a better way of doing this, but this is all I could come up with at the moment. It did seem extremely sturdy in the end and so far, its still doing a great job of hanging my daughter's towels. I welcome any suggestions or improvements you would like to make to this plan. Hope you like it! I thought it was a cute project idea and perfect for making use of scraps.
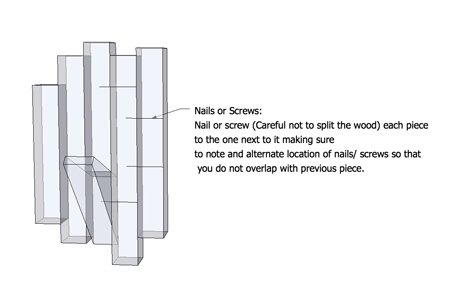
Thats it!
Ana, I don't know how you do it- this is my first time posting a plan and Im exhausted!
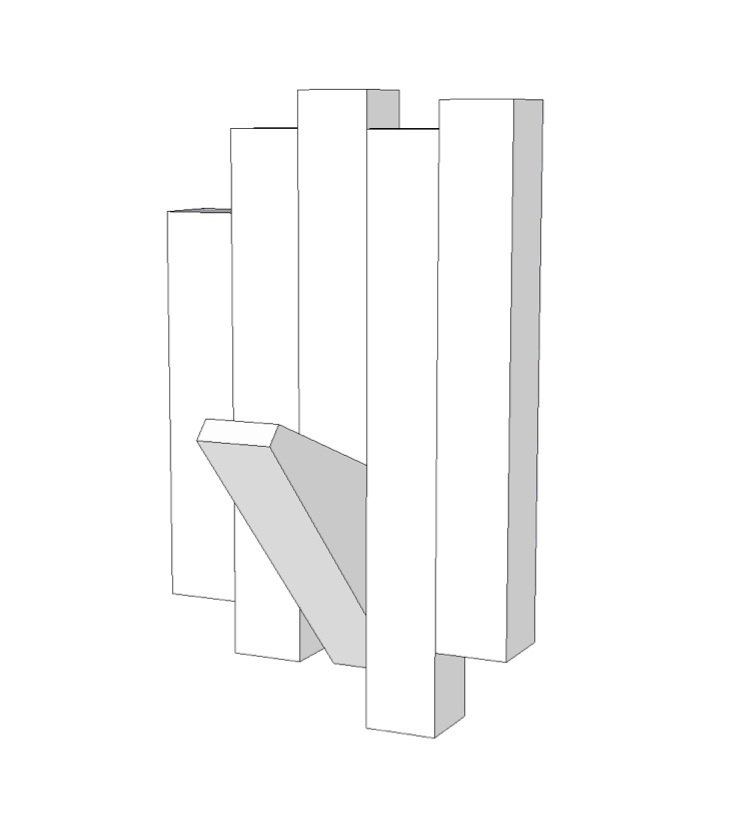
Finishing
Sand all surfaces, starting with a medium grit and finishing with fine. Wipe off the dust, fill any holes or gaps with wood filler, and sand smooth once dry. Apply primer if you're painting, then finish with your choice of paint or stain and seal with a durable clear topcoat. For outdoor projects, use exterior-rated primer, paint or stain, and sealer so the piece stands up to the weather.
Source (temporary): https://www.ana-white.com/woodworking-projects/coat-rack-scraps