Coffee Table with Trundle Toy Box
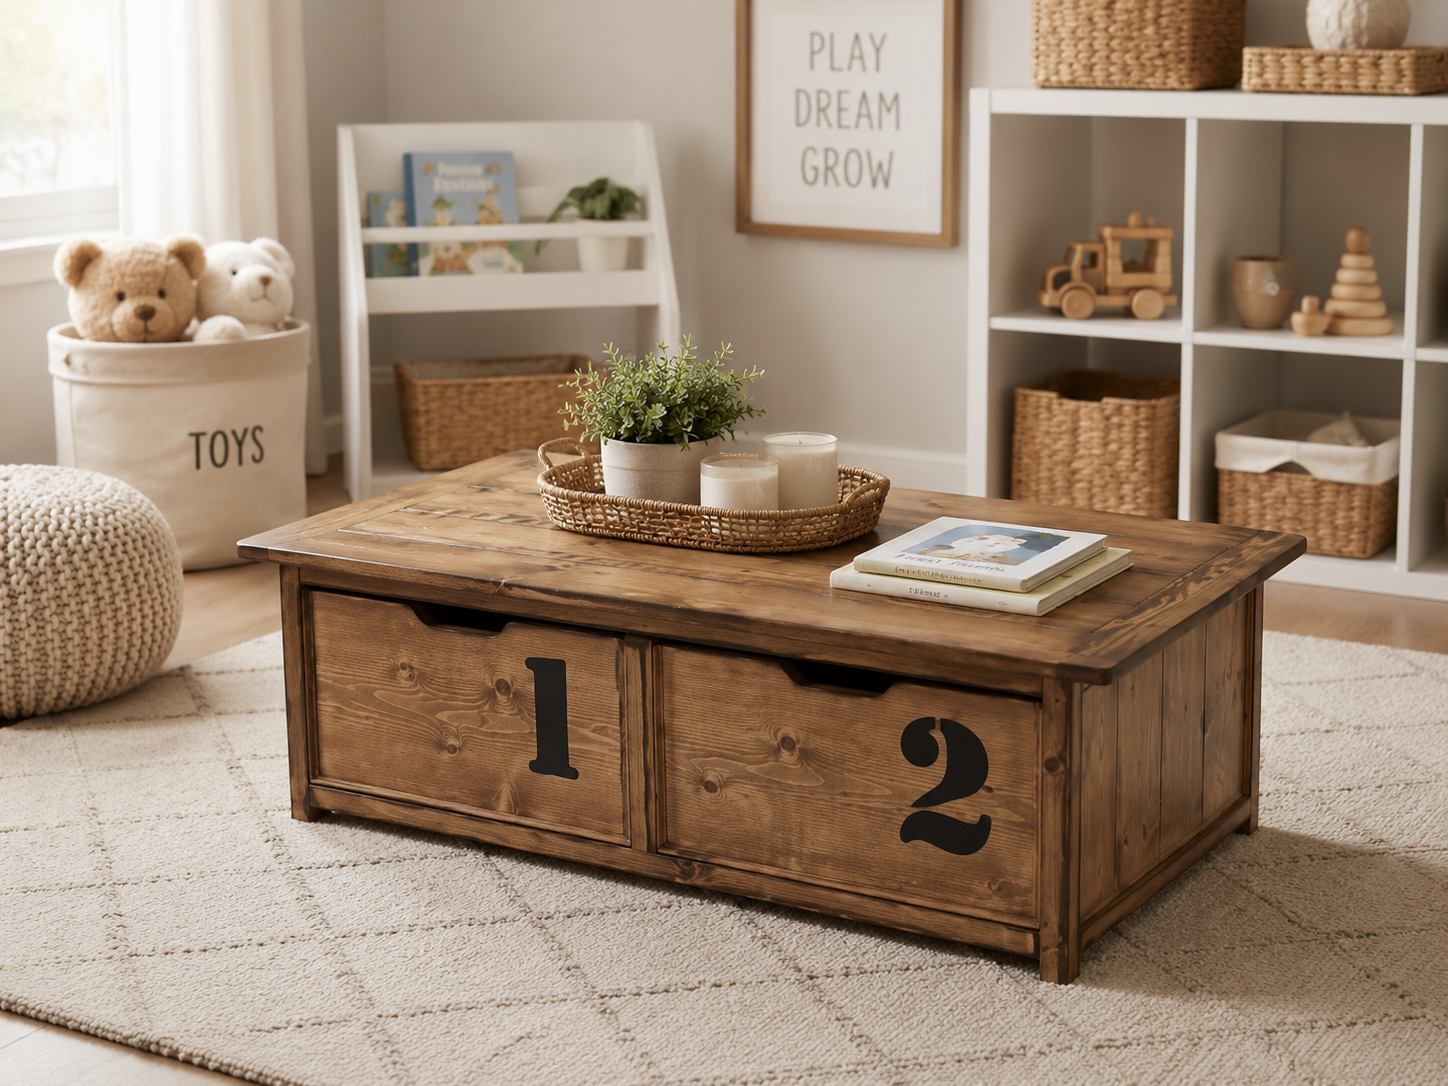
This coffee table features a huge trundle drawer that can be used to store blankets, pillows, or act as a toybox! We used this coffee table for years to hide toys in the living room. This is a with step by step diagrams, shopping and cut list - everything you need to build your own coffee table with trundle drawer.
Specifications
| Project type | Toy box Plans |
|---|---|
| Room | Kids and Toys |
| Style | Children's and Kid's Room Furniture and Toy Plans |
| Difficulty | Intermediate |
| Estimated cost | $20 - $50 |
Dimensions
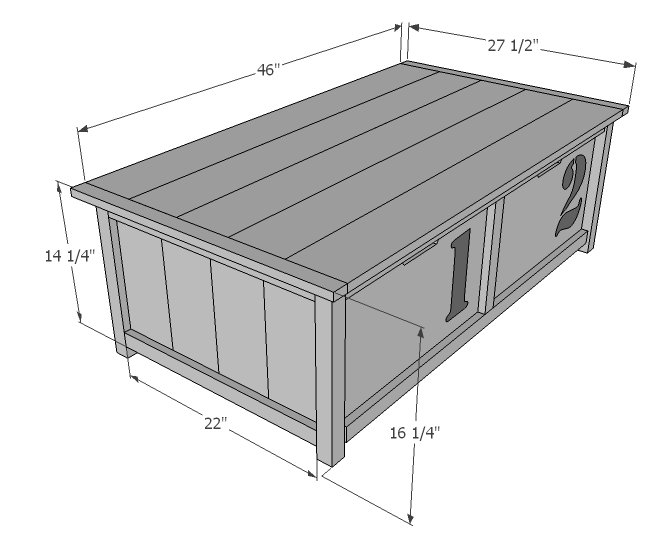
Use the size-specific shopping and cut lists below.
Shopping List
- 4 - 1x6 @ 8 feet long
- 3 - 2x2 @ 8 feet long
- 1 - 1x3 @ 6 feet long
- 1 - 1x12 @ 12 feet long
- 1 - 1x2 @ 10 feet long
- 1/4 sheet of - 1/2" plywood
- 4 - 1 1/2" caster wheels with an overall clearance of 2"
Cut List
- 4 - 2x2 @ 21 3/4" (cut to length of your leg sides)
- 2 - 2x2 @ 43 1/2"
- 5 - 1x6 @ 45"
- 8 - 1x6 @ 14 1/4"
- 4 - 1x2 @ 22" (side trim - cut to fit)
- 2 - 2x2 @ 15 1/2" (for caster wheels with overall clearance of 2" - most commonly 1 1/2" diameter wheels)
- 2 - 1x3 @ 27 1/2" (cut to width of tabletop)
TRUNDLE
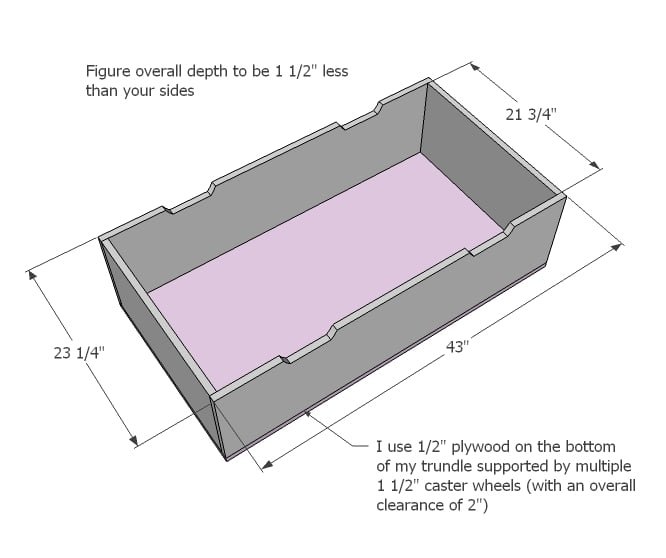
- 2 - 1x12 @ 43"
- 2 - 1x12 @ 23 1/4" (1/4" less in length than the side trim)
- 2 - 1x2 @ 43"
- 2 - 1x2 cut to fit most likely around 11" 1/2" plywood cut to fit bottom
Tools
- measuring tape
- square
- pencil
- safety glasses
- hearing protection
- kreg-jig
- drill
- circular saw
- nailer
- sander
- countersink drill bit
Step-by-step Instructions
Step 1
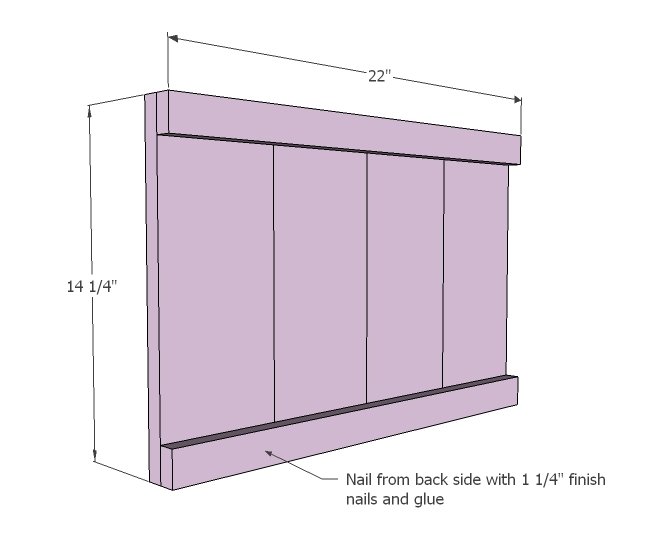
There's a number of different ways you can go about putting this pretty simple coffee table together. I actually put mine together in a different set of steps: I first built the top, then the leg sides, then added the top to leg sides, followed by trundle construction. But what happened is this table is highly dependent on the tabletop as the main structure, and I had some not quite straight tabletop boards. This created a ton of problems for me, so I wanted to present these plans in a different order to help alleviate issues for you. If you have straight boards and a Kreg Jig, it may make the most sense to just build the tabletop, build the leg sides, the frame, and the trundle, and then put the pieces together. Either way we go, let's build those sides first. Because 1x6 boards can be a little "off" and end up changing overall widths, cut the trim pieces to match the width of four 1x6s as shown above. Nail and glue on. TIP: for pocket hole jig users, also join center of each 1x6 to neighboring 1x6 edge to edge.
Step 2
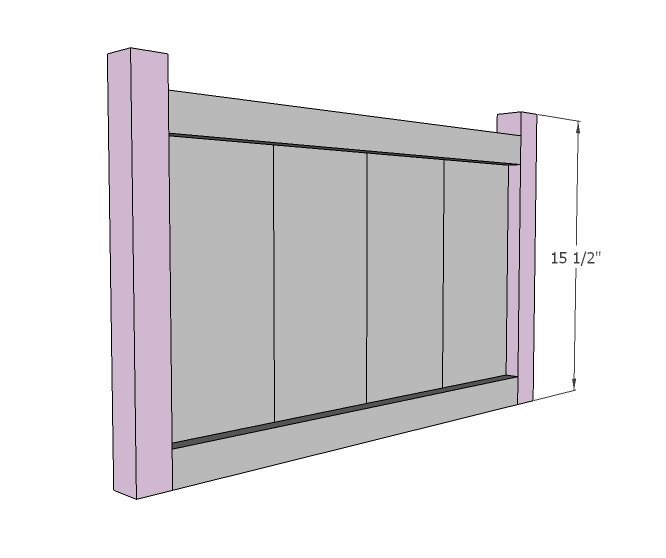
Now add the legs to the sides. You can either use countersunk screws at least 2 1/2" long or 3/4" pocket holes and 1 1/4" pocket hole screws.
Step 3
Now we will build the 2x2 frame. Remember, because the sides can vary ever so slightly in widths, you will want to build the 2x2 frame to the same width as the sides. Easiest way? Cut the 2x2 supports to the same length you cut the side trim too. It's super important to use straight 2x2s and build the frame square, so take your time here and get it right. Because the trundle basically acts like one big drawer, it's exceptionally important that the table is square so we don't have on giant cockeyed drawer that sticks. Ugh!
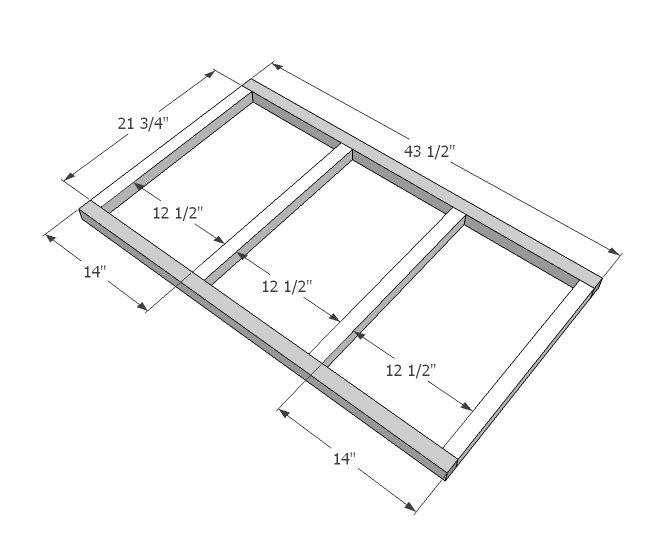
If you have a pocket hole jig, you may wish to build the tabletop first, including breadboard ends.
Otherwise, starting in the center and working outward, screw from bottom the tabletop boards through 2x2 supports with 2" countersunk screws. Overhangs are equal to sides, 3/4" on ends.
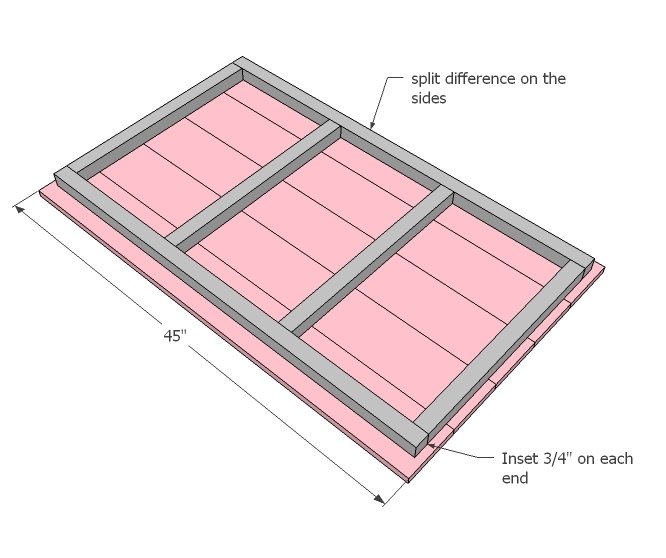
Step 5
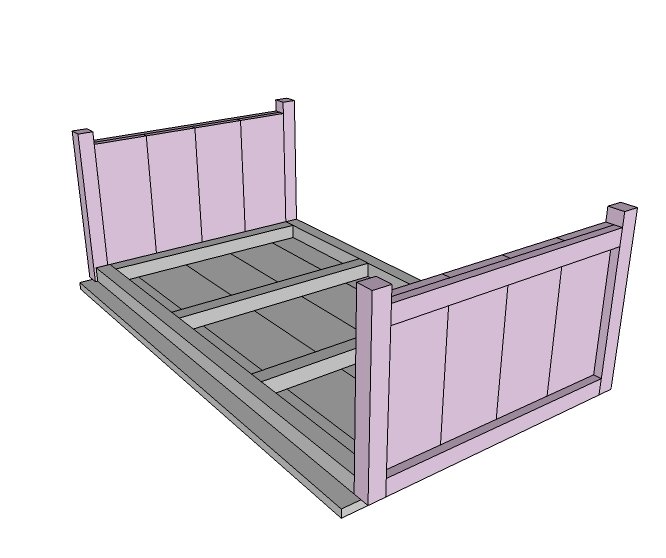
Step 6
And then the breadboard ends can be attached to the tabletop boards. Of course if you are using a pocket hole jig, you would have already attached in earlier steps.
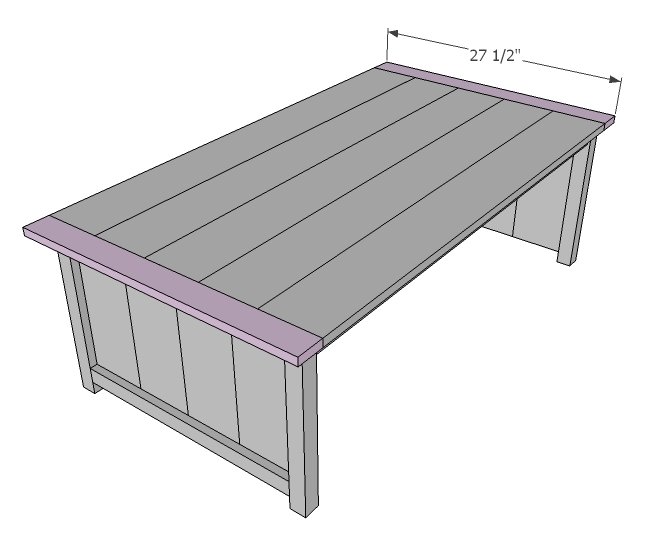
Step 7
Build the trundle as shown here. I simple screwed the plywood to the bottom with a countersink bit and 2" screws and glue. Notch out the handles if desired. For the caster wheels - I added only four and it's fine, but for a heavier load, you may consider adding another in the center.
Step 8
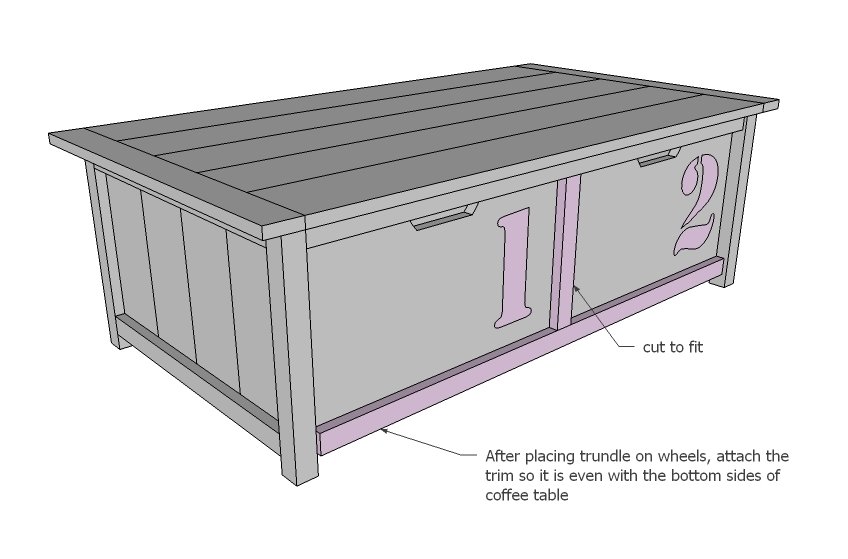
Because wheels and 1x12 widths and every your plywood might vary, what I did here was position the trundle under the table, and then match the trim to the sides level. I used glue and 2" finish nails. Then I added the center trim with 1 1/4" finish nails and glue.
Step 9
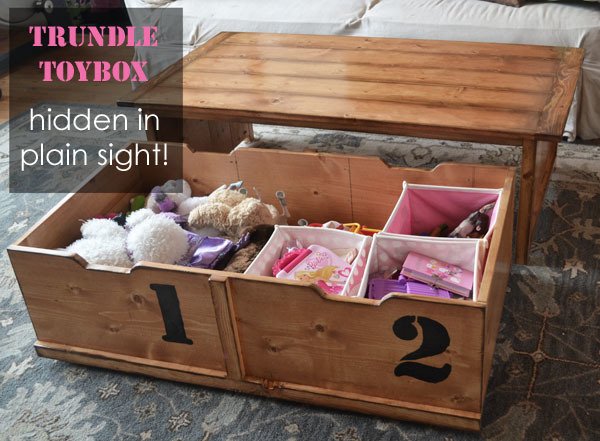
The number were painted on with acrylic paint and an angled brush.
Step 10
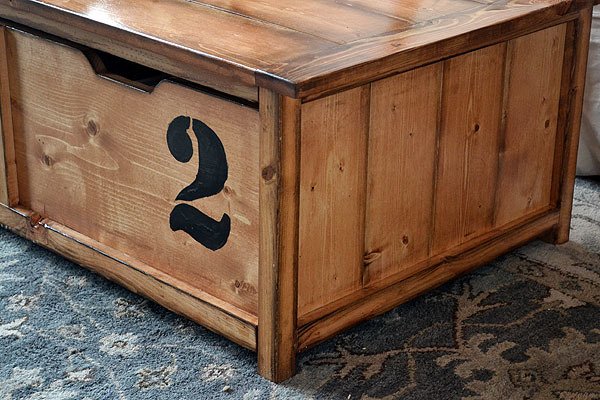
For the finish, I sanded well. Then one coat of Minwax Ipswich Pine, folowed by Minwax Dark Walnut rubbed on with a rag over edges. We sprayed four coats of polyurethane on to get that ultra smooth glossy finish.
Finishing
Sand all surfaces, starting with a medium grit and finishing with fine. Wipe off the dust, fill any holes or gaps with wood filler, and sand smooth once dry. Apply primer if you're painting, then finish with your choice of paint or stain and seal with a durable clear topcoat. For outdoor projects, use exterior-rated primer, paint or stain, and sealer so the piece stands up to the weather.
Source (temporary): https://www.ana-white.com/woodworking-projects/coffee-table-trundle-toy-box