Collapsible Potting Table
Build a collapsible potting table or BBQ area to provide an extra outdoor surface that can be stored away in the off season.
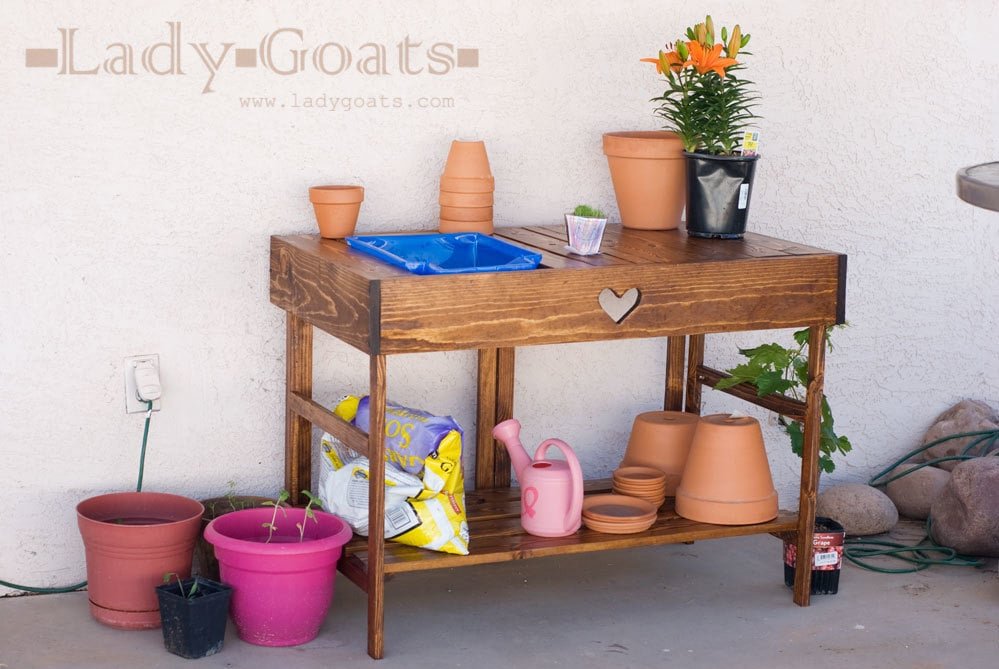
Specifications
| Project type | Kids Tables and Chairs |
|---|---|
| Room | Outdoor |
| Style | Cottage Style Furniture Plans |
| Difficulty | Intermediate |
| Estimated cost | $20 - $50 |
Dimensions
Use the size-specific shopping and cut lists below.
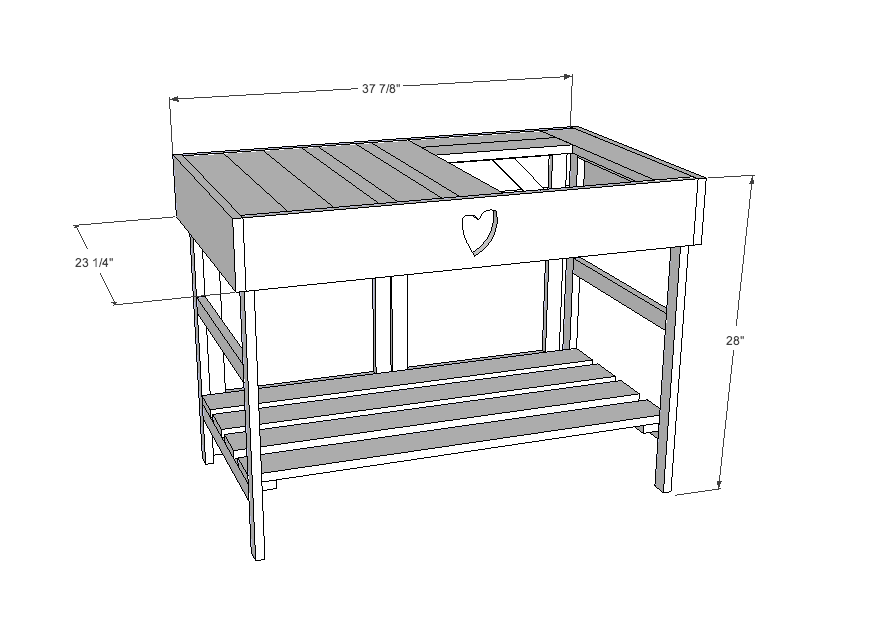
Shopping List
1 - 1 x 6 @ 8' 1 - 1 x 6 @ 4' 4 - 1 x 4 @ 8' 6 - 1x2 @ 8' 3 sets 1 1/2" butt hinges *Optional* 1 extra 1x2 @ 8', mentioned in step 7
Cut List
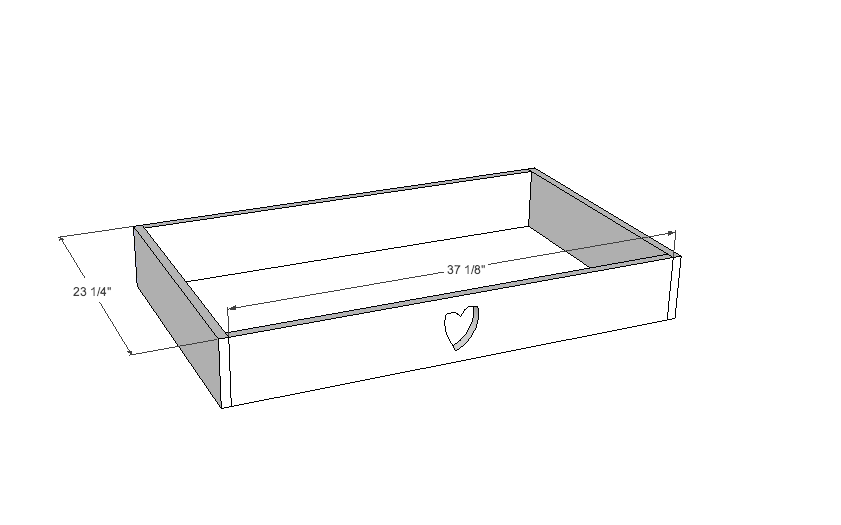
8 - 1x2 @ 27 1/4" 8 - 1x2 @ 17 3/4" 4 - 1x2 @ 14 1/2" 2 - 1x2 @ 12 1/2", ends cut at 45*, not parallel 2 - 1x2 @ 21 3/4" 4 - 1x4 @ 37 1/8" 6 - 1x4 @ 21 3/4" 2 - 1x4 @ 13 1/8" 2 - 1x6 @ 37 1/8" 2 - 1x6 @ 23 1/4"
Tools
- measuring tape
- square
- pencil
- safety glasses
- hearing protection
- kreg-jig
- drill
- jigsaw
- compound miter saw
- sander
Step-by-step Instructions
Step 1
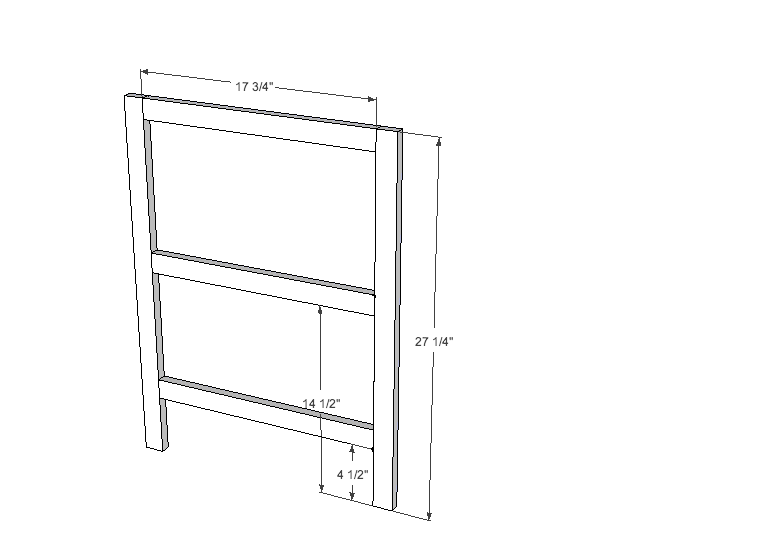
Build the side legs as shown above. Set your kreg jig for 3/4" stock and use 1 1/4" pocket hole screws. You need to build two of these.
Step 2
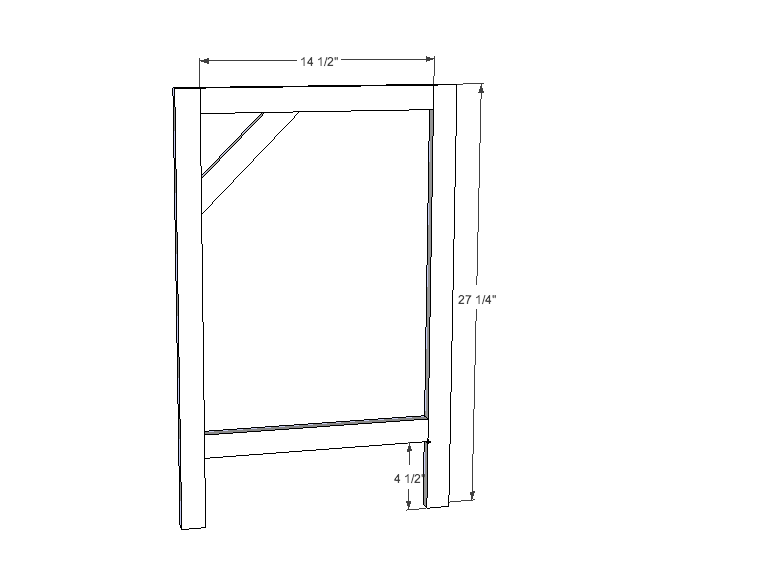
Build the back legs using the dimensions above. The angled piece is the 12 1/2" 1x2 with the 45 degree cuts. Use pocket holes set for 3/4" stock, using 1 1/4" pocket hole screws.
Step 3
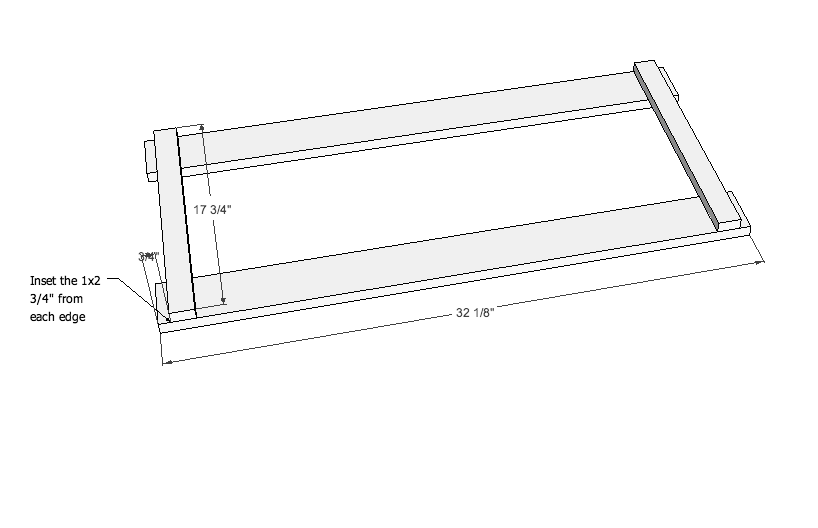
*Important!* Measurement in diagram is incorrect - lengths should be 37 1/8" (cut to fit). To start the bottom shelf, inset your 1x2s 3/4" from the ends of the 1x4s as pictured. Attach using 1 1/4" screws and glue, using two screws per shelf, per side.
Step 4
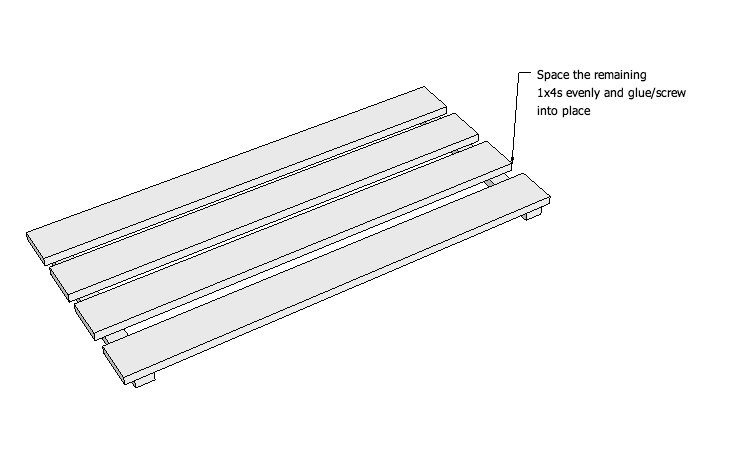
Evenly space the remaining shelf boards, making sure to glue and screw into place. Still using 2 screws per board, per side.
Step 5
Step 6
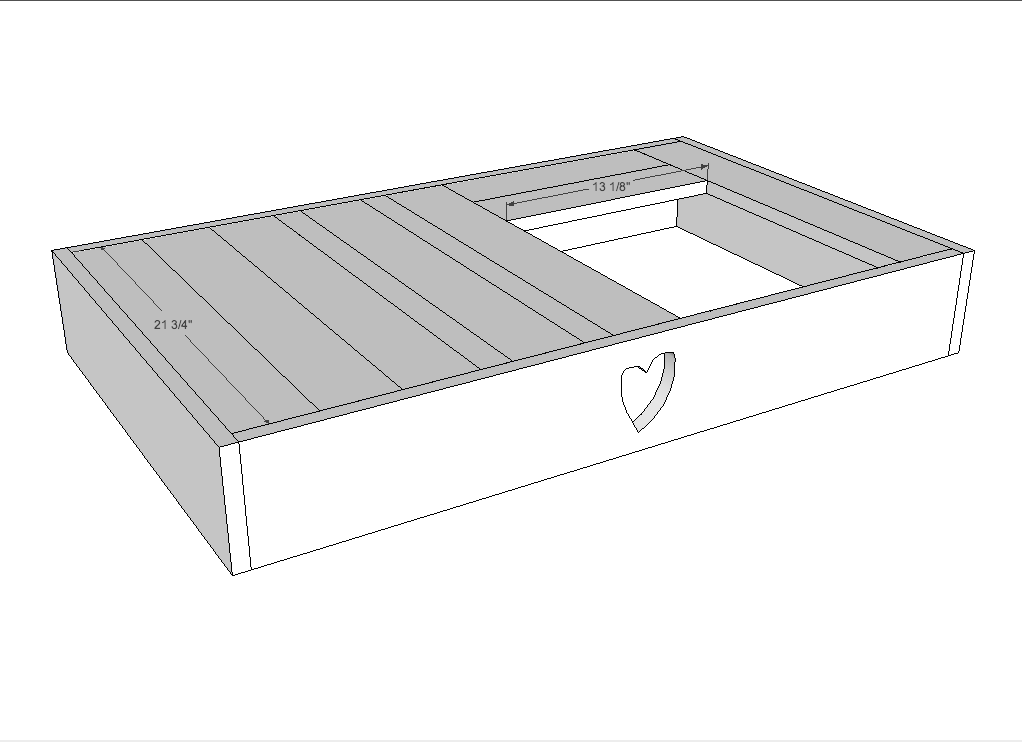
You can pocket hole the top boards together, but I would recommend that you plank them on a scrap board, leaving a slight gap between boards for drainage and to allow the boards to move, as it will be outside. If you plank them, arrange them inside the 1x6s, top down, and place the scrap board on top of them, gluing and screwing into place.Then you can either screw the plank inside with pocket holes or with countersunk screws from the outside.
Step 7
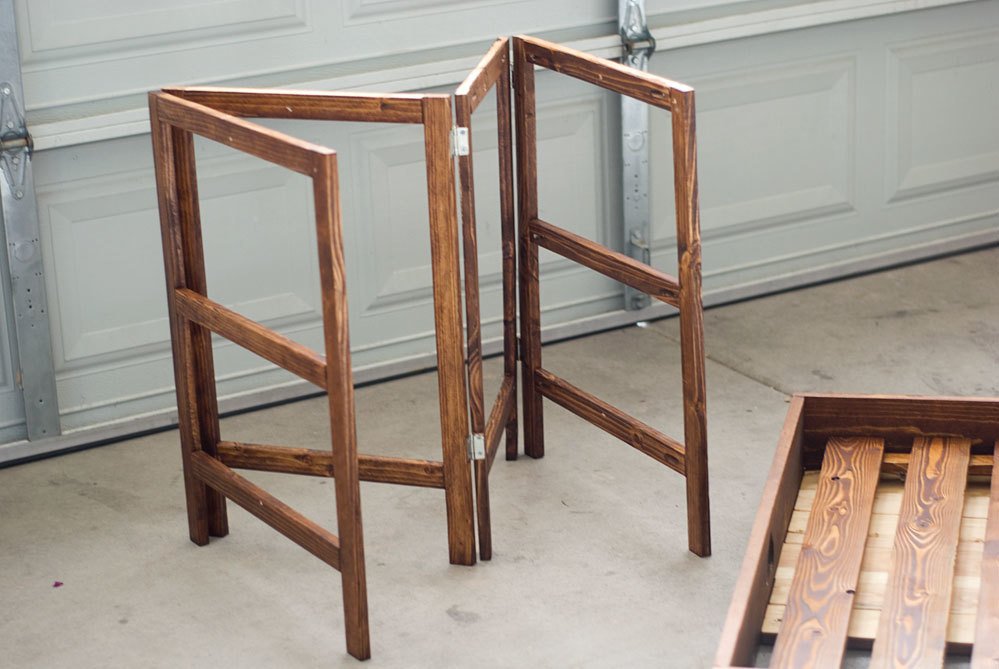
Attach hinges as shown. I stood the sides that were to be hinged together next to each other and test-folded it with the hinge to make sure I was putting it on the correct way. Then I scribed where the screws would go.
Step 8
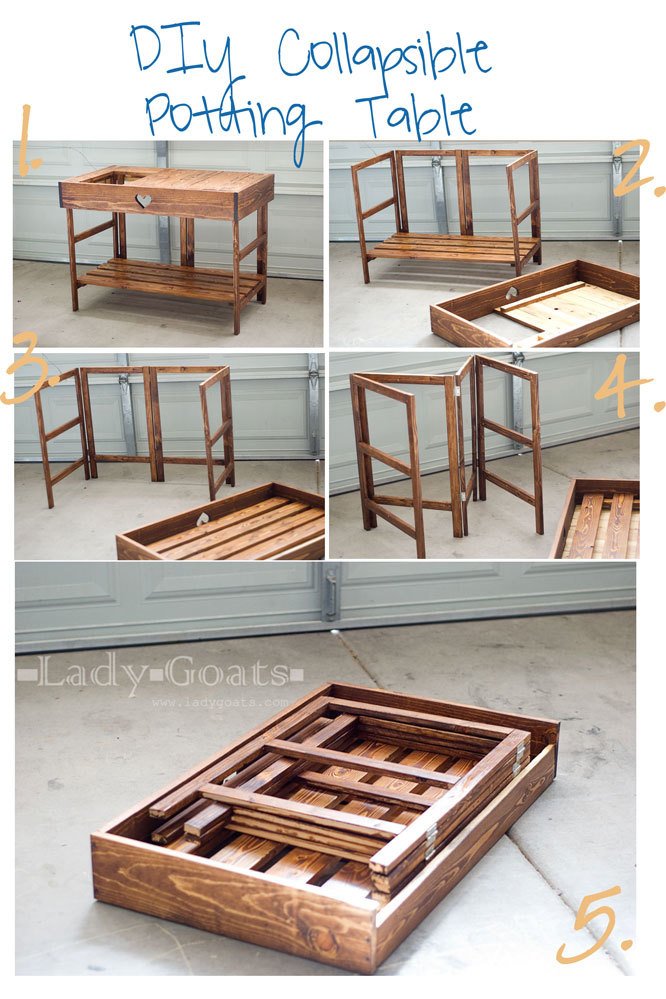
Assemble/disassemble as needed!
Finishing
Sand all surfaces, starting with a medium grit and finishing with fine. Wipe off the dust, fill any holes or gaps with wood filler, and sand smooth once dry. Apply primer if you're painting, then finish with your choice of paint or stain and seal with a durable clear topcoat. For outdoor projects, use exterior-rated primer, paint or stain, and sealer so the piece stands up to the weather.
Source (temporary): https://www.ana-white.com/woodworking-projects/collapsible-potting-table