Compact Outdoor Dining Table for Small Spaces
A simple, inexpensive outdoor table with modern styling that you can build in an afternoon. Seats four and features a slatted top and bottom stretcher.
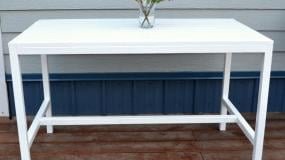
Specifications
| Project type | Dining Table Plans |
|---|---|
| Room | Outdoor |
| Style | Modern Style Furniture Plans |
| Difficulty | Beginner Projects |
| Estimated cost | $20 - $50 |
Dimensions
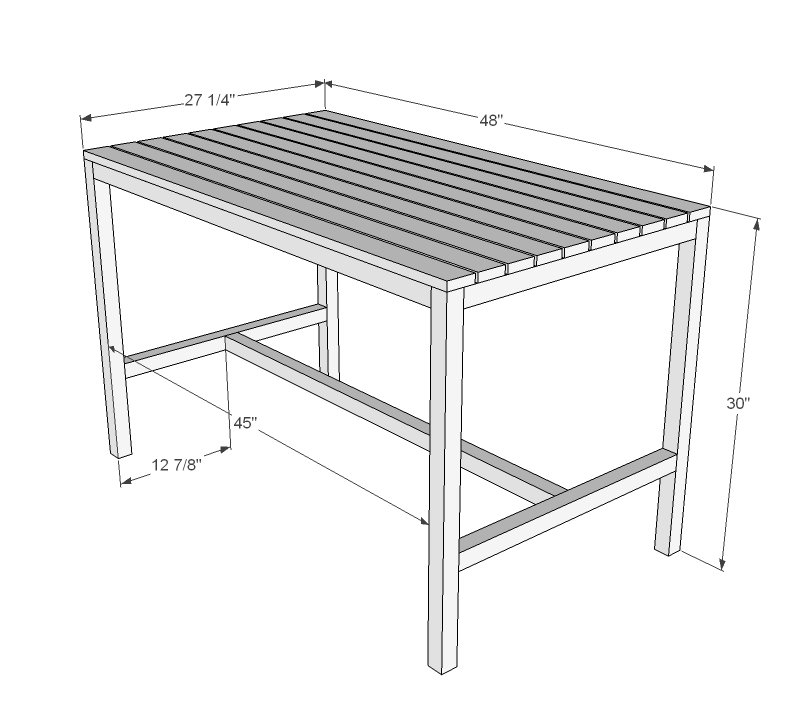
Use the size-specific shopping and cut lists below.
Shopping List
- 5 - 1x3 Boards, 8 feet long
- 5 - 2x2, 8 feet long
- 2 1/2" self tapping wood screws or 2 1/2" pocket hole screws
- 2" self tapping wood screws
Cut List
- 7 - 2x2 @ 24 1/2" (Ends/Supports)
- 3 - 2x2 @ 44 3/4" (Sides/Stretcher)
- 4 - 2x2 @ 29 1/4" (Legs)
- 10 - 1x3 @ 47 3/4" (Decking)
Tools
- measuring tape
- square
- pencil
- safety glasses
- hearing protection
- kreg-jig
- drill
- circular saw
- sander
- countersink drill bit
Step-by-step Instructions
Step 1
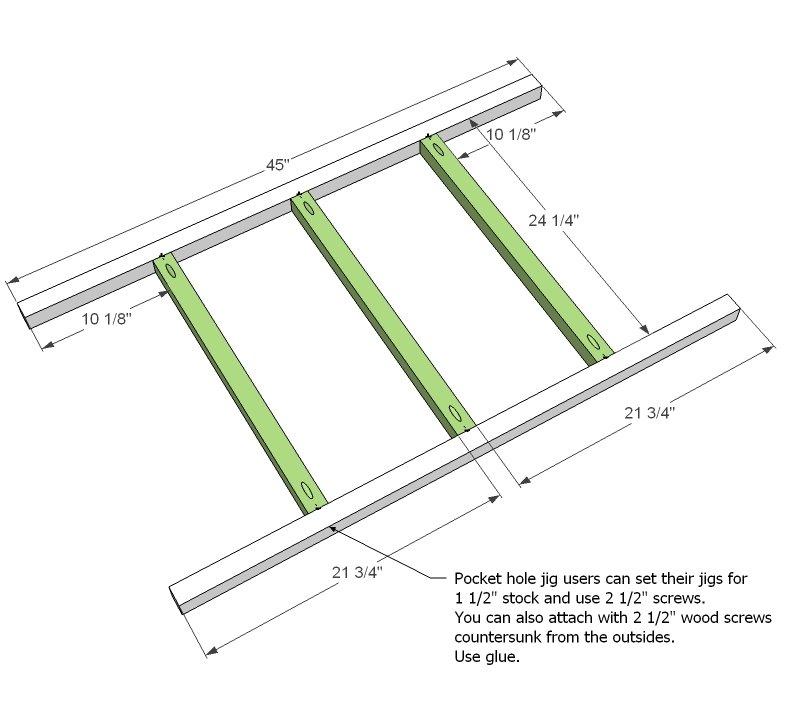
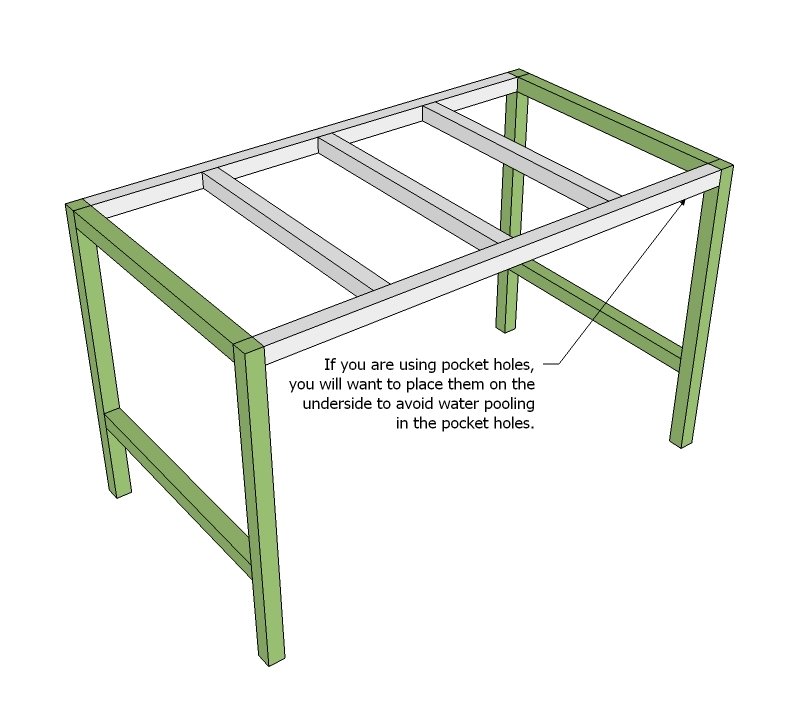
Begin by building your tabletop frame as shown above. Mark the placement of all joints and either use the Kreg Jig to drill pocket holes or a countersink bit to drill holes from the outside. Attach with 2 1/2" screws and wood glue. Check for square, and set aside.
Step 2
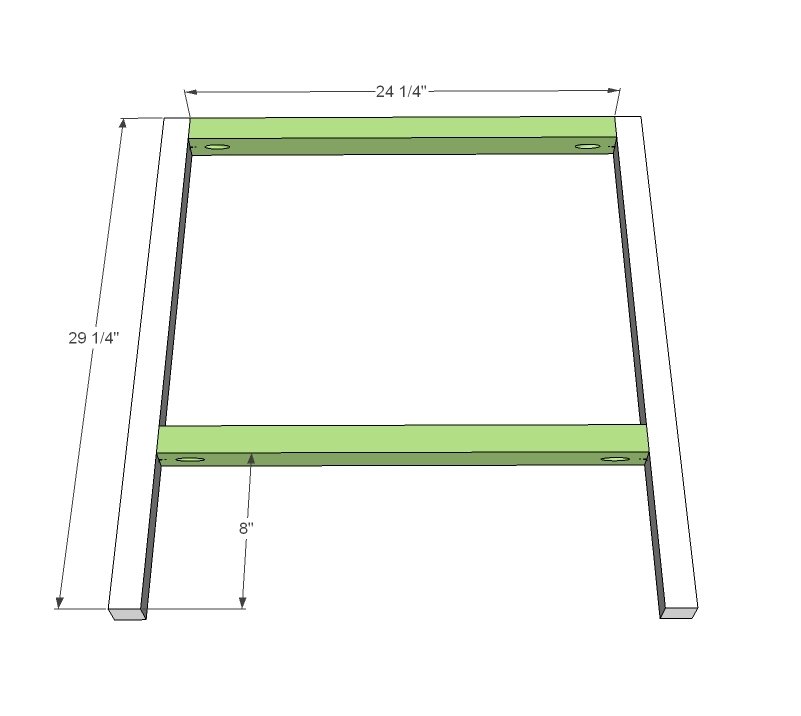
Now the legs... build two of these in the same manner as the tabletop. If you are using the Kreg Jig, remember to keep your pocket holes to the bottom, as water could pool in exposed pocket holes, and potentially destroy your table.
Step 3
Now simply attach the tabletop frame to the legs. I just turned the whole thing upside down and got my drill out:) Use glue and 2 1/2" screws.
Step 4
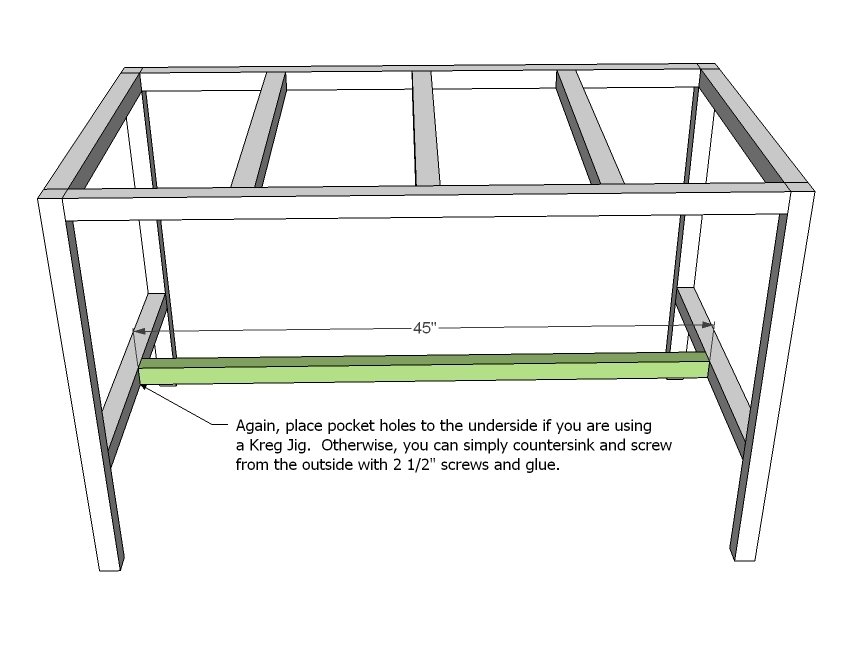
The stretcher really helps to keep the base square, and to keep the legs stable. Center the stretcher on the end boards and attach with screws and glue. Check out the dimensions diagram for center measurements - it's 12 7/8" from the outsides.
Step 5
Finishing
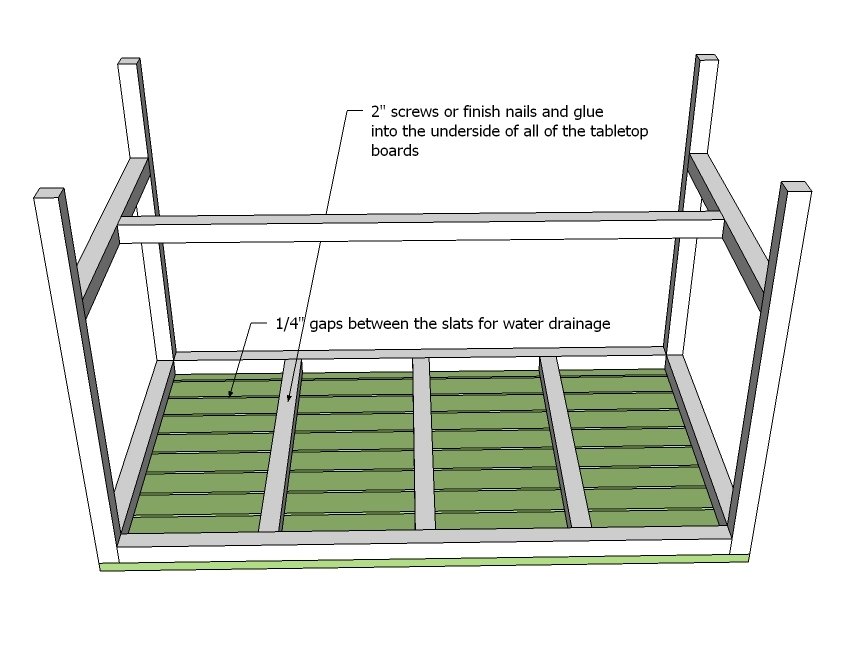
Sand all surfaces, starting with a medium grit and finishing with fine. Wipe off the dust, fill any holes or gaps with wood filler, and sand smooth once dry. Apply primer if you're painting, then finish with your choice of paint or stain and seal with a durable clear topcoat. For outdoor projects, use exterior-rated primer, paint or stain, and sealer so the piece stands up to the weather.
Source (temporary): https://www.ana-white.com/woodworking-projects/compact-outdoor-dining-table-small-spaces