Compartment Depot Bookshelf
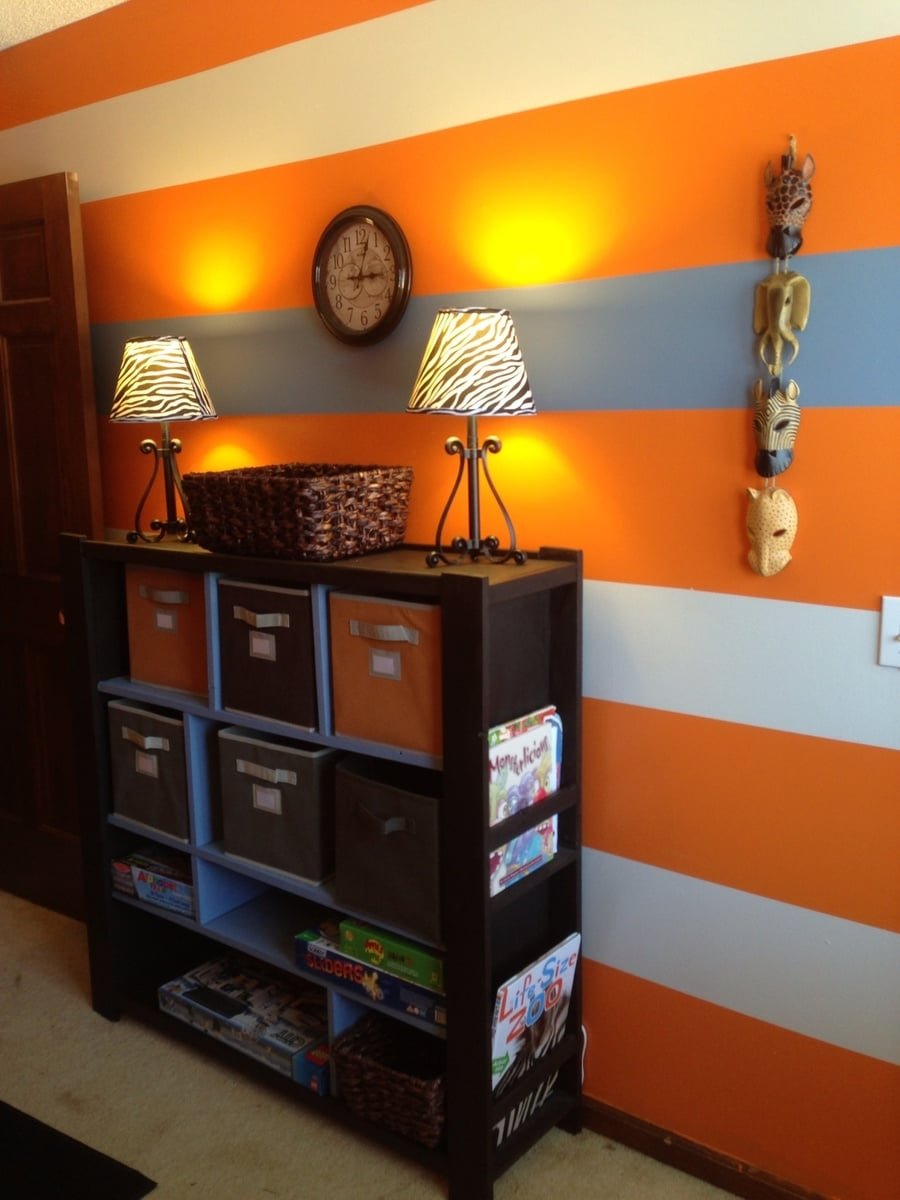
to build a Land of Nod Compartment Department inspired bookshelf from
Specifications
| Project type | Bookshelf and Bookcase Plans |
|---|---|
| Room | Storage Solutions |
| Style | Children's and Kid's Room Furniture and Toy Plans |
| Difficulty | Intermediate |
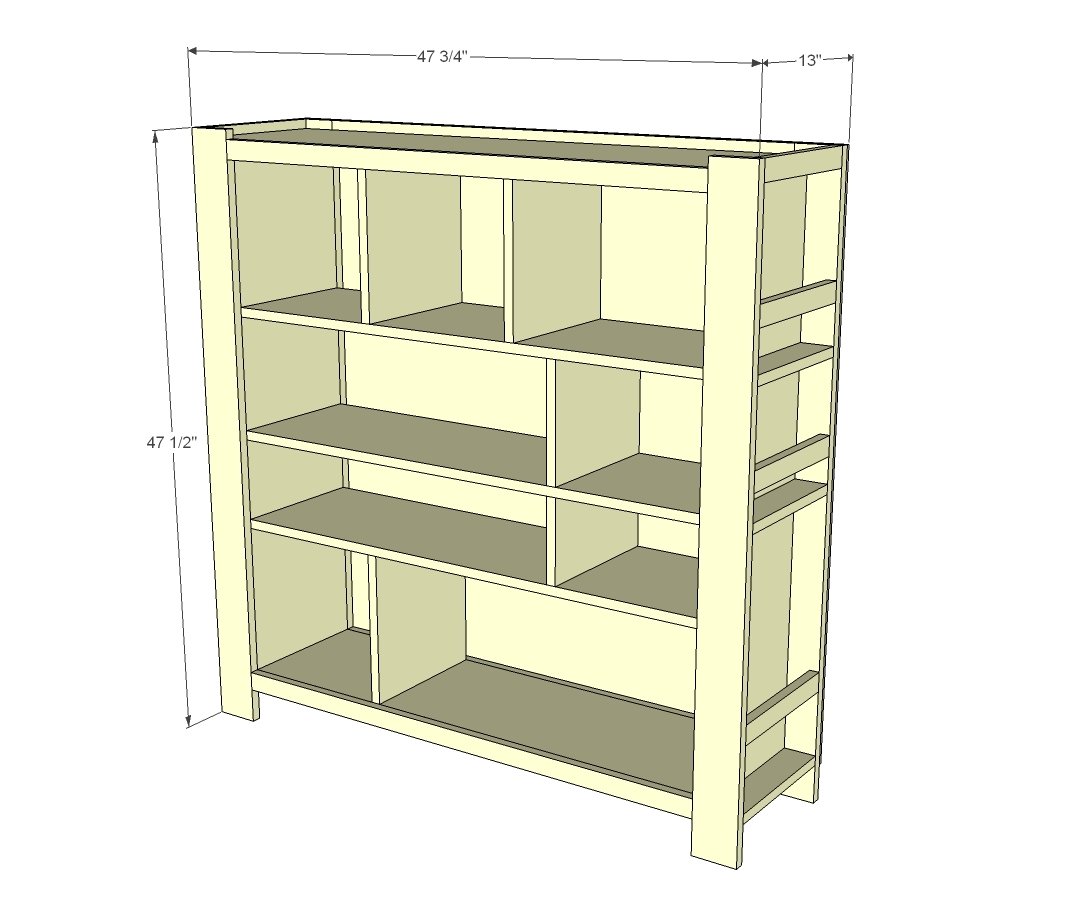
Dimensions
Use the size-specific shopping and cut lists below.
Shopping List
4 - 1x12 @ 8 feet long OR 1 sheet of 3/4" plywood ripped into strips 11 1/4" wide (you could actually go up to 11 3/4" wide but will need to adjust side shelves/trim cut widths)
2 - 1x4 @ 8 feet long
1 - 1x3 @ 8 feet long
3 - 1x2 @ 8 feet long *You'll need a couple more if filling in back pieces between back and shelves)
1/2 sheet of backing material (usually 1/4" plywood or other hardboard)
Recommend assembly with 1 1/4" pocket hole screws and 1 1/4" and 2" finish nails
Cut List
1 - 1x12 @ 6 1/2" (divider)
4 - 1x12 @ 41" (main shelves)
1 - 1x12 @ 9" (divider)
3 - 1x12 @ 12" (divider)
2 - 1x12 @ 42 1/2" (sides)
1 - 1x12 @ 46" (top)
4 - 1x4 @ 47 1/2" (legs)
6 - 1x3 @ 11 1/4 - OR width of 1x12 (small shelves)
8 - 1x2 @ 11 1/4" - OR width of 1x12 (side rungs/trim)
4 - 1x2 @ 40 1/2" - CUT TO FIT (front/back trim)
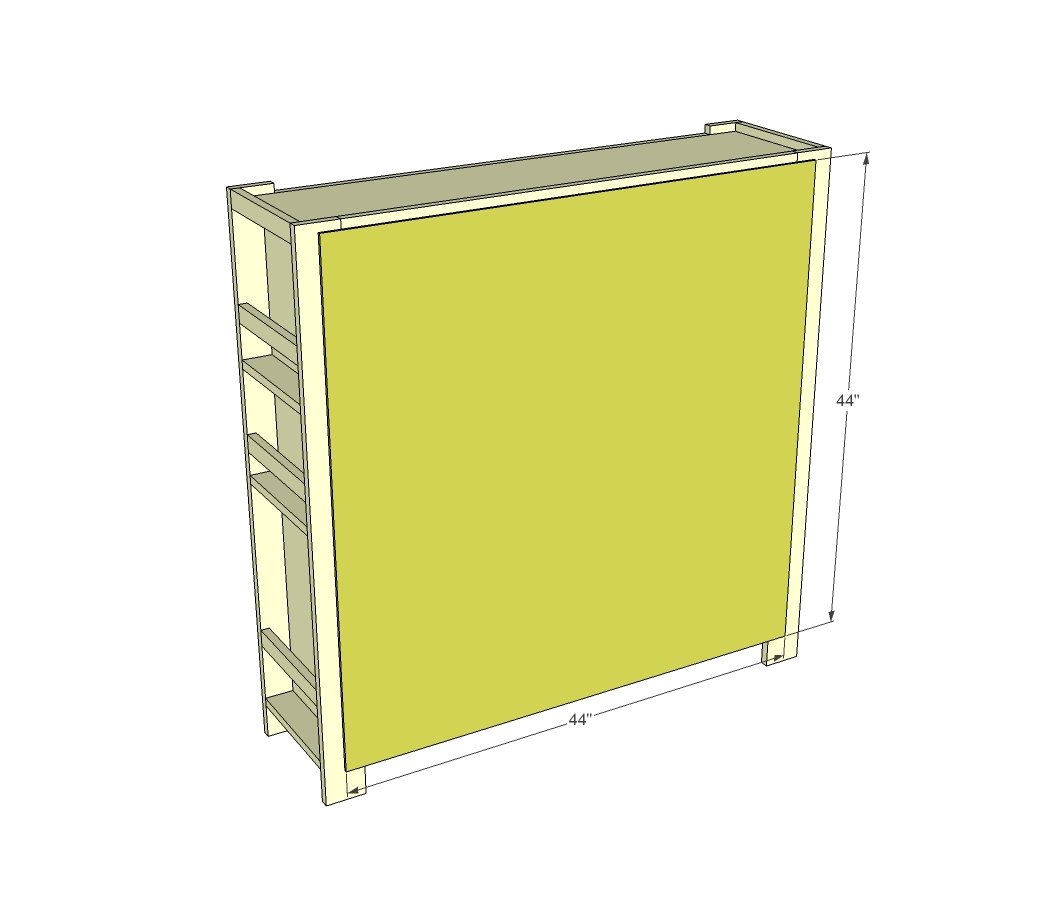
1 - 1/4" plywood @ 44" x 44" (back)
NOTE: you may also wish to fill in back shelves with 1x2 trim to get rid of spacing between shelves and back plywood - it's up to you.
Tools
- measuring tape
- square
- pencil
- safety glasses
- hearing protection
- kreg-jig
- drill
- circular saw
- compound miter saw
- nailer
- sander
- countersink drill bit
Step-by-step Instructions
Step 1
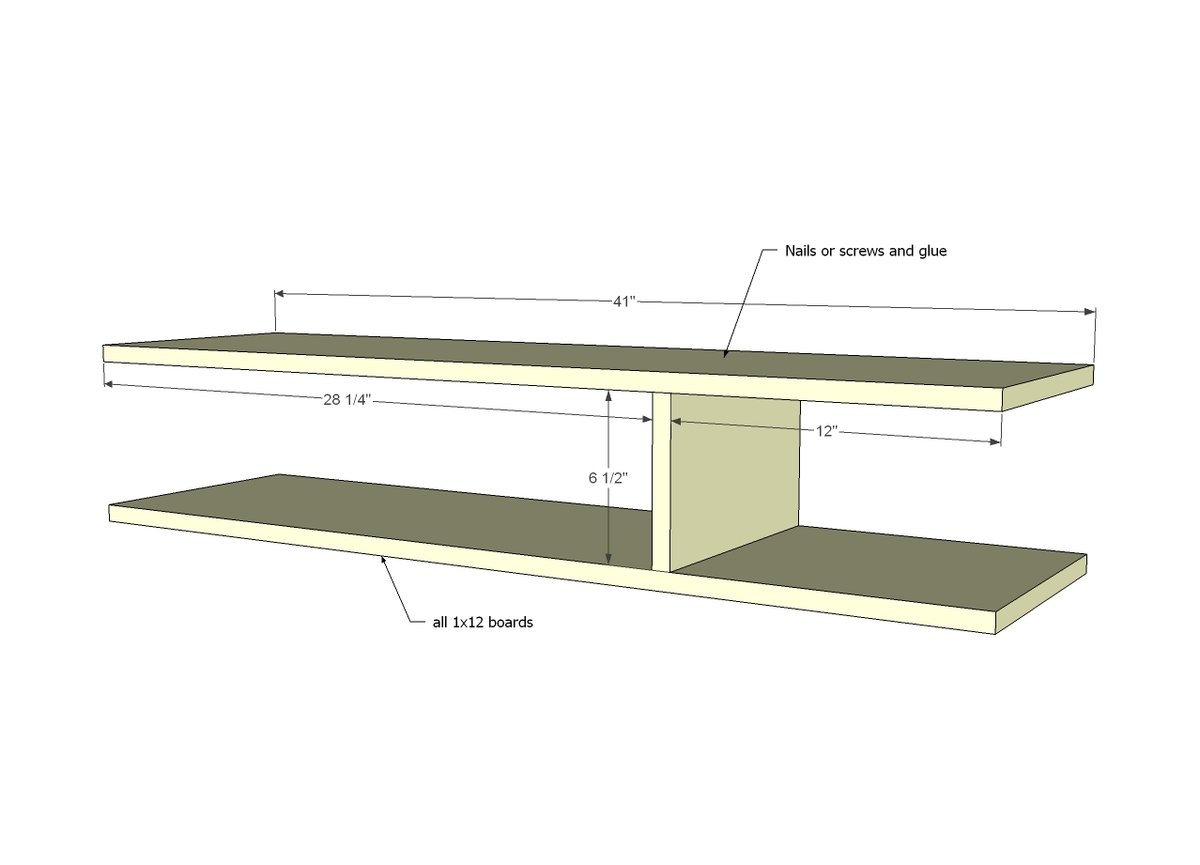
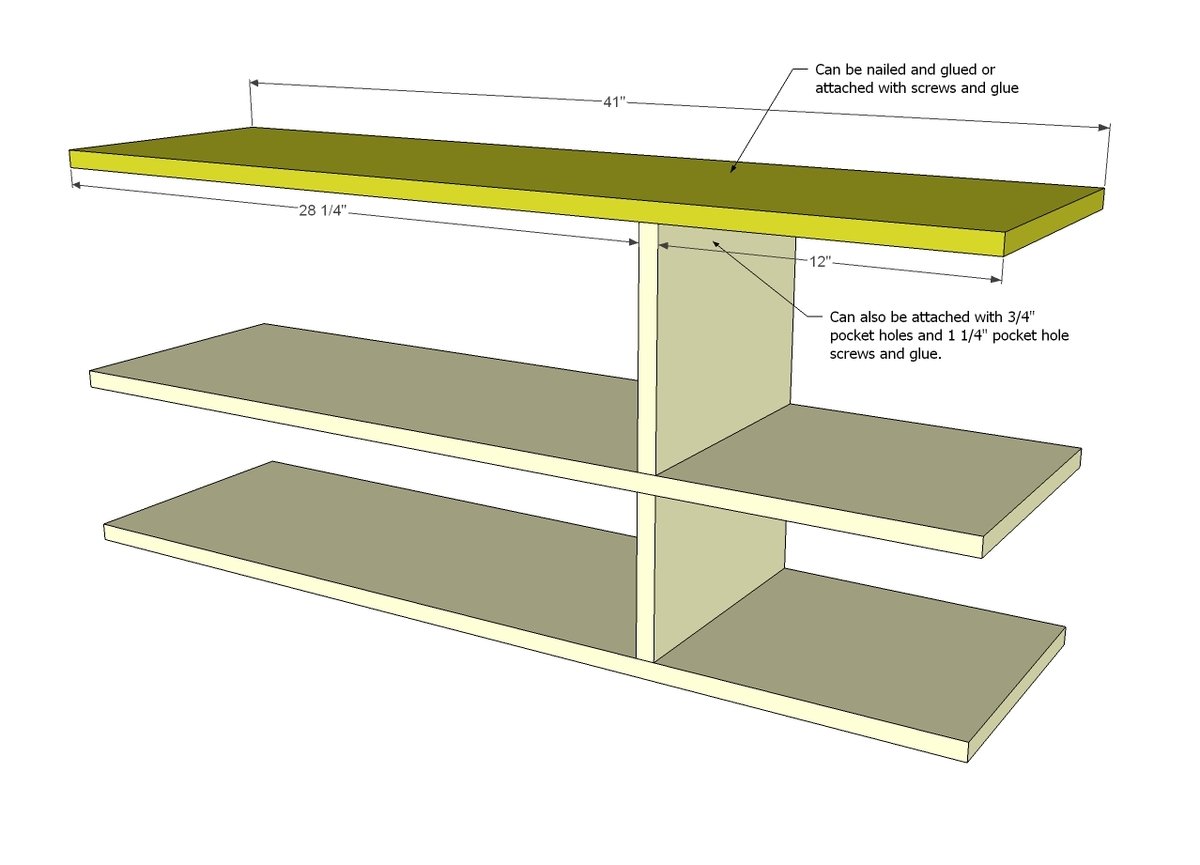
Because you have to think about leaving room for the drill when attaching, start on the inside and work your way outward. Attach divider to two shelves. NOTE: If you don't have a pocket hole jig, you may wish to attach bottom divider (see step 4) first because there won't be room to get a standard drill in between the shelves later on.
Step 2
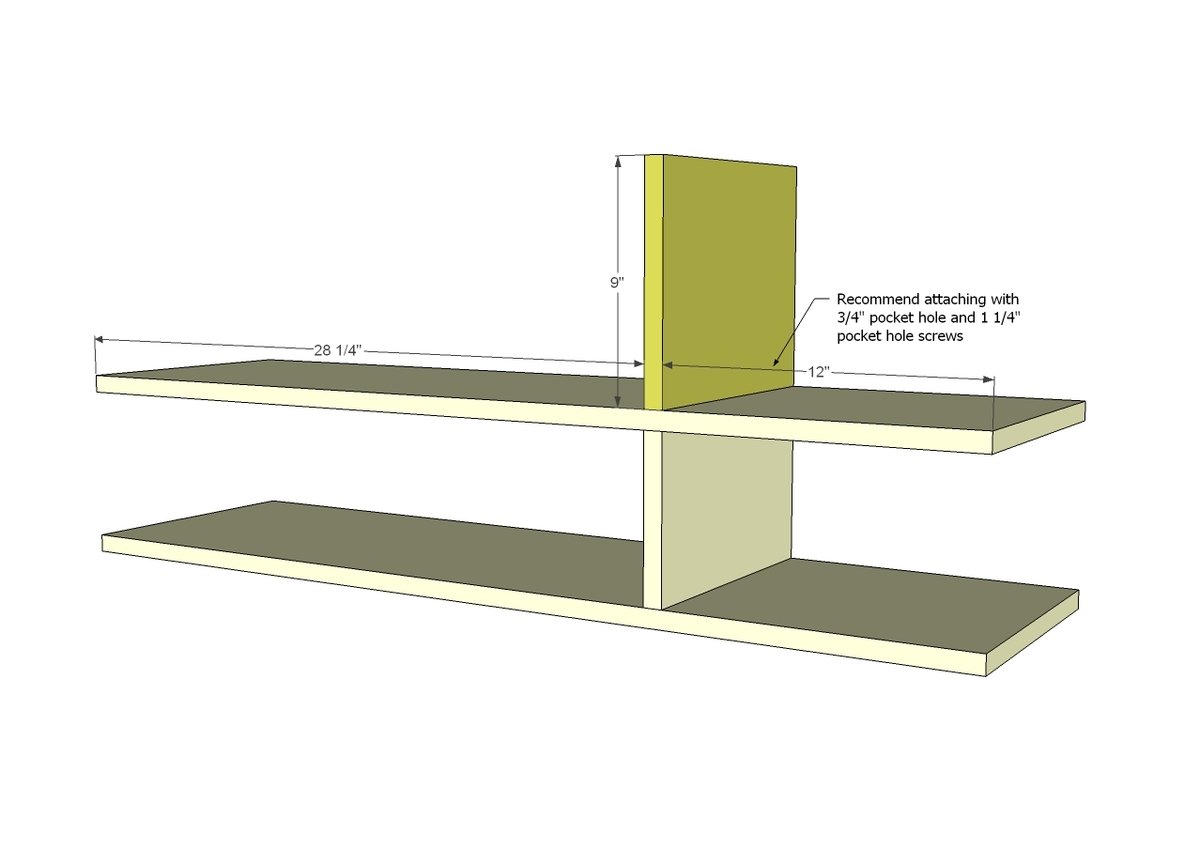
Next, attach divider on top. If you don't have a pocket hole jig (recommend getting one, even the tiny one would do the trick here) you could also glue and nail at an angle from both sides to keep in place, or drill holes and secure with wood dowels. There's lots of different options, I just give the easiest.
Step 3
Now attach the upper shelf, following measurements.
Step 4
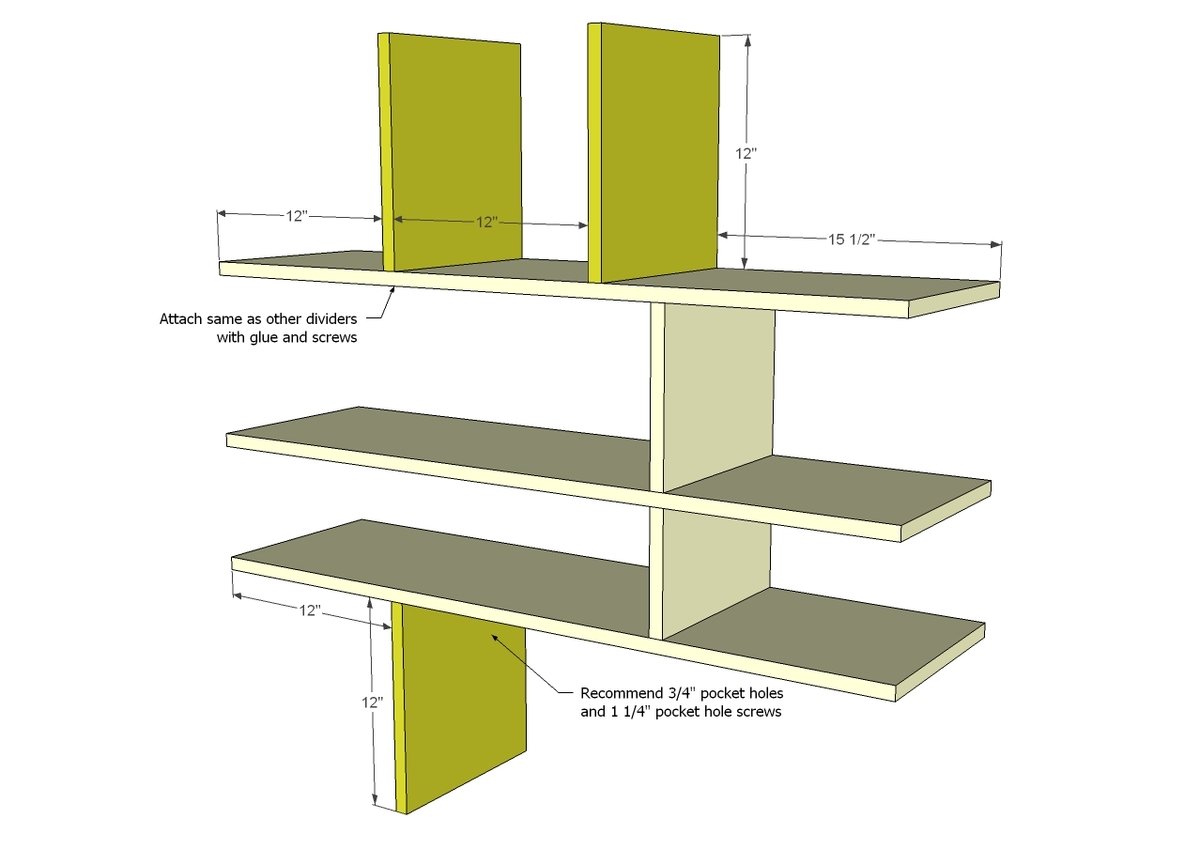
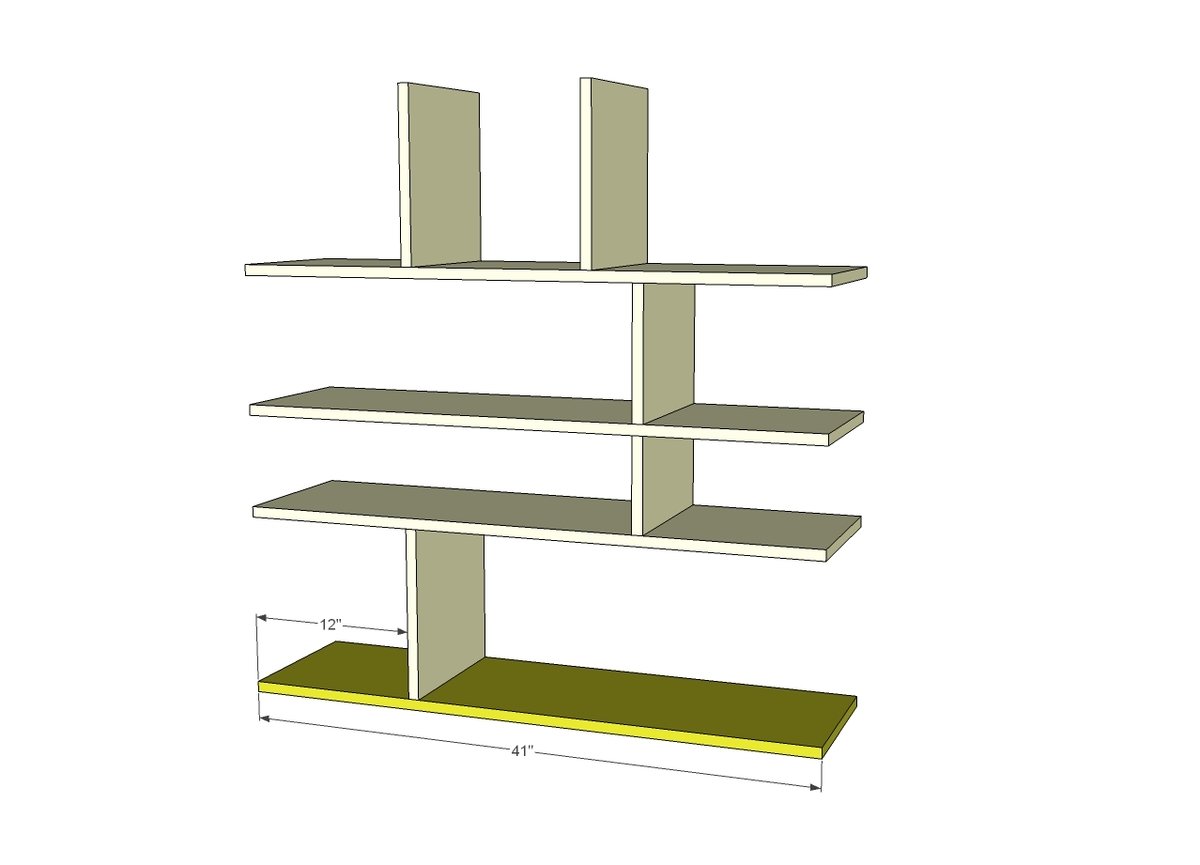
And the remaining dividers. As noted in step 1, the bottom divider will be tricky to get a drill in there if not using pocket holes, so do this first if you don't have a pocket hole jig.
Step 5
Step 6
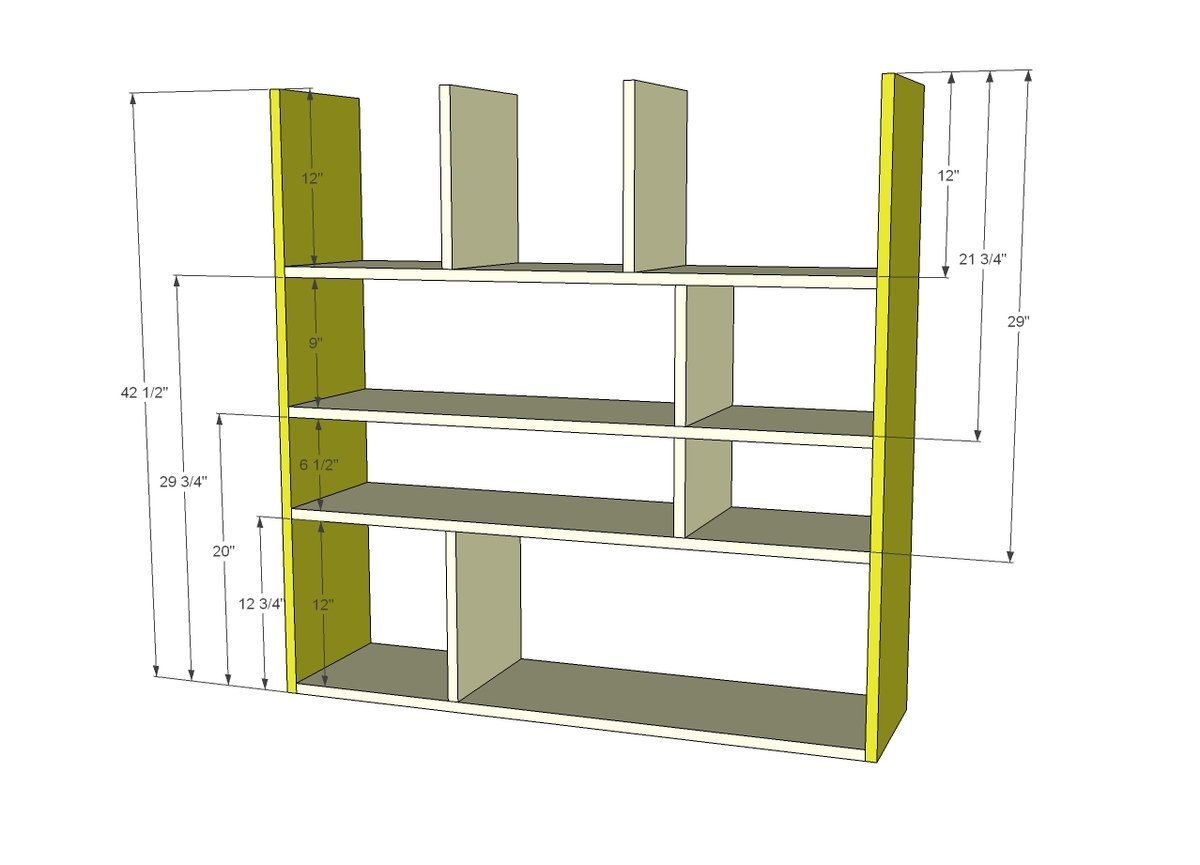
Attach sides to shelves keeping measurements carefully aligned. Measure twice cut (or nail or screw) once right?
Step 7
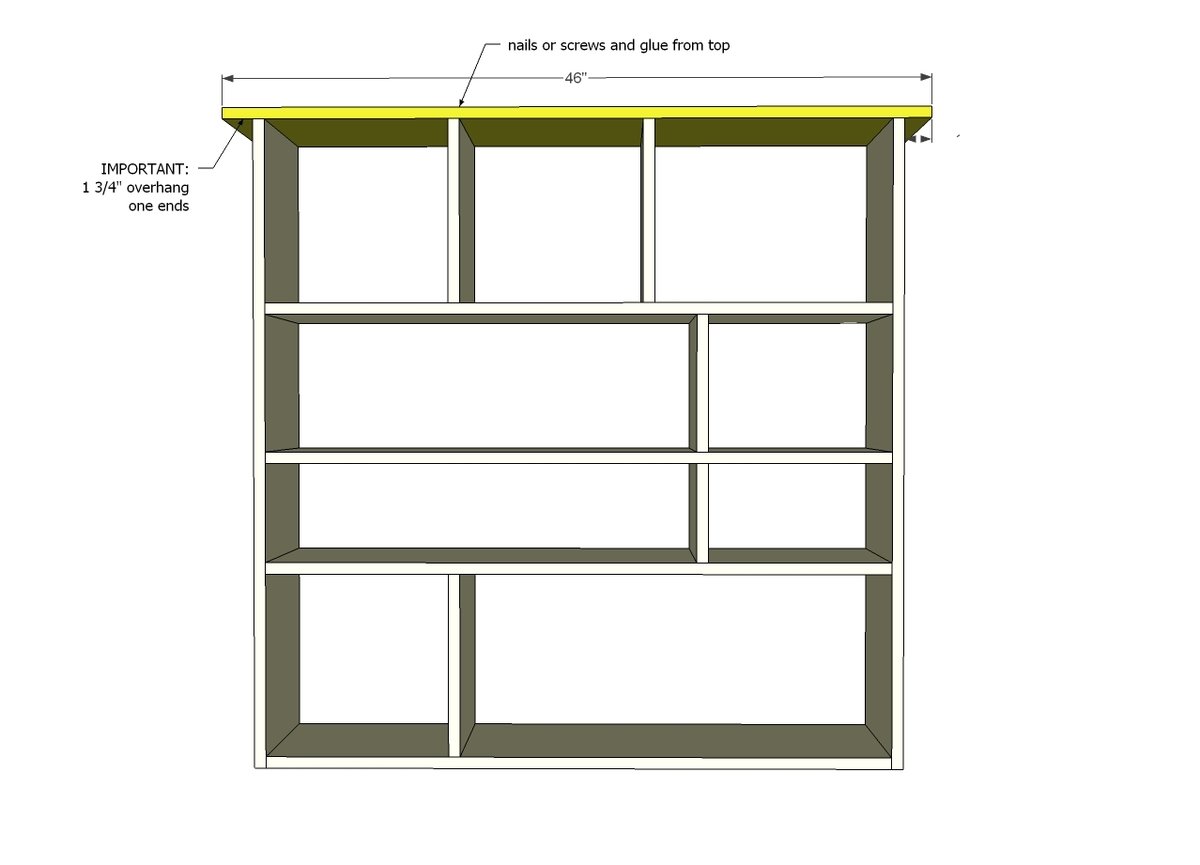
Mark the top 1 3/4" in on both ends and attach to top.
Step 8
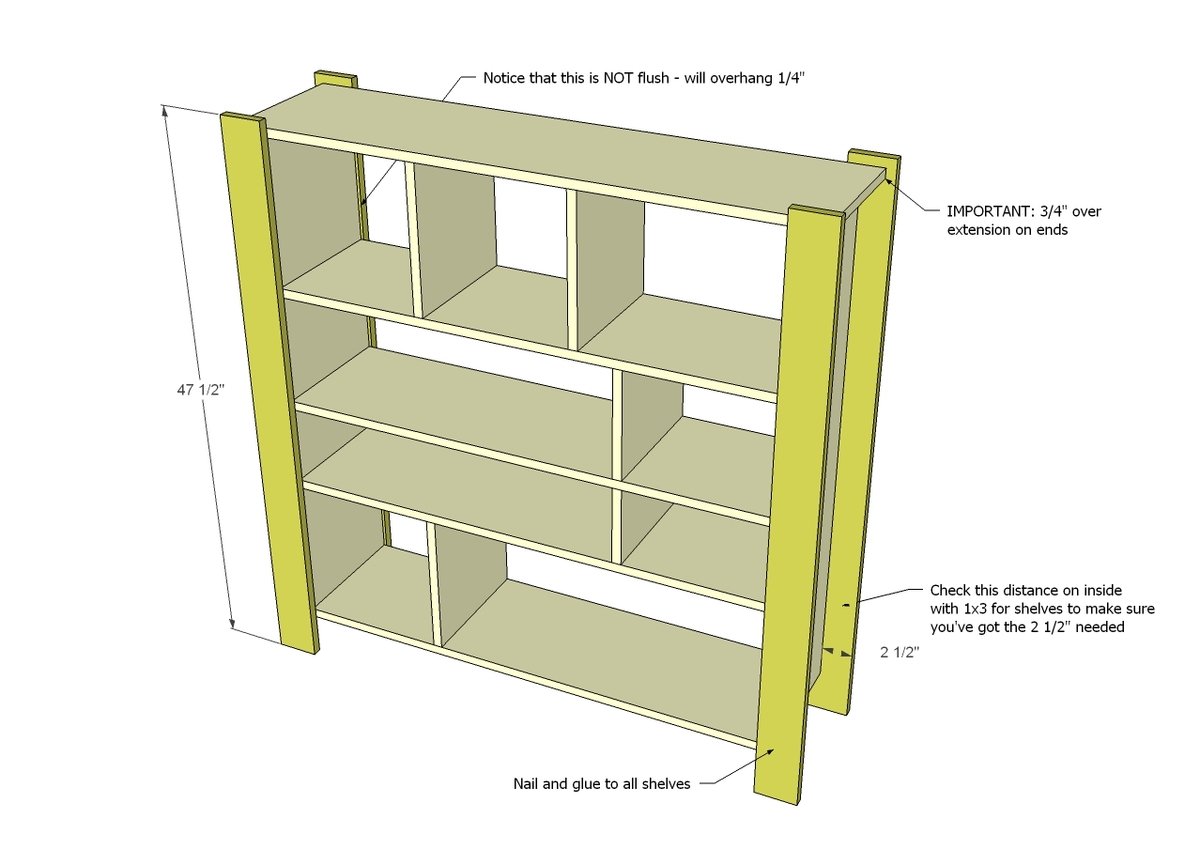
Next, add the legs. Note that the legs overextend the top by 3/4" and the side 1x12 by 2 1/2". This is to fit the side shelves (see following diagrams). Test fit shelves and rungs before securing. There's 3/4" gap to top of legs as well, and legs overextend bottom shelf by 3".
Step 9
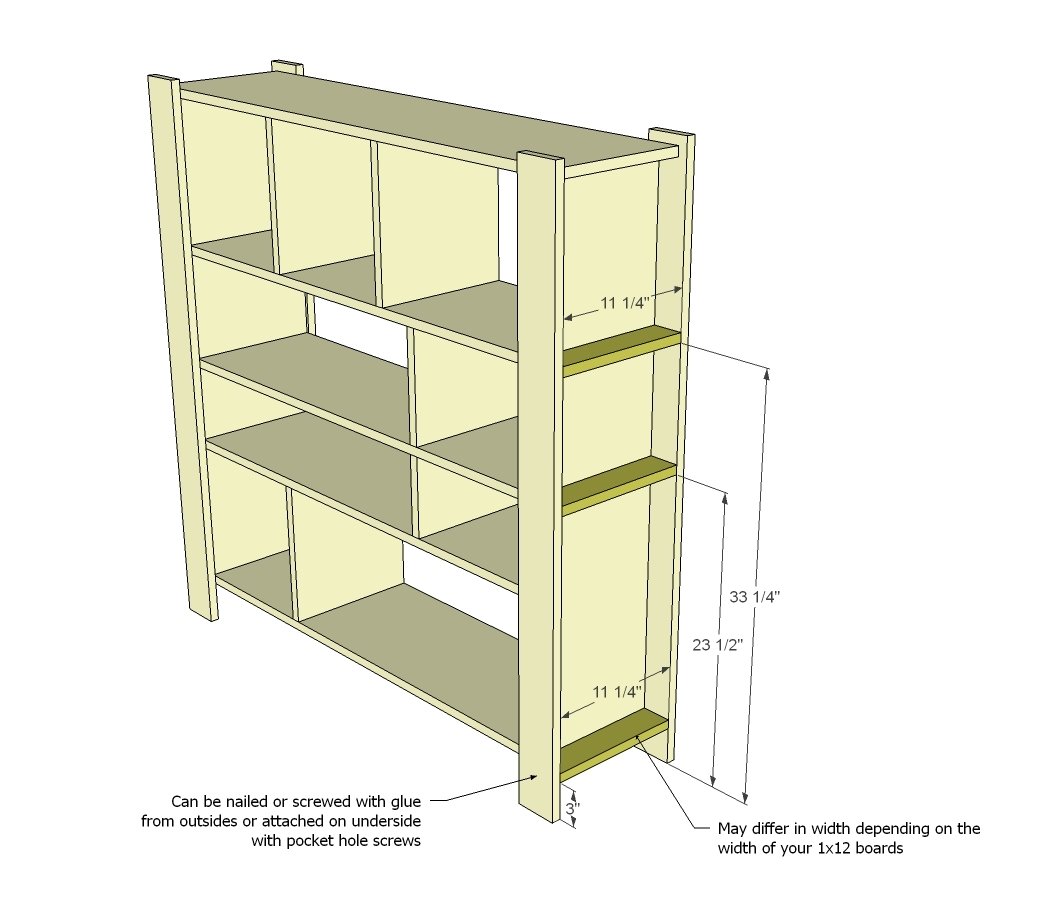
Now add the side shelves. I'd just nail and glue these babies in place.
Step 10
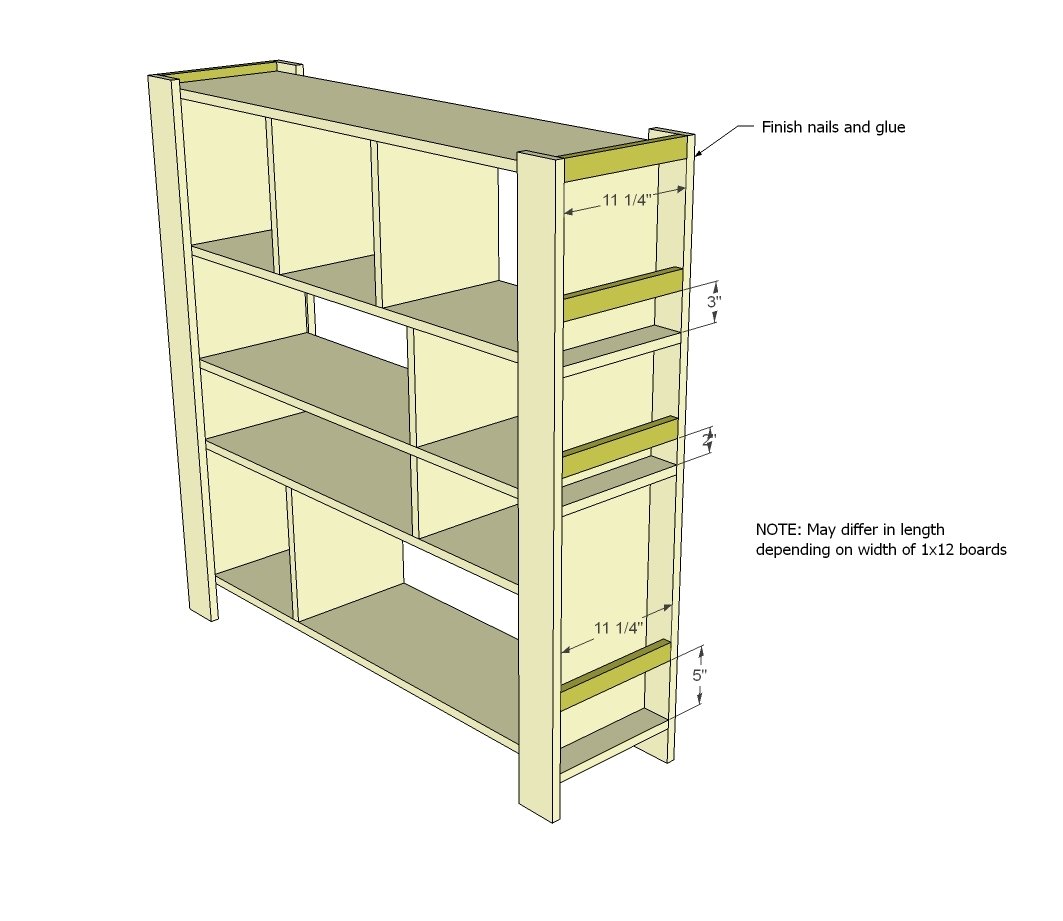
And then the side rungs to keep everything in place.
Step 11
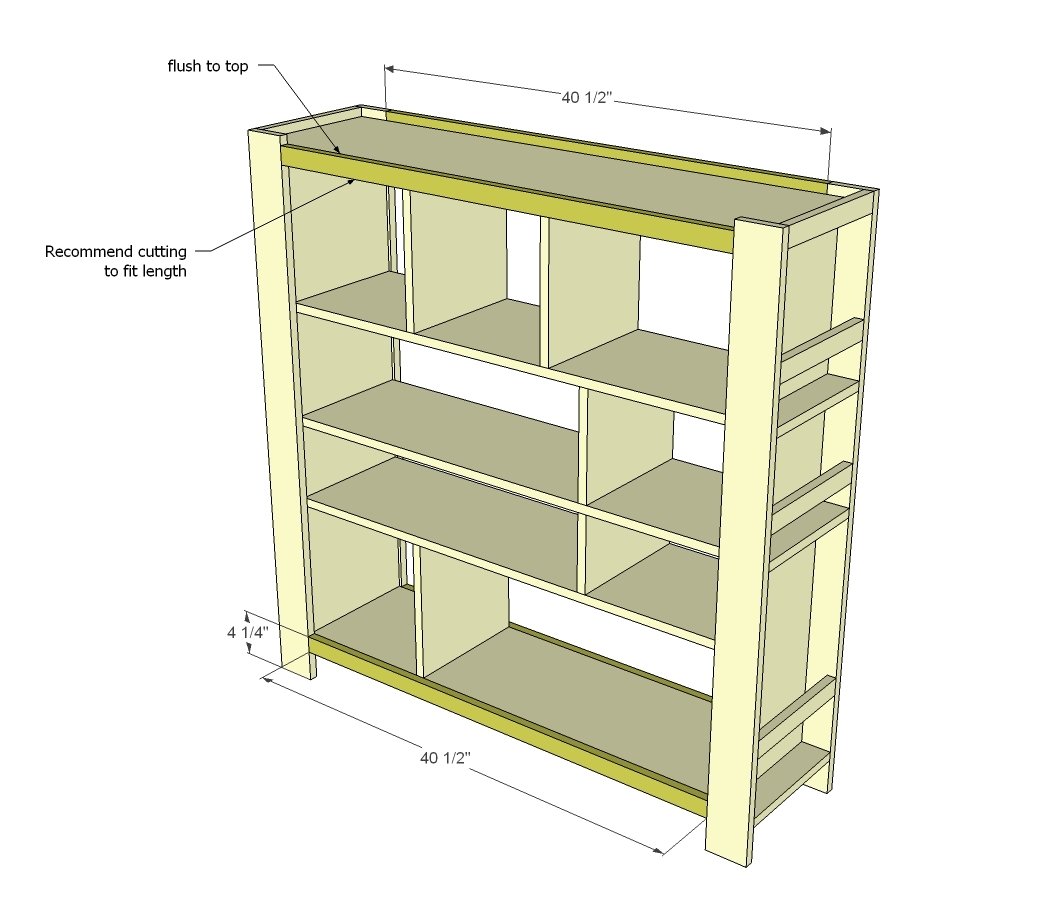
Finally the front trim - definitely measure and cut to fit here.
Step 12
For the back, there's a number of different ways you could do this. You could cut the plyood to fit inside the back frame, you could fill in the back shelves with 1x material, or you could be okay with a 3/4" gap and attach plywood to back as shown here - it's up to you. You could even leave the back open if you want.
Step 13
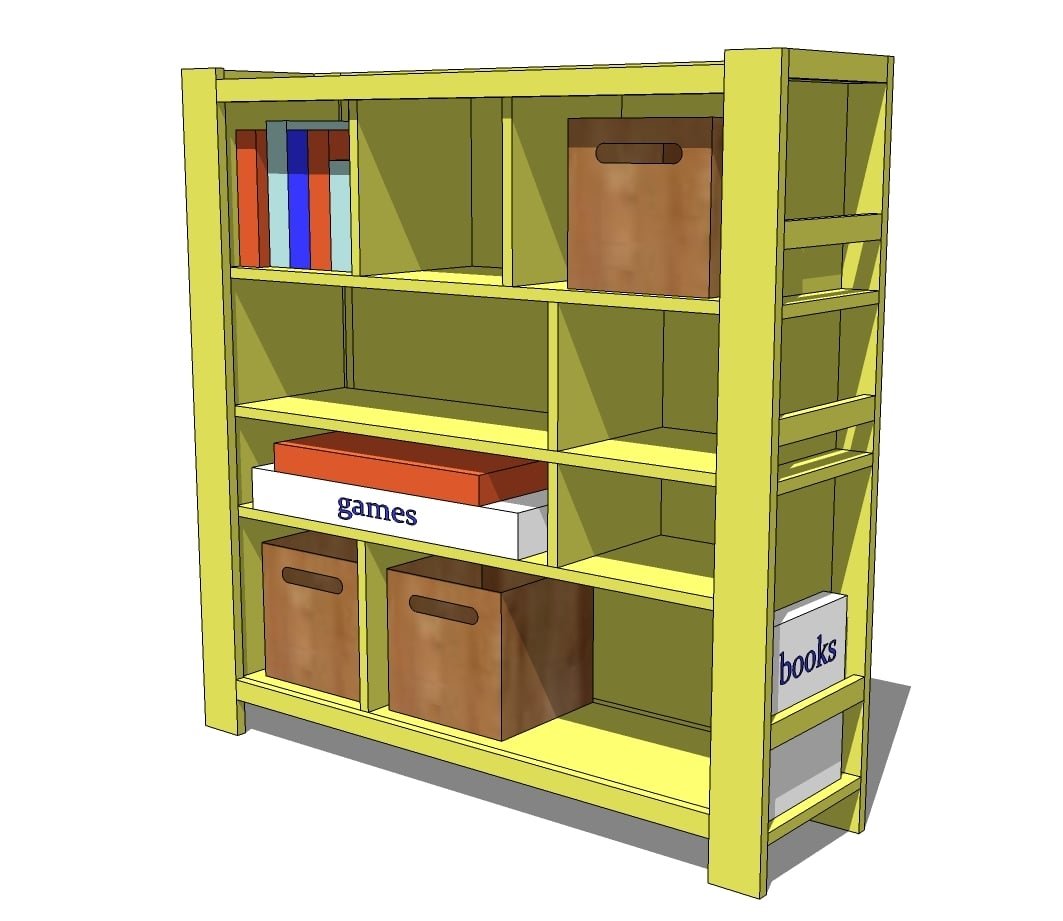
done deal!
Finishing
Sand all surfaces, starting with a medium grit and finishing with fine. Wipe off the dust, fill any holes or gaps with wood filler, and sand smooth once dry. Apply primer if you're painting, then finish with your choice of paint or stain and seal with a durable clear topcoat. For outdoor projects, use exterior-rated primer, paint or stain, and sealer so the piece stands up to the weather.
Source (temporary): https://www.ana-white.com/woodworking-projects/compartment-depot-bookshelf