Connor Side Table
Hey everyone it's Jamison from again. I've got another great plan that is just to easy and cool not to share.
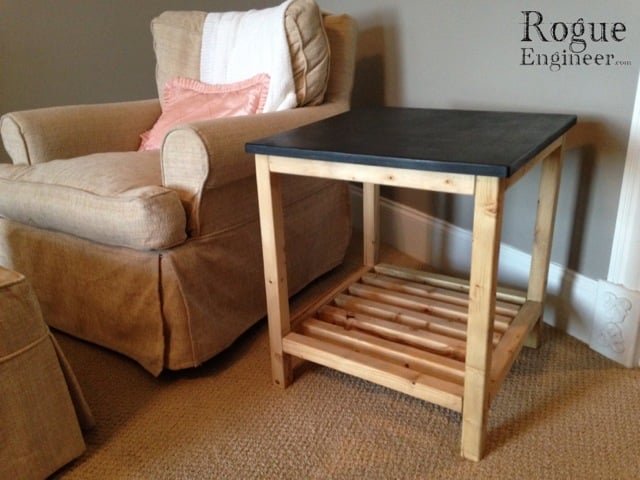
Specifications
| Project type | Side and End Table Plans |
|---|---|
| Room | Teens |
| Style | Cottage Style Furniture Plans |
| Difficulty | Beginner Projects |
| Estimated cost | $20 - $50 |
Shopping List
4x 2 x 2 x 8'
1x 1 x 8 x 6'
Cut List
13x 2 x 2 x 18.5″ Note: If it looks to big just decrease the length of these.
4x 2 x 2 x 23.25″
3x 1 x 8 x 22.25″
Tools
- measuring tape
- square
- pencil
- safety glasses
- hearing protection
- kreg-jig
- drill
- circular saw
- sander
- level
Step-by-step Instructions
Step 1
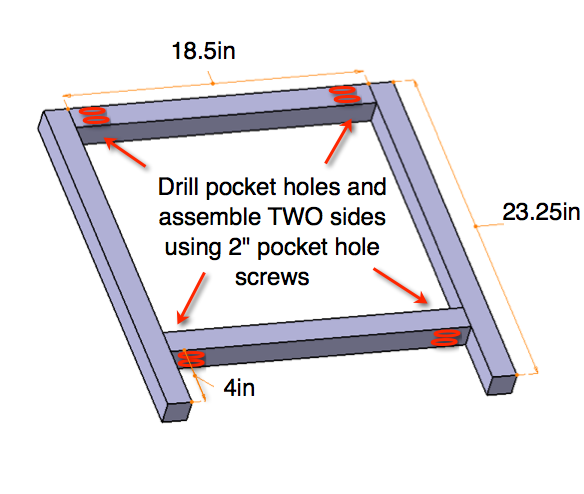
Assemble the TWO sides by drilling pocket holes at each end of the 2 x 2 x 18.5″ pieces as shown. Then, screw the 2 x 2 x 18.5″ pieces to the 2 x 2 x 23.25″ pieces as shown in the picture.
Step 2
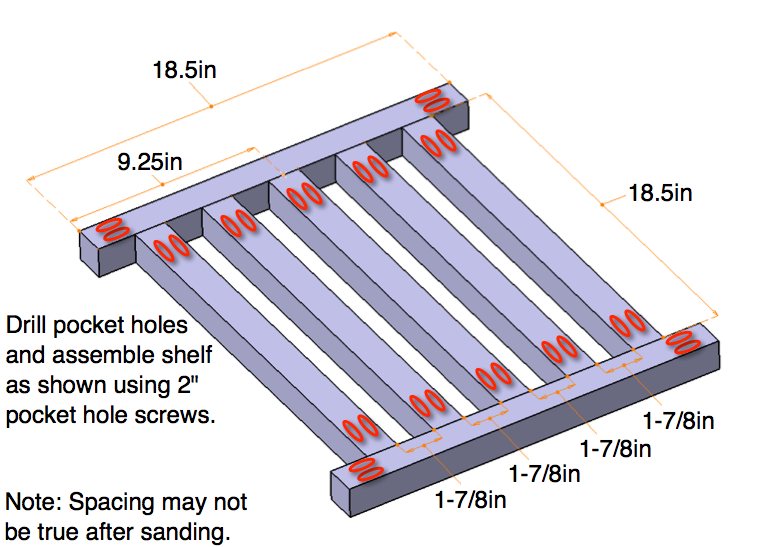
Assemble the shelf by first drilling pocket holes in each end of the seven 2 x 2 x 18.5″ pieces. It’s always best to choose wisely which side you drill pocket holes on since the opposite side will be most visable. Using 2 inch pocket hole screws, then screw the middle slat in place making sure center is center of the ouside piece. Screw in the four remaining slats (two per side) while maintaining 1-7/8 inch gap between each slat.
Step 3
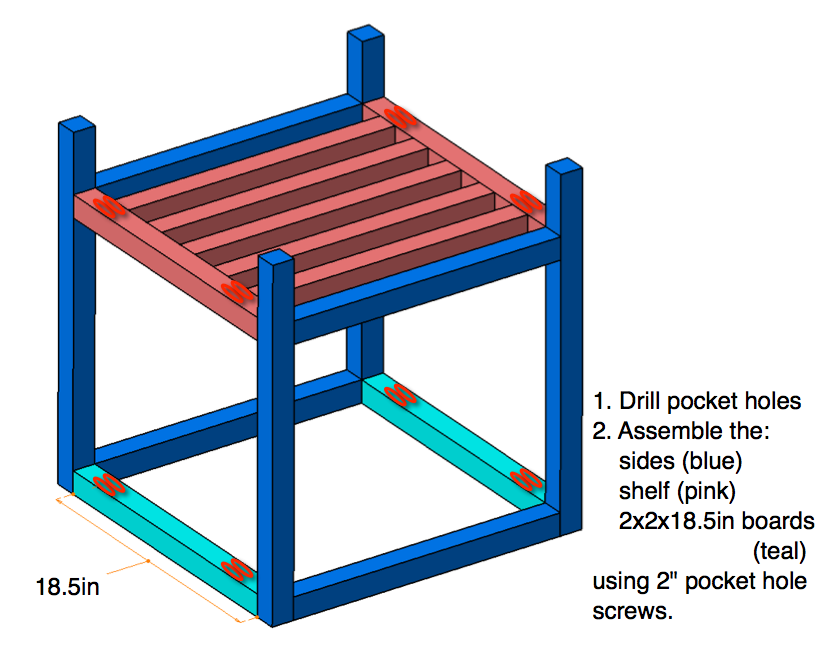
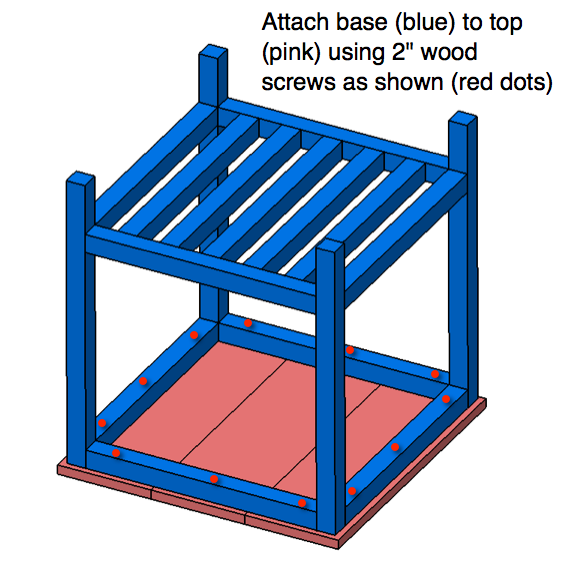
Drill pocket hole screws in each end of the remaining two 2 x 2 x 18.5″ boards, as shown in the picture. Now assemble the table base by attaching the shelf (pink), sides (blue) and the remaining two 2 x 2 x 18.5″ boards using 2 inch pocket hole screws.
Step 4
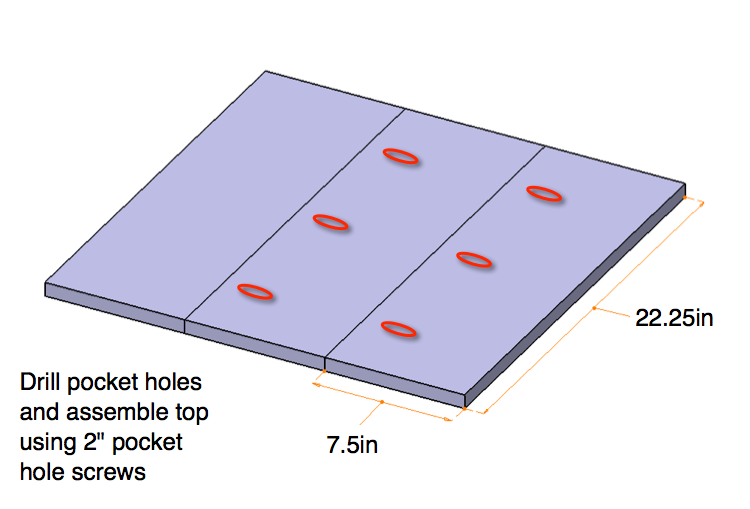
Drill three pocket holes in two of the 1 x 8 x 22.25″ boards. Make sure to adjust your jig to accommodate the 3/4″ material thickness. To form the tabletop, assemble the three boards by screwing and gluing the joints using 1-1/4 inch pocket hole screws. Make sure to clamp the joints to assure a nice even top.
Step 5
Finishing
Sand all surfaces, starting with a medium grit and finishing with fine. Wipe off the dust, fill any holes or gaps with wood filler, and sand smooth once dry. Apply primer if you're painting, then finish with your choice of paint or stain and seal with a durable clear topcoat. For outdoor projects, use exterior-rated primer, paint or stain, and sealer so the piece stands up to the weather.
Source (temporary): https://www.ana-white.com/woodworking-projects/connor-side-table