Corner Cupboard
This corner cupboard can turn an empty corner into a storage and display spot. Cleverly designed to minimize board waste and to be easy to build. Special thanks to Tamara for sharing her photos with us.
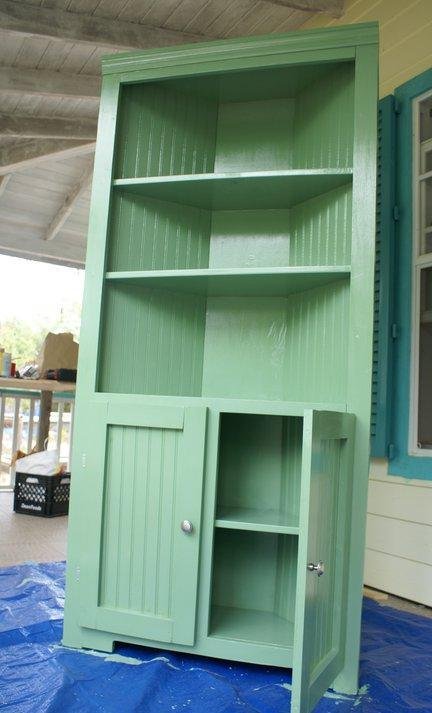
Specifications
| Project type | Bookshelf and Bookcase Plans |
|---|---|
| Room | dining room |
| Style | Cottage Style Furniture Plans |
| Difficulty | Intermediate |
| Estimated cost | $50 - $100 |
Dimensions
Use the size-specific shopping and cut lists below.
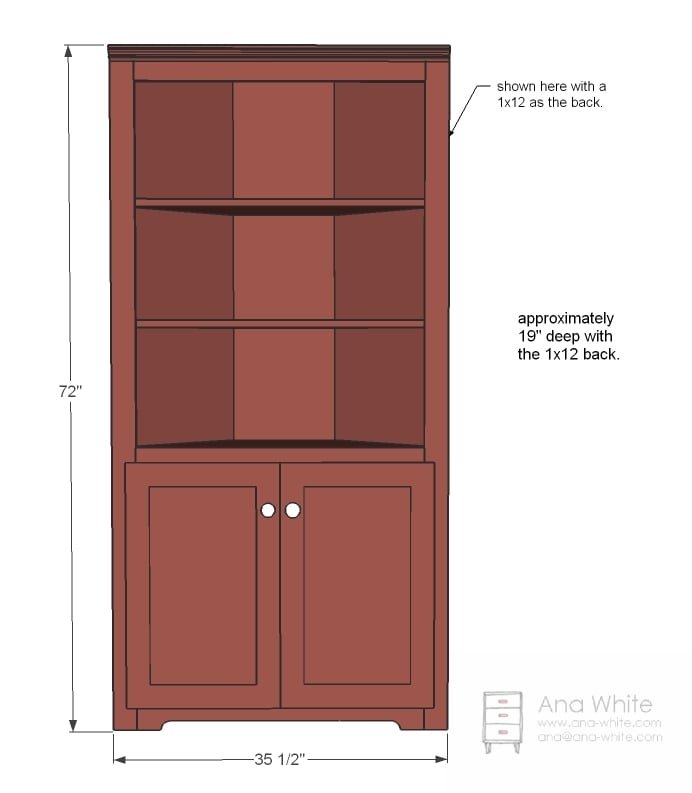
Shopping List
- 2 – 1x12s, 6 feet long
- 1 – 1×8, 6 feet long
- 1 – 1×4, 6 feet long
- 1 sheet of beadboard, preferably 1/4″ to 3/8″ thick
- 3 – 1x3s, 8 feet long
- 1 – 1×2, 3 feet long
- 1 – 36″ long crown moulding or other moulding
Cut List
- 1 – 1×8 @ 72″ (Back)
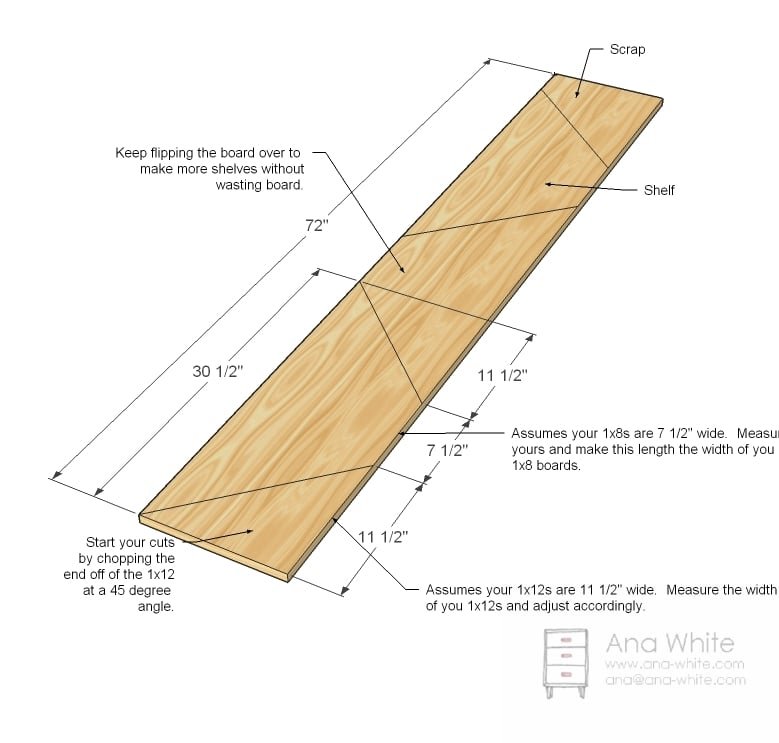
- 6 – 1×12 @ 30 1/2″, both ends cut at 45 degrees off square (see step 1)
- 2 – 1×3 @ 72″ (Front Side Trim)
- 2 – Beadboard @ 16 1/4″ x 72″ (Measure for exact fit)
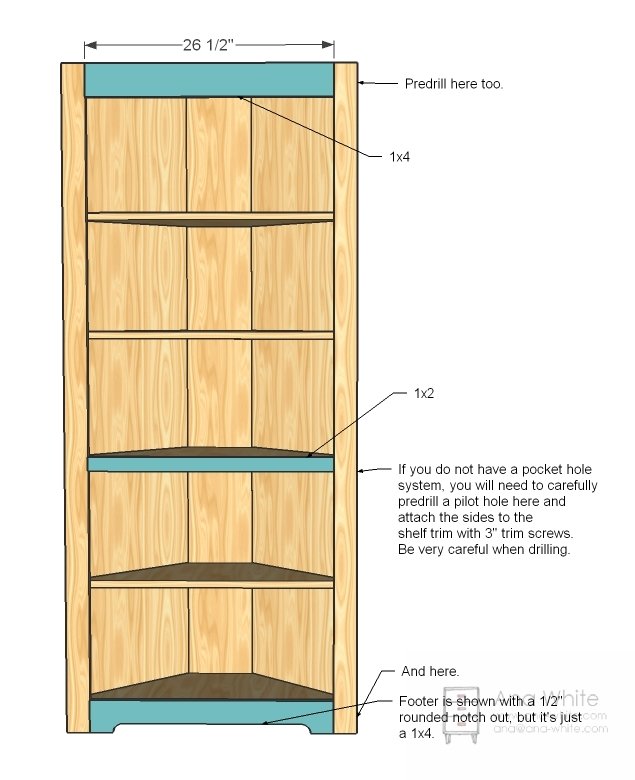
- 2 – 1×4 @ 26 1/2″ (Top and Bottom Trim, measure for exact fit)
- 1 – 1×2 @ 26 1/2″ (Tabletop trim, measure for exact fit) top moulding – measure to fit
- Doors – see step 6.
Step-by-step Instructions
Cut Shelves
This step would be really straight forward if widths of boards didn’t vary so much depending on where you live. So take your 1×8 pine boards and measure how wide they are. Can be anywhere from 7″ to 7 1/2″. Note this then start cutting your shelves by cutting one end of the 1×12 at 45 degrees. Then measure the width of the 1×8 (in the example above that is 7 1/2″) and a 45 degree cut PERPENDICULAR to the first cut. Then continue making cuts to make all your shelves. In this manner you can easily adjust the width of your back to the width of a 1×12 or 1×10. You will need to cut six shelves totally.
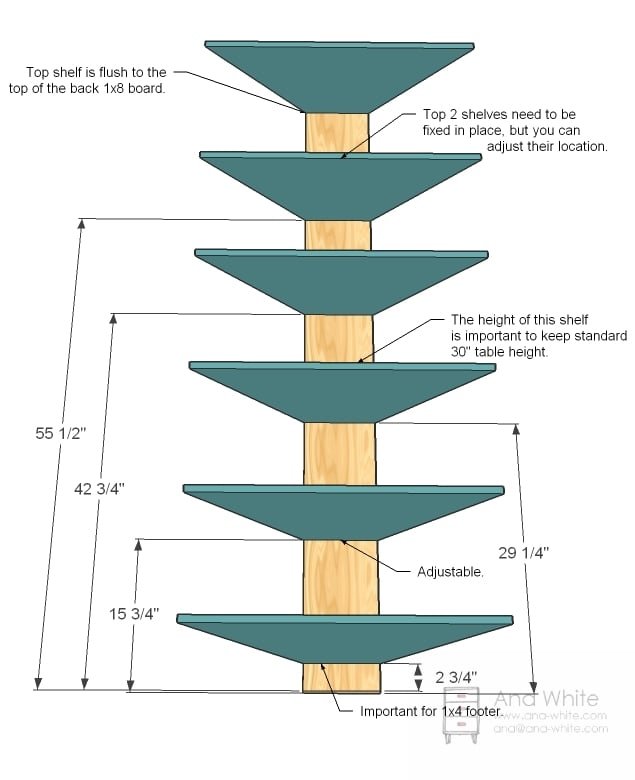
Back
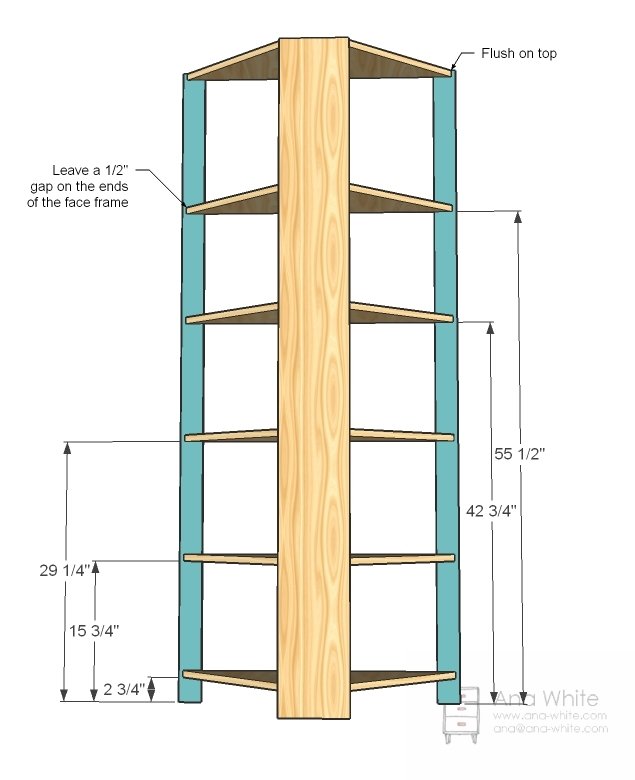
Now mark the back as shown in the diagram above. All shelves need to be fixed. Predrill your holes or pocket holes and apply glue. Attach back to shelves with 2″ screws and glue.
Front Side Trim
Mark the front side trim 1/2″ in all the way down the length of the back side of the side trim. Then mark all shelf locations as indicated in the above diagram. Predrill holes. Consider the depth of your screws and the angled shelf cuts as you place your screws – 2″ screws on the inside and 1 1/4″ screws on the outer edge, 2 screws per shelf. Use glue. Don’t stress this one too much, the sides are going to get beadboard (super strong) over them. The main thing is to get these lined up just right.
Beadboard
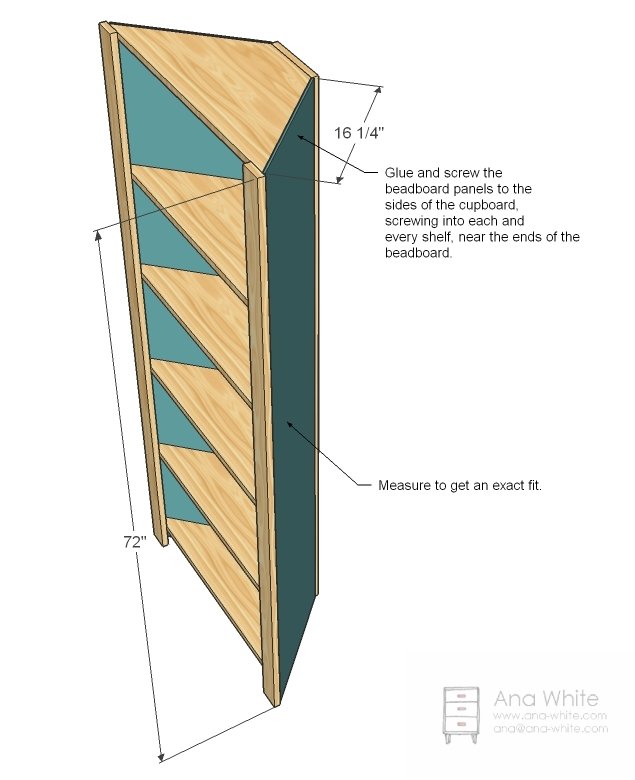
Measure the width of the open spaces on the back sides, and cut your beadboard to fit. Shown above is the perfect dimensions for 1x12s that measure 11 1/2″ wide. Try to get a nice tight fit. Apply glue to the shelf edges that are exposed and use 1 1/4″ screws to attach the beadboard to the shelves. Keep the beadboard first and foremost flush to the back 1×8, as this is the seam that will be most visible. The front seams are hidden behind the front side trim.
Step 5
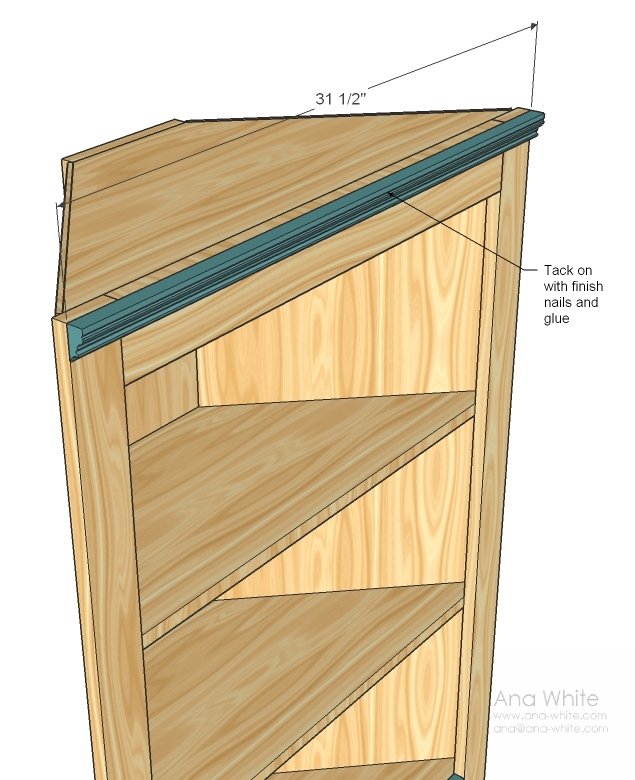
Top Moulding
Measure the top and tack the crown o
Doors
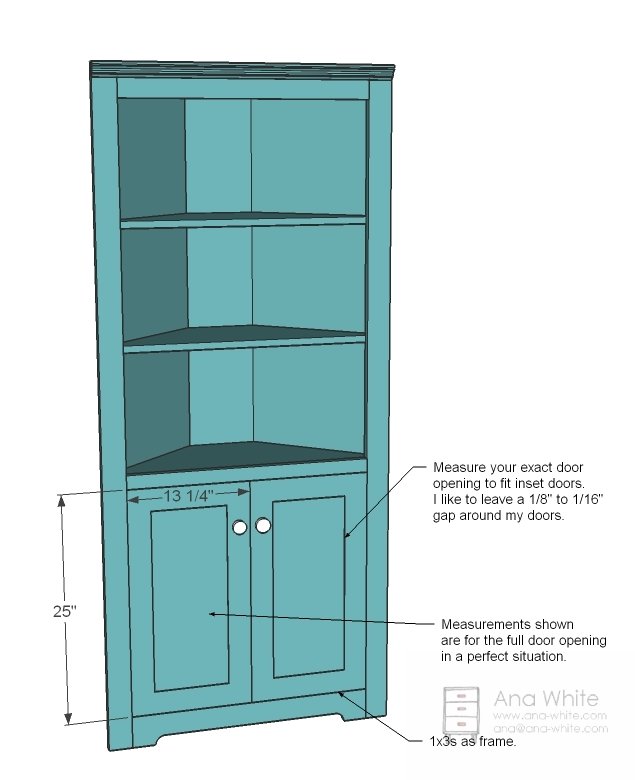
The doors are the most difficult part because most of us don’t have routers or tablesaws. If you do have a router or table saw, you can build your doors inset as shown above. because of the shelf behind the doors, the doors must be no more than 3/4″ thick, so you will have to inset the panel in the frame of the door. There are other options.
Step 8
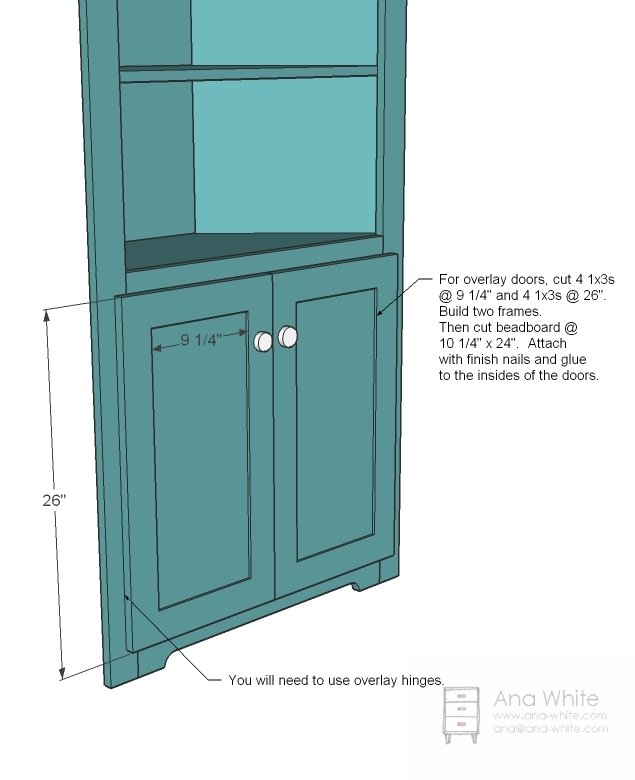
You can build an overlay door. Simply build a frame out of 1x3s, either using a Kreg Jig™ or 3″ fine screws to build the frame. Then tack beadboard to the back, but make sure the beadboard would fit in the opening in the shelf.
Step 9
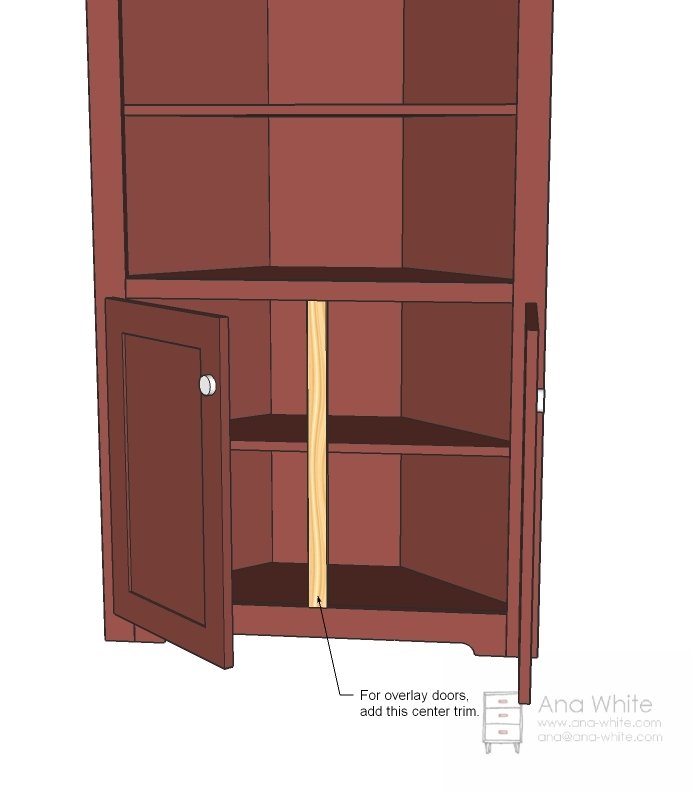
And you would want to add the center post to remove any gaps between the doors.
Finishing
Sand all surfaces, starting with a medium grit and finishing with fine. Wipe off the dust, fill any holes or gaps with wood filler, and sand smooth once dry. Apply primer if you're painting, then finish with your choice of paint or stain and seal with a durable clear topcoat. For outdoor projects, use exterior-rated primer, paint or stain, and sealer so the piece stands up to the weather.
Source (temporary): https://www.ana-white.com/woodworking-projects/corner-cupboard