Corner Workbench with Bench Tool Lazy Susan
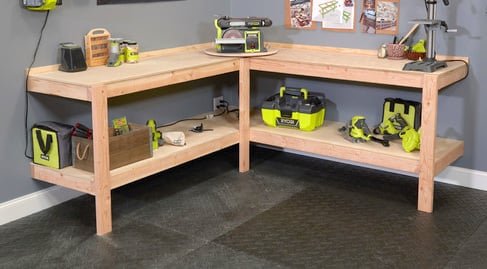
Here's how you can make your own corner workbench or storage system! from
Specifications
| Project type | Workshop and Garage Plans |
|---|---|
| Room | Garage and Workshop |
| Difficulty | Intermediate |
Shopping List
1 - Lazy Susan Hardware Kit
1- 6” long I bolt to use as locking pin
12 - 8 feet long 2x4
2 - 48” x 96” ½ thick plywood
1 - 16-24” Round tabletop or ¾” plywood circle
100 - 2-3/4” Self Tapping Wood Screws
150 - 1” Brad Nails
Cut List
4 – 2x4 @ 84” – long shelf front/back
4 – 2x4 @ 60” – short shelf front/back
14 – 2x4 @ 21” – shelf supports
3 – 2x4 @ 35-1/2” – legs
2- 1/2” plywood @ 24” x 84”
2- 1/2” plywood @ 24” x 60”
1 – round tabletop, 16-24” diameter
Tools
- measuring tape
- square
- safety glasses
- drill
- circular saw
- nailer
Step-by-step Instructions
Shelf Frames
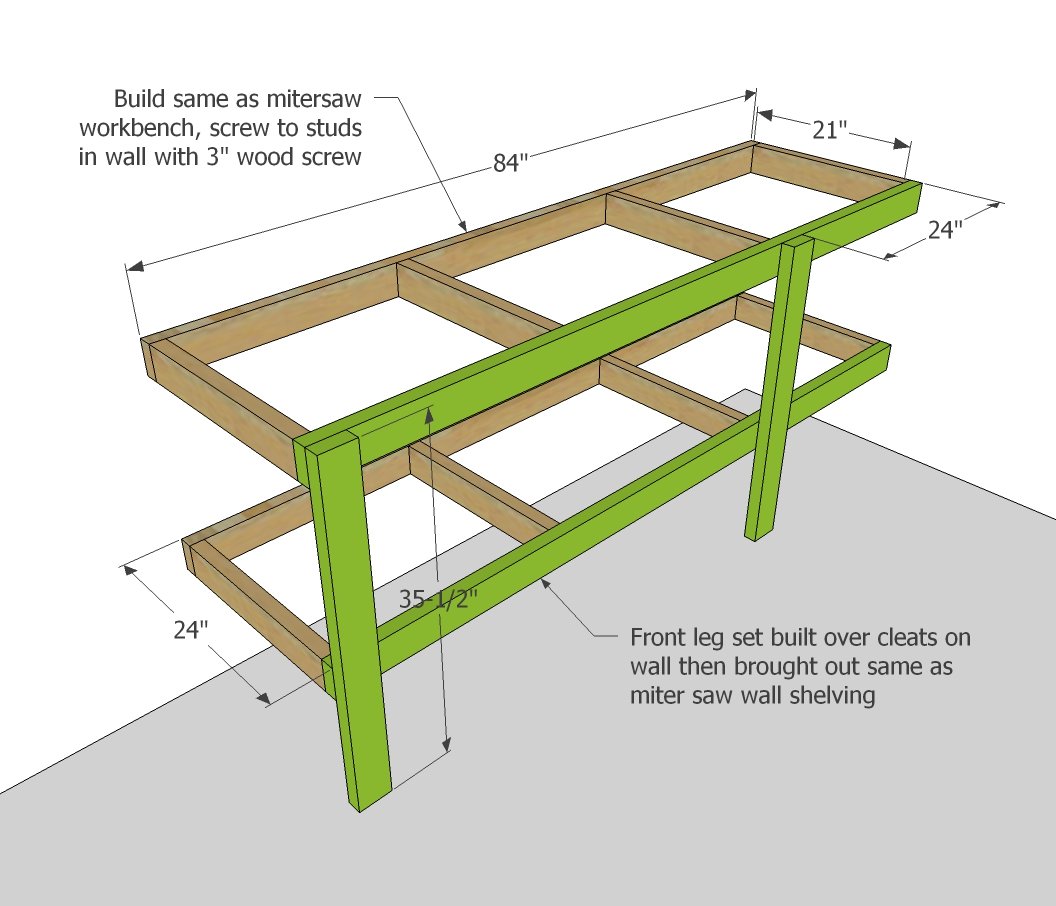
Build two long shelf frames by attaching four 21” long 2x4s to the 84” long 2x4s, with shelf support on end, and evenly spacing two middle shelf supports. Use glue and 2-3/4” self tapping wood screws. Repeat steps to build shorter shelf frames with 60” long front and backs, but use just one middle shelf support. Attaching Long Shelf Frames to Wall Locate studs in walls and mark. Mark wall with level 15-1/2” and 35-1/2” up from floor for shelf placement. Screw long shelf frames to studs in wall, with top edges at 15-1/2” and 35-1/2” from top of floor. Long Shelf Leg Attach one leg to outside corner of long shelf with 2-3/4” self tapping wood screws.
Attaching Short Shelf Frames to Wall
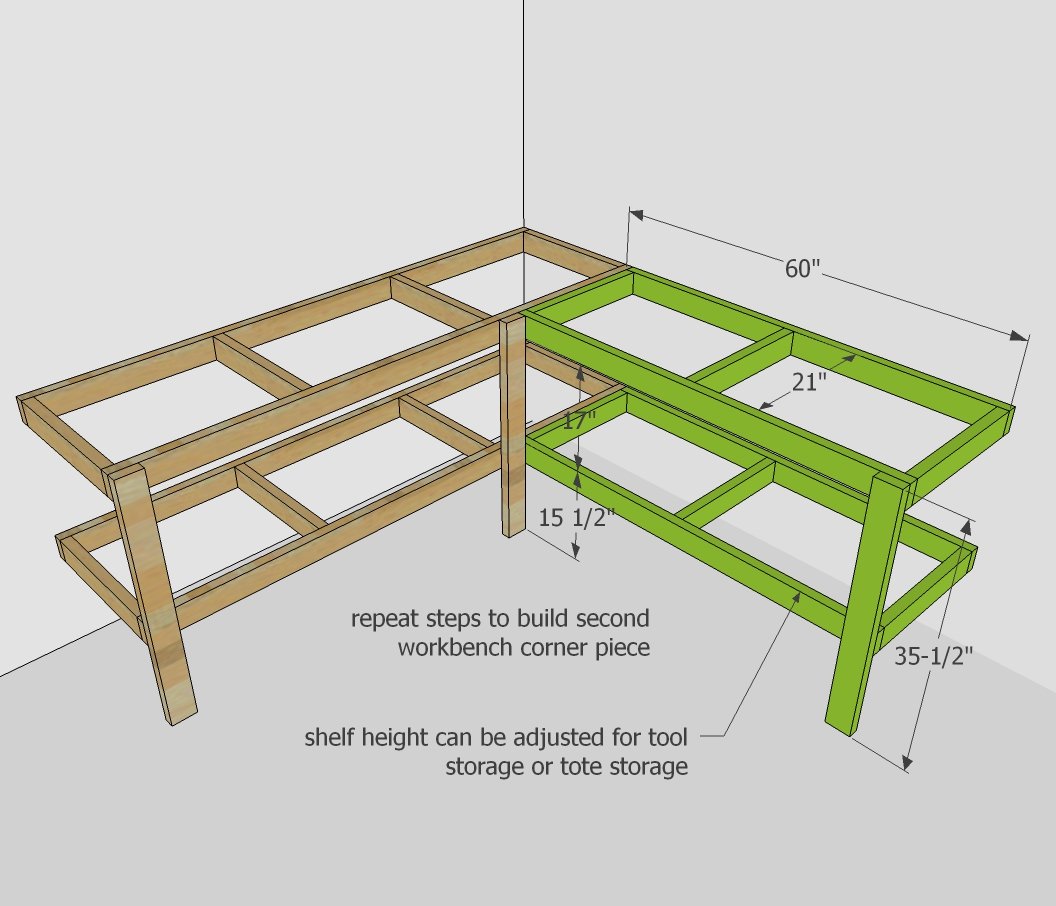
Attach shorter shelf frames to wall and longer shelf frame, using 2-3/4” screws. Attaching Remaining Legs Attach one leg to inside corner of two shelves with 2-3/4” screws. Attach remaining leg to end of shorter shelf.
Shelf Tops
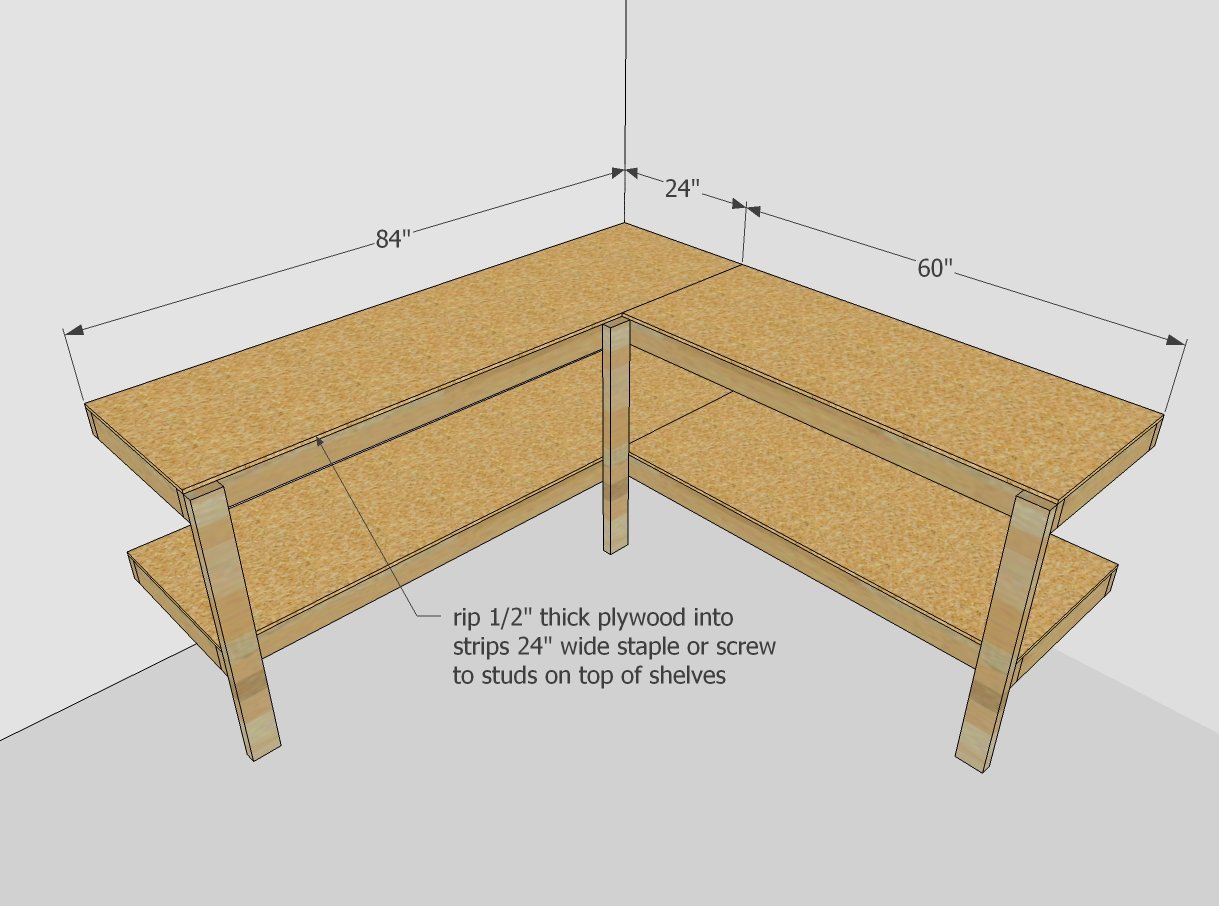
Apply wood glue to tops of shelf frames. Place ½” plywood shelving pieces on top. Use 1” brad nails to fasten shelving to 2x4 frames.
Lazy Susan
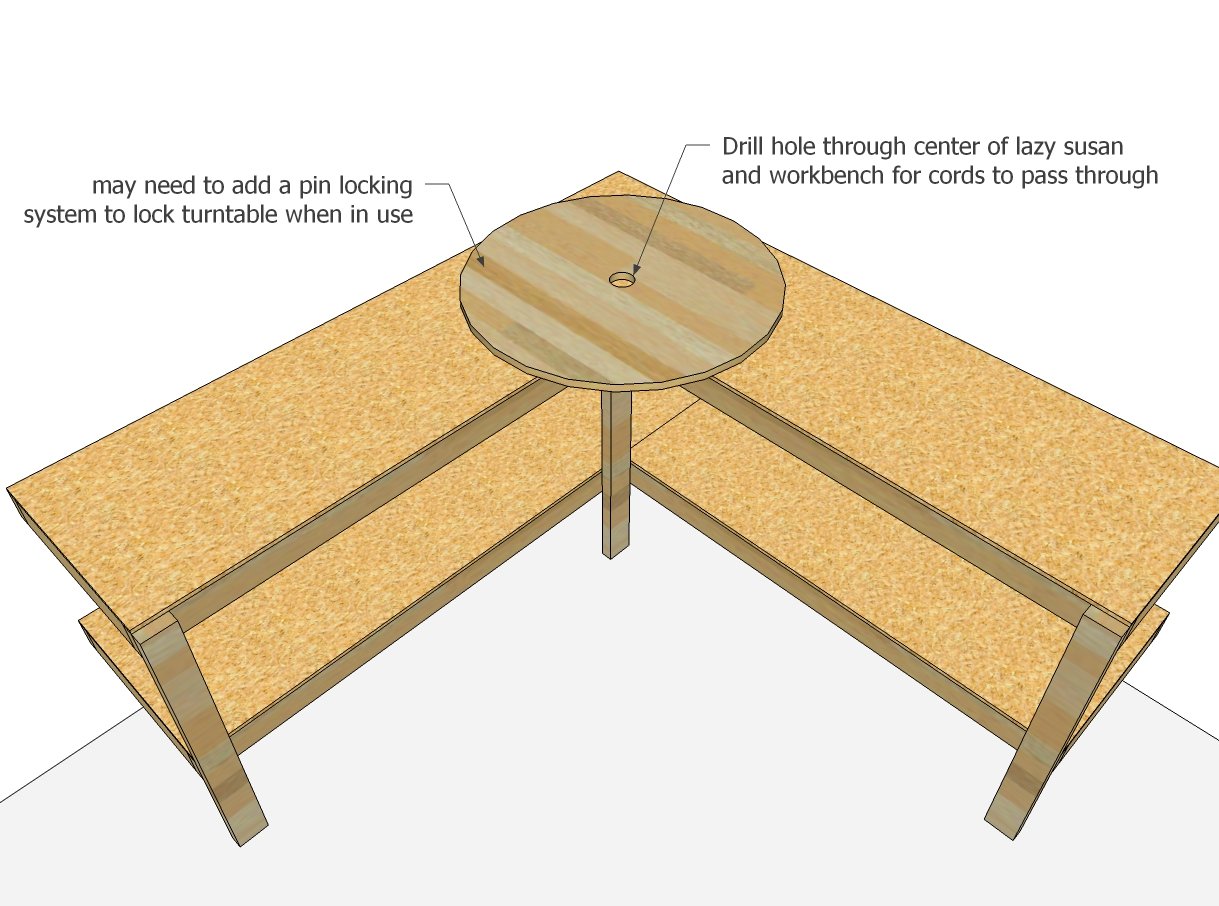
Install round tabletop in corner of shelf with lazy susan hardware. Drill holes through tabletop and shelf top for locking pin point to secure the lazy susan at different point. Install bench tools on lazy susan.
Finishing
Sand all surfaces, starting with a medium grit and finishing with fine. Wipe off the dust, fill any holes or gaps with wood filler, and sand smooth once dry. Apply primer if you're painting, then finish with your choice of paint or stain and seal with a durable clear topcoat. For outdoor projects, use exterior-rated primer, paint or stain, and sealer so the piece stands up to the weather.
Source (temporary): https://www.ana-white.com/woodworking-projects/corner-workbench-bench-tool-lazy-susan