Cottage Bench with Storage Cubbies
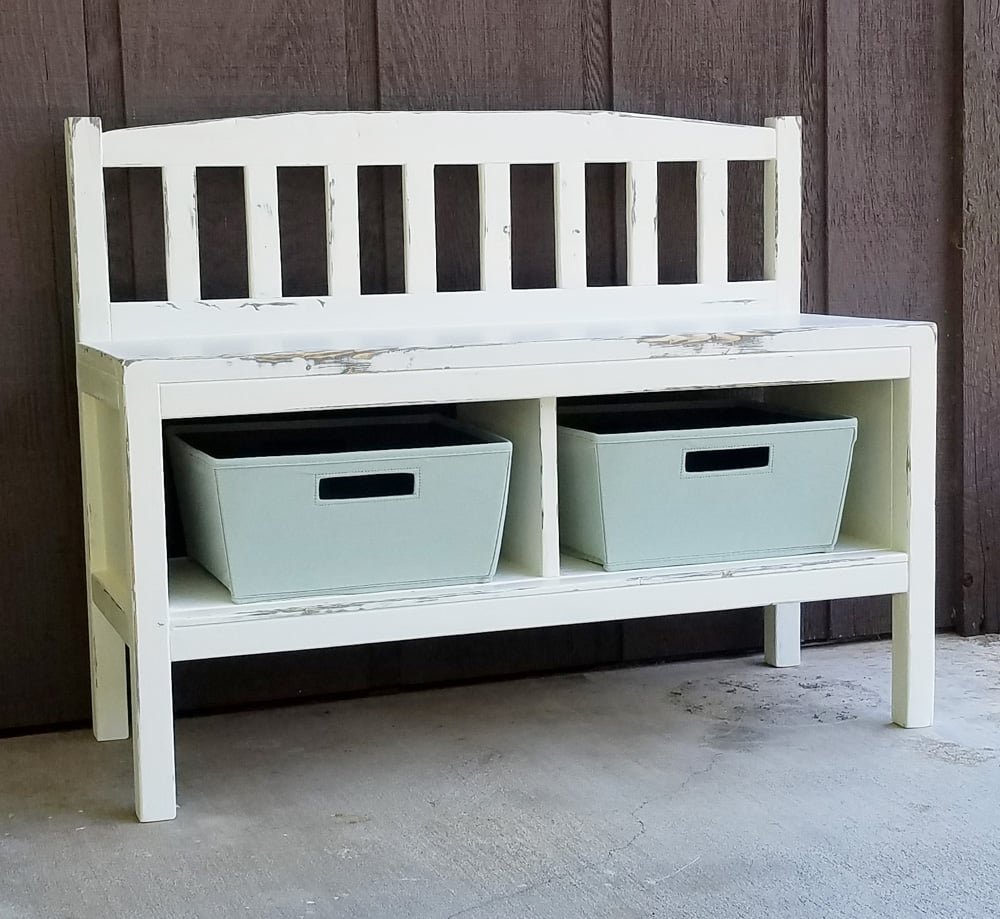
to build an entryway bench by This is a project plan for a simple cottage style entryway bench with under seat storage cubbies. Though the bench itself is small - perfect for tighter entryways or smaller spaces, the seat is adult height and size. Cubbies are a good for baskets, or shoe storage.
Specifications
| Project type | Bench |
|---|---|
| Room | Storage Solutions |
| Style | Cottage Style Furniture Plans |
| Difficulty | Intermediate |
| Estimated cost | $20 - $50 |
Dimensions
Use the size-specific shopping and cut lists below.
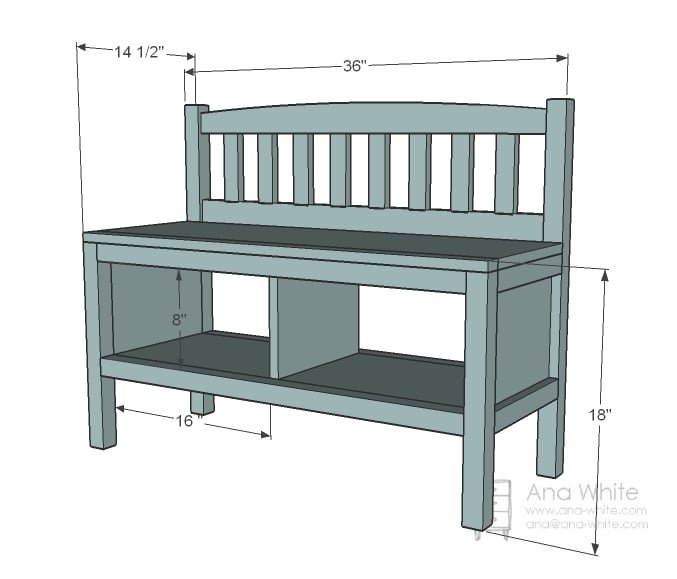
Shopping List
- 1 – 1×12 @ 10 feet long
- 1 – 1×3 @ 8 feet long
- 3 – 2×2 @ 8 feet long
- 2 – 1×2 @ 8 feet long
Cut List
- 8 – 1×2 @ 6″ (Slats)
- 2 – 1×3 @ 33″ (Back)
- 2 – 2×2 @ 28 1/2″ (Back Legs)
- 3 – 2×2 @ 33″ (Back Support, Bottom and Front 2x2s)
- 1 – 1×12 @ 36″ (Seat)
- 2 – 1×12 @ 11″ (Sides)
- 1 – 1×12 @ 9 1/2″ (Center Divider)
- 1 – 1×12 @ 33″ (Bottom of Cubbies)
- 4 – 1×2 @ 11 1/4″ (Width of your 1x12s – adjust to fit)
- 1 – 1×2 @ 36″ (Front Trim)
- 2 – 2×2 @ 17 1/4″ (Front Legs)
Tools
- measuring tape
- square
- pencil
- safety glasses
- hearing protection
- kreg-jig
- drill
- circular saw
- jigsaw
- sander
- level
- countersink drill bit
Step-by-step Instructions
Back
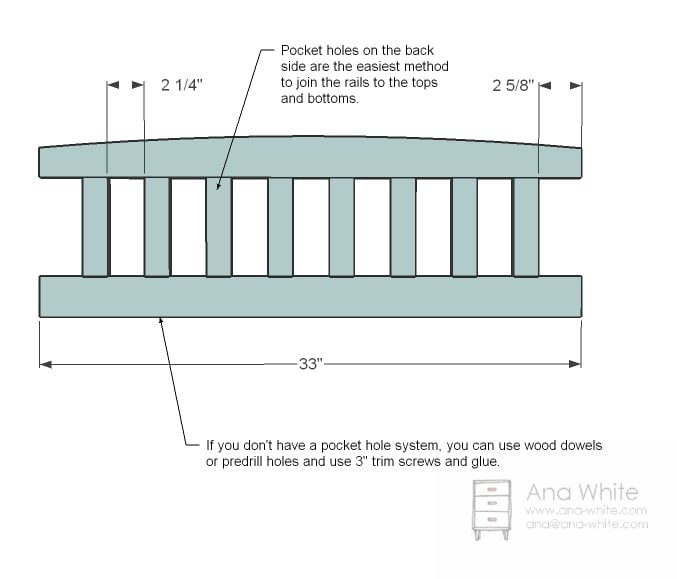
The design of the back can be altered, try a X back or more or less slats for a different look. Just make sure the overall height and length are the same. Mark out your back 1×3 boards for the placement of the 1×2 rails. Drill a 3/4" pocket hole in each end of the rails (1x2s @ 6″ long) - With glue applied, you will only need one 1-1/4" long pocket hole screw per end of each rail. OPTIONAL ARCHED TOP: I arched the top of the back by measuring in 9″ from the end of the 1×3 top board and down 1″. I drew a straight line and cut with my jigsaw. Then I rounded the top with a sander to make it look like it is a arched top.
Step 2
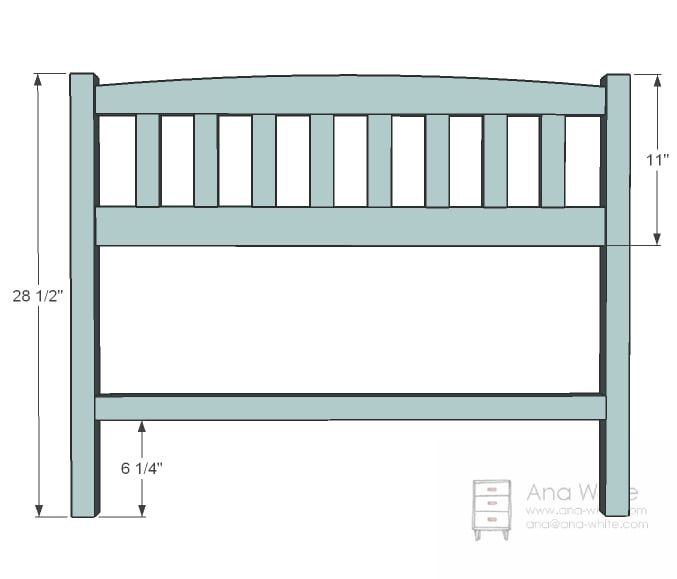
Attach the back panel to the legs with 3/4" pocket holes, two per end, and 1-1/4" pocket hole screws. Attach the bottom 1x2 in the same method.
With pocket hole jig set on 3/4" setting -
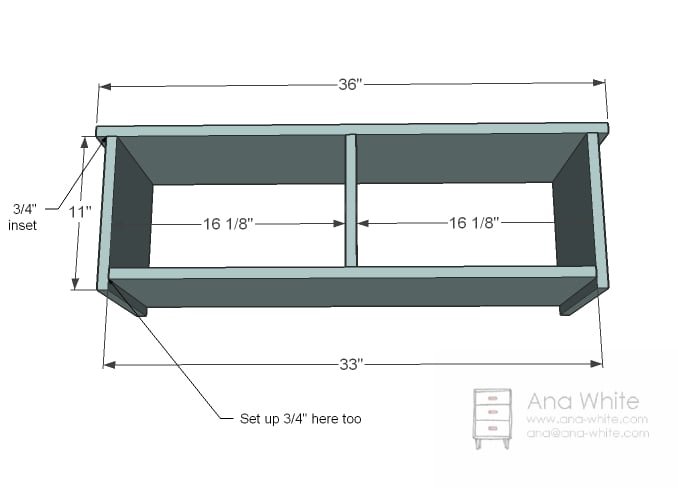
• On the two long 1x12 pieces (the top and bottom) drill 4 pocket holes along both long edges, for attaching the front and back face frames in step 6. When assembling the storage box, make sure the pocket holes are face down so you won't see them once the bench is finished. • Then drill two pocket holes on each end of the bottom piece. • Drill two pocket holes on the top ends of the side pieces. • Attach the side pieces to the top piece with 1-1/4" pocket hole screws. • Attach the bottom piece to the side pieces with 1-1/4" pocket hole screws. • Position the center divider inside and attach with 1-1/4" brad nails and wood glue.
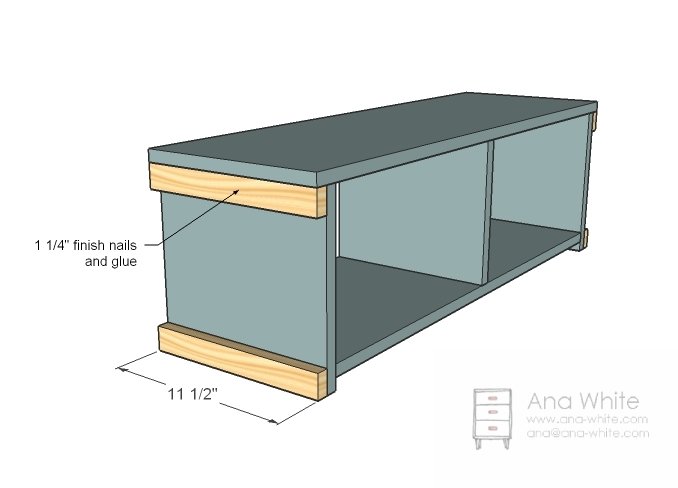
Measure and cut 1x2 trim pieces to fit the ends.
Attach with 1-1/4" brad nails and wood glue.
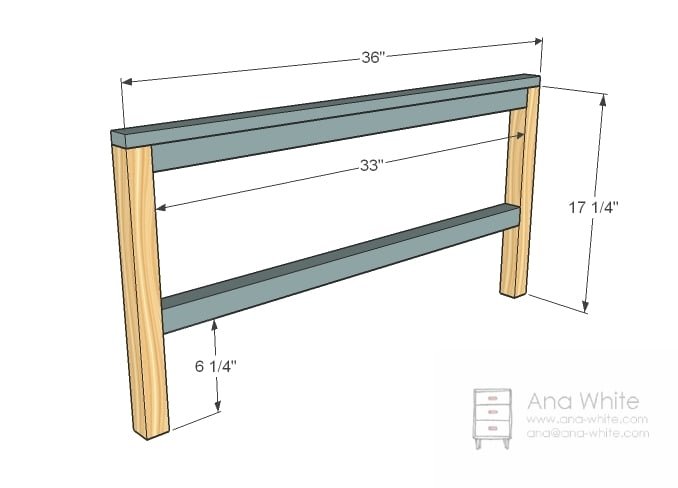
Set the pocket hole jig to the 1-1/2" setting.
Attach the 2x2 pieces together using 2-1/2" pocket hole screws and glue. Nail and glue the 1x2 piece to the top using 1-1/4" brad nails and glue.
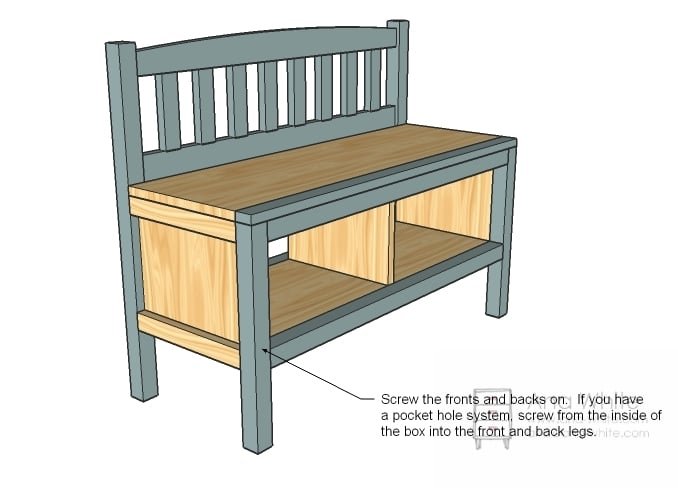
Attach the front and back frames to the middle storage section through the predrilled pocket holes.
Additional screws can be added if desired.
Finishing
Sand all surfaces, starting with a medium grit and finishing with fine. Wipe off the dust, fill any holes or gaps with wood filler, and sand smooth once dry. Apply primer if you're painting, then finish with your choice of paint or stain and seal with a durable clear topcoat. For outdoor projects, use exterior-rated primer, paint or stain, and sealer so the piece stands up to the weather.
Source (temporary): https://www.ana-white.com/woodworking-projects/cottage-bench-storage-cubbies