Counter Height Bar Stool
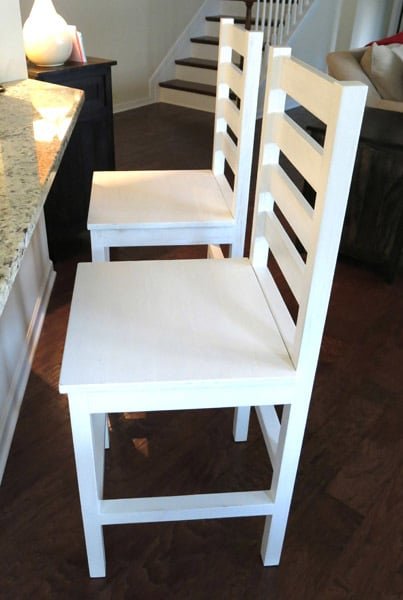
These stools are ideal for a kitchen counter and I made them to fit ours which is about 36 inches from the floor.
Specifications
| Project type | Stools |
|---|---|
| Room | kitchen |
| Difficulty | Beginner Projects |
| Estimated cost | $50 - $100 |
Shopping List
2 by 2 - 8 ft lengths - Qty 3 1 by 2 - 6 ft length - Qty 1 1 by 3 - 6ft lengthh - Qty 2 1 by 4 - 8 ft length - Qty 1
Cut List
2 by 2 24 2 Front Legs 2 by 2 45 2 Back Legs 2 by 2 14.5 2 Bottom rails for front and back 2 by 2 15.5 2 Bottom rails for sides 1 by 2 14.5 1 Seat trim for back frame 1 by 3 14.5 6 Rails for front and back 1 by 3 15.5 2 Top rails for sides 1 by 4 18.5 5 Seat
Tools
- measuring tape
- square
- pencil
- safety glasses
- kreg-jig
- circular saw
Step-by-step Instructions
Step 1
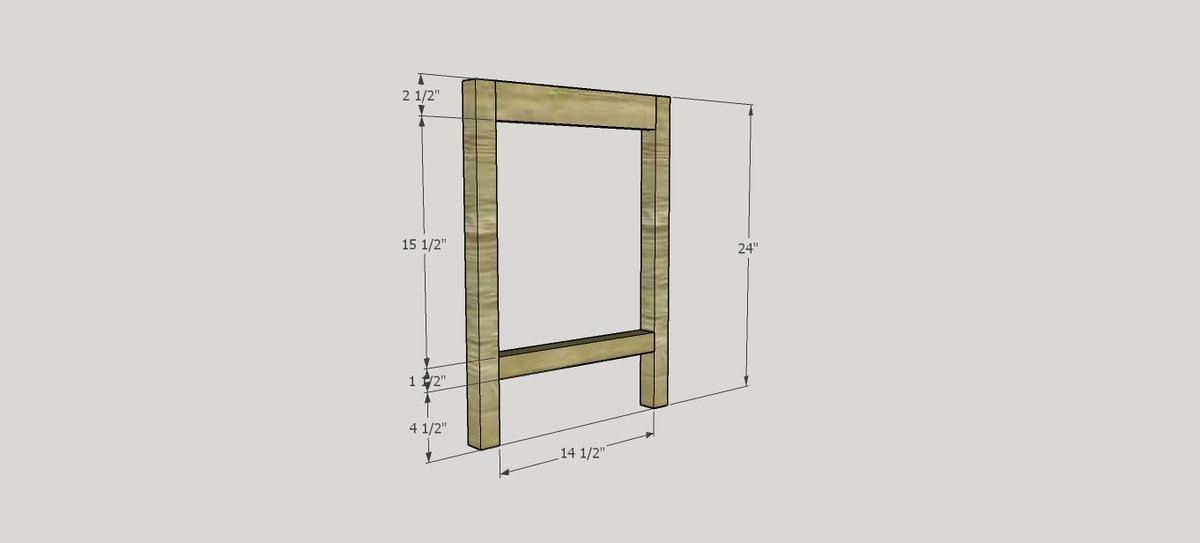
Join the two shorter legs measuring 24 inches together using one of the 14 ½ inch 1 by 3s and a 14 ½ 2 by 2. I placed the bottom edge of the 2 by 2 rail 4 ½ inches up from the bottom of the leg and drilled the pocket holes for the 2 by 2s on the bottom edge so they are hidden from sight. The 1 by 3s will be hidden by the seat so you won’t see the pocket holes on the inside once seat is fitted. I decided to make the outside of the top rail flush with the outside of the legs rather than inset.
Step 2
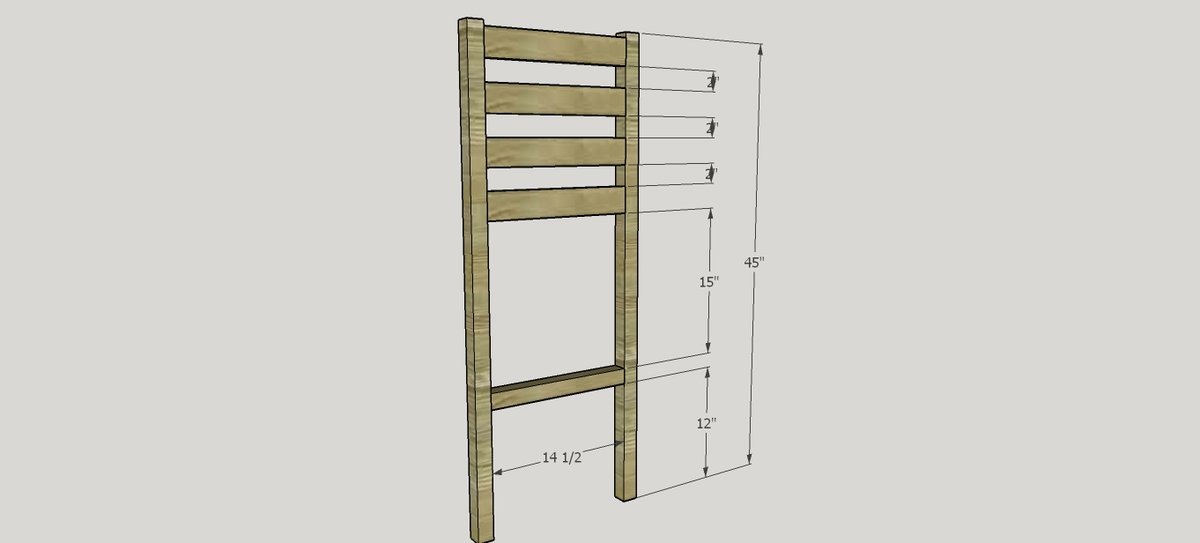
Join the two longer legs measuring 45 inches together using 4 of the 14 ½ inch 1 by 3s and a 14 ½ 2 by 2. I placed the bottom edge of the 2 by 2 rail 12 inches up from the bottom of the leg. I spaced the rails out by 2 inches which left a gap of half an inch from the top of the top rail to the top of the leg. Tip: Cut two scraps of wood two inches long and use them as spacers when fitting the back rails If you look at my finished photo, the diagram below actually shows the back of the chair. The part you lean against actually has the 1 by 3s inset by ¾ inch (so they are flush with the back). I put my pocket holes on the back side and made sure I filled, sanded, filled, sanded and repeated until happy the holes would not show. It is time consuming but worth the end result.
Step 3
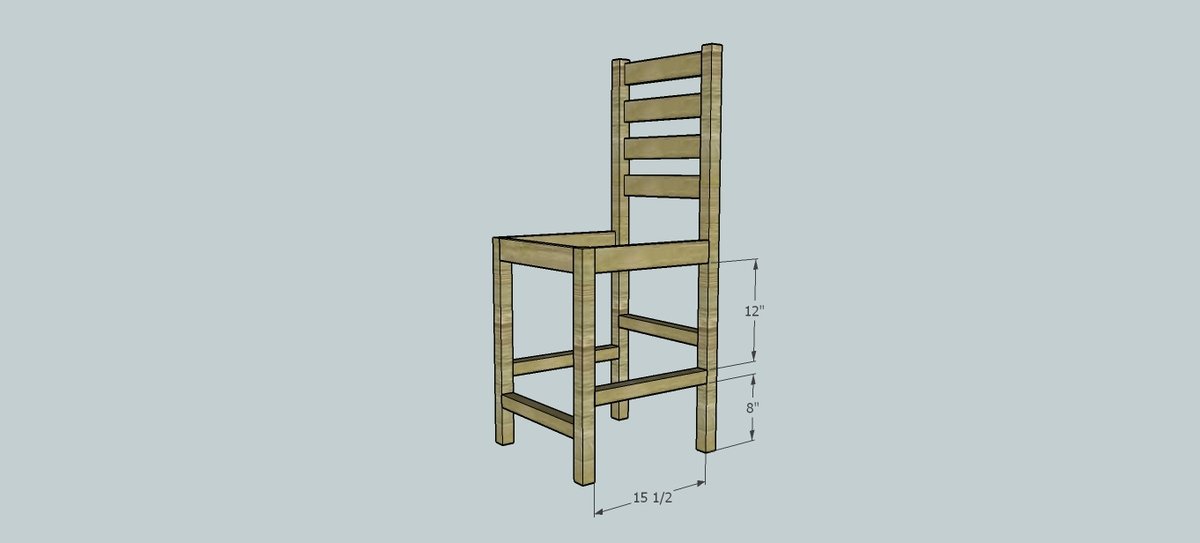
Join the front and back together as shown. On each side use one of the 15 ½ inch 1 by 3s and a 15 ½ inch 2 by 2. Make sure you are consistent with the top rails so that on all sides they are all either flush with the outside edge or inset by ¾ inch.
Step 4
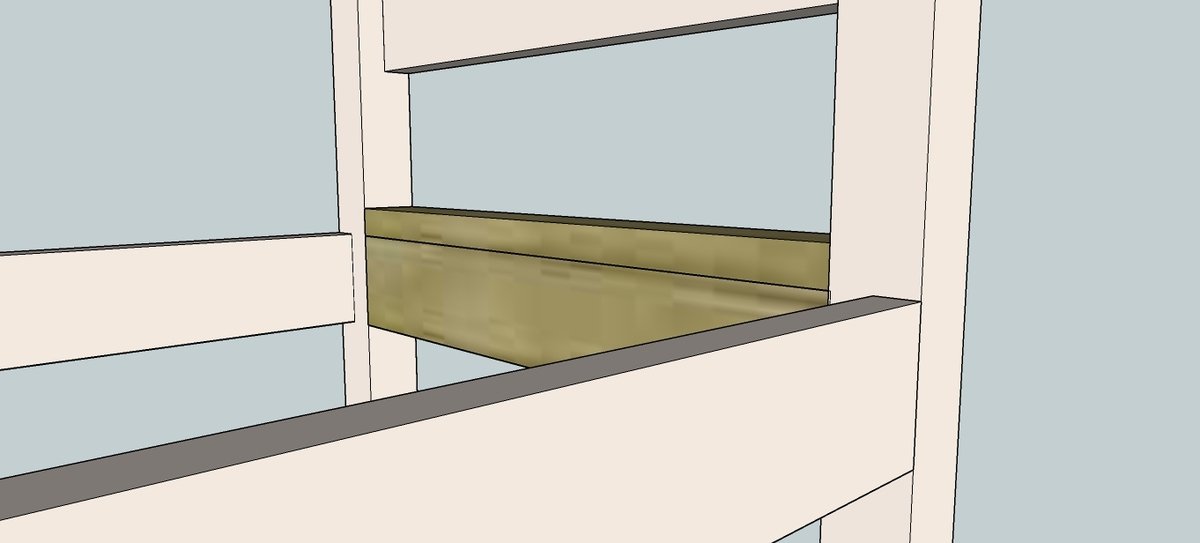
Add the back 1 by 3 rail so the top of it is flush with the top of the two side rails and it is flush with the front of the leg as shown. Drill pocket holes facing upwards on the inside and fix the 1 by 2 measuring 14 ½ inches to it.
Step 5
Step 6
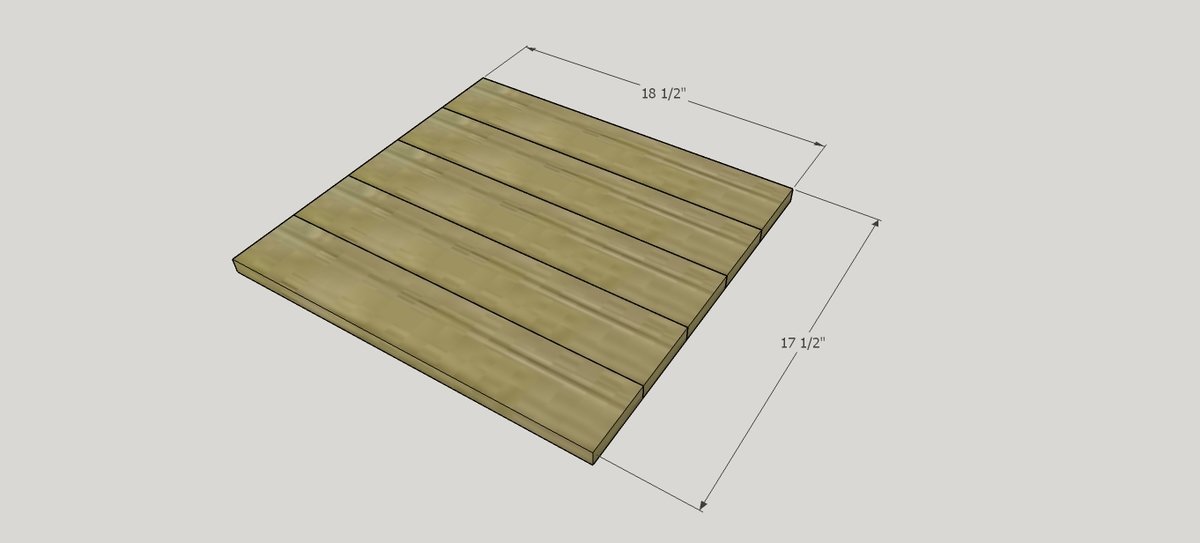
Drill pocket holes on the inside of the frame facing towards the top to use to screw the seat on. Place the top good side down and place the upturned chair frame on top of it. Make sure you have an equal gap around the edge and fix with pocket hole screws.
Step 7
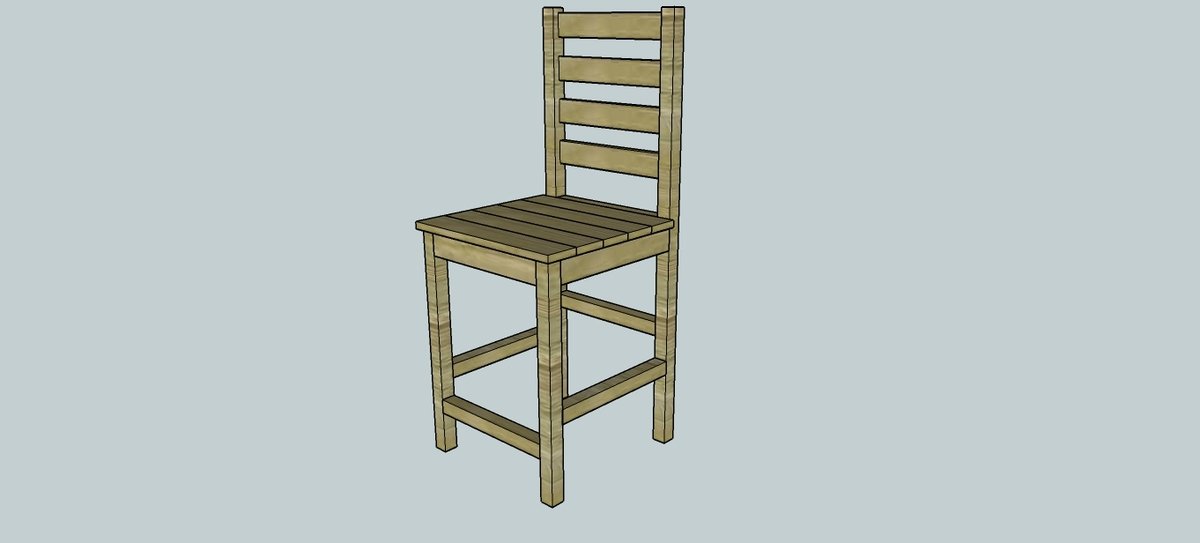
Sand well to smooth out the joints and remove any wood glue residue. If staining then apply Pre-stain and your choice of stain or paint as desired.
Finishing
Sand all surfaces, starting with a medium grit and finishing with fine. Wipe off the dust, fill any holes or gaps with wood filler, and sand smooth once dry. Apply primer if you're painting, then finish with your choice of paint or stain and seal with a durable clear topcoat. For outdoor projects, use exterior-rated primer, paint or stain, and sealer so the piece stands up to the weather.
Source (temporary): https://www.ana-white.com/woodworking-projects/counter-height-bar-stool