Countertop Potato Bin
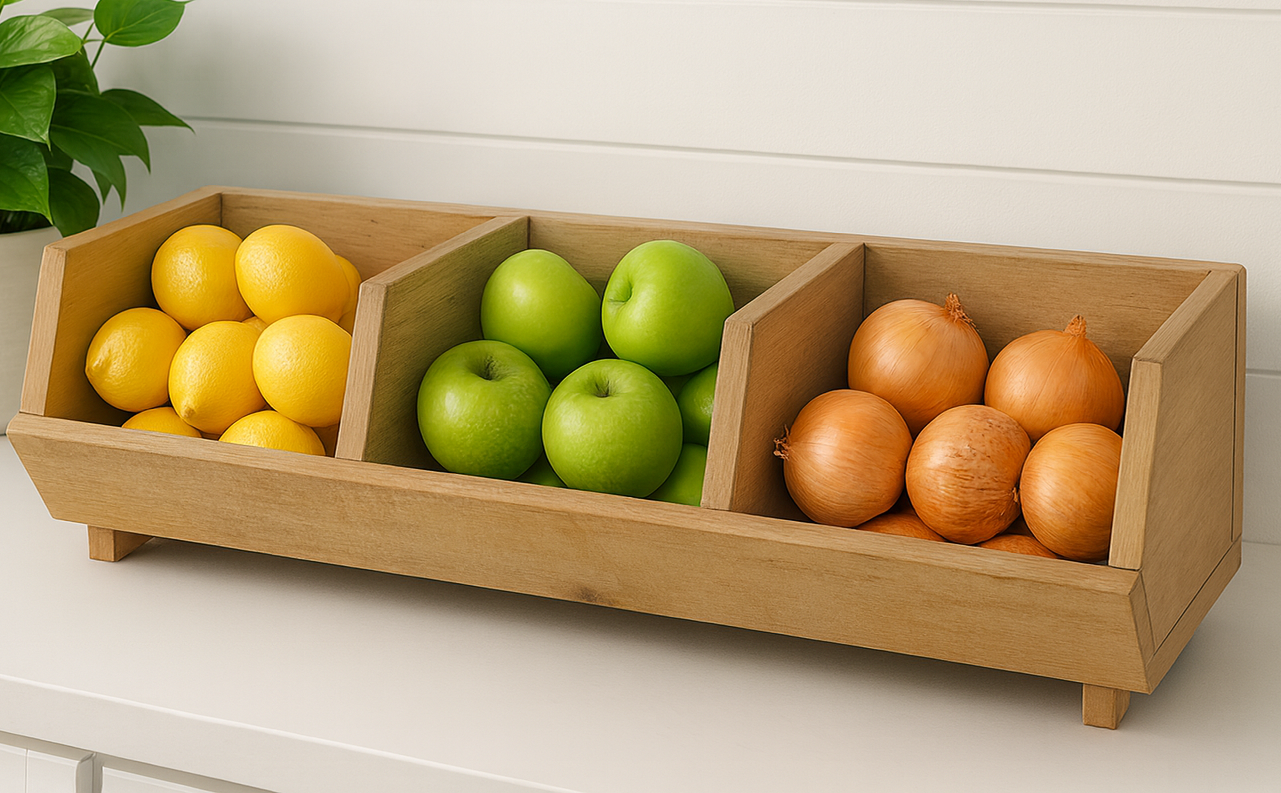
to build your own potato bin for about $20 in lumber. Features three compartments generously sized, each holding about 10 pounds of produce. Stackable design. Solid wood construction, can be easily modified and stained or painted as desired. This is an easy DIY project using pine wood boards and includes free step by step diagrams, shopping and cut list from
Specifications
| Project type | Storage Woodworking Plans |
|---|---|
| Room | Storage Solutions |
| Difficulty | Beginner Projects |
Dimensions
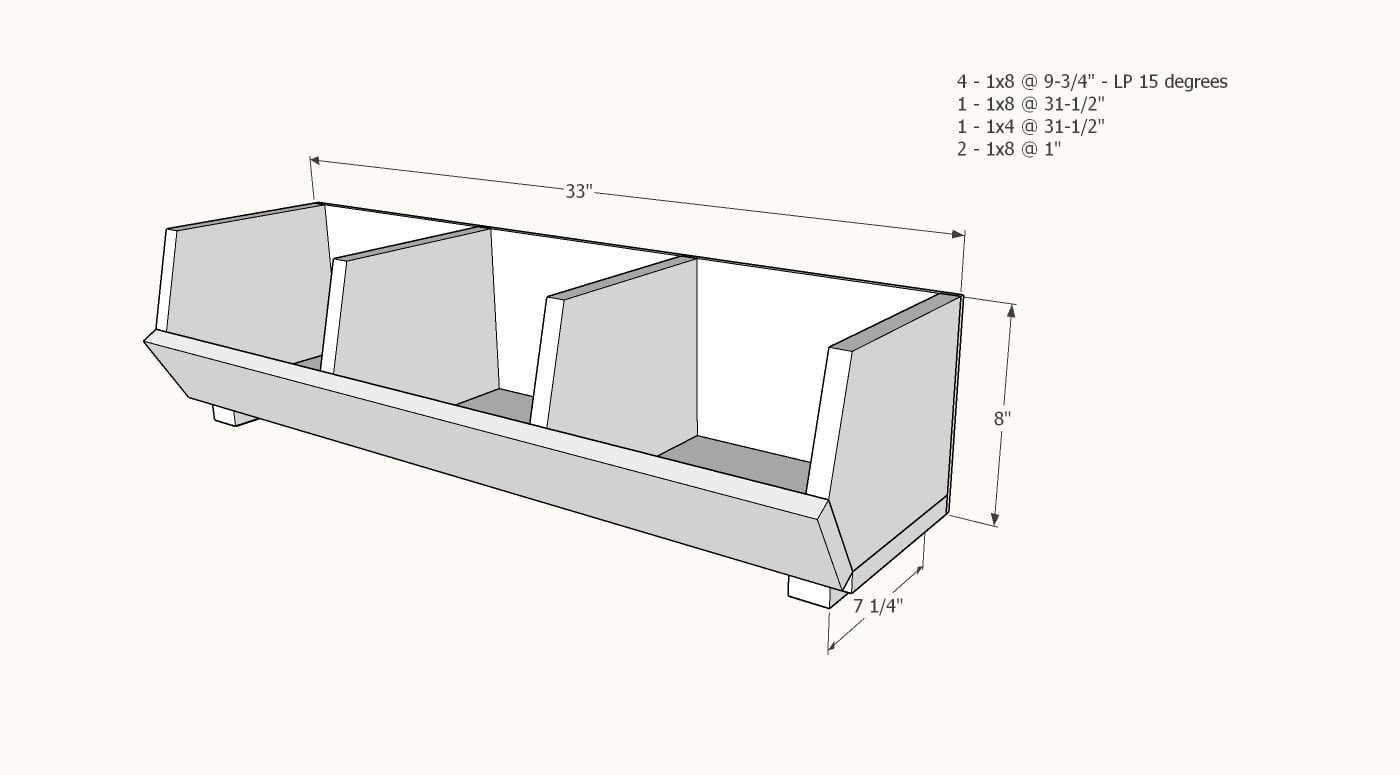
Use the size-specific shopping and cut lists below.
Shopping List
- 1 - 1x8 @ 6 feet long
- 1 - 1x4 @ 8 feet long
- 1-1/4" brad nails and wood glue
- food safe stain or paint
- protective stick on furniture pads (felt or acrylic) to protect countertops on bottom of feet
If you don't have a brad nailer, you can also attach with 2" self tapping star bit screws (trim screws is what I would recommend) using a drill.
Cut List
- 2 - 1x8 @ 1" long - cut first
- 4 - 1x8 @ 9-3/4" long - longest point measurement, one end cut at 15 degrees off square
- 1 - 1x8 @ 31-1/2" long
- 3 - 1x4 @ 31-1/2" long
Tools
- measuring tape
- square
- pencil
- safety glasses
- compound miter saw
- nailer
- sander
Step-by-step Instructions
Step 1
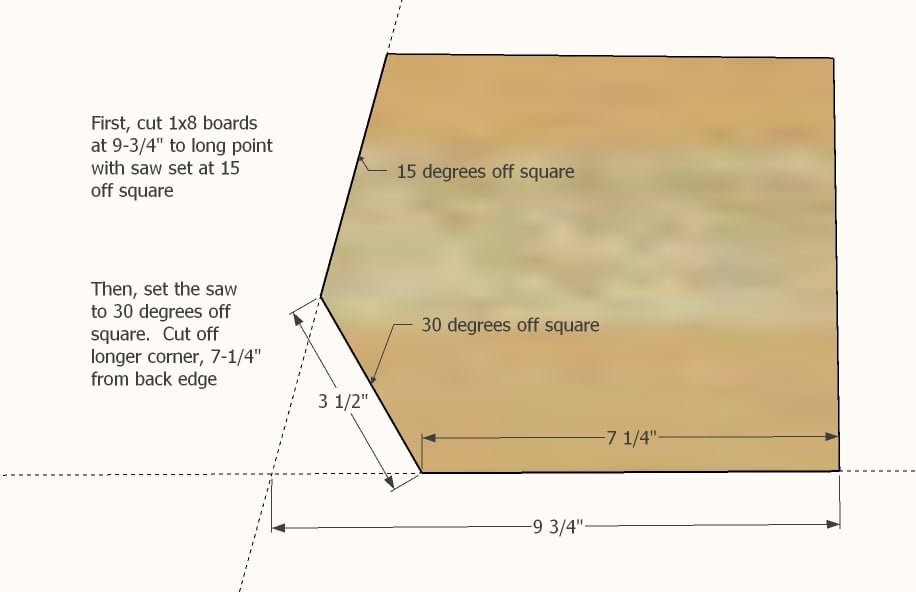
Cutting the dividers isn't hard, and once you have one cut, you can use it as a pattern to cut the rest. A miter saw is recommended to make these cuts, but you could also use a speed square and circular saw to mark the angles. To conserve wood when cutting, cut the pieces as follows: • First, set your saw to 15 degrees off square. • Cut one divider, with the long point 9-3/4". • Then set saw back to square (0 degrees). • Cut the second divider using the first 15 degree cut as your angled cut side. • Repeat to cut the remaining two dividers. • Then set the saw to 30 degrees off square. • Mark the longer corner as shown in the diagram and cut off with the miter saw.
Step 2
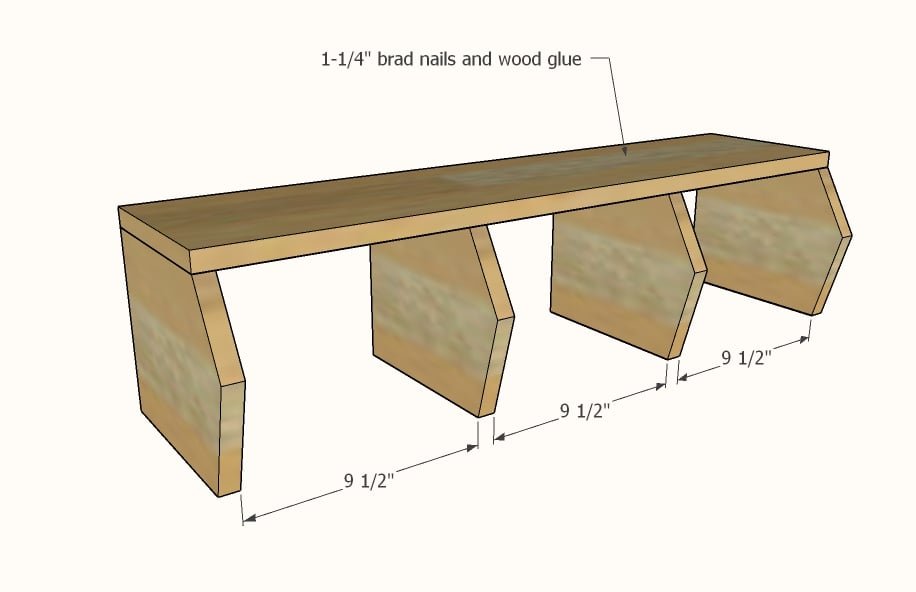
Attach the 1x8 bottom to the dividers with 1-1/4" brad nails and wood glue.
Step 3
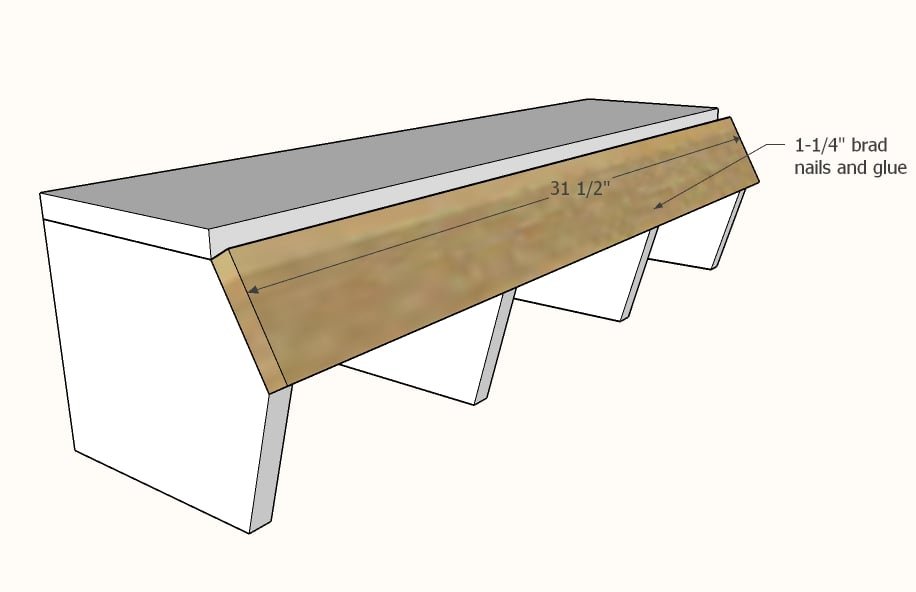
Attach the front 1x4 with 1-1/4" brad nails and wood glue.
Step 4
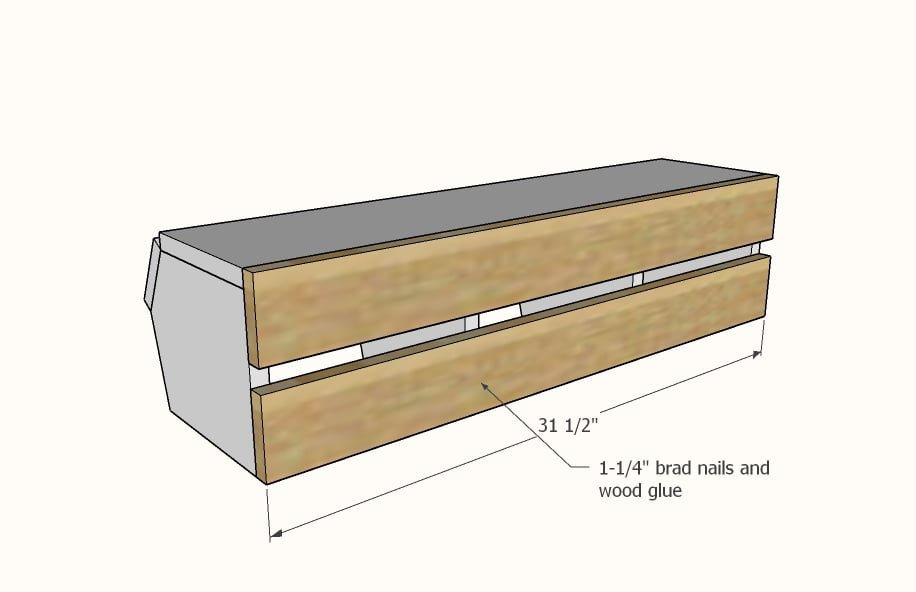
Attach the back 1x4s with 1-1/4" brad nails and wood glue.
Step 5
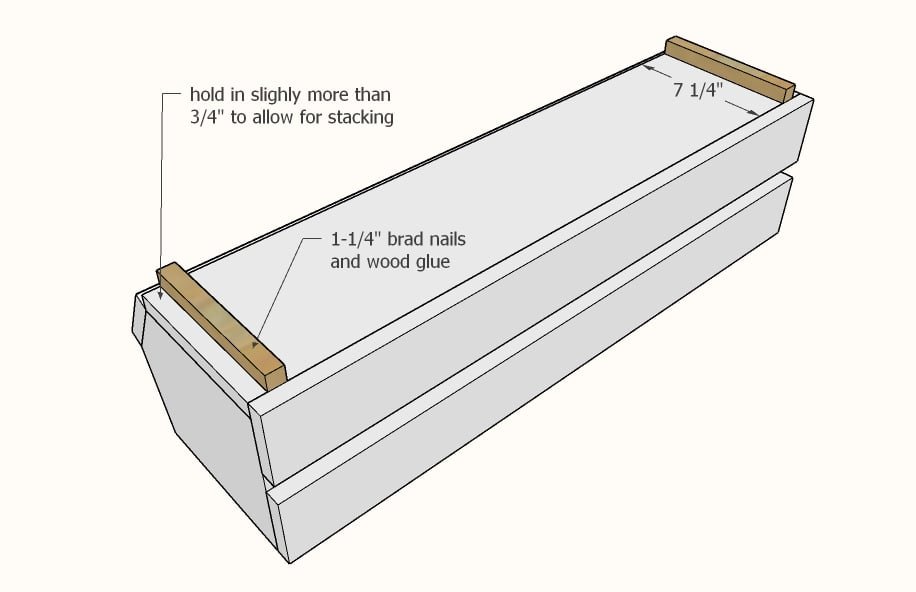
Attach the "feet" to the bottom, with slightly more than 3/4" space on the outside to allow for stacking.
Finishing
Sand all surfaces, starting with a medium grit and finishing with fine. Wipe off the dust, fill any holes or gaps with wood filler, and sand smooth once dry. Apply primer if you're painting, then finish with your choice of paint or stain and seal with a durable clear topcoat. For outdoor projects, use exterior-rated primer, paint or stain, and sealer so the piece stands up to the weather.
Source (temporary): https://www.ana-white.com/woodworking-projects/countertop-potato-bin