Country Shoe Bench
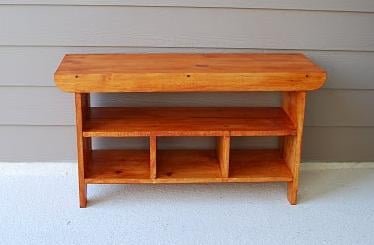
Build your own shoe bench! This little bench provides seating and storage - and it's easy to make! with lots of reader submitted photos from Photo by Jenny.
Specifications
| Project type | Side and End Table Plans |
|---|---|
| Room | Bathroom |
| Style | Farmhouse Furniture |
| Difficulty | Starter Projects |
| Estimated cost | Under $20 |
Dimensions
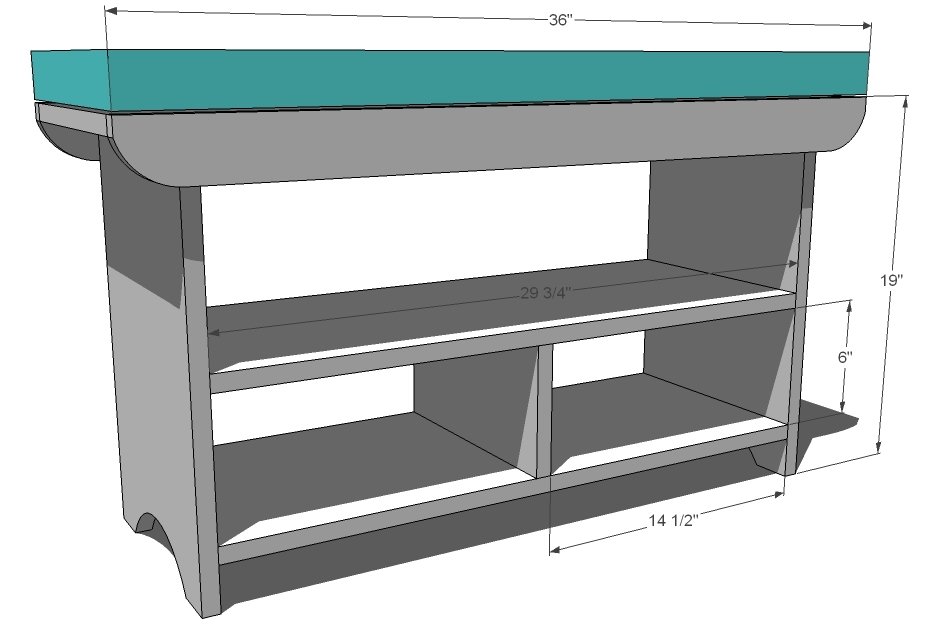
Use the size-specific shopping and cut lists below.
Shopping List
Shopping List
- 1 – 1×12, 12′ Long
- 1 – 1×3, 8′ Long
- 2″ Self Tapping Star Bit Screws
- Wood Glue
- Wood Filler
Cut List
- 2 – 1×12 @ 29 3/4″ (Shelves)
- 1 – 1×12 @ 6″ (Divider)
- 2 – 1×12 @ 18 1/4″ (Sides)
- 1 – 1×12 @ 36″ (Top)
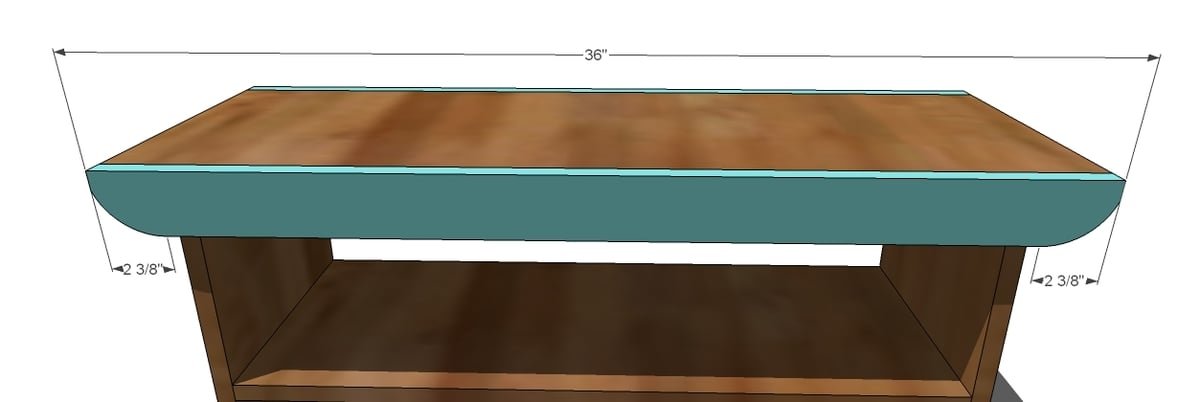
- 2 – 1×3 @ 36″ (Top Trim)
Tools
- pencil
- safety glasses
- jigsaw
- compound miter saw
- nailer
- sander
Step-by-step Instructions
Step 1
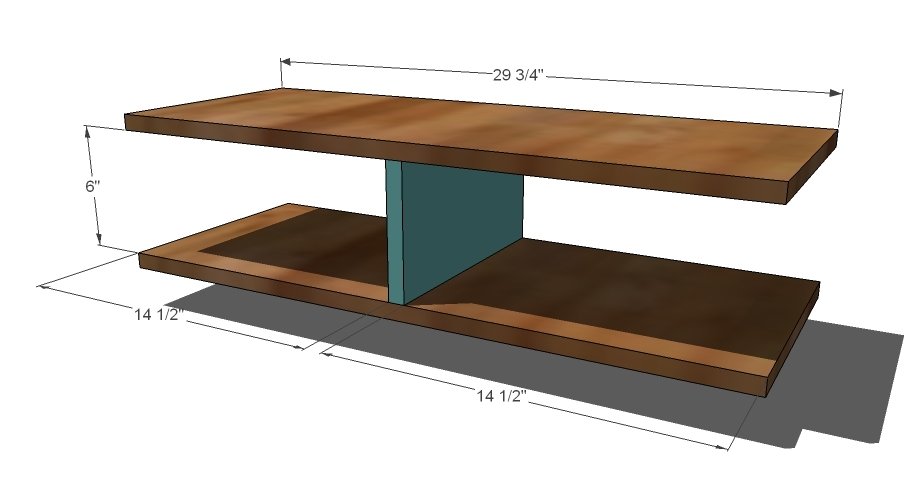
Divider and Shelves. Begin by marking the shelves 14 1/2″ from each end, as shown above. This is the joint. Mark both sides so you also know where to fasten from. Then drill a pilot hole and fasten the divider to the shelves, as shown above. Check for square.
Step 2
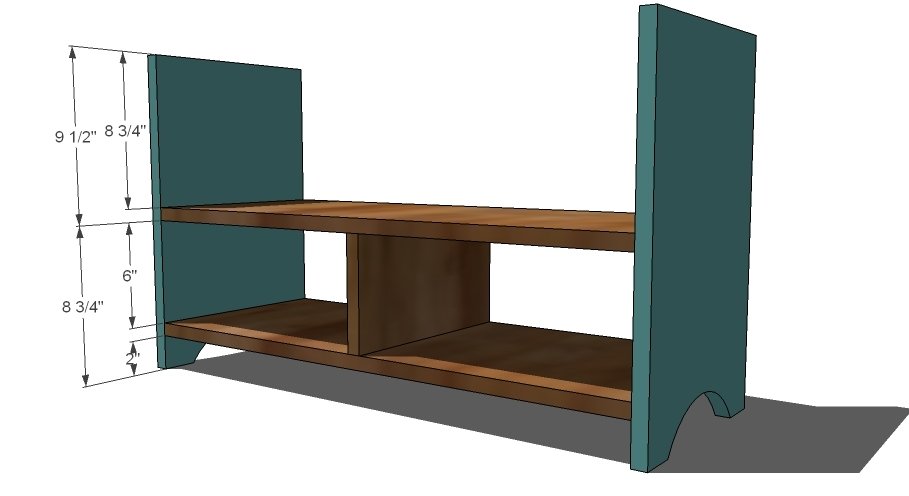
Sides. Mark the sides as you did the shelves, on both the inside and the outside. Then fasten the shelves to the sides. Predrill and countersink your screws, as you did in step 1.
Step 3
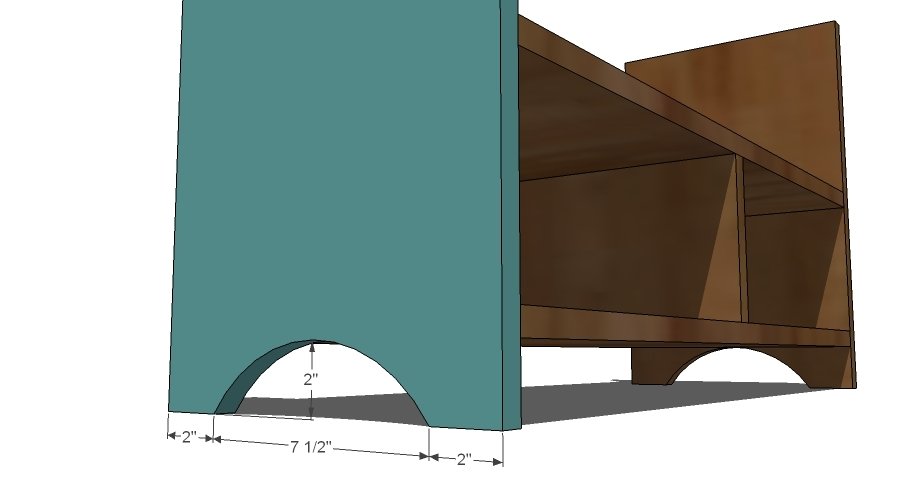
Side Cutout. Use a round object to draw out your side cutouts and then use a jigsaw to carefully cutout the sides as shown above.
Step 4
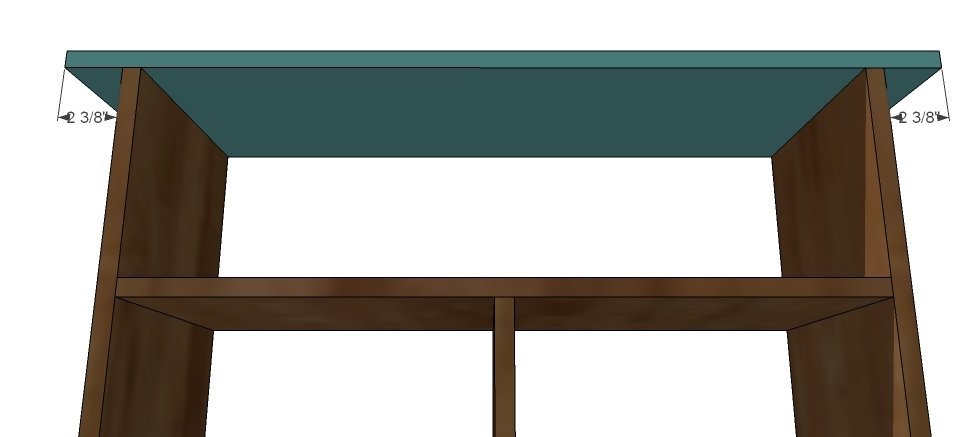
Top. Mark the top 2 3/8″ in from either end and position on top of the bench. Fasten to the sides.
Step 5
Step 6
Finish. Fill any holes with wood filler and sand and finish as desired.
Finishing
Sand all surfaces, starting with a medium grit and finishing with fine. Wipe off the dust, fill any holes or gaps with wood filler, and sand smooth once dry. Apply primer if you're painting, then finish with your choice of paint or stain and seal with a durable clear topcoat. For outdoor projects, use exterior-rated primer, paint or stain, and sealer so the piece stands up to the weather.
Source (temporary): https://www.ana-white.com/woodworking-projects/country-shoe-bench