Craft Room Storage Tower
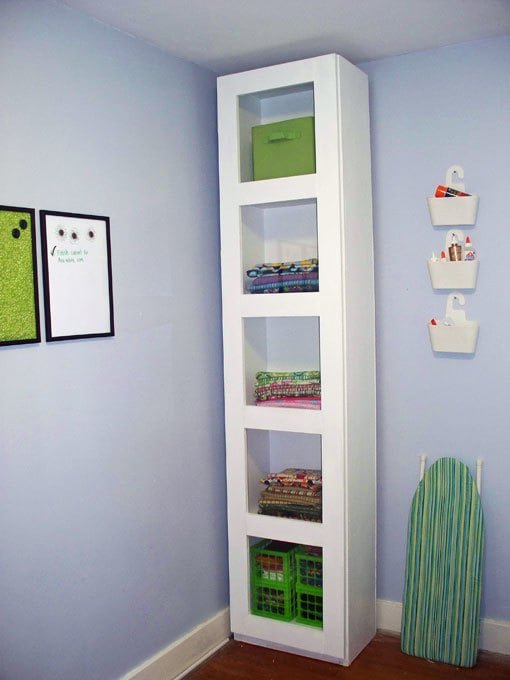
Make a very tall and extra room storage tower complete with modern style doors! These DIY plans will add lots of storage to your space. Can be made with glass doors too! Full you can follow to make your own. Use as a closet or closet divider by adding closet rods to the outside for a chic wardrobe!
Specifications
| Project type | Cabinet Plans |
|---|---|
| Room | Craftroom |
| Style | Modern Style Furniture Plans |
| Difficulty | Beginner Projects |
| Estimated cost | $150 - $200 |
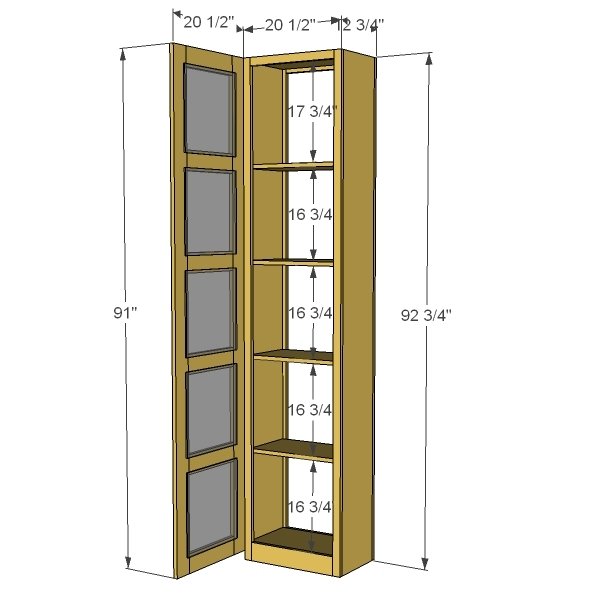
Dimensions
Use the size-specific shopping and cut lists below.
Shopping List
2 – 1x12 @ 8 feet long
1 – 1x12 @ 10 feet long (cut shelves from this board)
3 – 1x2 @ 8 feet long
3 – 1x4 @ 8 feet long
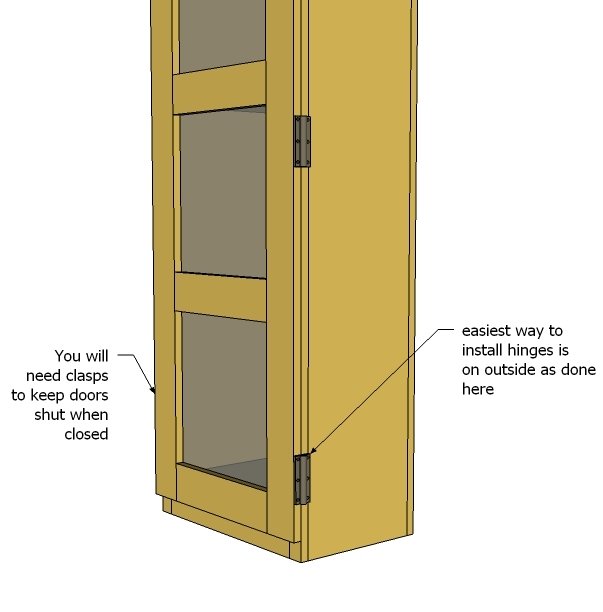
Hinges – either euro face frame mount or standard side mount to be mounted on exterior of cabinet.
Acrylic glass
Mirror clips
1 ¼” pocket hole screws
2” and 1 ¼” finish nails
Cut List
2 – 1x12 @ 92 ¾”
6 – 1x12 @ 19”
2 – 1x2 @ 92 ¾”
1 – 1x2 @ 17 1/2”
1 – 1x4 @ 17 ½”
1 – ¼” plywood @ 92 ¾” x 20 ½” OR Double face frame
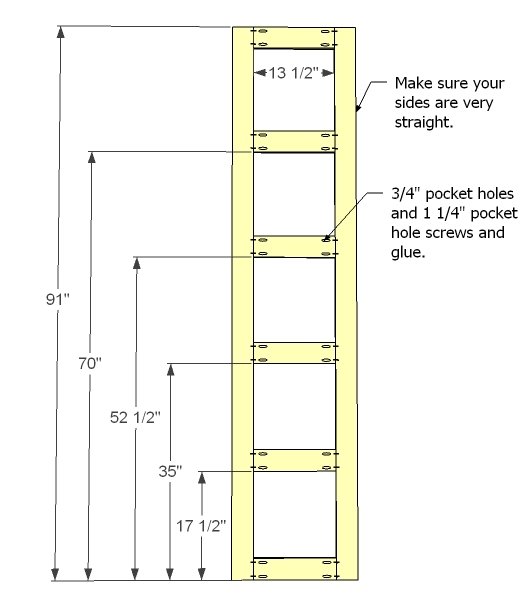
2 – 1x4 @ 91”
6 – 1x4 @13 ½”
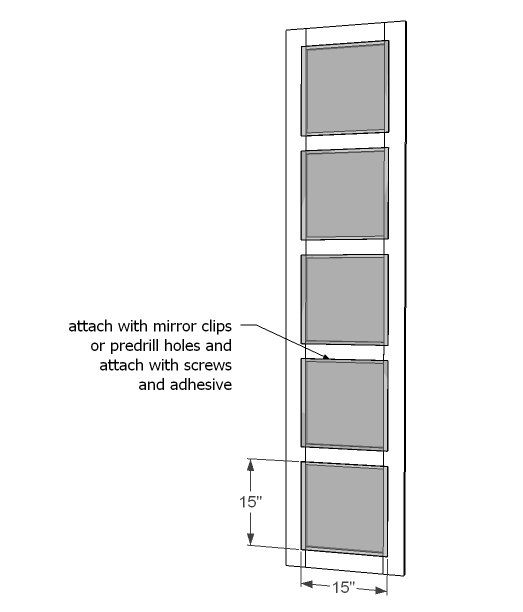
5 – ¼” acrylic glass @ 15” x 15”
Tools
- measuring tape
- square
- pencil
- hammer
- safety glasses
- kreg-jig
- drill
- compound miter saw
- sander
Step-by-step Instructions
Step 1
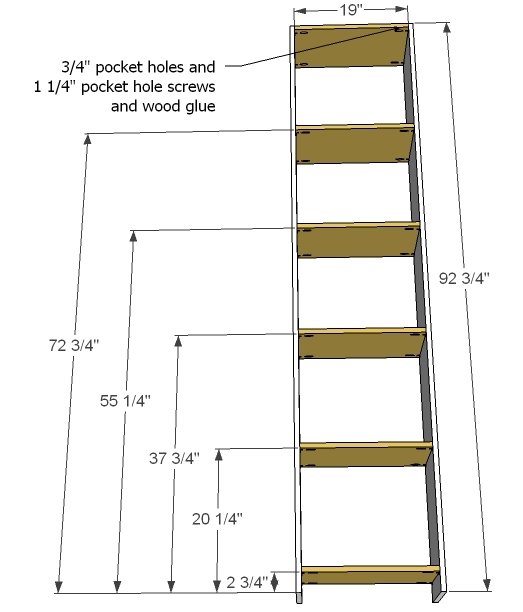
Build the box as show in the diagram. You can use either pocket holes or 2" screws or even finish nails, as this project is fully face framed for extra support on front and has a back.
Step 2
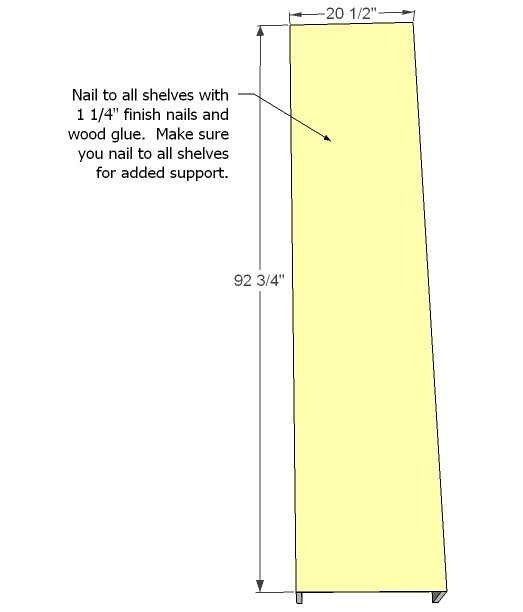
Attach back, using it to square up your project. Also attach to all shelves for the greatest support.
Step 3
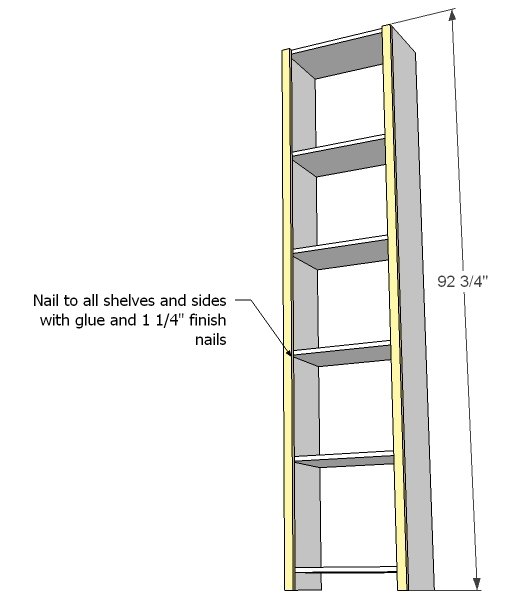
Front trim can be nailed on or if you have a pocket hole jig, you can build the front face frame first, and then attach as one piece.
Step 4
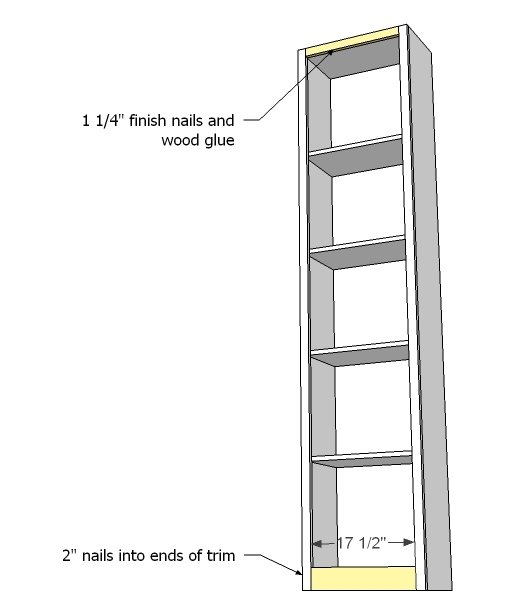
Add the remaining pieces for the front face frame.
Step 5
Step 6
If you are using glass or acrylic glass, attach with mirror hooks or glue. You can also use 1/4" plywood for the backs.
Step 7
Door is attached with hinges. The easiest method is hinges on the outsides.
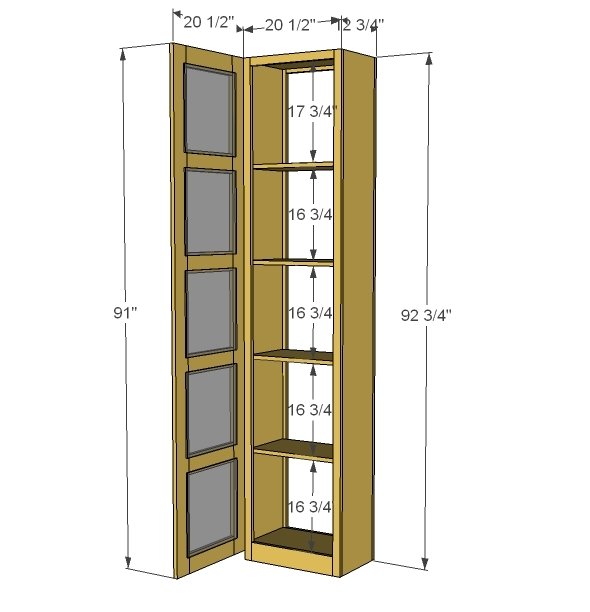
You may need a clasp to keep the door shut.
This cabinet MUST be secured to a stud in the wall behind as it will be very top heavy to prevent tipping.
Finishing
Sand all surfaces, starting with a medium grit and finishing with fine. Wipe off the dust, fill any holes or gaps with wood filler, and sand smooth once dry. Apply primer if you're painting, then finish with your choice of paint or stain and seal with a durable clear topcoat. For outdoor projects, use exterior-rated primer, paint or stain, and sealer so the piece stands up to the weather.
Source (temporary): https://www.ana-white.com/woodworking-projects/craft-room-storage-tower