Craft Table Top For The Modular Collection
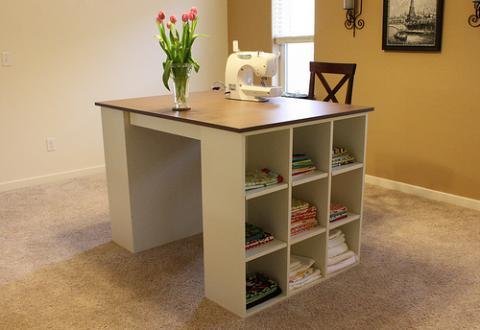
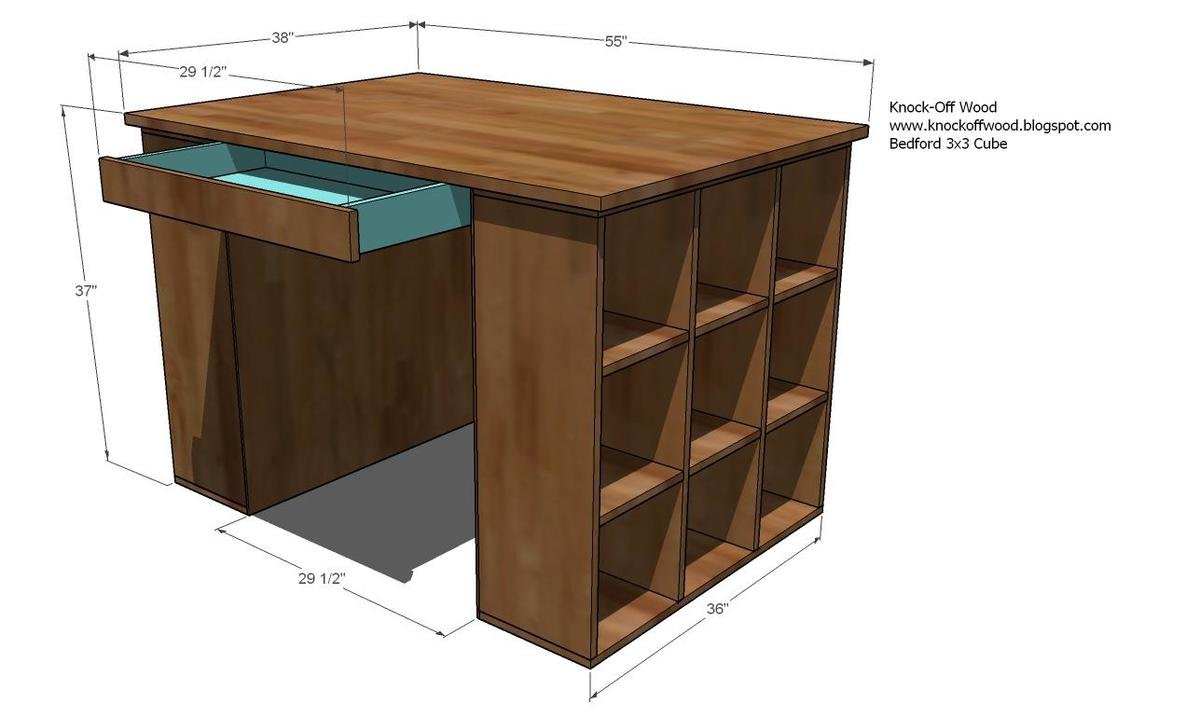
This counter height project table features two drawers and 18 cubbies to keep all of your crafting supplies handy. By simply building two of the cubby bookcases from the Modular Offfice Collection and adding a desktop, voila! we've got a stylish, simple project table.
Specifications
| Project type | Table Plans |
|---|---|
| Room | Craftroom |
| Difficulty | Intermediate |
| Estimated cost | $20 - $50 |
Dimensions
Use the size-specific shopping and cut lists below.
Shopping List
1 Sheet of MDF or A1 Plywood 2 – 1×4 Boards, 8′ Long 2- 15″ Drawer Slides
Cut List
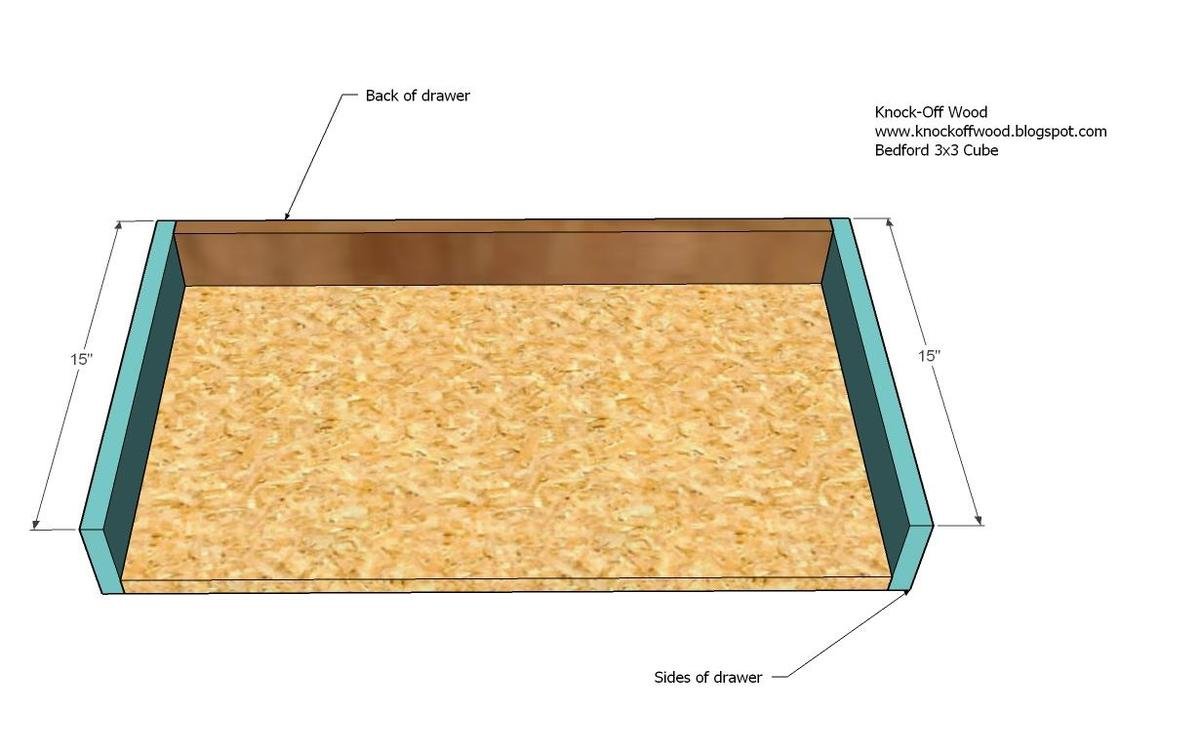
1 – 3/4″ MDF or A1 @ 55″ x 38″ (Top) 2 – 1×4 @ 31 1/2″ (Sides of Drawer Housing) 1 – 1×4 @ 28″ (Center of Drawer Housing) 2 – 3/4″ MDF or A1 Plywood @ 25 1/2″ x 14 1/4″ 2 – 1×4 @ 25 1/2″ (Backs of Drawers) 4 – 1×4 @ 15″ (Sides of Drawers) 2 – 1×4 @ 29 1/2″ (Measure to fit, Drawer Face)
Tools
- measuring tape
- square
- pencil
- hammer
- safety glasses
- hearing protection
- kreg-jig
- drill
- circular saw
- sander
Step-by-step Instructions
Step 1
Dimensions for the Tabletop with drawers is shown above.
Step 2
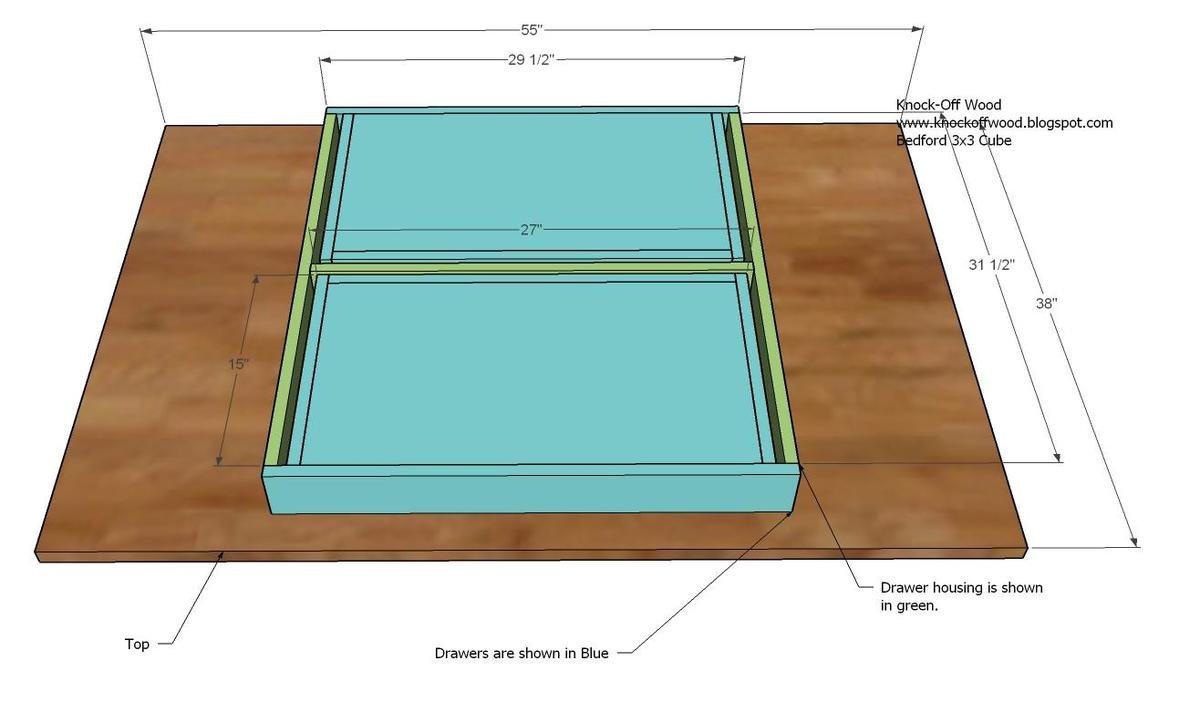
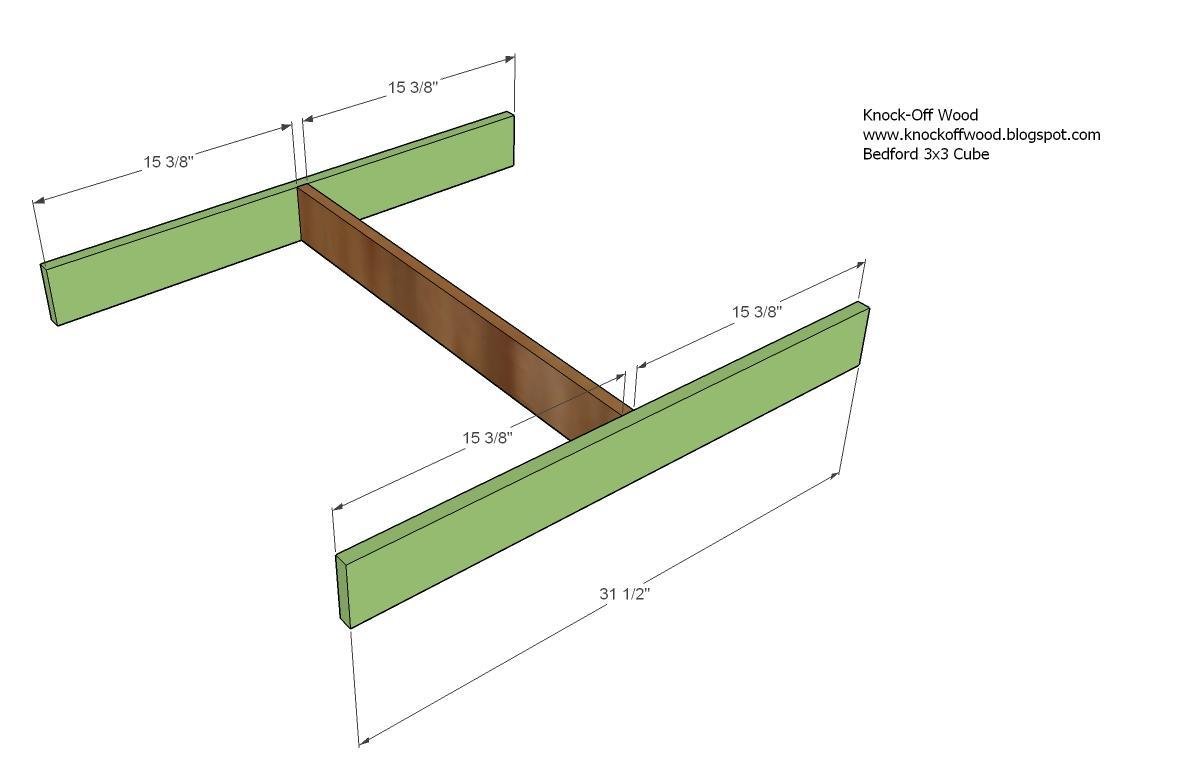
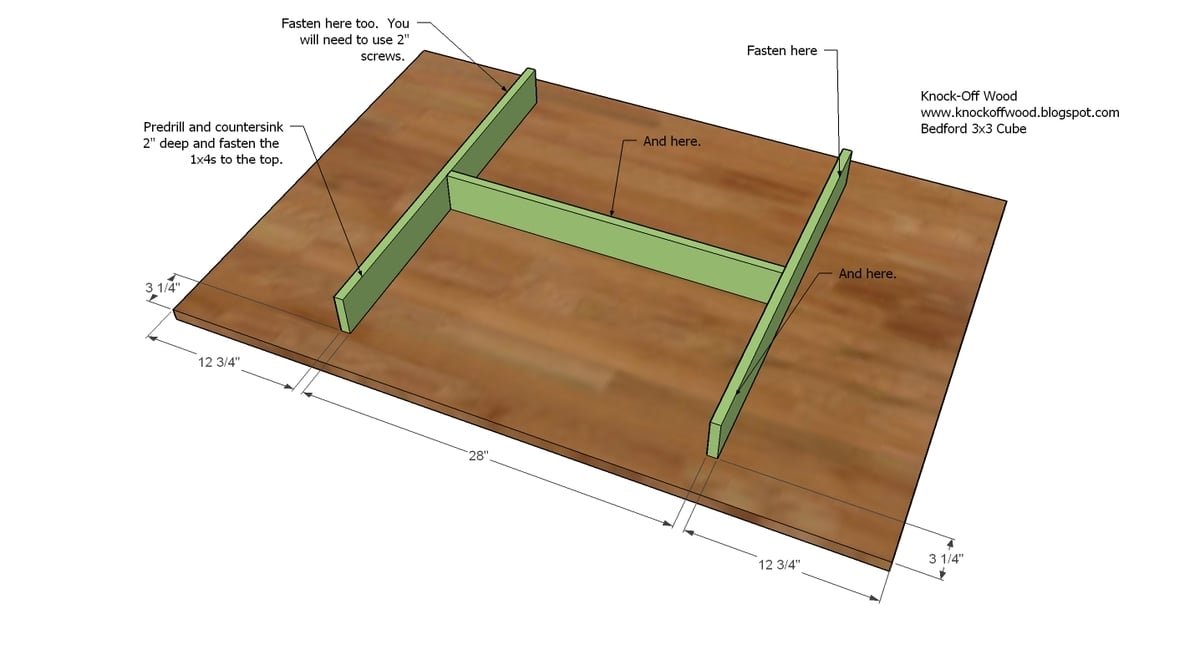
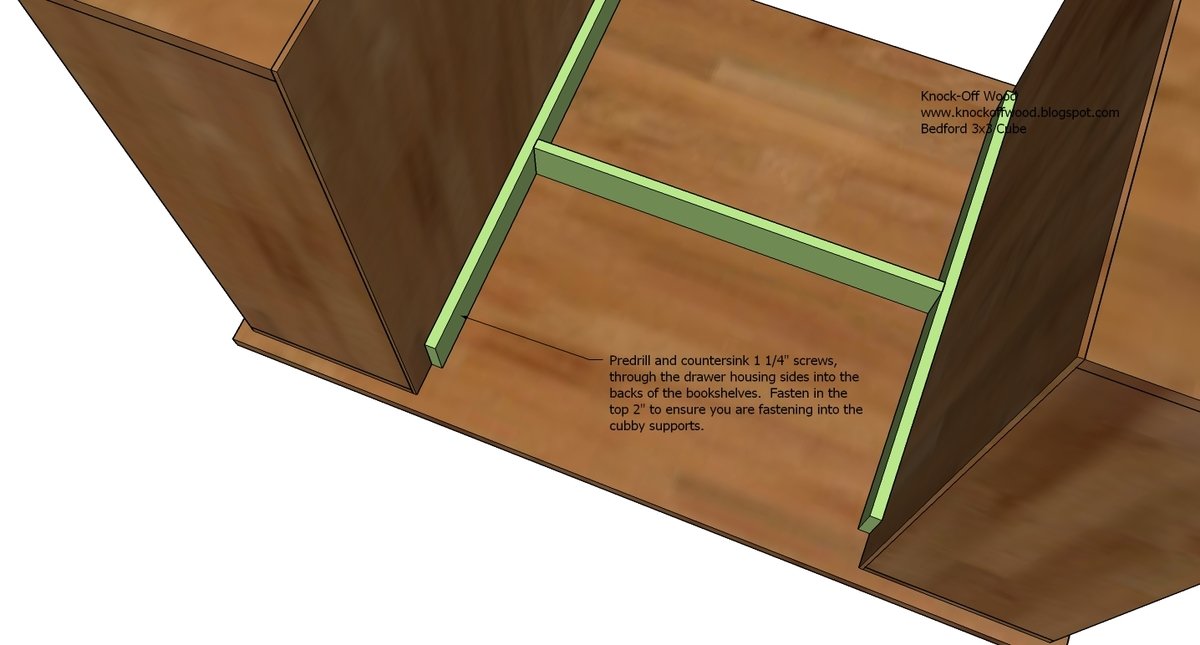
Drawer Housing. Measure and mark out the sides of the drawer housing as shown above. Fasten the center to the sides, using 2″ screws and glue. You will need to predrill and countersink your screws. You will need to be perfect in your building, as the drawers will not slide right if you do not build perfectly square.
Step 3
Drawer Housing to Top. Fasten the drawer housing to the top, using the measurements above. Again, you must be perfectly square. Predrill and countersink your screws 2″ deep (the screw head will be 2″ inset into the 1×4 boards) and fasten the 1x4s to the top. This will also hide any screws from showing on the tabletop.
Step 4
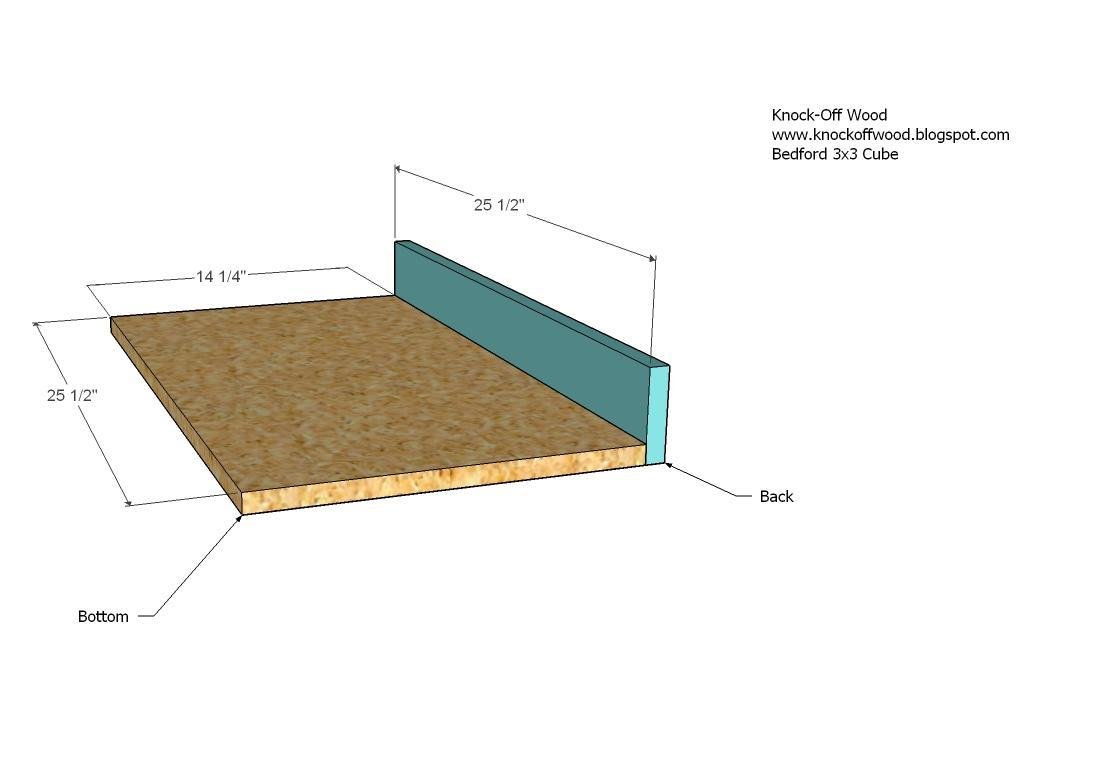
Drawer Backs. Fasten the drawer back to the drawer bottom. Use the 2″ screws and glue.
Step 5
Step 6
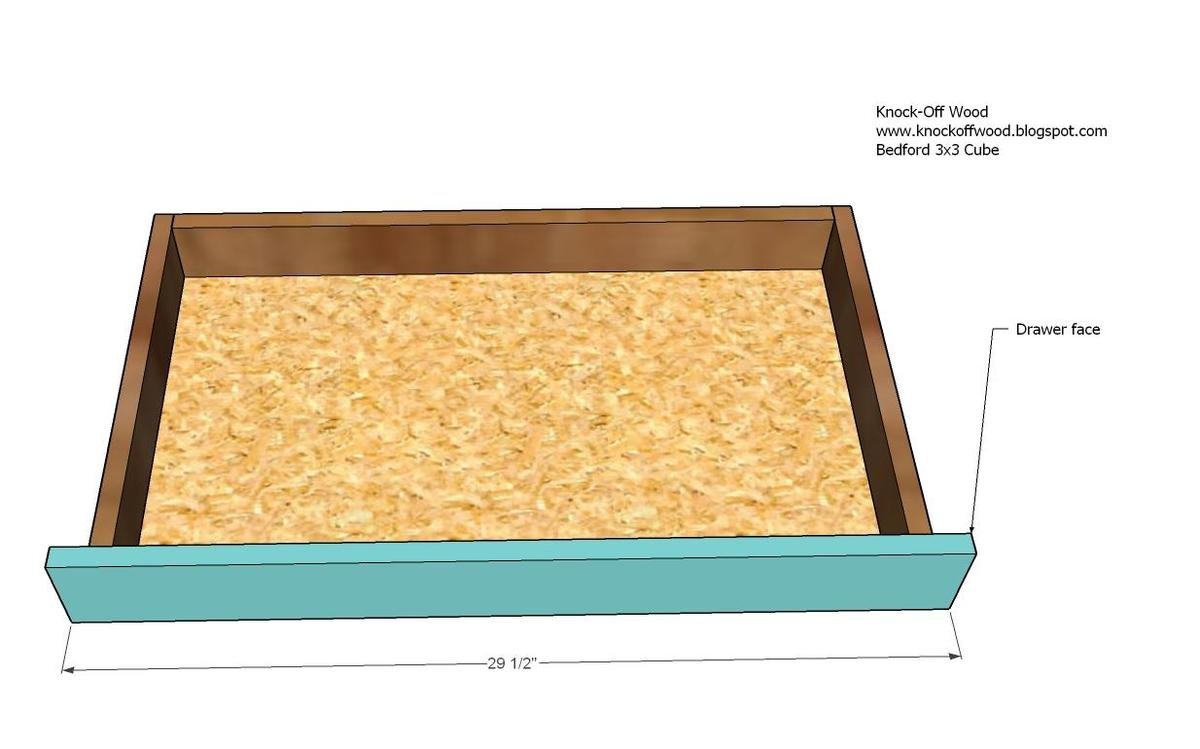
Drawer Face. Measure the opening from the outside of the drawer housing to the opposite outside. The distance should be about 29 1/2″. Subtract 1/4″. Cut your drawer face from a 1×4 to this measurement. After you have inserted the drawer into the slides, line the drawer face up with the drawer and fasten in place.
Step 7
Putting it all together. Fasten the top to the bookcases, as shown above. Follow the directions above. Do not use glue. This will enable you to take apart the project table easily.
Step 8
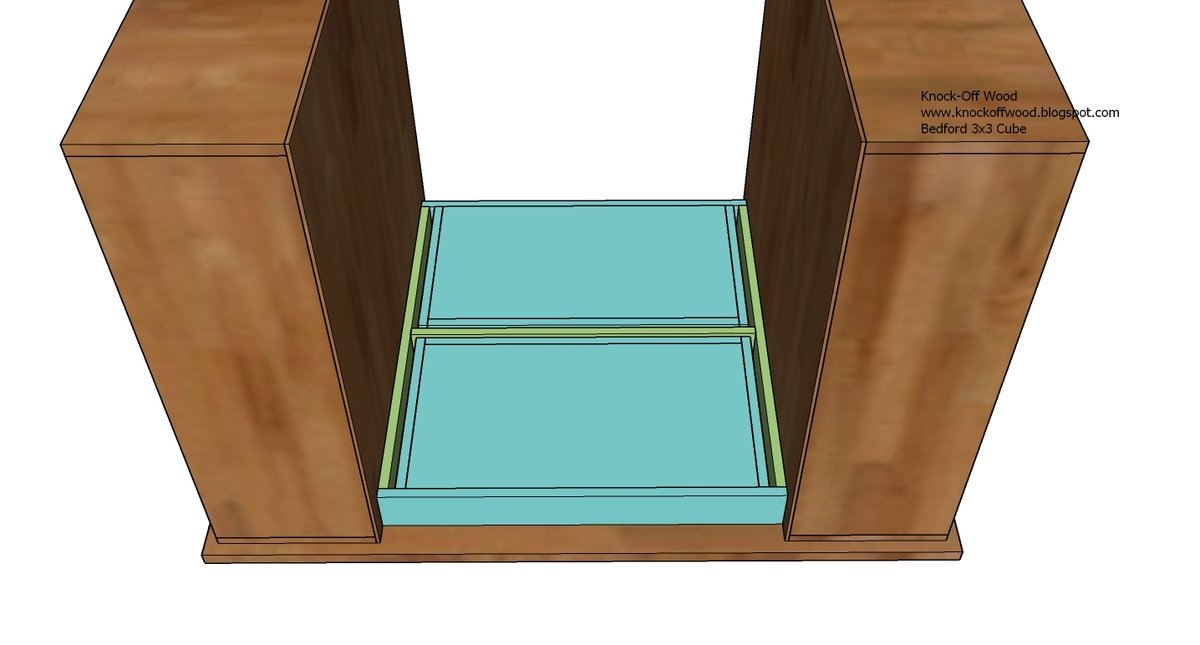
Insert the Drawers. Insert the drawers into the slides. If you would like, you can add hardware to the faces of the drawers.
Finishing
Sand all surfaces, starting with a medium grit and finishing with fine. Wipe off the dust, fill any holes or gaps with wood filler, and sand smooth once dry. Apply primer if you're painting, then finish with your choice of paint or stain and seal with a durable clear topcoat. For outdoor projects, use exterior-rated primer, paint or stain, and sealer so the piece stands up to the weather.
Source (temporary): https://www.ana-white.com/woodworking-projects/craft-table-top-modular-collection