Craftsman Style Playhouse
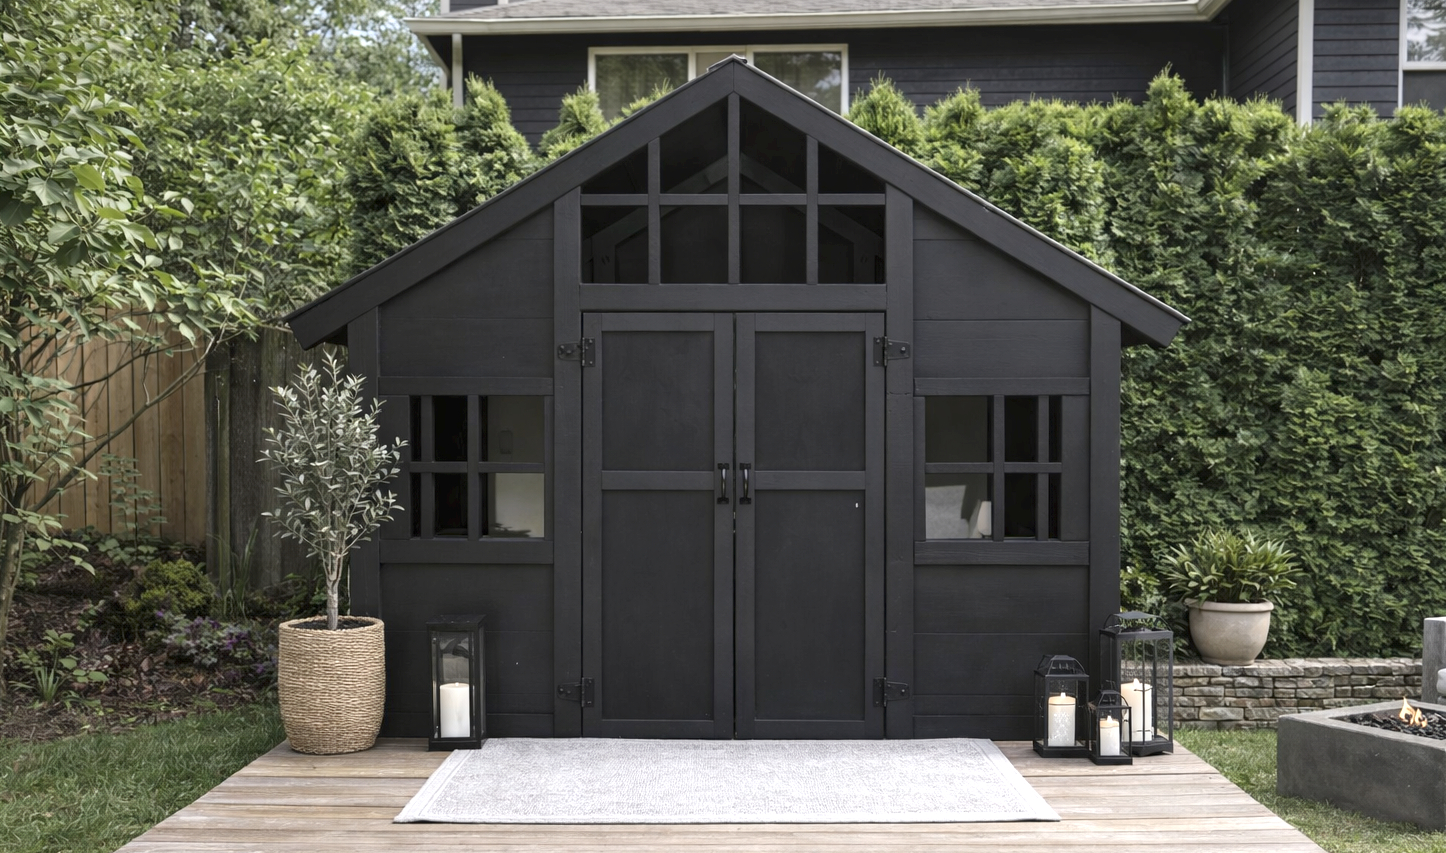
This gorgeous playhouse features wide open french doors, a taller ceiling, and beautiful windows. You'll love the step by step plans and diagrams. Fun to build and decorate and use!
Specifications
| Project type | Playhouse |
|---|---|
| Room | Kids and Toys |
| Style | Children's and Kid's Room Furniture and Toy Plans |
| Difficulty | Intermediate |
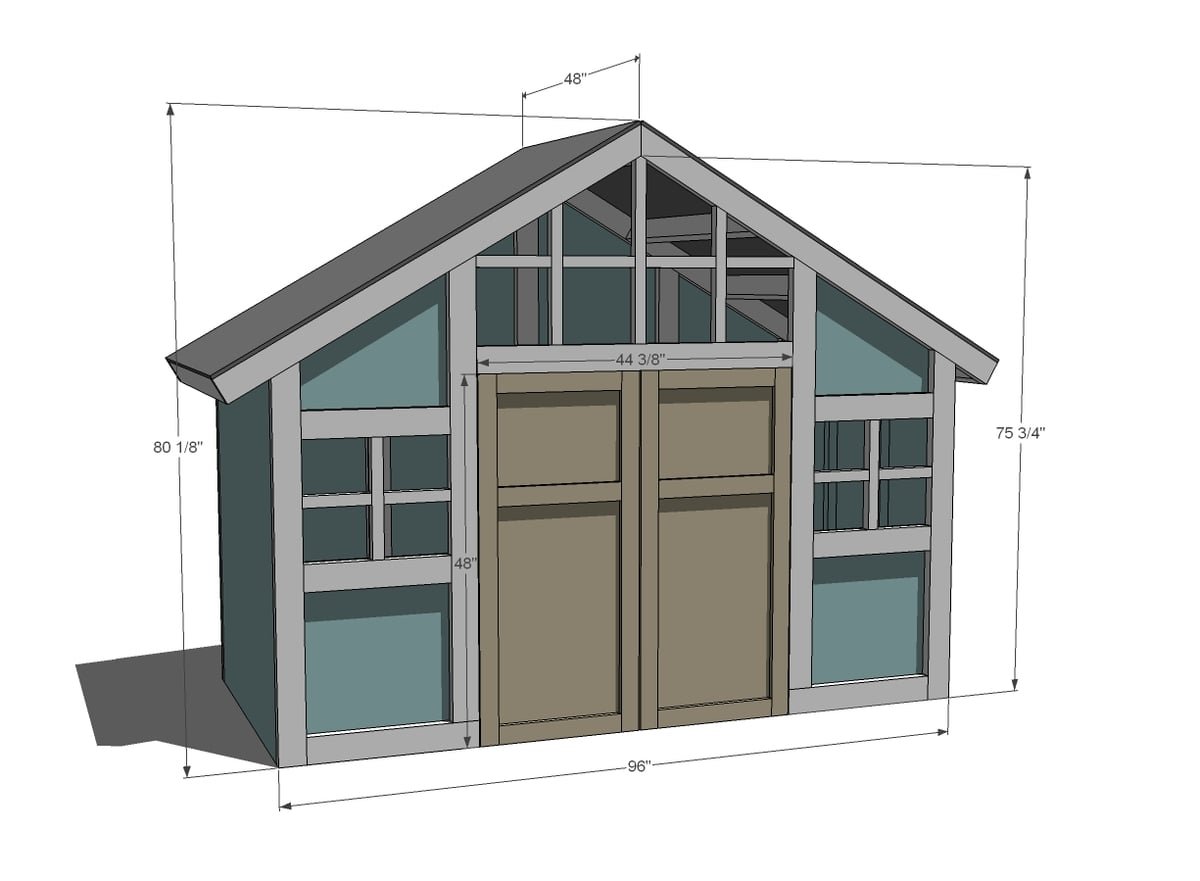
Dimensions
Use the size-specific shopping and cut lists below.
Shopping List
- 5 - sheets exterior plywood (we used 3/8" but see notes on roofing plywood below)
- 8 - 2x2 @ 8 feet long
- 20 - 2x4 @ 8 feet long
- 1x3s for doors if desired
- 2-1/2" pocket hole screws (blue coated exterior ones)
- Galvanized nails or screws for attaching plywood
- Roofing of choice
Cut List
Listed in steps
Tools
- measuring tape
- square
- pencil
- safety glasses
- hearing protection
- kreg-jig
- drill
- circular saw
- compound miter saw
- nailer
Step-by-step Instructions
FRONT WALL
• 2 – 2x4 @ 63 1/2" (top cut at 30 degrees off square) • 2 – 2x4 @ 50” (top cut at 30 degrees off square) • 2 – 2x4 @ 59 3/8” (top cut at 30 degrees off square) • 4 – 2x4 @ 18 3/4" • 2 – 2x4 @ 22 1/4" • 1 – 2x4 @ 44 1/2" WINDOW GRILLS • 2 – 2x2 @ 15 1/2" • 4 – 2x2 @ 8 5/8” • 4 – 2x2 @ 10” • 2 – 2x2 @ 18” (top end cut at 30 degrees off square) • 1 – 2x2 @ 24 1/4" (top dogeared to 30 degrees off square) - this is the top center piece The entire front wall was built on the ground with a Kreg Jig set for 1-1/2" stock and using 2-1/2" pocket hole screws. The 2x4 boards are joined together flat (so the wall is 1-1/2" thick before plywood). Wait until after you build the other walls to use scrap plywood for filling in the blue pieces. We used 3/8" exterior plywood, just nailed on from back. Top rafters overhang the outer 2x4s by 6", measured along bottom edge of rafters.
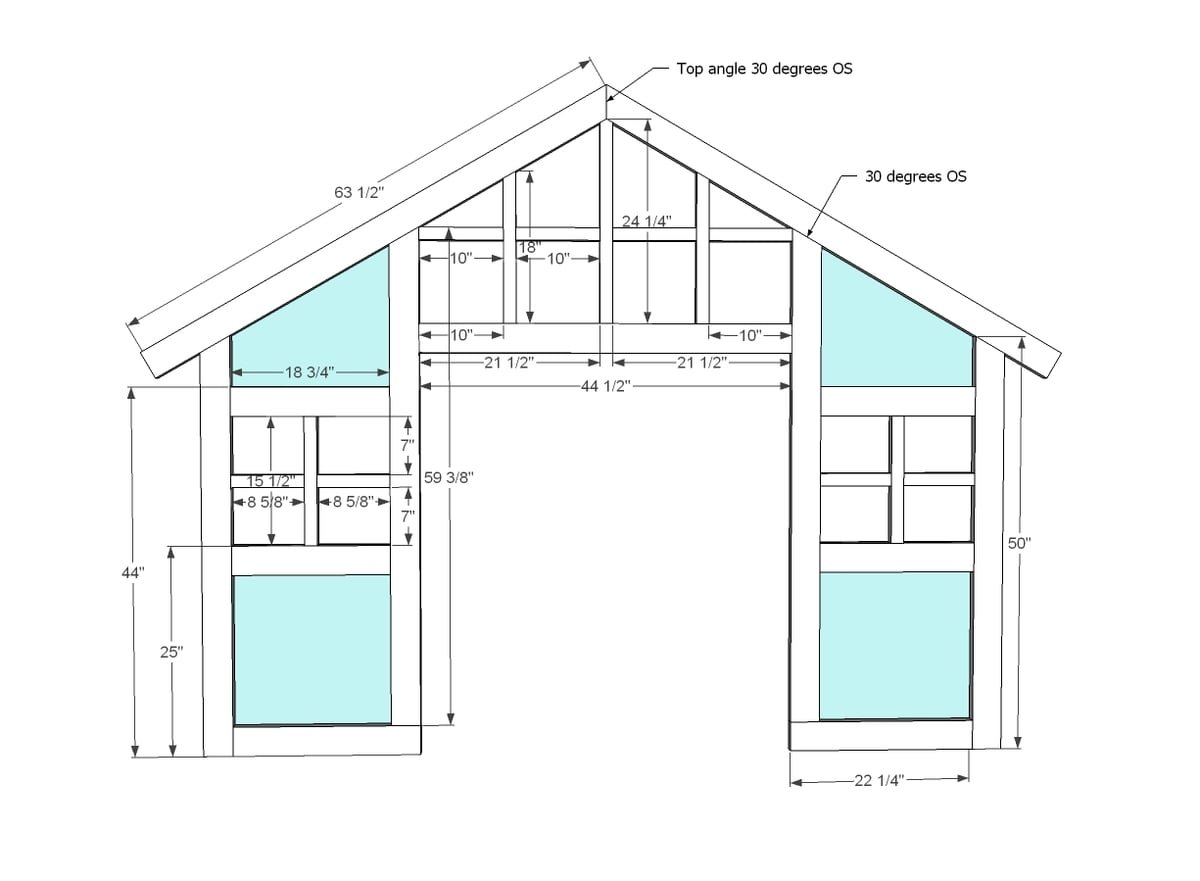
ROOF OVERHANG ON UNDERSIDE OF RAFTERS IS 6”
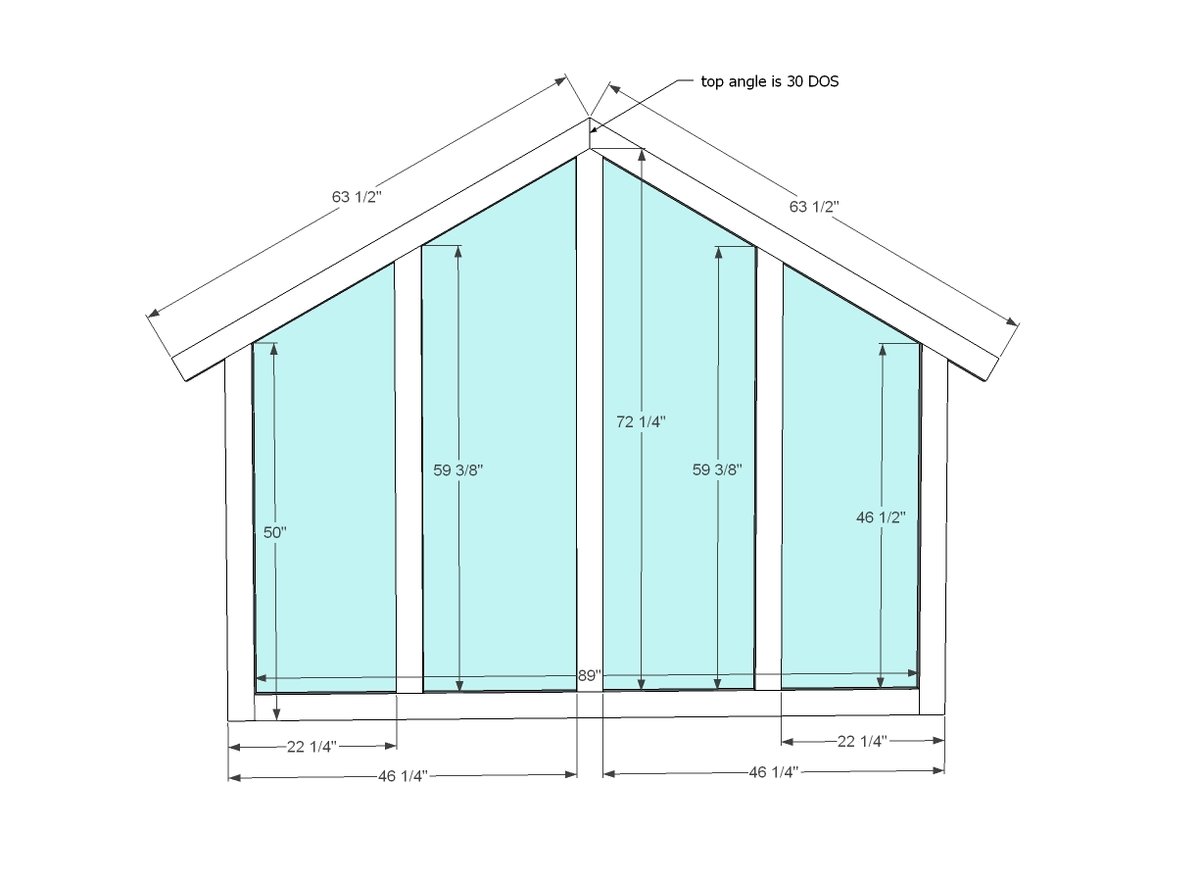
BACK WALL • 2 – 2x4 @ 63 1/2” – one end cut at 30 degrees off square • 2 – 2x4 @ 50” – one end cut at 30 degrees off square • 2 – 2x4 @ 59 3/8” – one end cut at 30 degrees off square • 1 – 2x4 @ 62 1/4” – top dogeared to point at 30 degrees off square • 1 – 2x4 @ 89” 2 - 3/8" exterior plywood 48" cut to fit - save scraps for the front wall. We built the back wall again on the ground, using the Kreg Jig again. The blue is 3/8" exterior plywood nailed on to back. Again, 2x4 boards are joined together flat, so wall is 1-1/2" thick before plywood is attached.
SIDE WALLS – BUILD 2
• 12 – 2x2 @ 45” • 2 – 1/2" plywood @ 45” x 48” Build two of the side walls - we used the Kreg Jig here too.
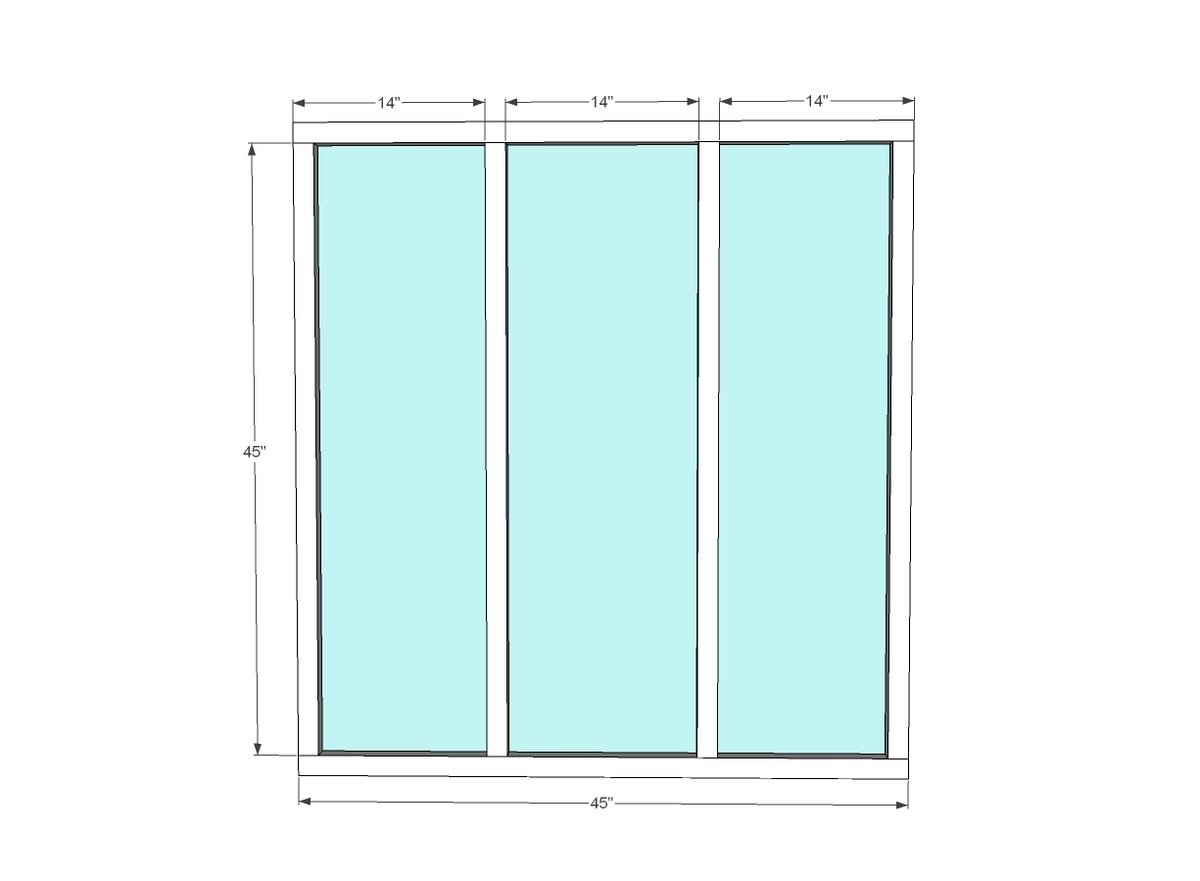
Step 4
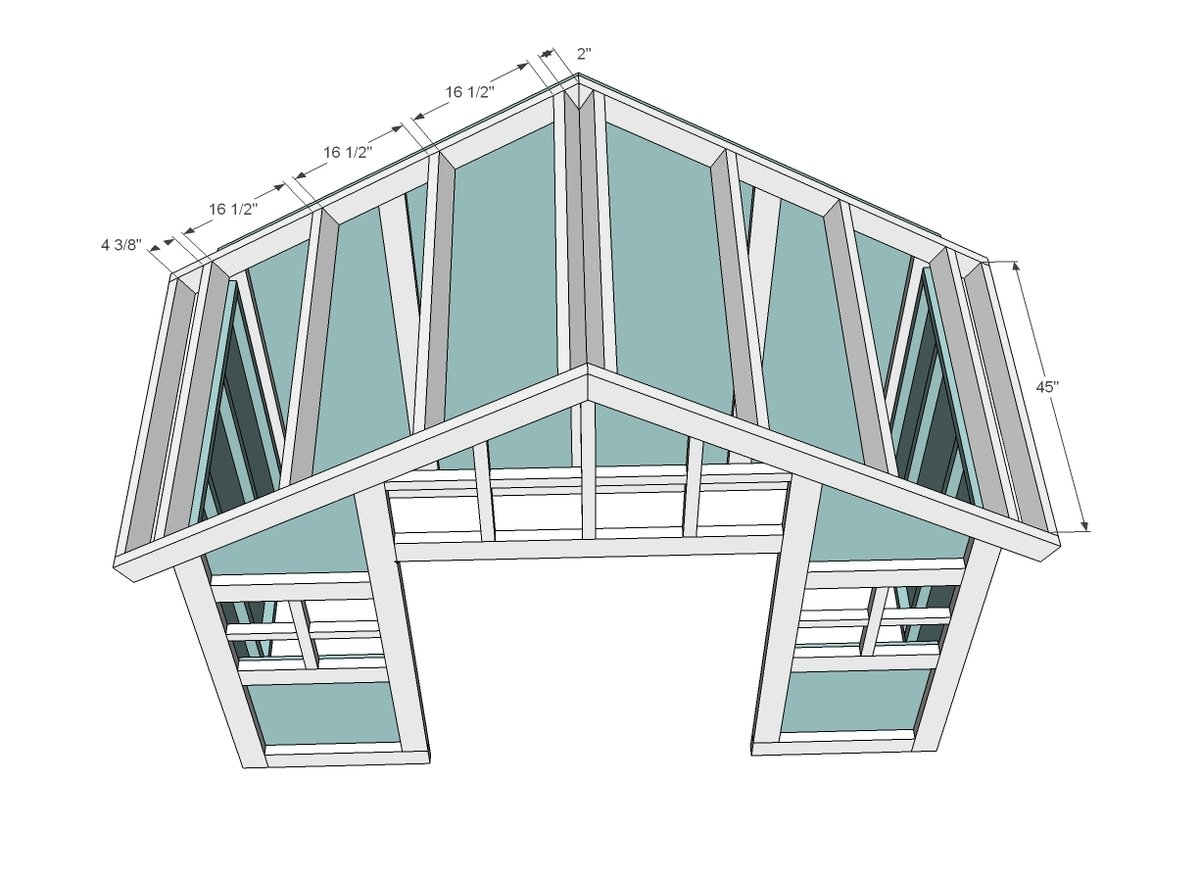
Once all the walls were built, we attached the front and back walls to the side walls to create the walls of the playhouse. Then we added rafters to make the roof. RAFTERS • 10 – 2x4 @ 45”
Step 5
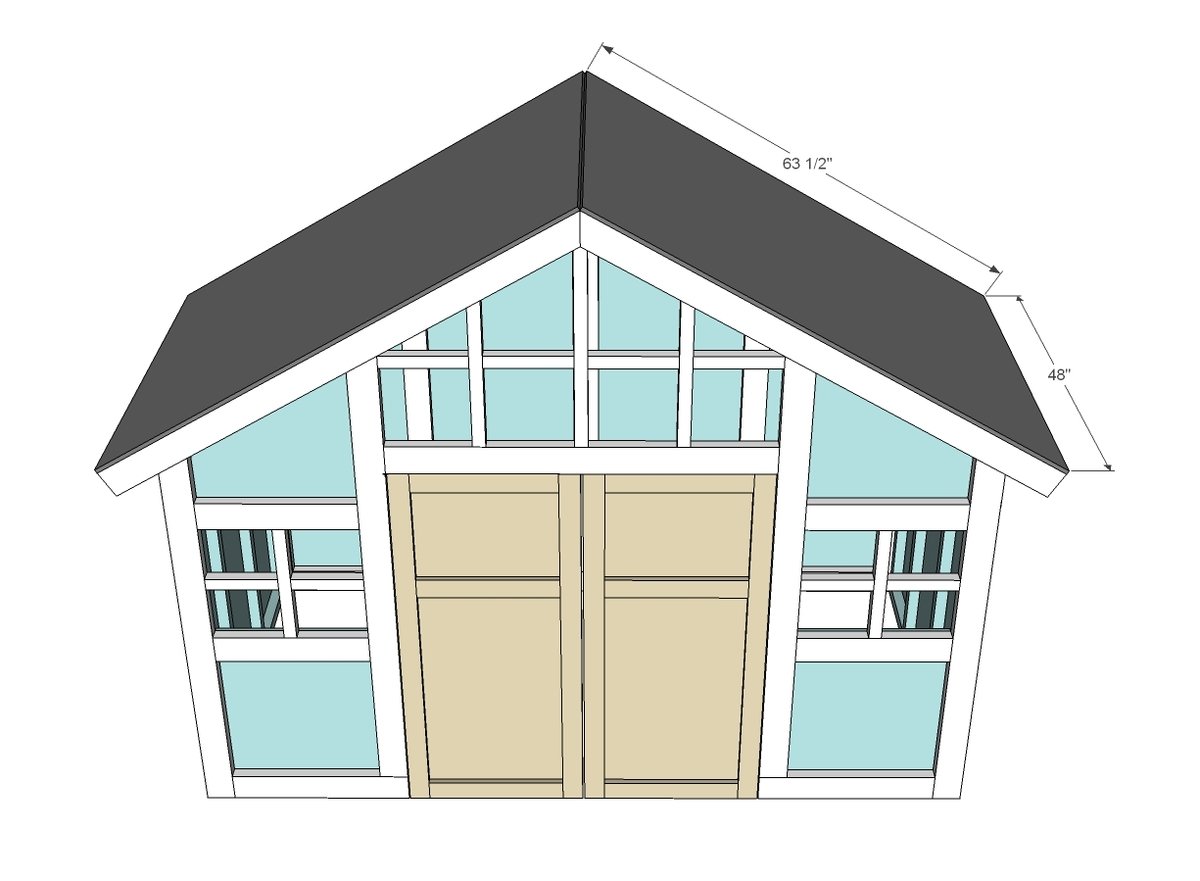
Attach roof plywood to top.
Step 6
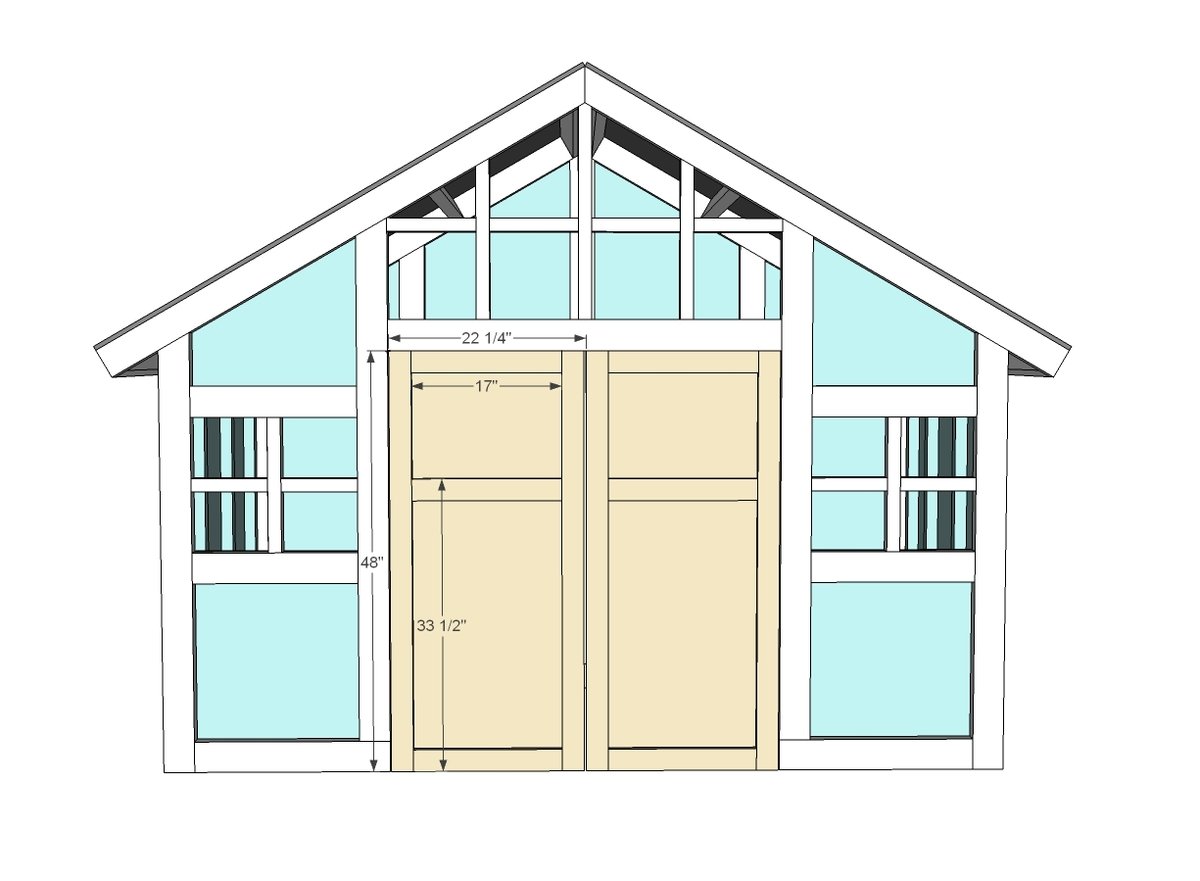
DOORS - BUILD TO YOUR OPENINGS. We recommend leaving generous gaps around the doors to prevent finger pinching. • 4 – 1x3 @ 48” • 6 – 1x3 @ 17” • 2- ½” plywood @ 22 ¼” x 48” We built the doors out of 1x3s and added the 3/8" plywood to the back. If your roof plywood is 3/4" thick, you could just use the slabs as doors. Also, later on we ended up trimming 2" off the bottoms of the doors just so they open easy and no toes get scraped underneath the door.
Finishing
Sand all surfaces, starting with a medium grit and finishing with fine. Wipe off the dust, fill any holes or gaps with wood filler, and sand smooth once dry. Apply primer if you're painting, then finish with your choice of paint or stain and seal with a durable clear topcoat. For outdoor projects, use exterior-rated primer, paint or stain, and sealer so the piece stands up to the weather.
Source (temporary): https://www.ana-white.com/woodworking-projects/craftsman-style-playhouse