Cubby Bookcases Modular Office Collection
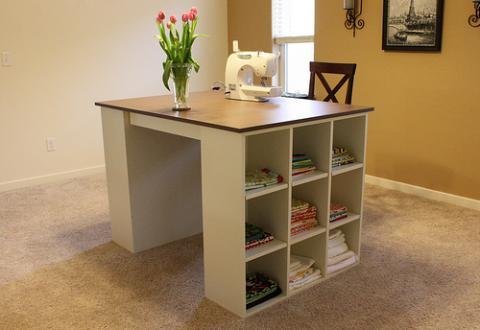
Cubby bookshelves are so popular because they enable you to further sort and organize your belongings. No longer do you need bookends and even baskets and bins become optional. This cubby bookshelf works with the craft table top to create a project table. It's the best of both worlds - ample workspace and easy storage. Build the cubby bookshelves alone or add the project tabletop for even more functionality.
Specifications
| Project type | Media and Entertainment Centers |
|---|---|
| Room | Storage Solutions |
| Style | Cottage Style Furniture Plans |
| Difficulty | Beginner Projects |
| Estimated cost | $50 - $100 |
Dimensions
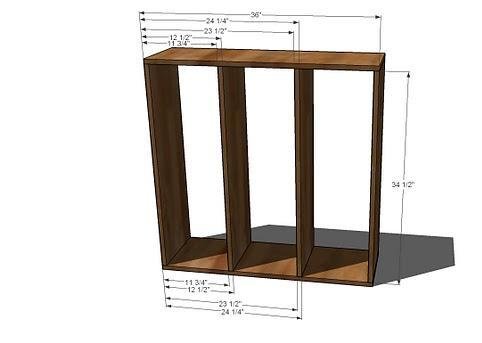
Use the size-specific shopping and cut lists below.
Shopping List
(This shopping list is for only one bookshelf)
3 - 1x12(8')
1 - 1/4" plywood (1/2 sheet)
1 -1x2 (8')
Cut List
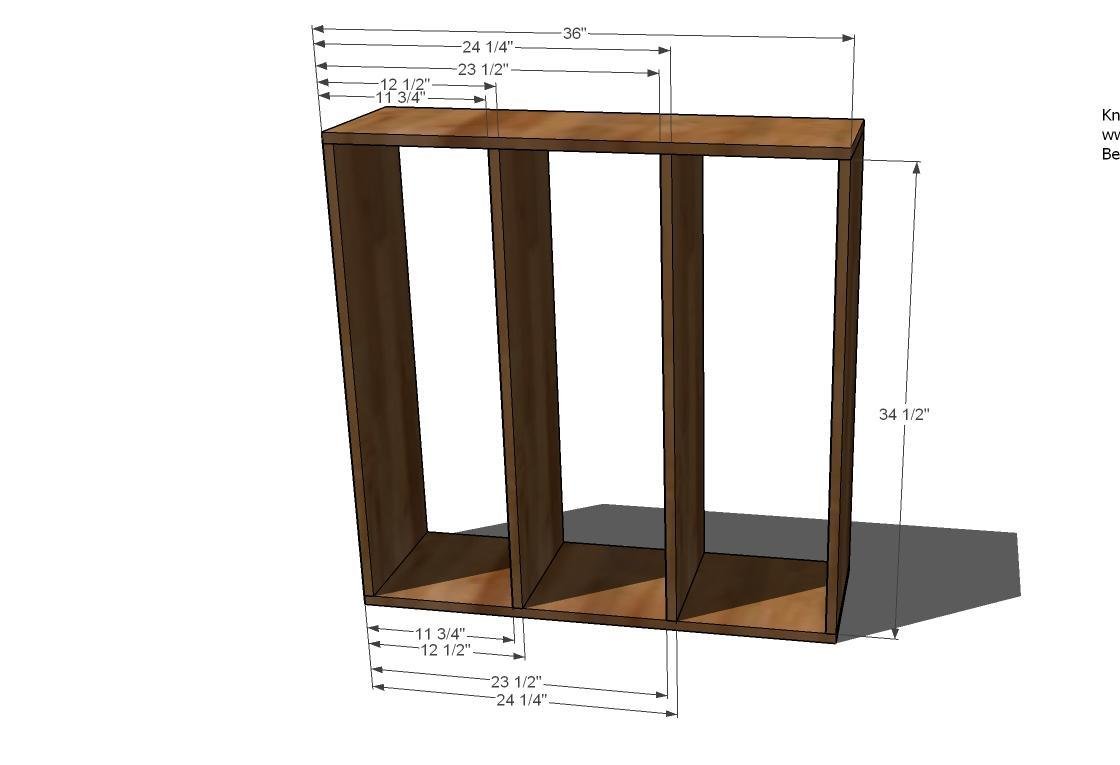
- 2 – 1×12 @ 36″ (Top and Bottom)
- 4 – 1×12 @ 34 1/2″ (Vertical Dividers)
- 6 – 1×12 @ 11″ (Shelves)
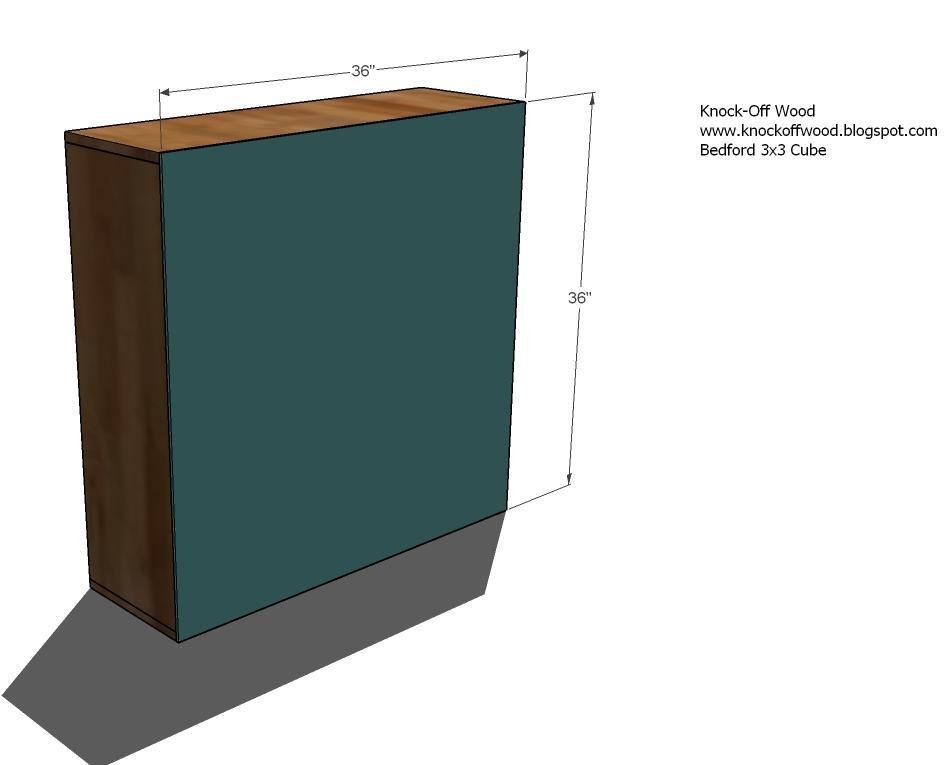
- 1 – 36″ x 36″ 1/4″ Plywood (Back)
- 6 – 1×2 @ 11″ (Inside Supports)
Tools
- measuring tape
- square
- pencil
- hammer
- safety glasses
- hearing protection
- kreg-jig
- drill
- sander
Step-by-step Instructions
Step 1
Build the Box. Fasten the vertical dividers to the tops and bottoms as directed above. Screws will hold better, nails are easier. If you use screws, predrill and countersink your screw heads. Use 2″ fasteners and glue. Check for square.
Step 2
Back. Attach the back, making sure to fasten to the vertical dividers. Use the 1 1/4″ nails and glue. Check for square.
Step 3
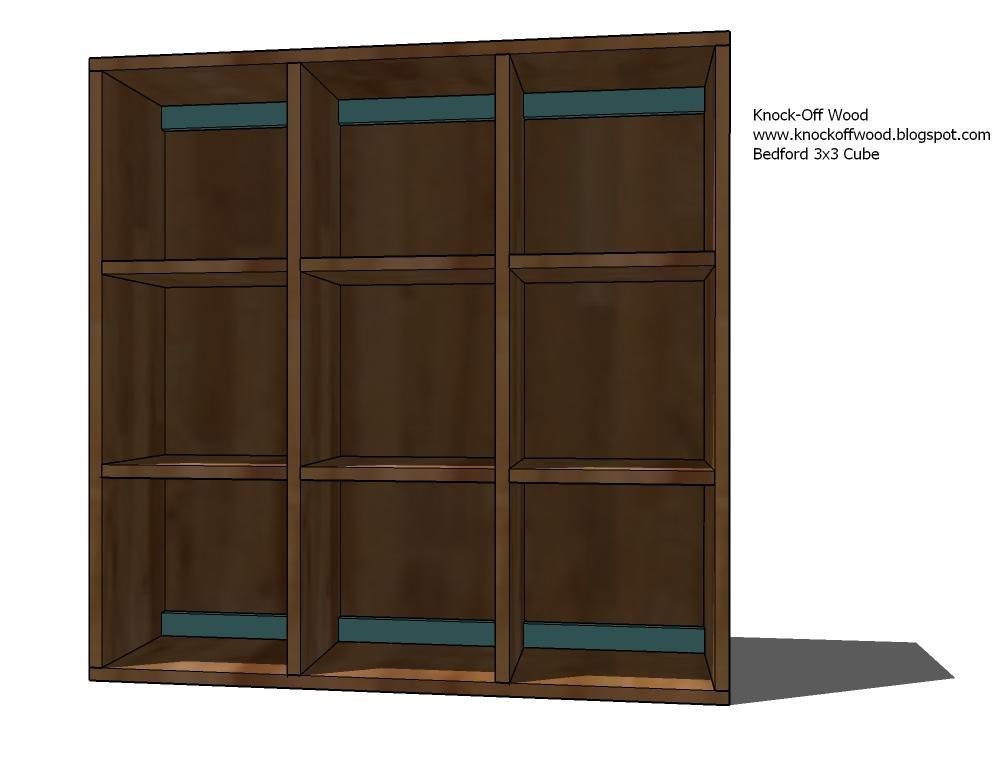
Inside Supports. Fasten the inside supports through the tops and bottoms using glue and 2″ fasteners. Also fasten through the sides into the ends. These supports will keep everything square and give you something to fasten the project table top to.
Step 4
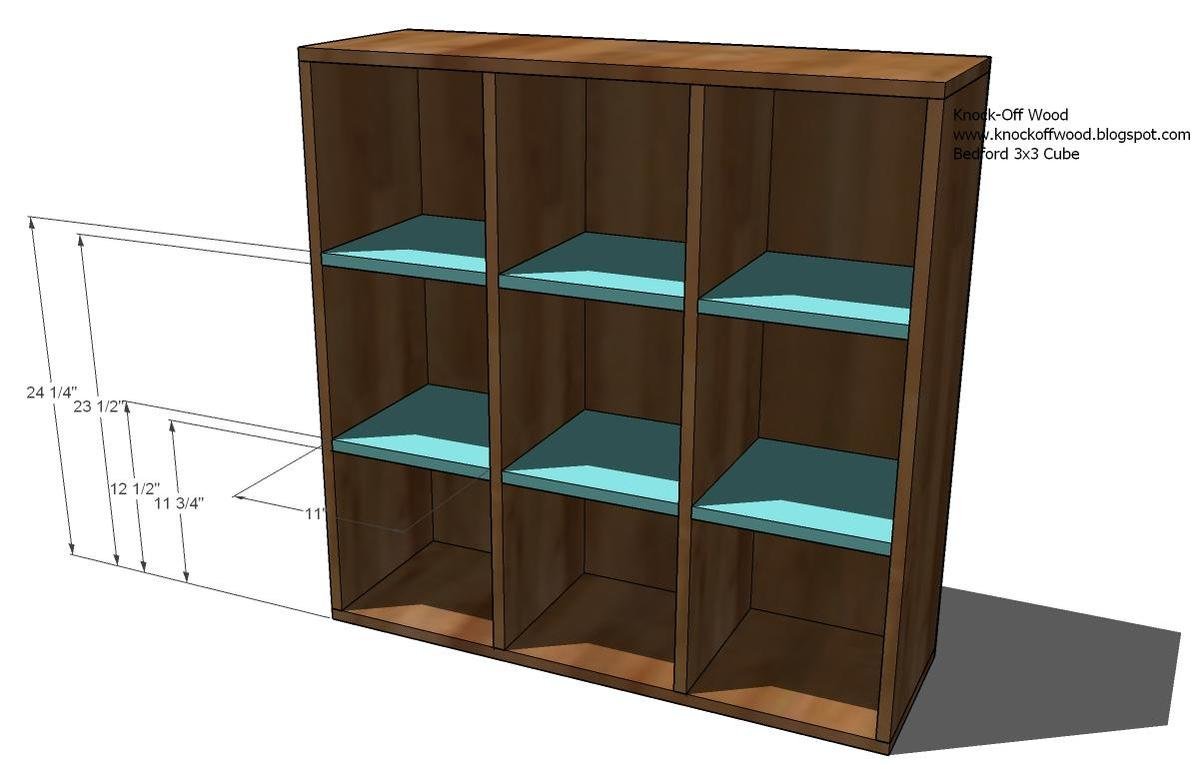
Shelves. Measure and add shelf pins where the shelves are marked above. Notice the first Pottery Barn photo – the shelves in this system are removable. Fit the shelves on the shelf pins.
Finishing
Sand all surfaces, starting with a medium grit and finishing with fine. Wipe off the dust, fill any holes or gaps with wood filler, and sand smooth once dry. Apply primer if you're painting, then finish with your choice of paint or stain and seal with a durable clear topcoat. For outdoor projects, use exterior-rated primer, paint or stain, and sealer so the piece stands up to the weather.
Source (temporary): https://www.ana-white.com/woodworking-projects/cubby-bookcases-modular-office-collection