Cubby Desk and Hutch
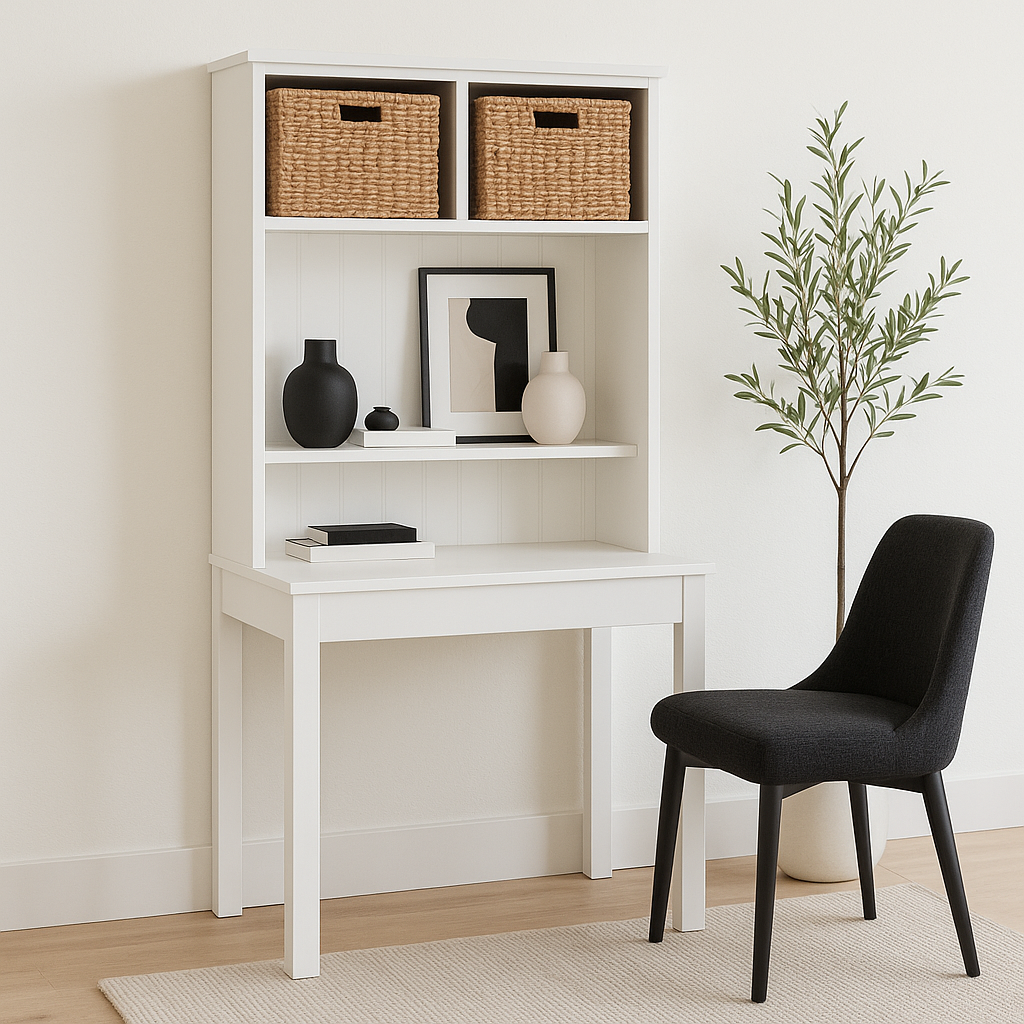
DIY Desk with Hutch Create a beautiful and functional desk with hutch using. This project combines a simple writing desk with a tall storage hutch, giving you both workspace and display space in one compact design. Built from basic lumber and straightforward cuts, this project is budget-friendly and completely customizable. Add baskets for hidden storage, style with books and décor, or leave it clean and minimal — the design works perfectly in bedrooms, home offices, or even entryways. Why Build This Project? • – Easy-to-follow instructions included • Beginner-Friendly Build – Perfect for DIYers with basic tools • Smart Storage – Hutch provides open shelving and optional basket storage • Customizable Look – Paint, stain, or style to fit your home décor • Affordable – Built with standard boards and simple joinery Whether you’re looking for a kid’s study station, a compact home office solution, or a stylish storage piece, this DIY desk with hutch is a project you’ll be proud to build and use. Design image rendered from plans, actual reader photos
Specifications
| Project type | Desk, Desk Systems and Project Table Plans |
|---|---|
| Room | Kids and Toys |
| Style | Children's and Kid's Room Furniture and Toy Plans |
| Difficulty | Intermediate |
| Estimated cost | $50 - $100 |
Dimensions
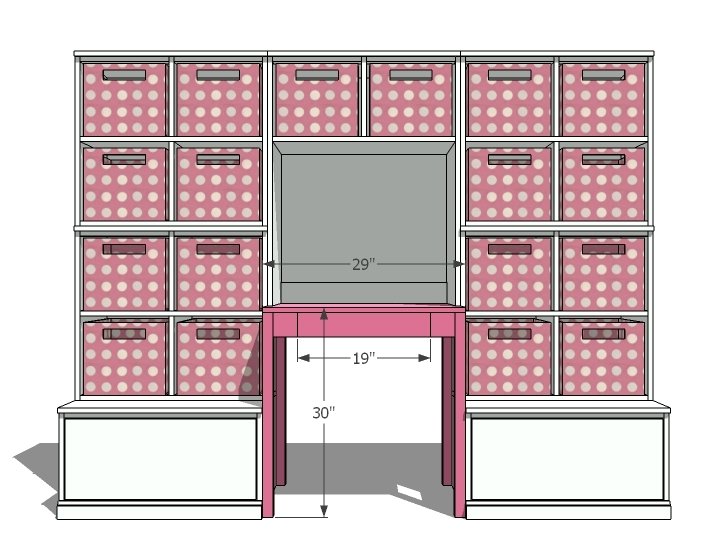
Use the size-specific shopping and cut lists below.
Shopping List
For the Desk:
- Scrap 1/4" plywood for drawer bottom
- 3/4" plywood for top
- 1 - 1x4 @ 8 feet long
- 1 - 2x4 @ 8 feet long
- 2 - 2x2 @ 8 feet long
- Full Extension Style Drawer Slides
- Knob or handle
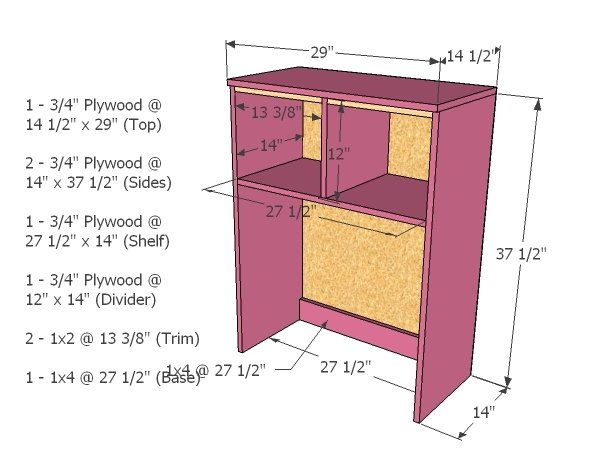
For Hutch see in plan
Cut List
- 1 - 1x4 @ 26"
- 2 - 1x4 @ 18 3/4"
- 2 - 2x4 @ 18"
- 1 - 3/4" Plywood @ 21" x 29"
- 2 - 1x4 @ 3 1/2"
- 4 - 2x2 @ 29 1/4"
- Cut drawer to fit from 1x3s
Tools
- measuring tape
- square
- pencil
- safety glasses
- hearing protection
- kreg-jig
- drill
- circular saw
- nailer
- sander
- staple gun
- level
- countersink drill bit
Step-by-step Instructions
Step 1
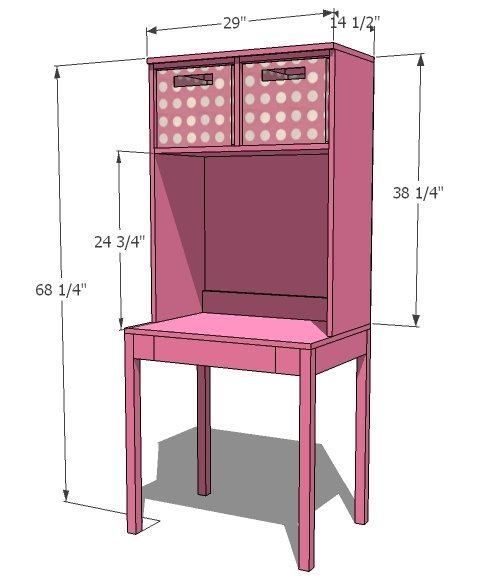
Dimensions for just this plan.
Back Aprons
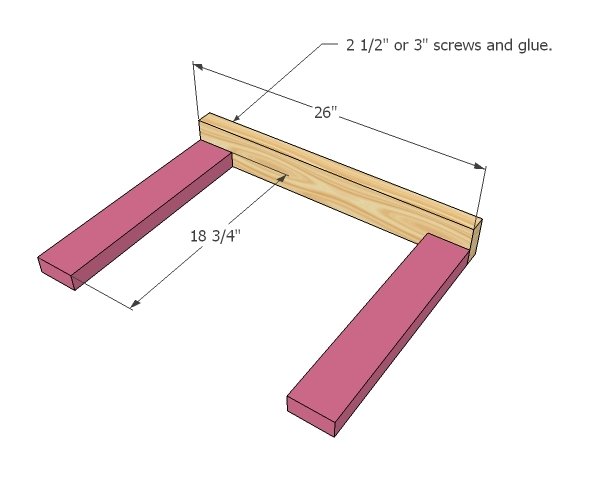
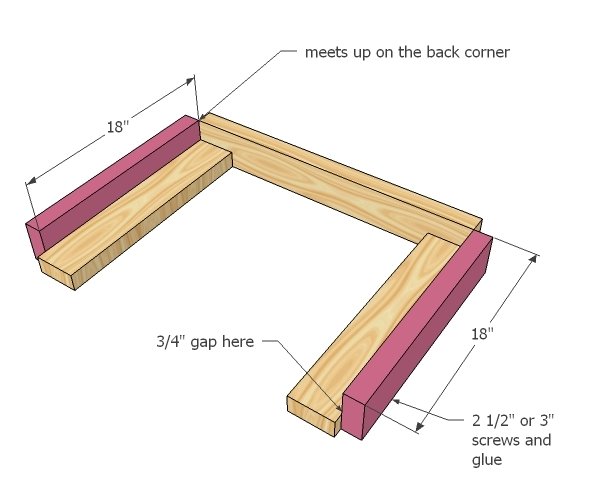
Start by screwing the cleats to the back apron with glue and 2 1/2″ or 3″ screws. Predrill your screw holes to keep wood from splitting with a countersink bit.
Side aprons
Now screw the side aprons to the cleats.
Top
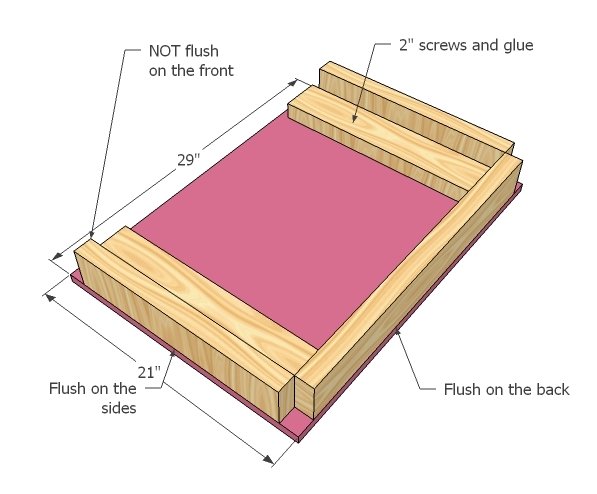
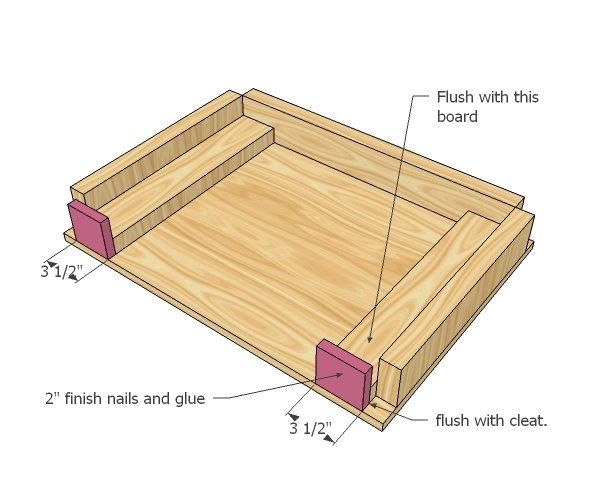
Glue the top to the frame, keeping back and side edges flush. Use 2″ screws to screw the cleats to the tabletop. You can finish the tabletop edges with iron on edge banding for a solid wood look, or use MDF for paint grade.
Step 5
Legs
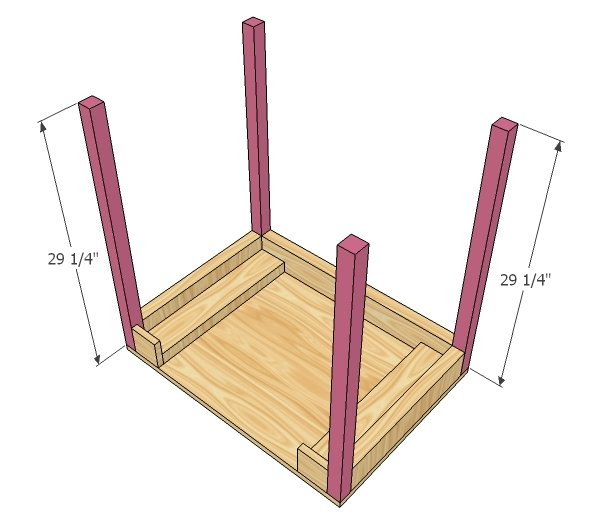
Now just add the legs with the 2 1/2″ or 3″ screws and glue. Now it’s time to do the drawer.
Drawer Box
Build the drawer box with 2″ screws and glue to fit the opening, leaving 1/2" gap on either side of the drawer for drawer slide allowance. Good time to add dividers if you would like. Dividers should be cut from the 1x3s and will add strength and functionality to the drawer.
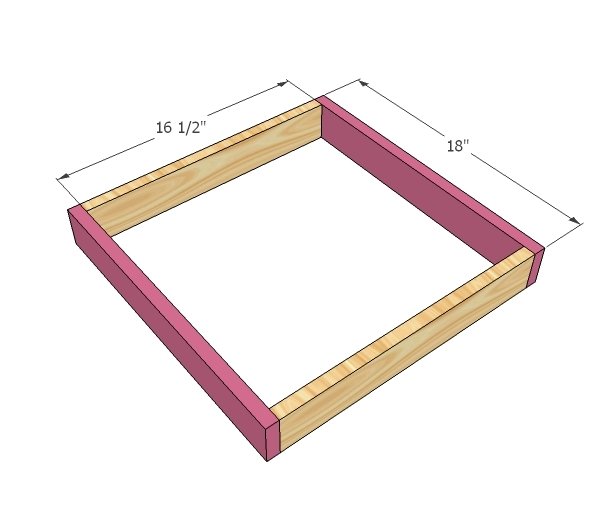
Drawer Bottom
Now add the drawer bottom with 2″ screws and glue.
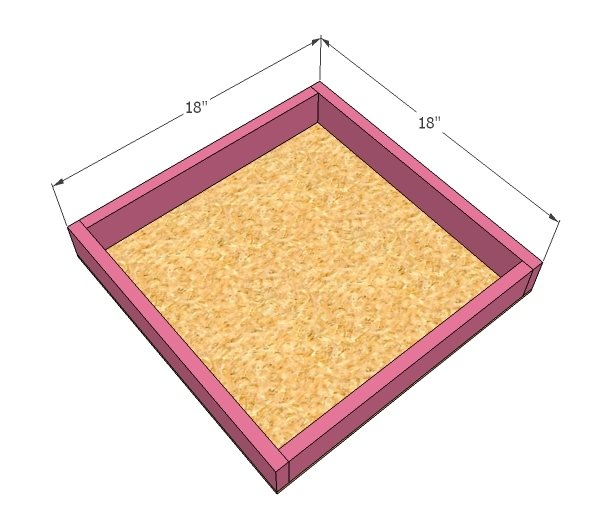
Mount Drawer
Mount the drawer into the desk. Notice how the drawer is inset 3/4″ from the front of the desk.
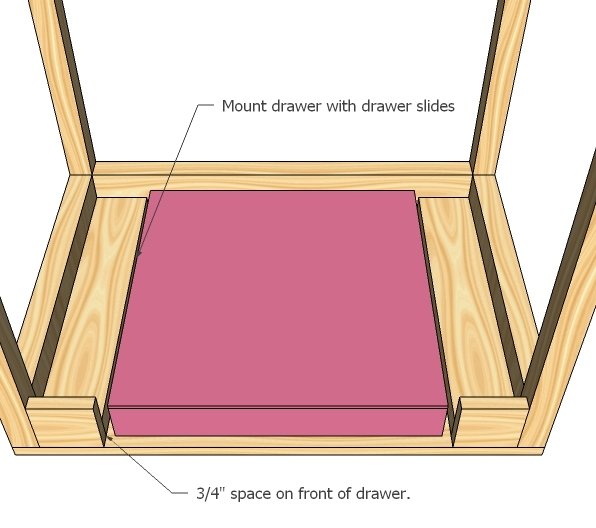
Drawer Face
Now line the drawer face up with the drawer and nail on with finish nails and glue. Add knob or handle.
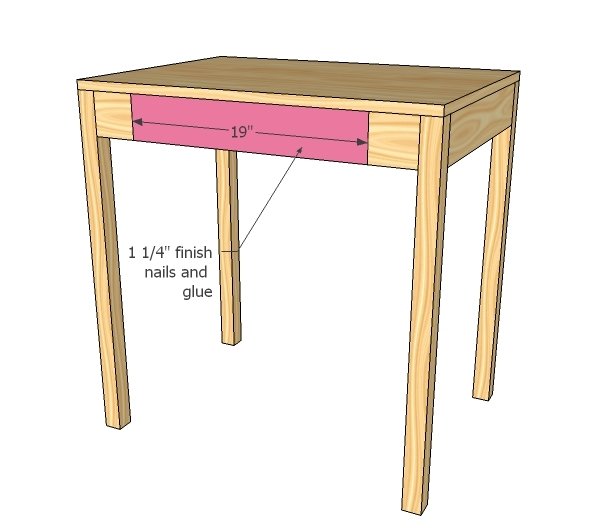
Hutch
For the hutch, consult the cubby hutch plans for full instructions.
Finishing
Sand all surfaces, starting with a medium grit and finishing with fine. Wipe off the dust, fill any holes or gaps with wood filler, and sand smooth once dry. Apply primer if you're painting, then finish with your choice of paint or stain and seal with a durable clear topcoat. For outdoor projects, use exterior-rated primer, paint or stain, and sealer so the piece stands up to the weather.
Source (temporary): https://www.ana-white.com/woodworking-projects/cubby-desk-and-hutch