Cube CPU Cart
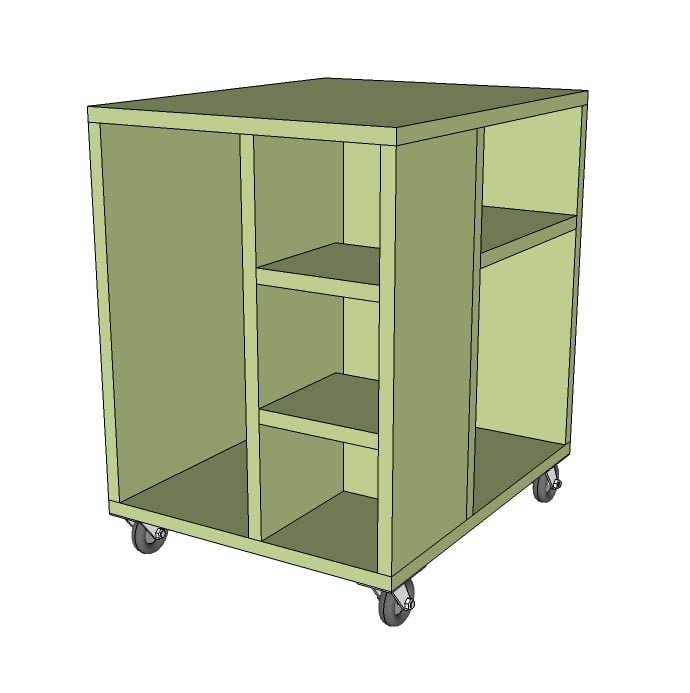
Roll this cute and functional CPU Cube cart under your desk to store CPU and other office items in style. Also could be used as an end table or even nightstand.
Specifications
| Project type | Side and End Table Plans |
|---|---|
| Room | Teens |
| Style | Cottage Style Furniture Plans |
| Difficulty | Beginner Projects |
| Estimated cost | $20 - $50 |
Dimensions
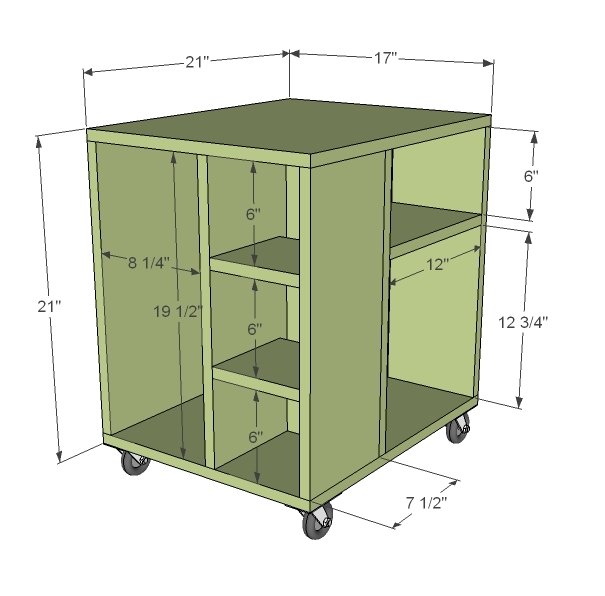
Use the size-specific shopping and cut lists below.
Shopping List
1 – 1/2 Sheet of 3/4″ thick MDF or Plywood 1 – 1×8 @ 8 feet long 4 Caster Wheels 2″ screws or 1 1/4″ pocket hole screws wood glue wood filler paint and finishing supplies
Cut List
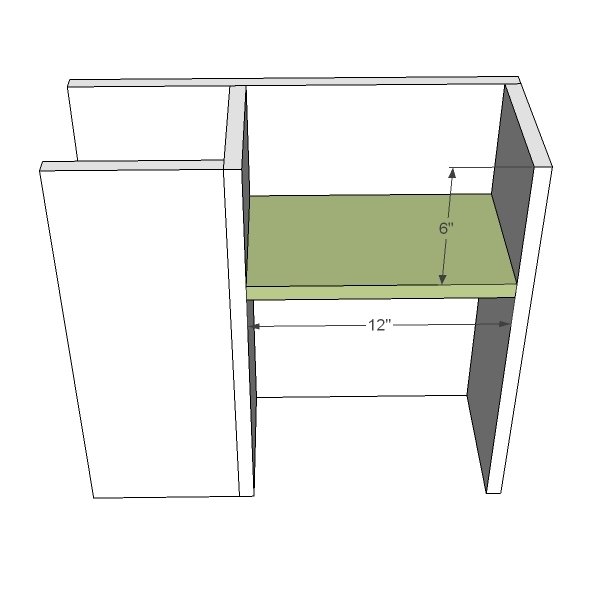
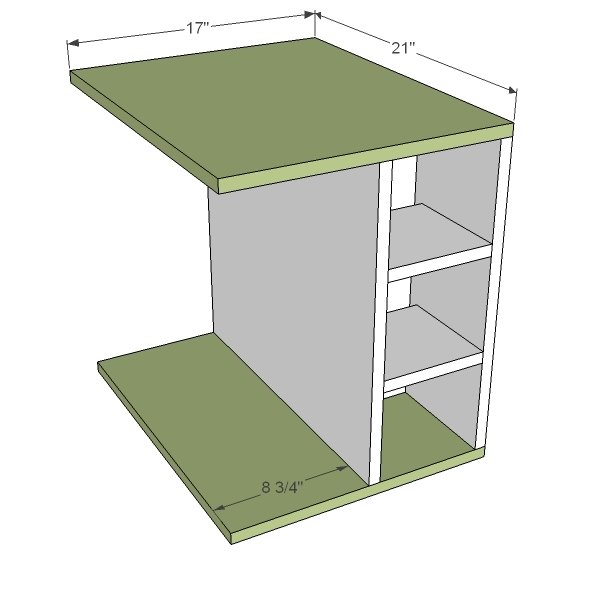
3 – 1×8 @ 19 1/2″ (Cubby Partitions) 2 – 1×8 @ 6 3/4″ (Cubby Shelves) 2 – 3/4″ plywood or MDF @ 19 1/4″ x 21″ (partitions and side) 1 – 1×8 @ 12″ (Long Shelf) 2 – 3/4″ plywood or MDF @ 17″ x 21″ (top and bottom)
Tools
- measuring tape
- square
- pencil
- hammer
- safety glasses
- hearing protection
- kreg-jig
- drill
- circular saw
- sander
Step-by-step Instructions
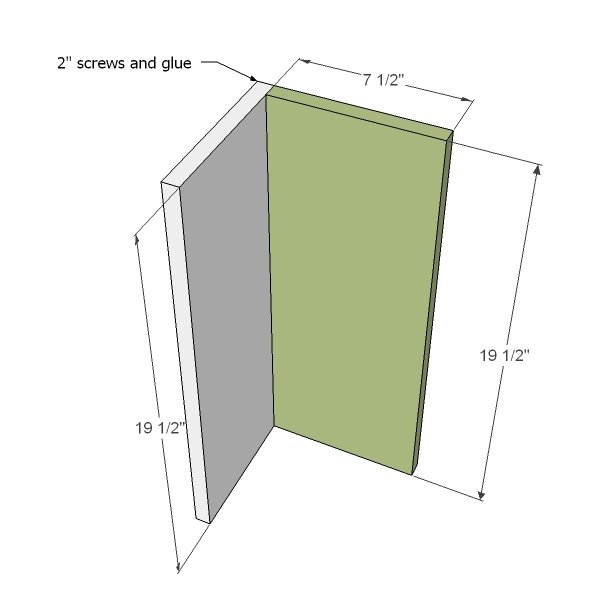
Screw 2 1x8s Together
Screw 2 of the 1×8 boards @ 19 1/2″ long together. Either use 2″ screws countersunk and glue or pocket hole screws.
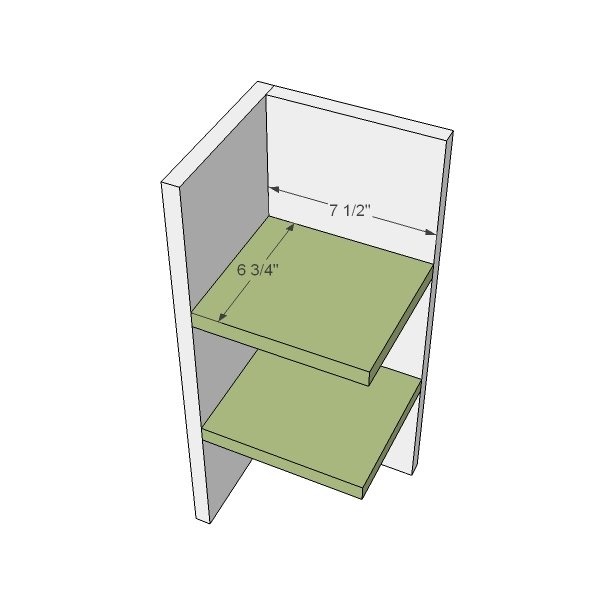
Cubby Shelves
Mark the boards from step 1 on the insides down and up 6″ from the bottom and top. Then place your shelves and screw in place.
Center Partition
Attach the center partition to the cubbies as shown above.
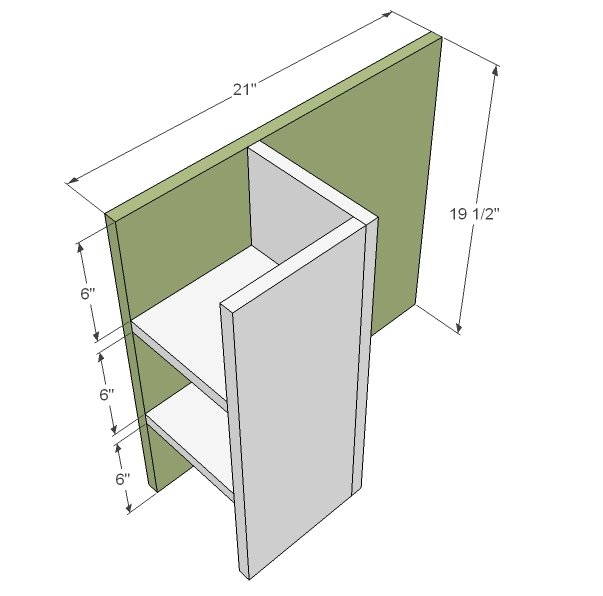
Back
And add the remaining 1×8 board to the back. Well, I take that back. There is one more...
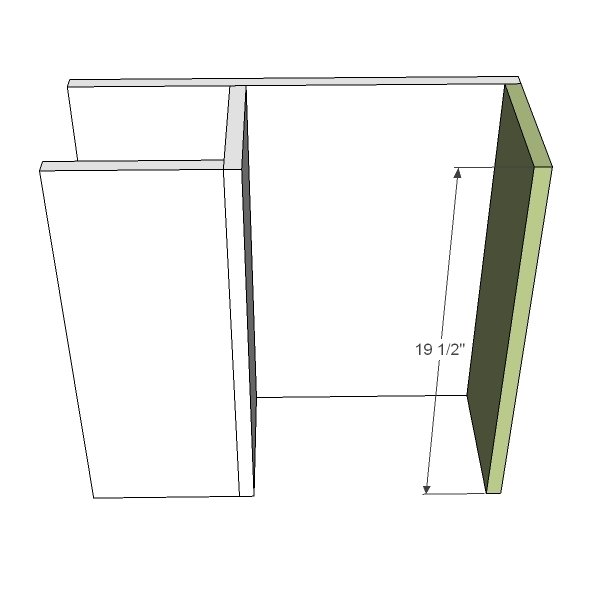
Step 5
Top and Bottom
Attach the top and bottom to the shelves as shown above. Keep flush to the shelf side.
Final Side
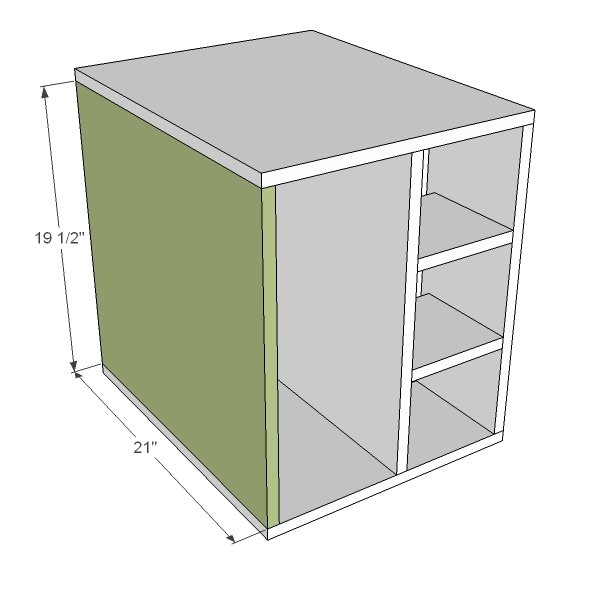
Attach the last remaining side as shown above. Use glue and 2″ screws or 1 1/4″ pocket hole screws.
Caster Wheels
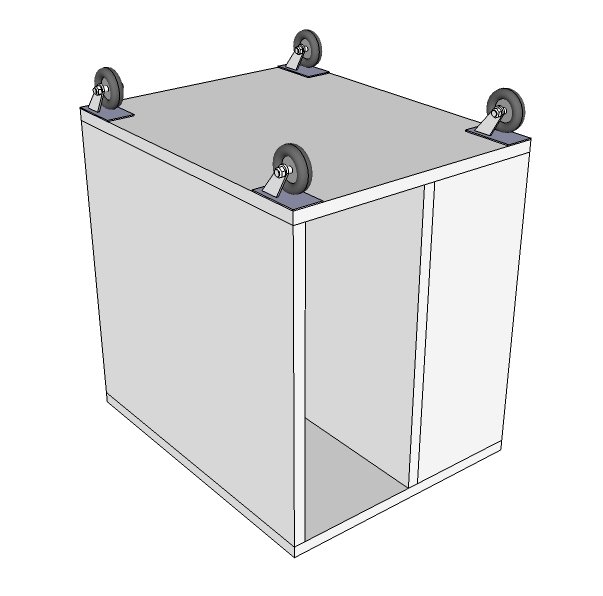
Finish with the caster wheels. If your wheels do not come with screws, you may need to purchase appropriately sized screws. Keep the screws under 3/4″ long to prevent your screws tips from poking out. Fill all holes with wood filler. Let dry and sand and finish as desired. BTW does anyone else think this could double as a modern style end table?
Finishing
Sand all surfaces, starting with a medium grit and finishing with fine. Wipe off the dust, fill any holes or gaps with wood filler, and sand smooth once dry. Apply primer if you're painting, then finish with your choice of paint or stain and seal with a durable clear topcoat. For outdoor projects, use exterior-rated primer, paint or stain, and sealer so the piece stands up to the weather.
Source (temporary): https://www.ana-white.com/woodworking-projects/cube-cpu-cart