Cupcake Tiered Display Stand
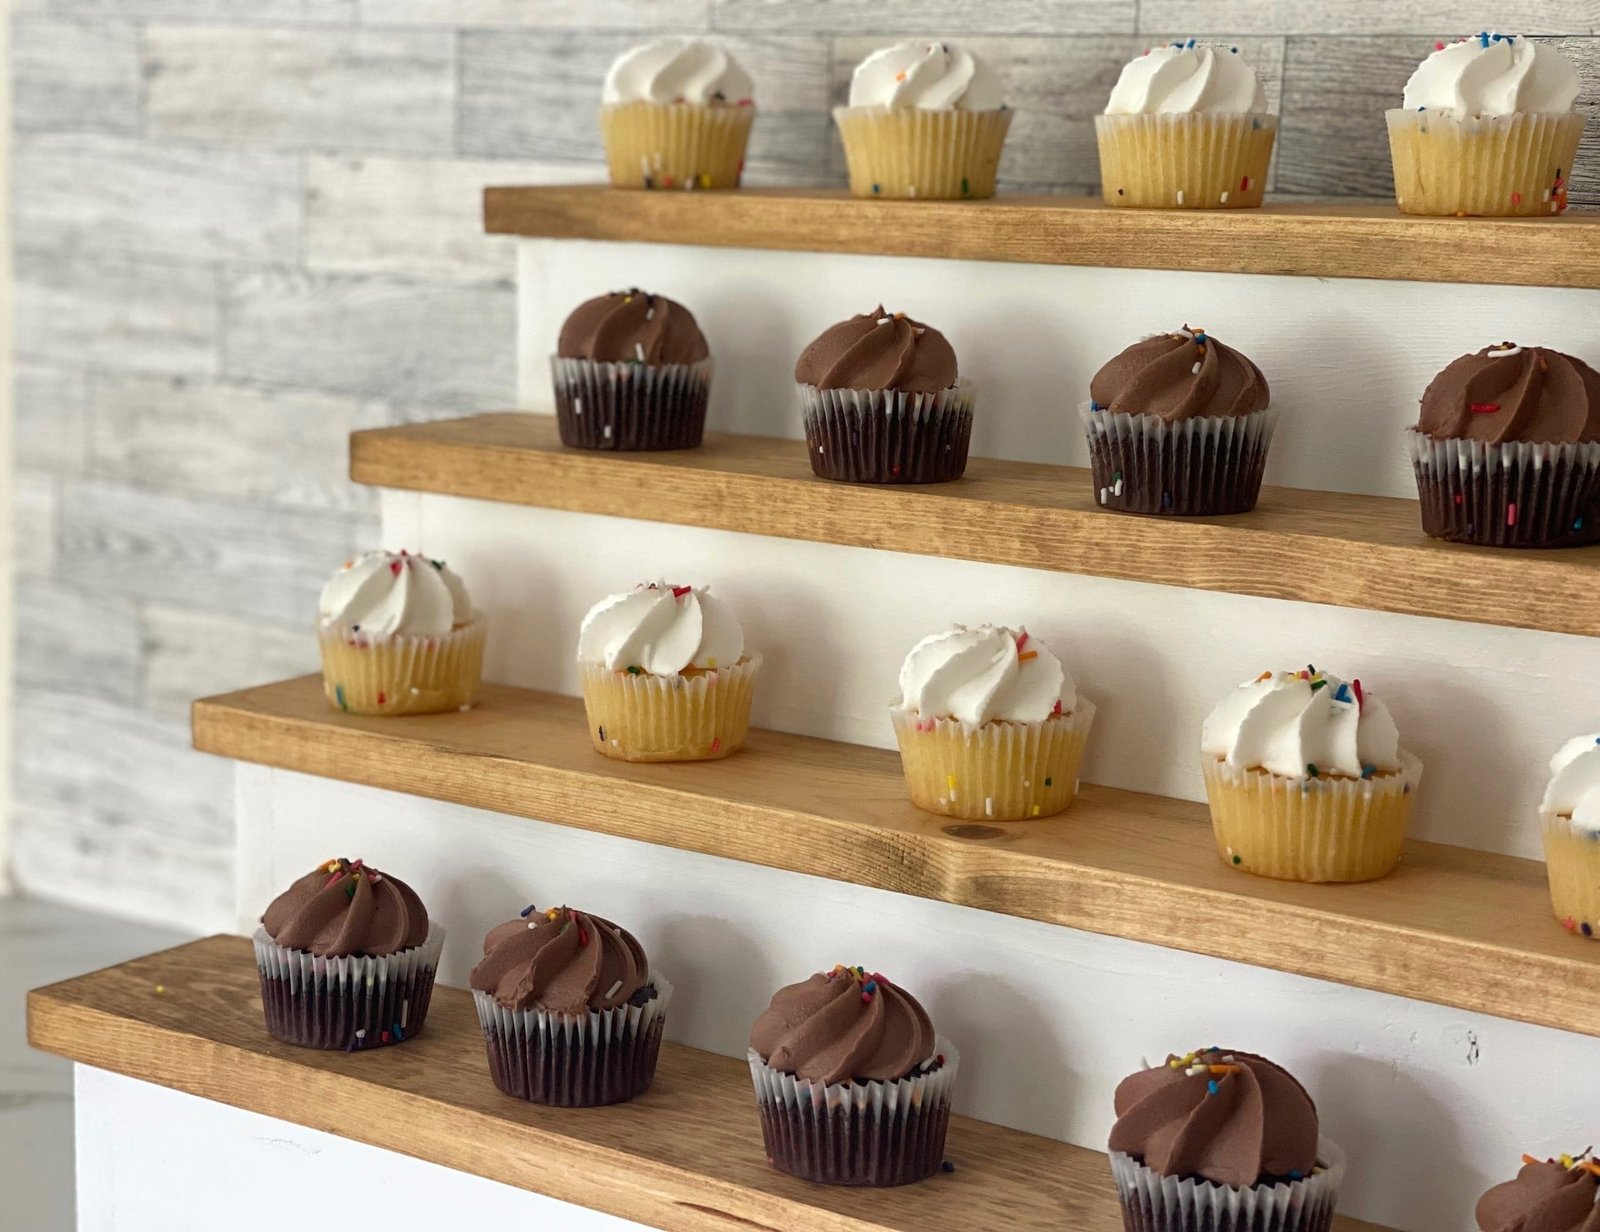
to build your own cupcake display stand. This cupcake stand featured a stepped design, serving as both a beautiful wood grained backdrop for your desserts and a functional serving center. Can be made in any length. from
Specifications
| Project type | Kitchen Cabinet Plan, Accessories and Serving |
|---|---|
| Room | Parties and Events |
| Difficulty | Starter Projects |
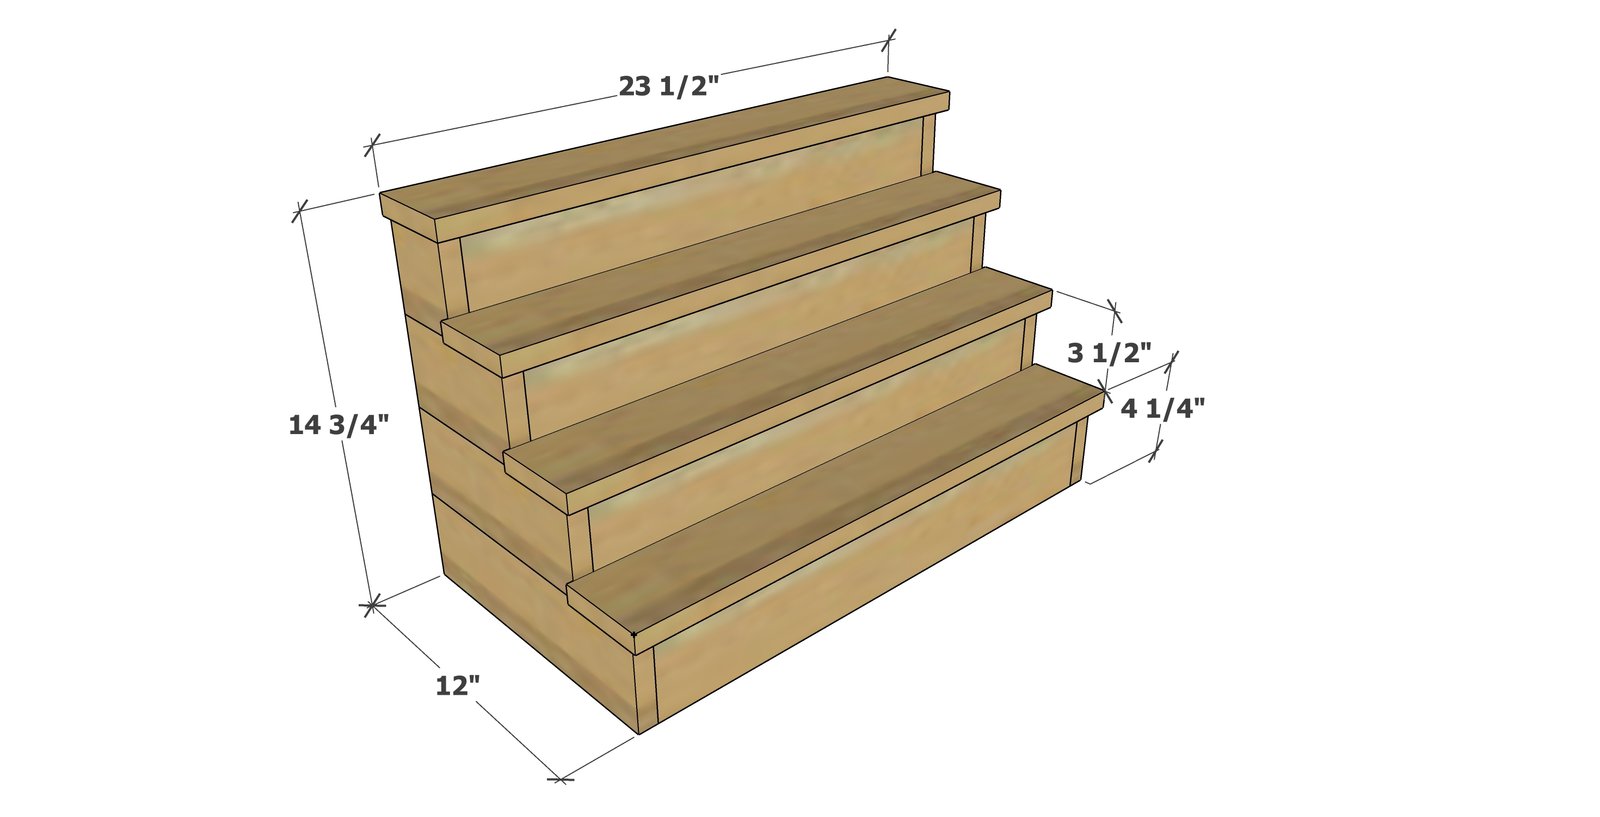
Dimensions
Use the size-specific shopping and cut lists below.
Shopping List
3 - 1x4 @ 8 feet long
1-1/4" brad nails
wood glue
wood stain
wood filler
Cut List
2 - 1x4 @ 3"
2 - 1x4 @ 6"
2 - 1x4 @ 9"
2 - 1x4 @ 12"
4 - 1x4 @ 21-1/2"
4 - 1x4 @ 23-1/2"
Tools
- measuring tape
- pencil
- safety glasses
- compound miter saw
- nailer
- sander
Step-by-step Instructions
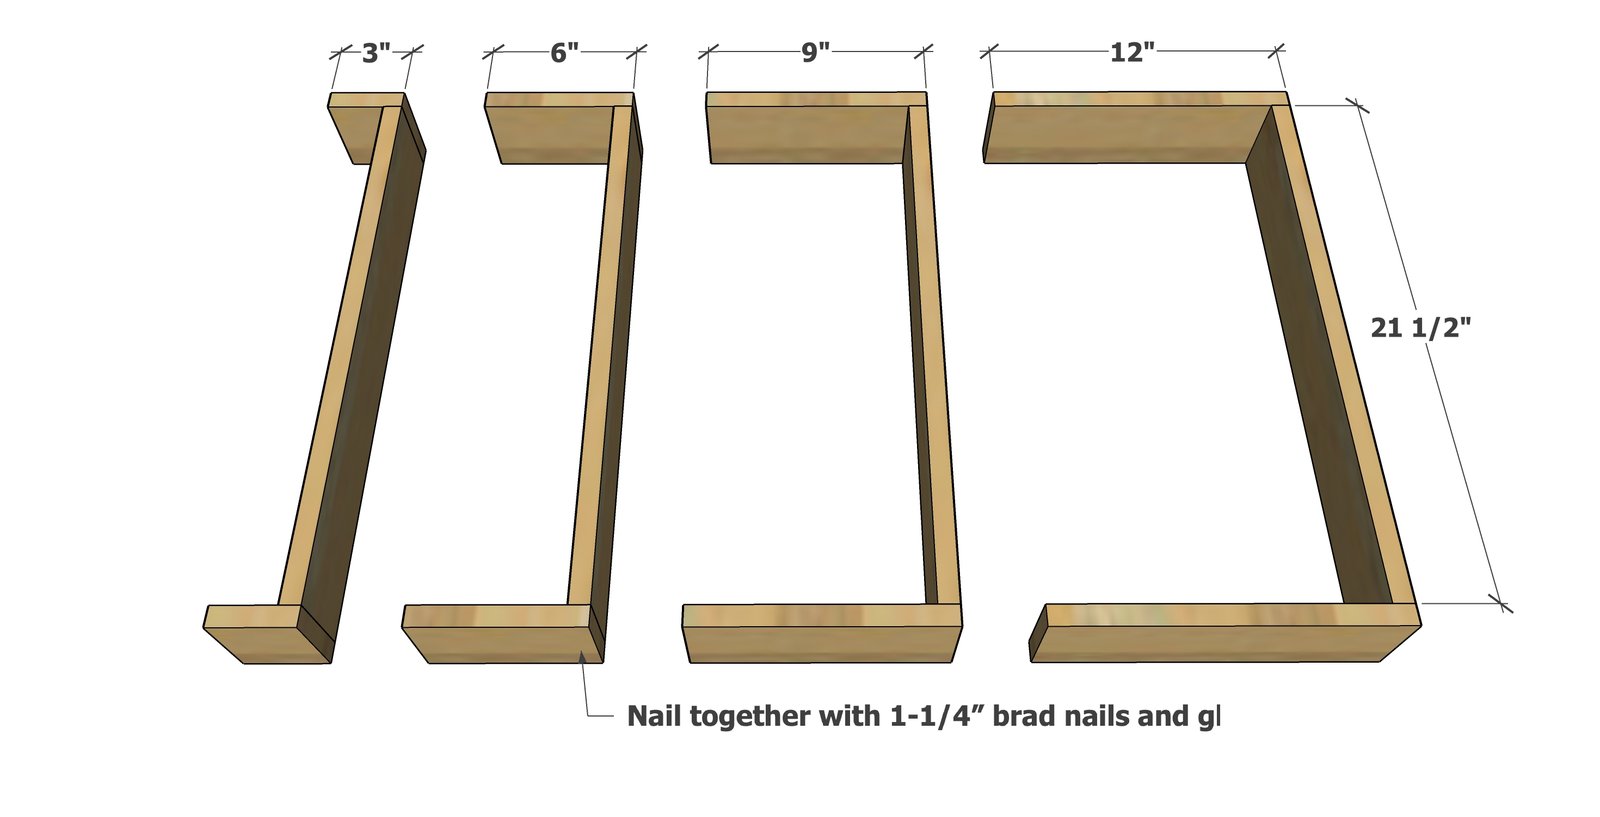
Attach the bases together with three 1-1/4" brad nails and glue per corner.
Adjust for square.
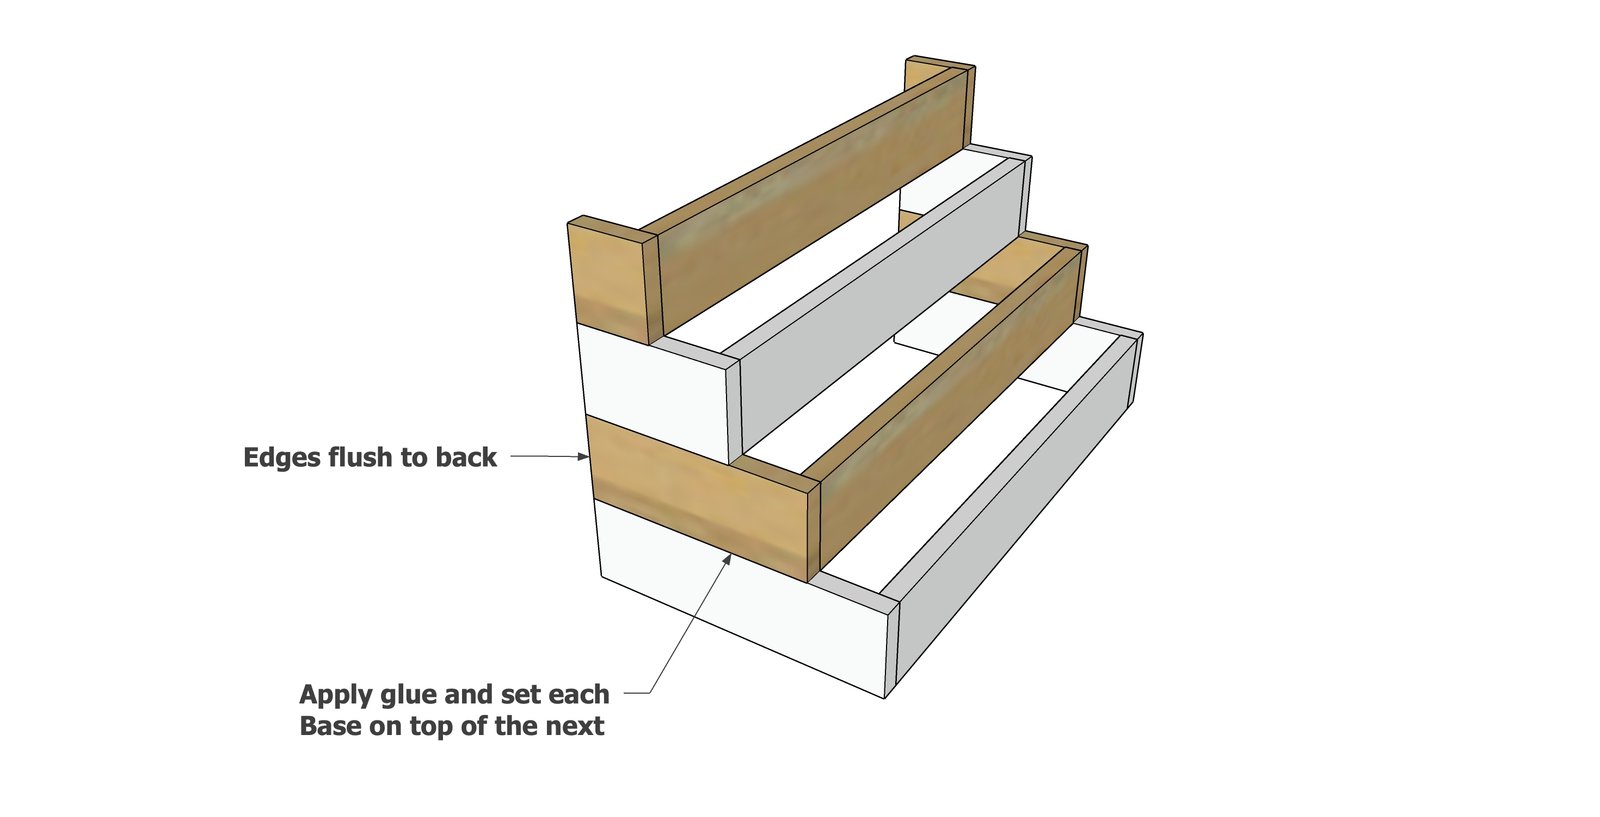
Apply glue to the top edges of the biggest base.
Set the next biggest base on top. Repeat for the next two bases. Make sure the sides are flush at the back and lined up.
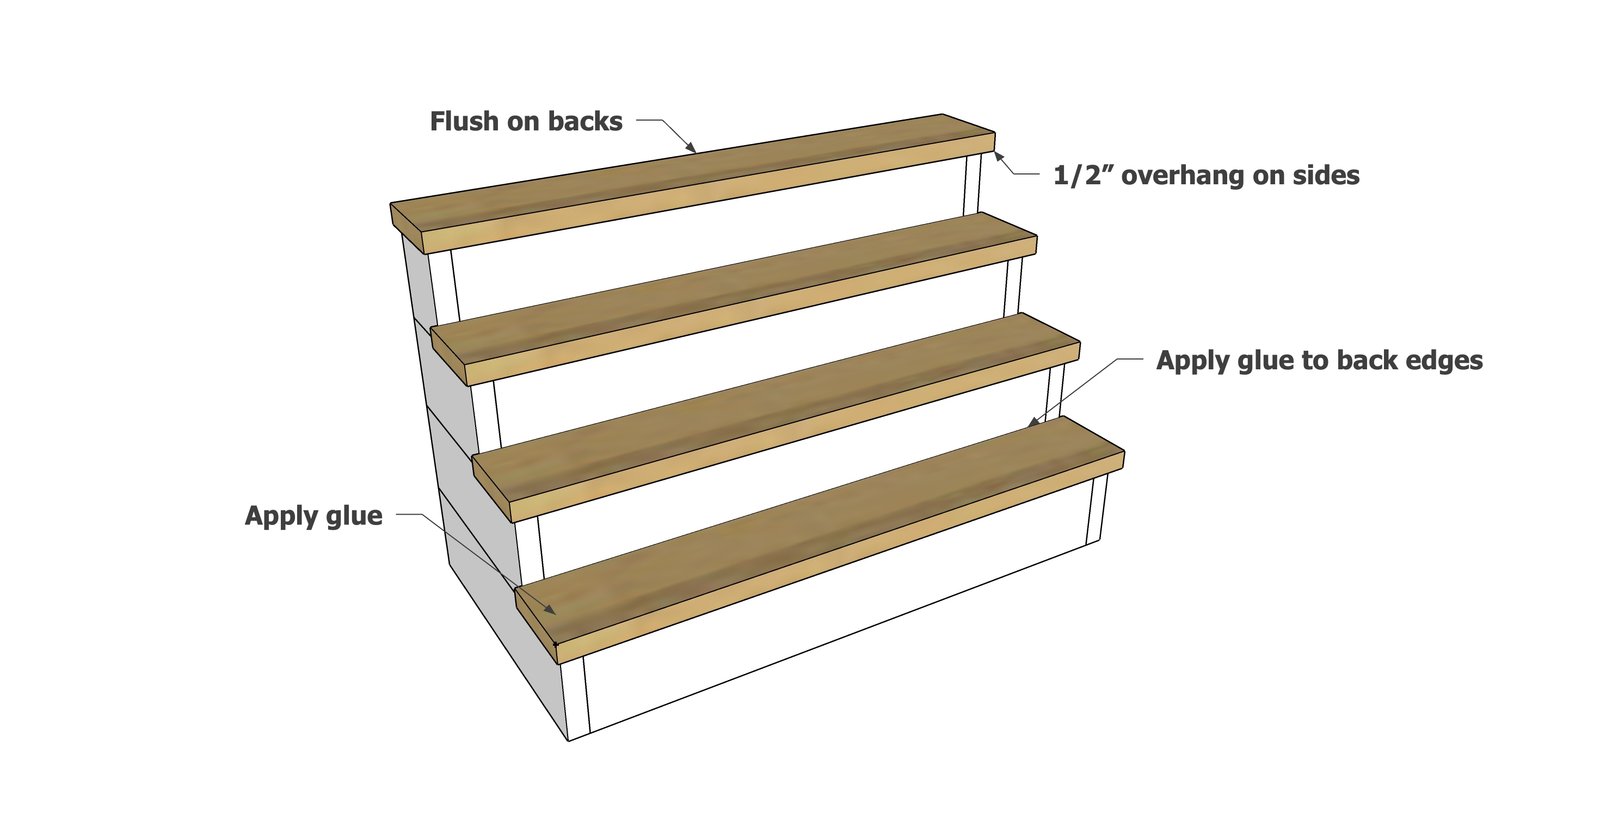
Apply glue to the back edges of the "treads"
Set treads on top of the bases, with even overhangs on the sides and flush to the backs. Attach treads with 1-1/4" brad nails and wood glue.
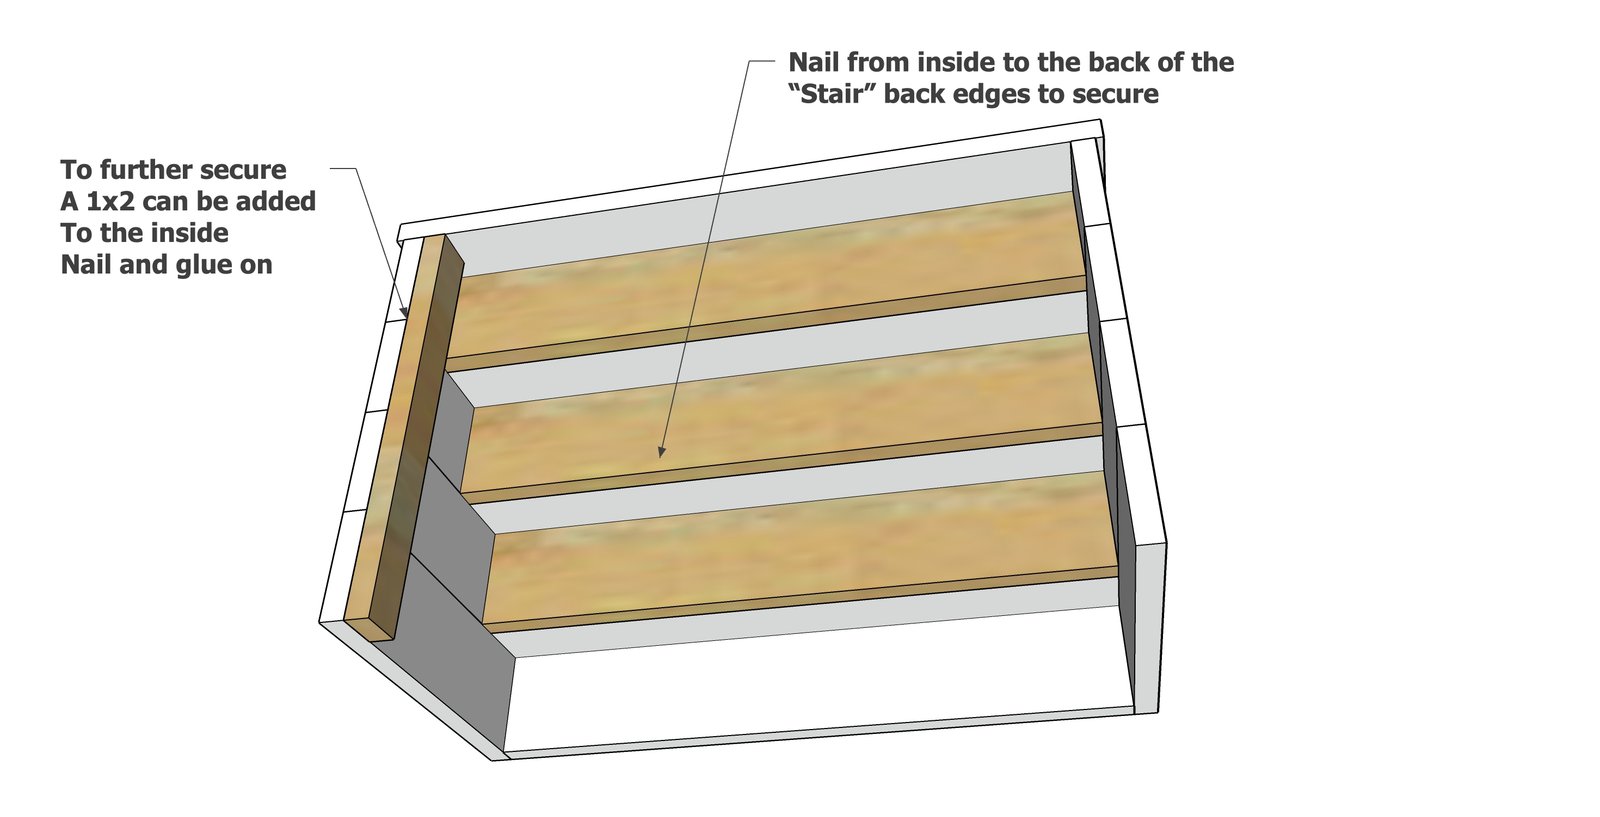
From the back, further secure the treads with 1-1/4" brad nails and wood glue.
An optional 1x2 can be added for additional support.
Finishing
Sand all surfaces, starting with a medium grit and finishing with fine. Wipe off the dust, fill any holes or gaps with wood filler, and sand smooth once dry. Apply primer if you're painting, then finish with your choice of paint or stain and seal with a durable clear topcoat. For outdoor projects, use exterior-rated primer, paint or stain, and sealer so the piece stands up to the weather.
Source (temporary): https://www.ana-white.com/woodworking-projects/cupcake-tiered-display-stand