Dawsen Canopy or Poster Bed
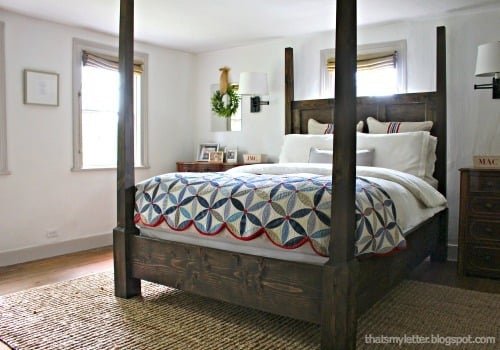
build your own colonial style poster bed or canopy bed from
Specifications
| Project type | Queen Beds and Bed Frames |
|---|---|
| Room | Bedroom |
| Style | Farmhouse Furniture |
| Difficulty | Advanced |
| Estimated cost | $150 - $200 |
Dimensions
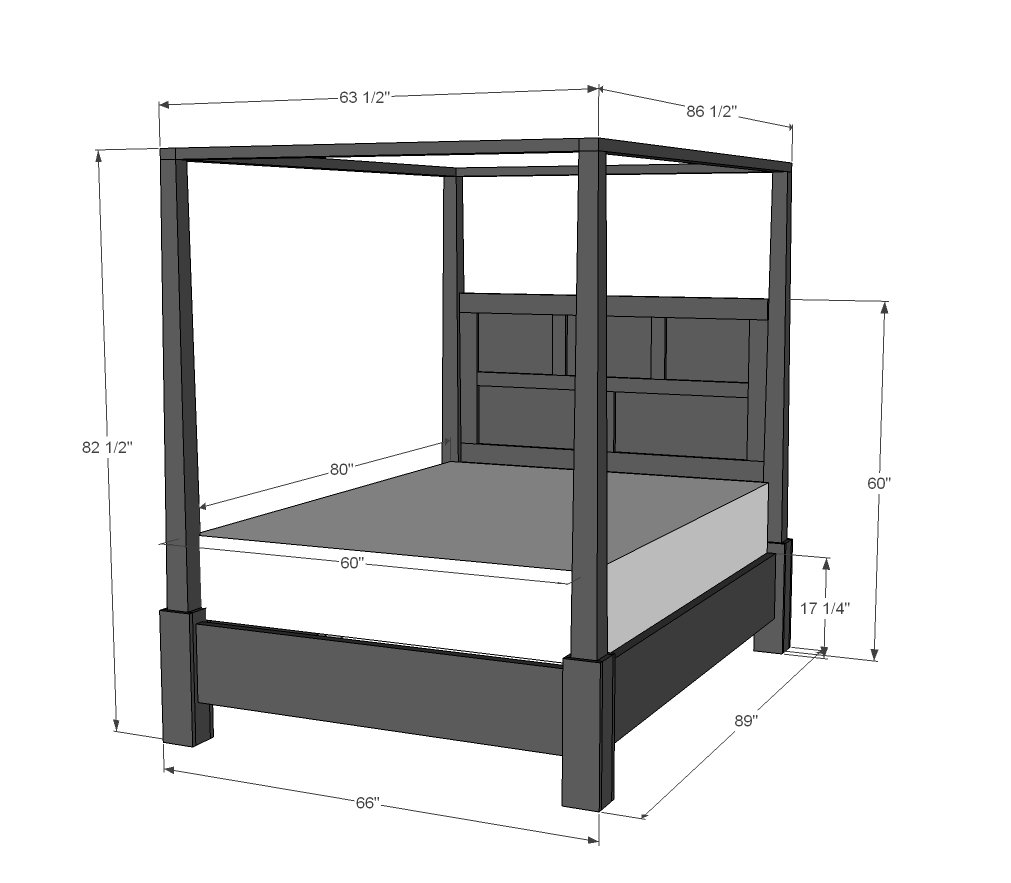
Use the size-specific shopping and cut lists below.
Shopping List
1 - 2x12x16
1 - 2x12x12
4 - 1x4x8
3 - 1x6x8
1 - 1x3x8
4 - 2x3x8
3 - 2x4x8
1 - 1/4" plywood sheet
30' cove moulding (optional)
Pencil post legs, 3-1/2" overall at bottom (custom by Osborne Wood )
Cut List
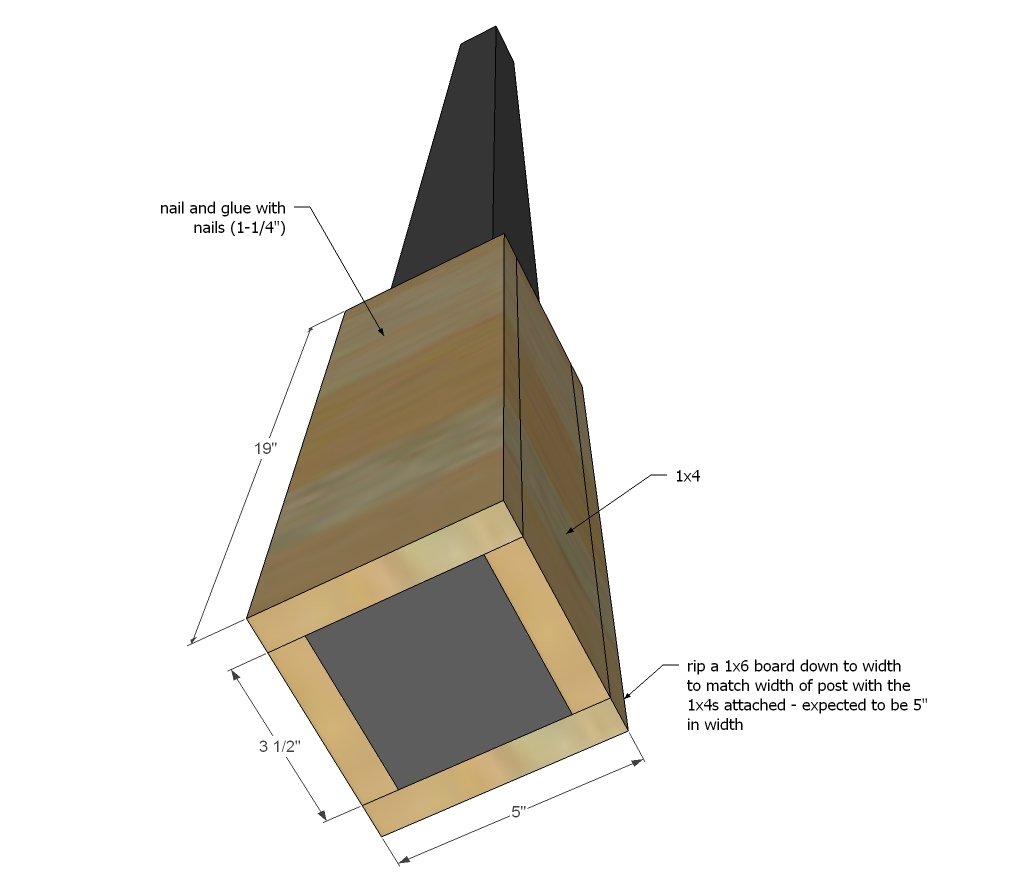
8 - 1x4 @ 19"
8 - 1x6 (ripped down to fit) @ 19"
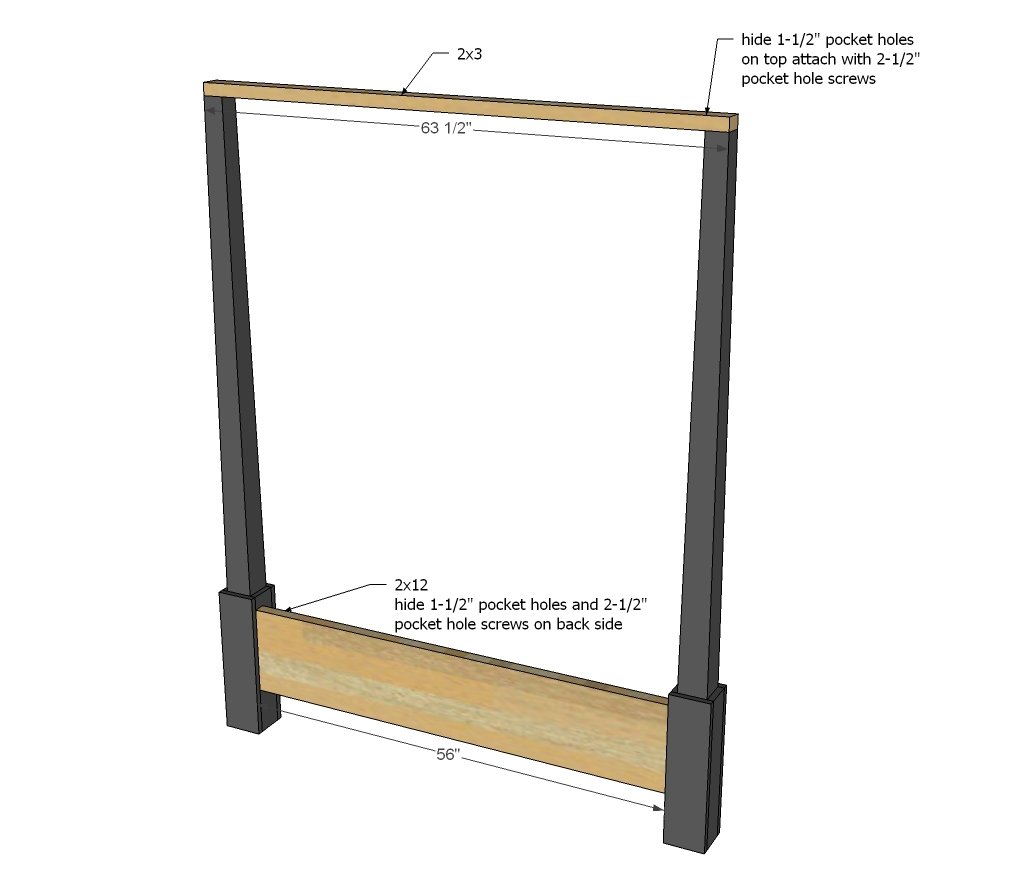
2 - 2x3 @ 63-1/2"
2 - 2x3 @ 81-1/2"
2 - 2x12 @ 79"
2 - 2x12 @ 56"
2 - 2x4 @ 79"
1 - 2x4 @ 81-3/4"
HEADBOARD PIECES
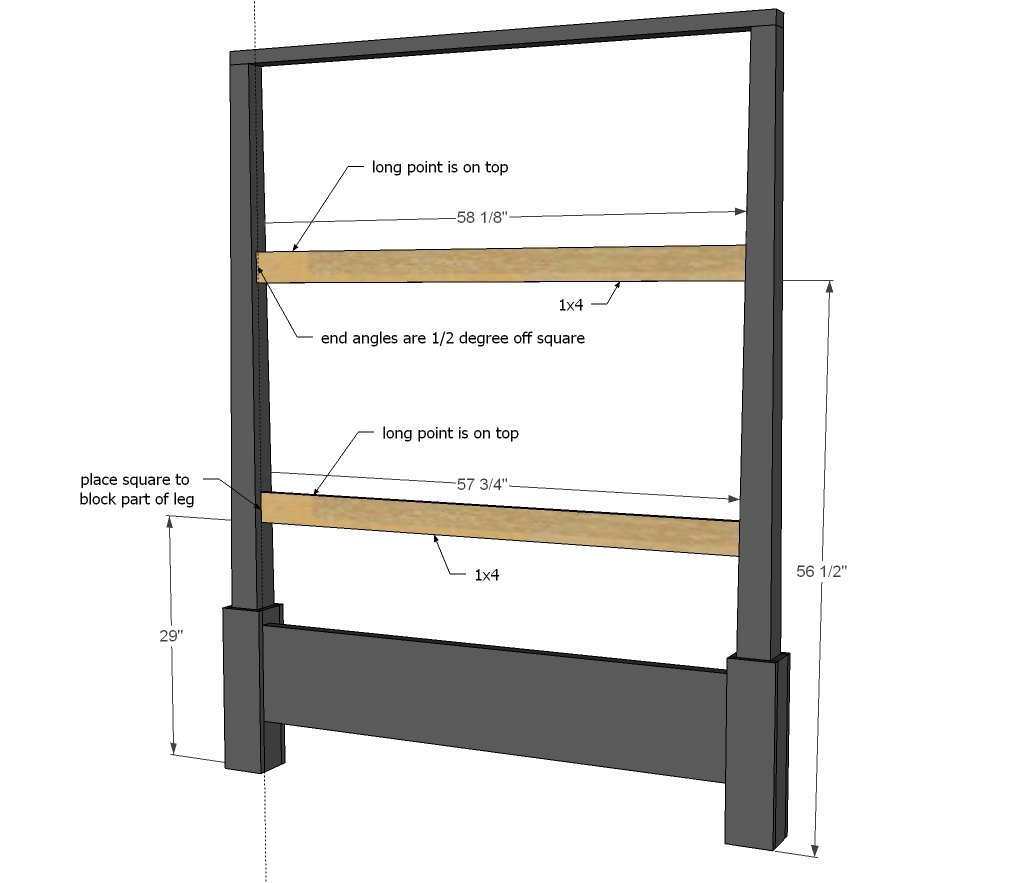
1 - 1x4 @ 58-1/8" (long point measurement, both ends cut at 1/2 degree off square, ends are NOT parallel)
1 - 1x4 @ 57-3/4" (long point measurement, both ends cut at 1/2 degree off square, ends are NOT parallel)
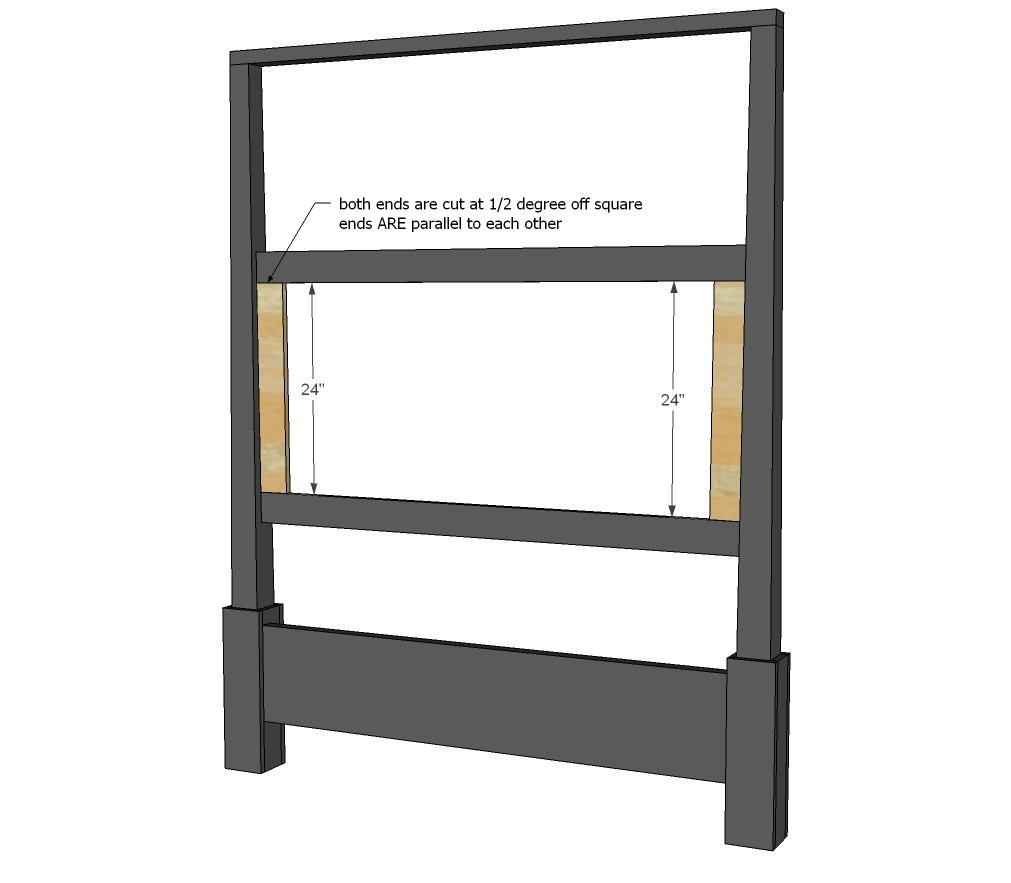
2 - 1x4 @ 24" (long point to short point measurement, both ends cut at 1/2 degree off square, ends ARE parallel)
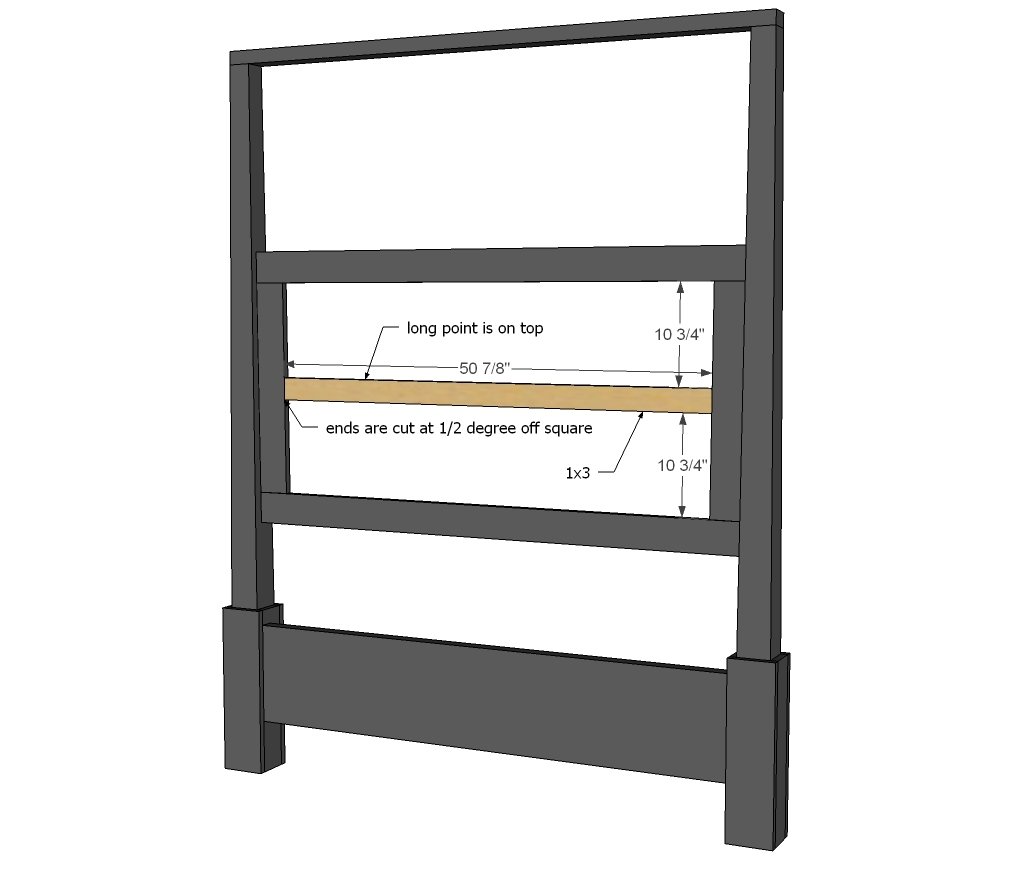
1 - 1x3 @ 50-7/8" (long point measurement, both ends cut at 1/2 degree off square, ends are NOT parallel)
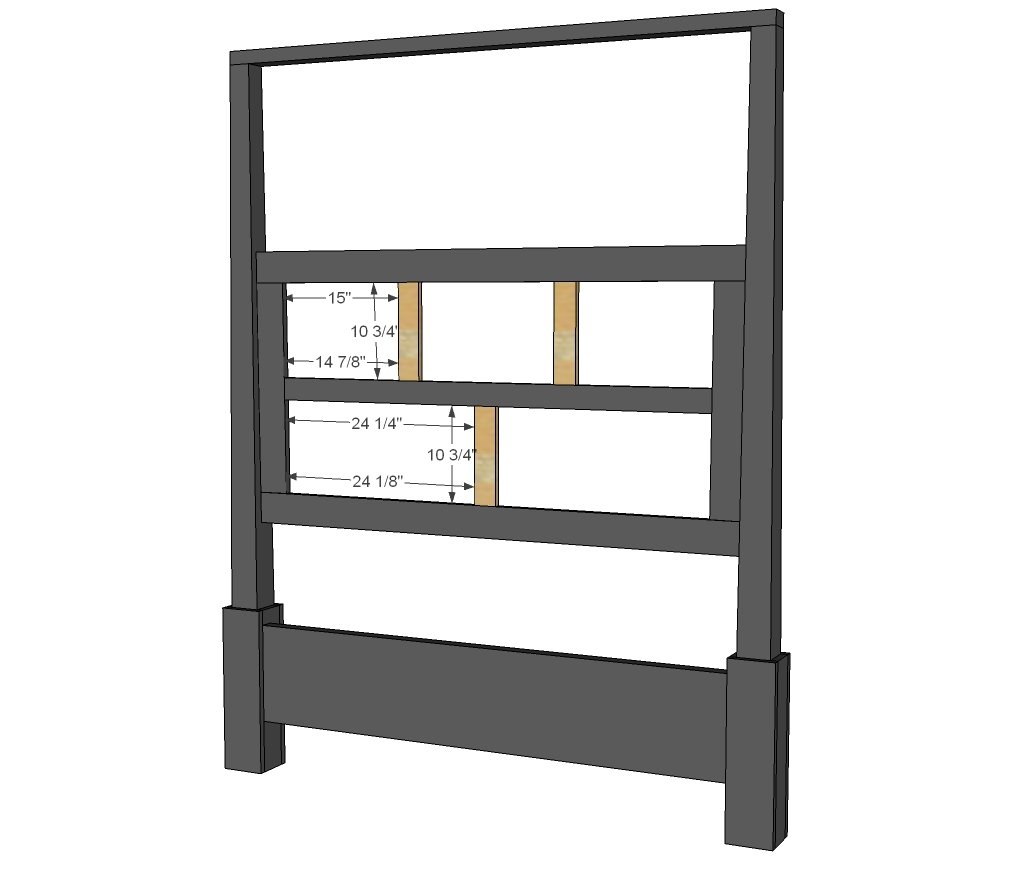
3 - 1x3 @ 10-3/4"
1 - 1/4" plywood @ 30" x 57"
Tools
- measuring tape
- square
- pencil
- safety glasses
- hearing protection
- kreg-jig
- drill
- circular saw
- compound miter saw
- nailer
Step-by-step Instructions
Step 1
Take the premade pencil post legs (Jaime got hers from Osborne Wood ) and wrap with 1xs. Jaime details how she did this with a beveled top edge here.
Step 2
Once you have the legs wrapped, add the bottom and top (Jaime choose no top on her bed).
Step 3
For the headboard, add the main headboard pieces. When you make the cuts at 1/2 degree off square, make sure you note the long point/short point, as it will be hard to differentiate this small of an angle cut without markings on the board.
Step 4
Next, fill in the side pieces. Attach also to the legs with pocket holes.
Step 5
Step 6
Fill in with the vertical pieces. Use 3/4" pocket holes and 1-1/4" pocket hole screws.
Step 7
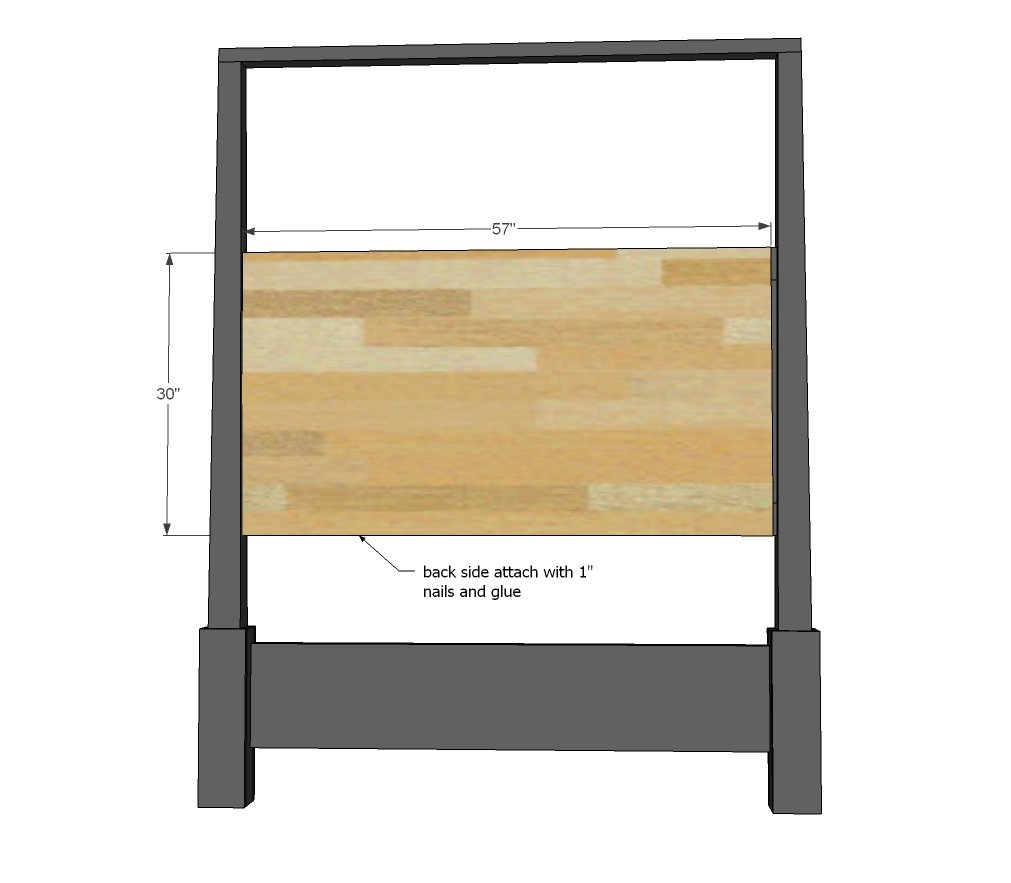
BACK VIEW - attach paneling or plywood to back.
Step 8
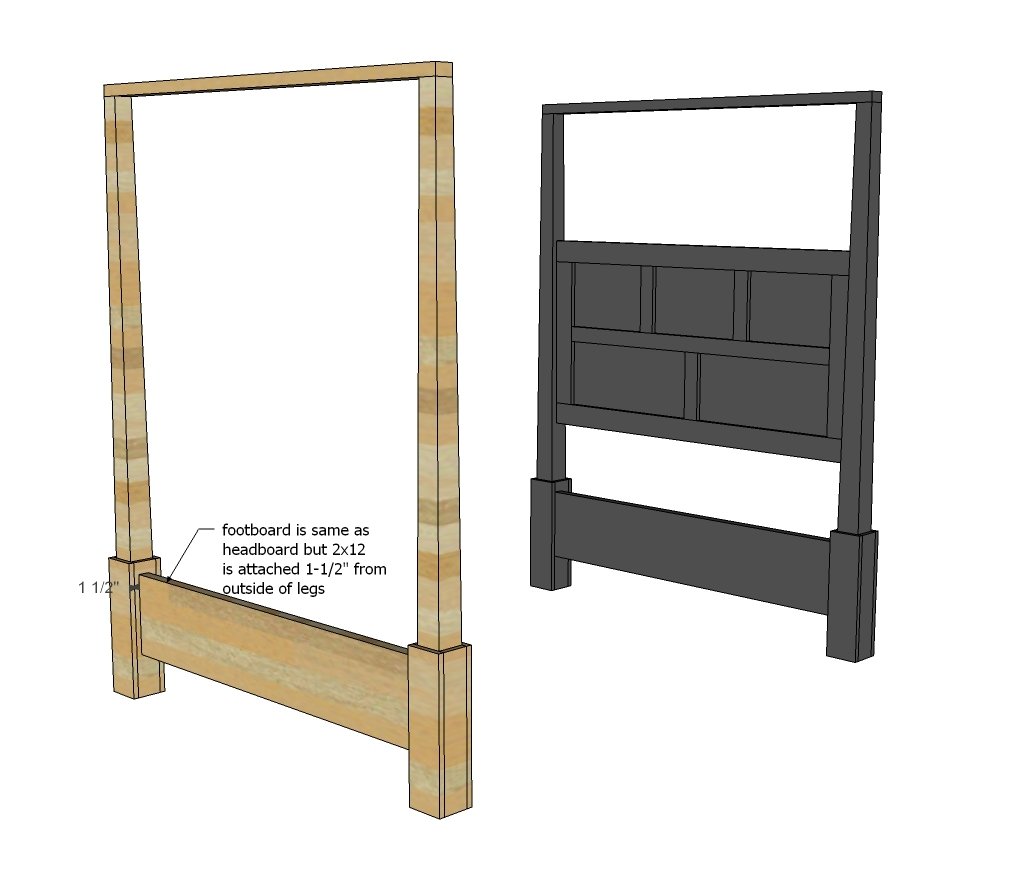
Next, build the footboard piece - similar to the headboard.
Step 9
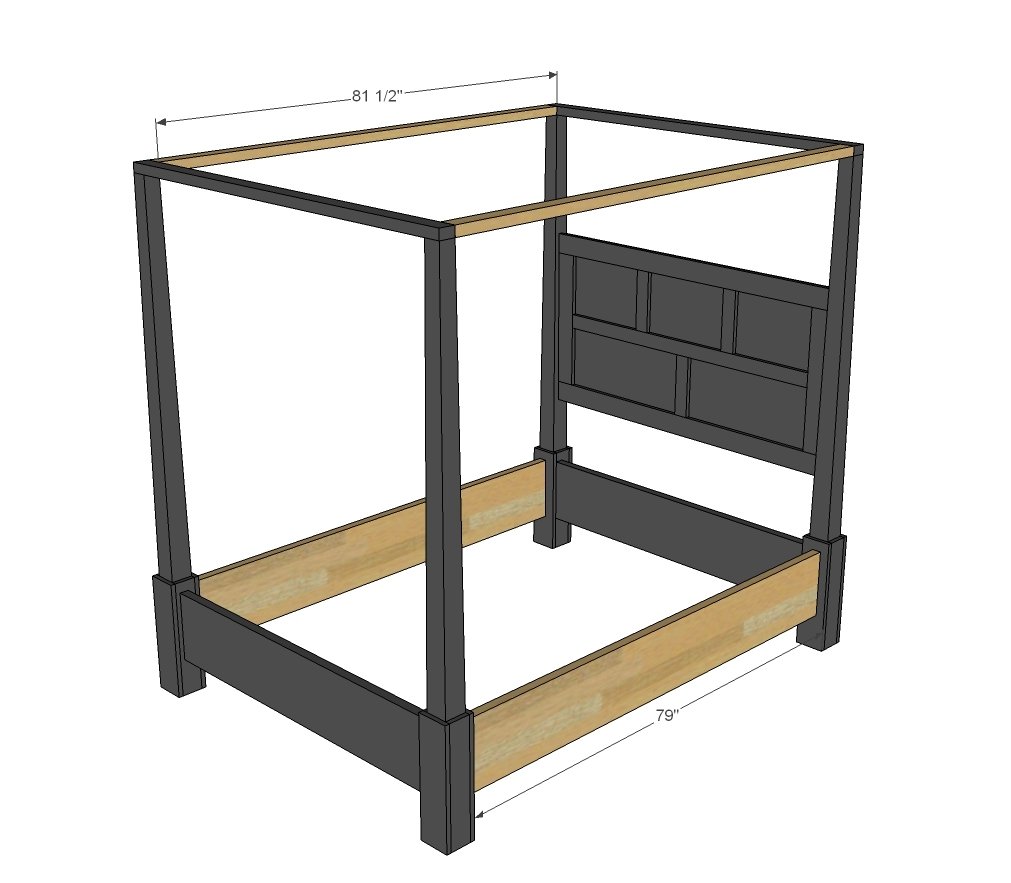
You'll probably want to finish the pieces separately so you can move this bed into the room without issue. Then assemble the pieces by attaching with 1-1/2" pocket holes and 2-1/2" pocket hole screws.
Step 10
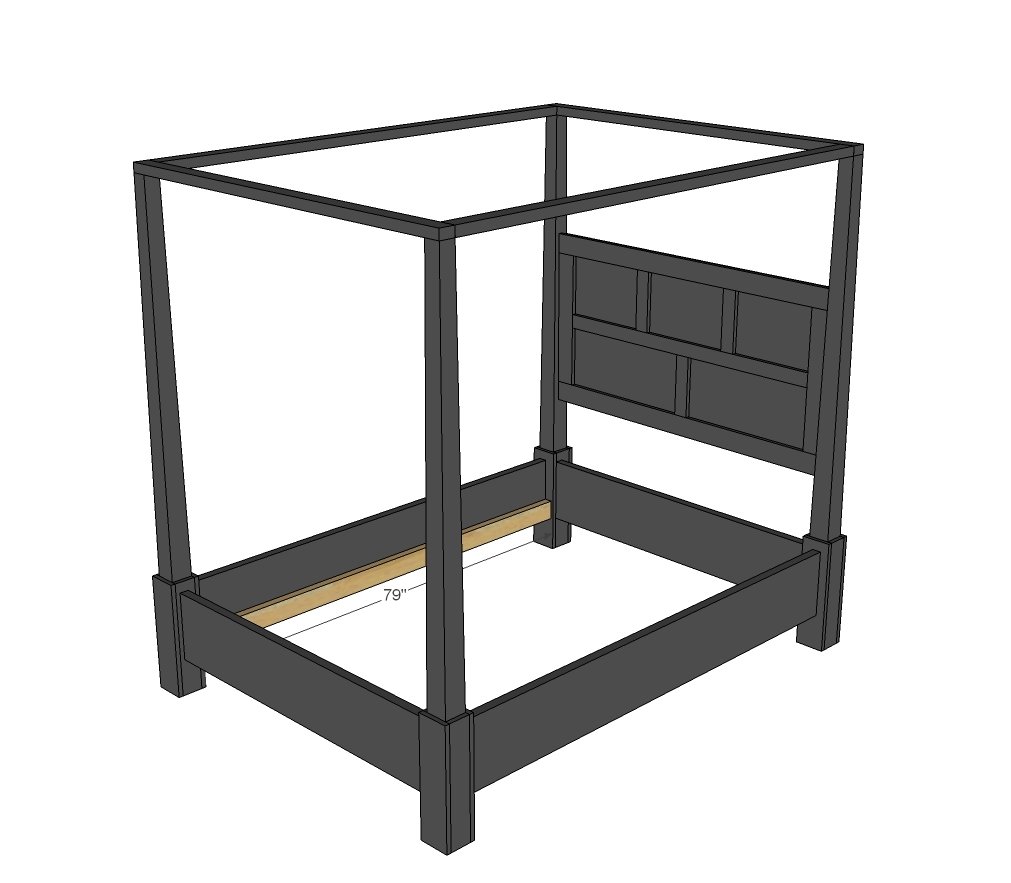
These cleats will support a box spring. Attach with 2-1/2" screws to the inside of the bed rail.
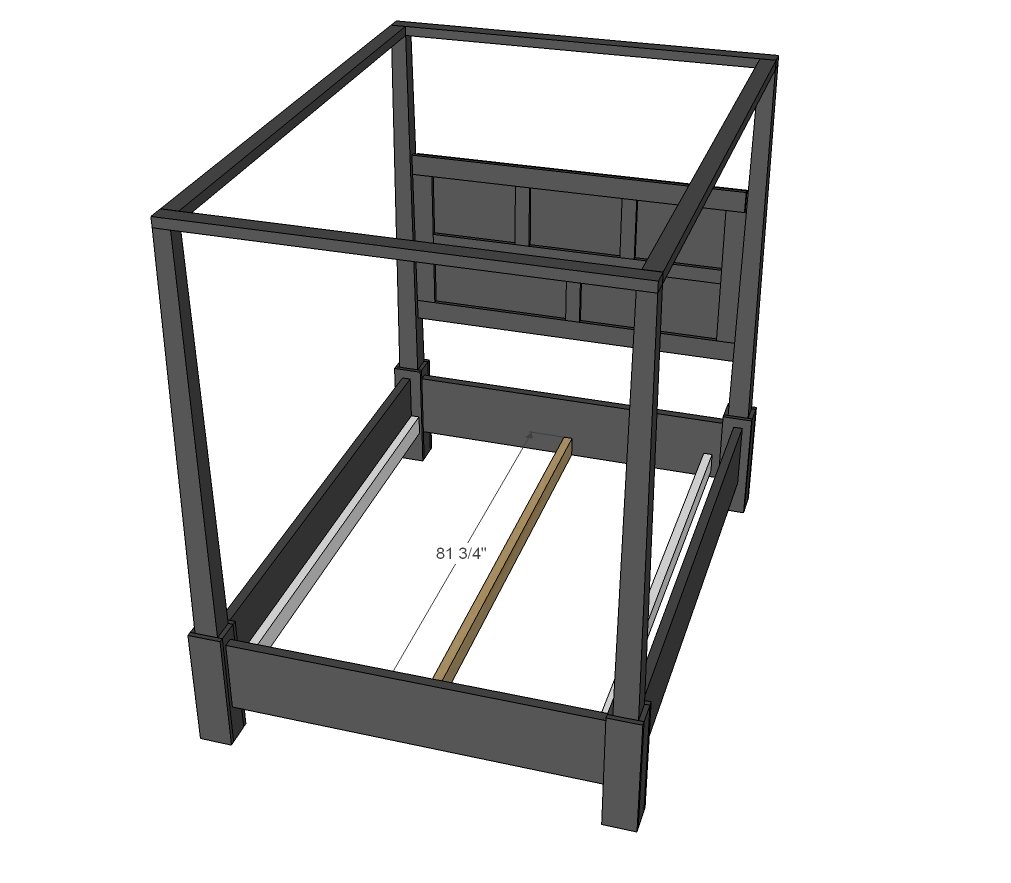
Step 11
For additional support add a center post. You can also add a center "leg" for even more support tied into the center support. For no box spring, you can lay slats on top of the cleats and center support.
Finishing
Sand all surfaces, starting with a medium grit and finishing with fine. Wipe off the dust, fill any holes or gaps with wood filler, and sand smooth once dry. Apply primer if you're painting, then finish with your choice of paint or stain and seal with a durable clear topcoat. For outdoor projects, use exterior-rated primer, paint or stain, and sealer so the piece stands up to the weather.
Source (temporary): https://www.ana-white.com/woodworking-projects/dawsen-canopy-or-poster-bed-queen