Dawsen Media Console
to build a media console inspired by Pottery Barn Dawson Media Console
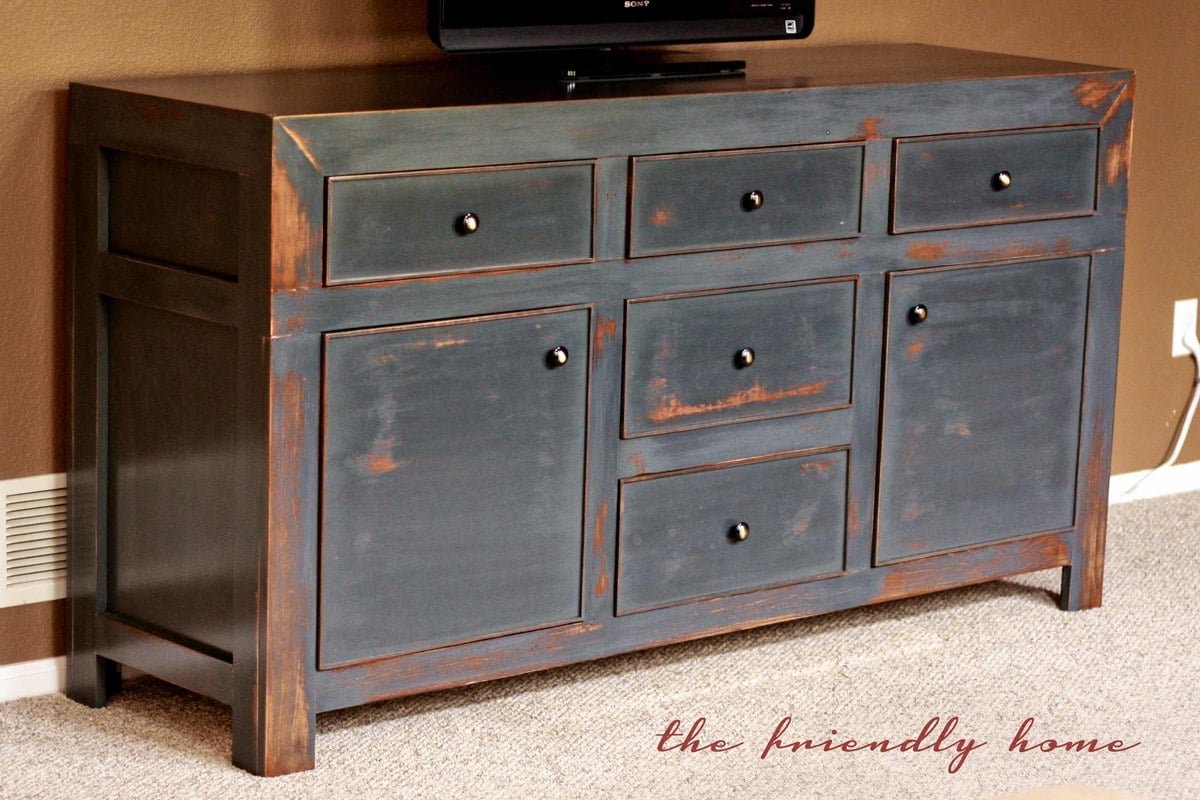
Specifications
| Project type | Console Table Plans |
|---|---|
| Room | Storage Solutions |
| Style | Farmhouse Furniture |
| Difficulty | Intermediate |
| Estimated cost | $150 - $200 |
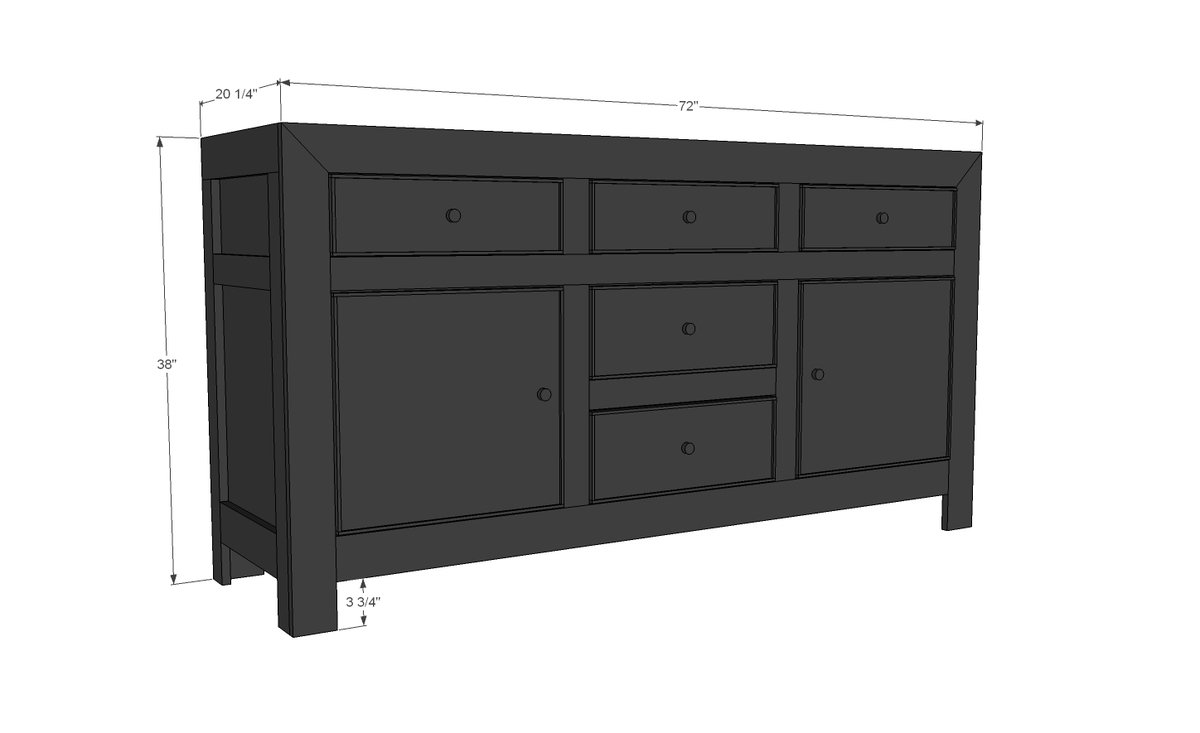
Dimensions
Use the size-specific shopping and cut lists below.
Shopping List
- 2 - sheets 3/4” plywood ripped into strips 19 1/4” wide TIP: Use remaining strips for drawer box construction
- 1 - sheet 1/4” plywood for back and drawer bottoms
- 4 - 1x4 @ 8 feet long
- 3 - 1x3 @ 8 feet long
- 1 - 1x6 @ 6 feet long
- 1 - 1x8 @ 4 feet long
- 5 sets drawer slides (18” or shorter, two must be bottom mount or else you will need to add additional interior blocking)
- 2 sets hinges for inset doors
- Depending on drawer slides, drawers can be made to different widths. I have not accounted for the 1x6 and 1x4 boards needed to build the drawer boxes.
- 36 feet of 1/4" thick edge beading to frame doors/drawer faces
Cut List
MAIN BOX
- 2 - 3/4” plywood @ 19 1/4” x 70 1/2” (top/bottom)
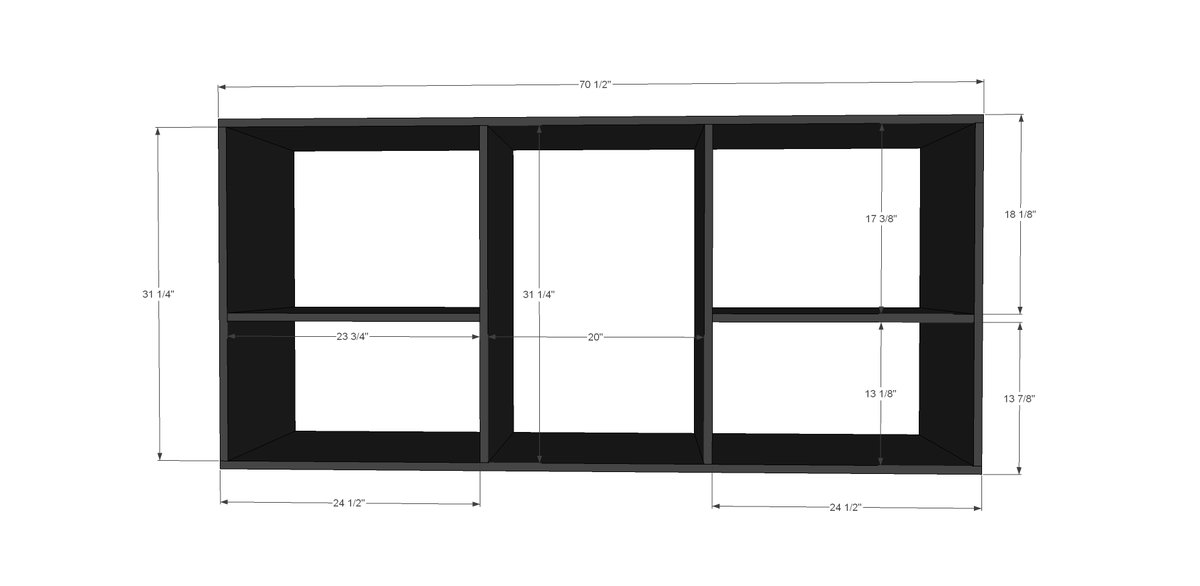
- 2 - 3/4” plywood @ 19 1/4” x 23 3/4” (shelves)
- 2 - 3/4” plywood @ 19 1/4” x 31 1/4” (dividers)
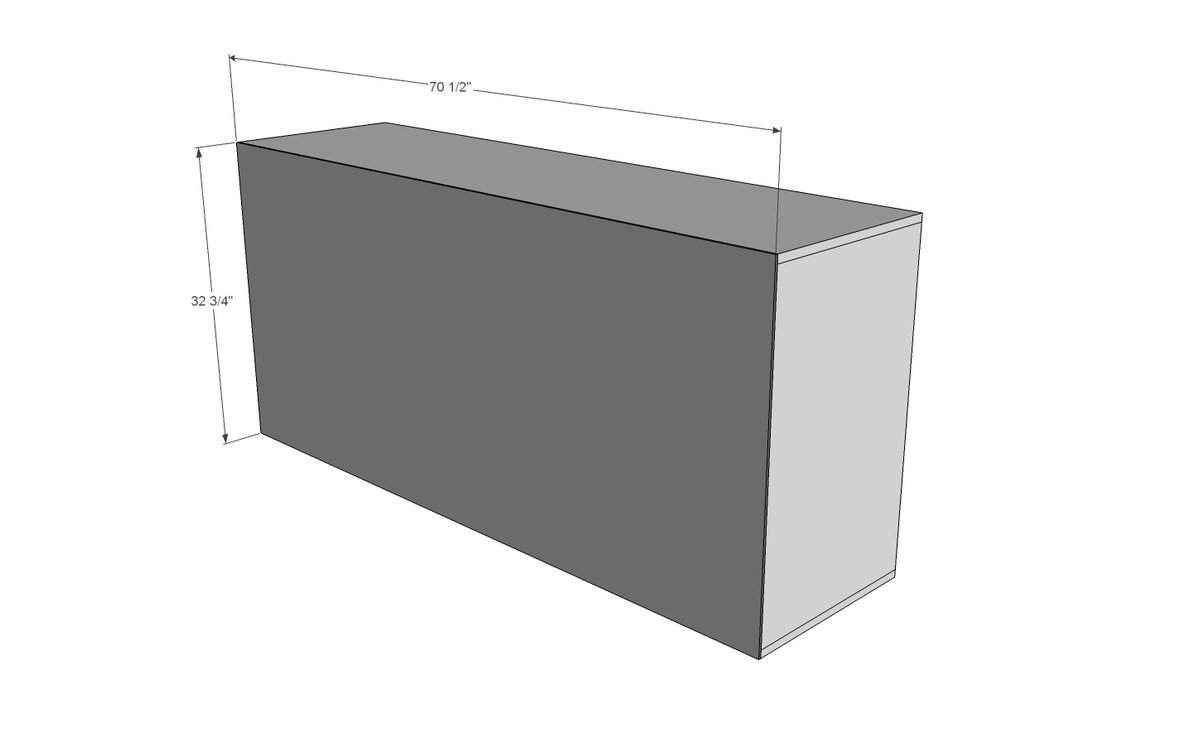
- 1 - 1/4” plywood @ 32 3/4” x 70 1/2”
SIDE FACE FRAMES
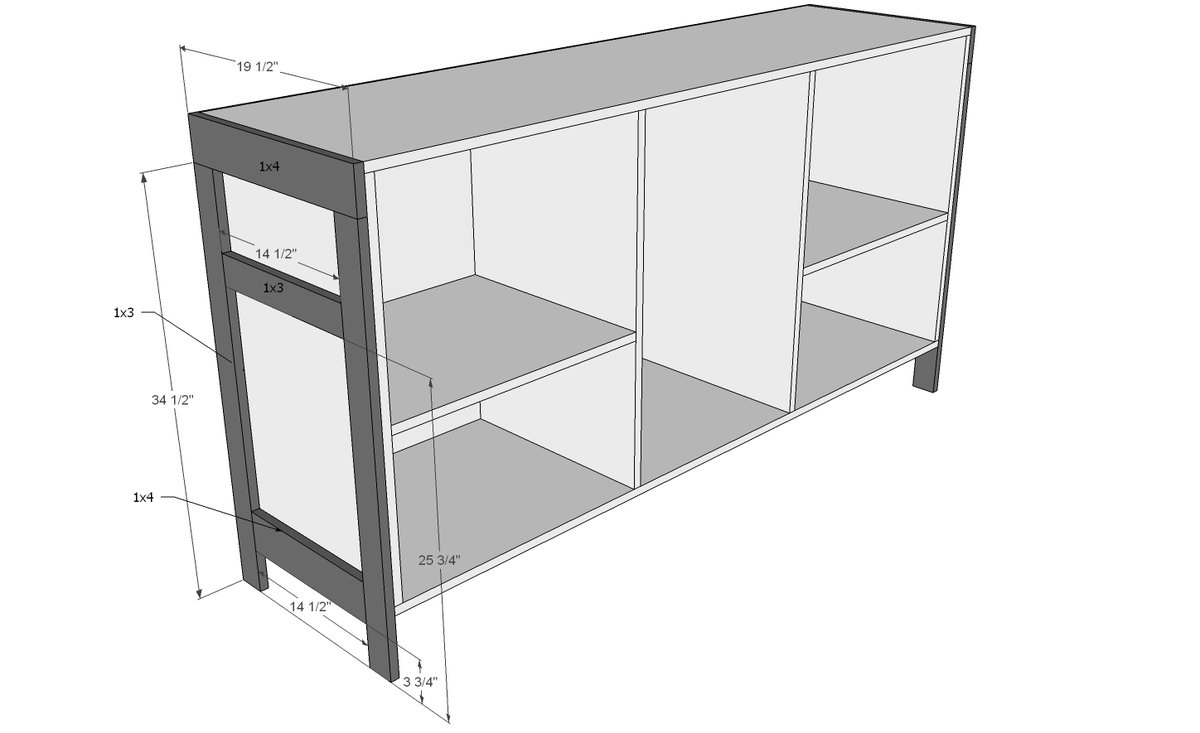
- 2 - 1x4 @ 19 1/2”
- 4 - 1x3 @ 34 1/2”
- 2 - 1x3 @ 14 1/2”
- 2 - 1x4 @ 14 1/2”
FRONT FACE FRAME
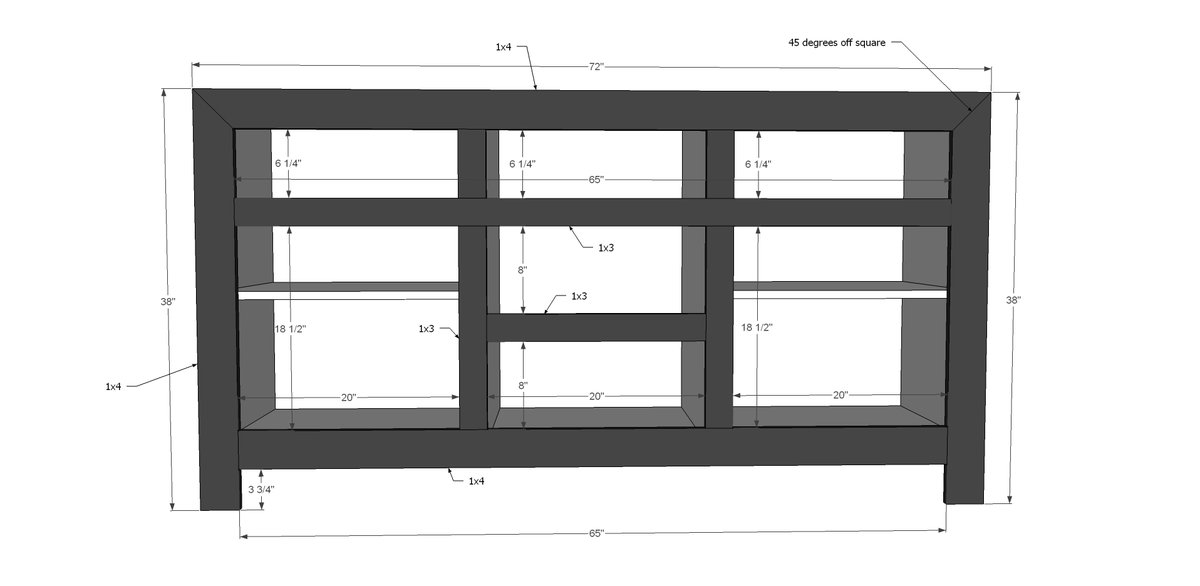
- 1 - 1x4 @ 72” (long point to long point, both ends cut NOT parallel at 45 degrees)
- 2 - 1x4 @ 38” (one end cut at 45 degrees, longest point measurement)
- 2 - 1x3 @ 6 1/4”
- 1 - 1x3 @ 65”
- 2 - 1x3 @ 18 1/2”
- 1 - 1X3 @ 20”
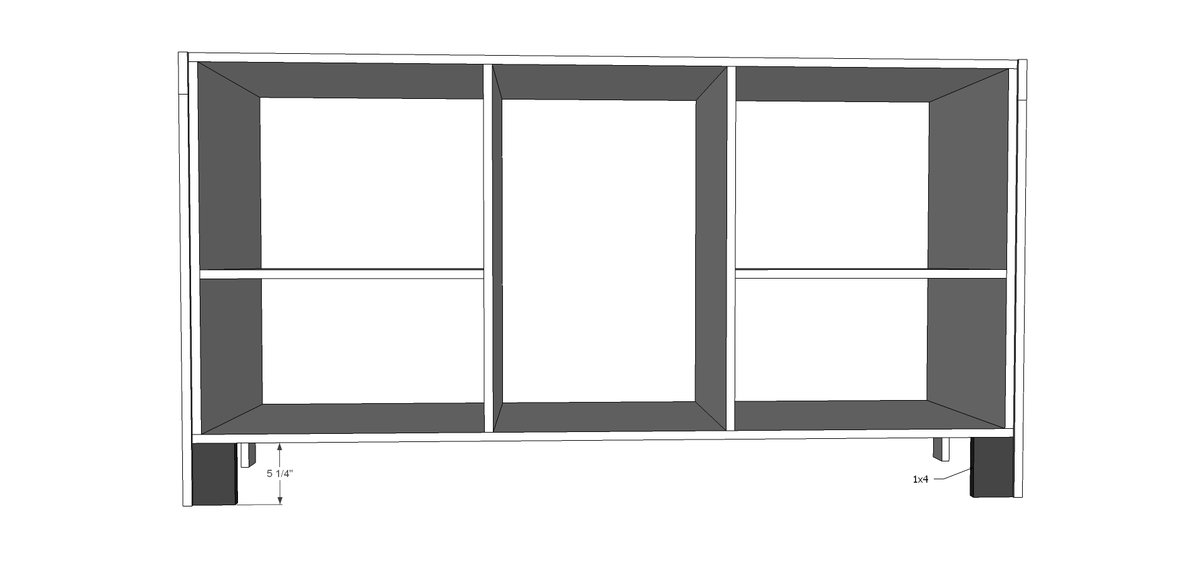
- 2 - 1x4 @ 5 1/4” (back legs)
DRAWER/DOOR FACES
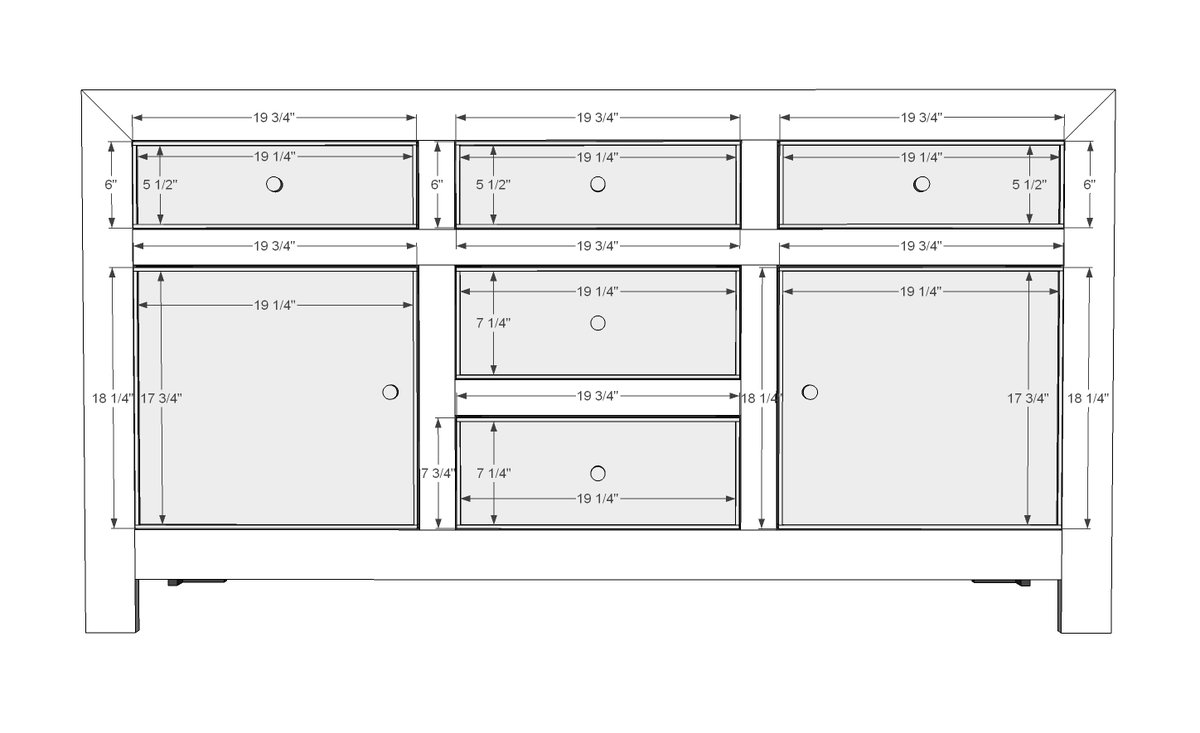
- 2 - 3/4” Plywood @ 19 1/4” x 17 3/4”
- 3 - 1x6 @ 19 1/4”
- 2 - 1x8 @ 19 1/4”
- Edge beading is 1/4” thick, expected to frame all drawer faces
- Build three drawers to fit 20” wide openings from 1x4s (top drawers)
- Build two drawers to fit 20” wide openings from 1x6s
Tools
- measuring tape
- square
- pencil
- safety glasses
- hearing protection
- kreg-jig
- drill
- compound miter saw
- table saw
- nailer
- sander
Step-by-step Instructions
Step 1
Note that the horizontal shelves 23 3/4” long are not required at this step and can be made fixed or adjustable.
Step 2
Back is attached and sides will be hidden by side face frames. You can also hide top plywood edge with a 1x or piece of the edge beading. Also note depending on your drawer slides, you may wish to attach back after last step.
Step 3
Build side face frames first, then attach with 1 1/4” finish nails and wood glue. Note that the face frame is designed 1/4” wider than the base carcass to cover back plywood edges.
Step 4
On back, (back not shown) attach two legs to support back and also to keep look consistent from sides. Additional support can be added to center for heavier loads.
Step 5
Step 6
Drawer faces are shown above. An alternative to 1x6 and 1x8 use is to use 3/4” plywood ripped into 19 1/4” wide strips as used in main carcass for drawer faces. All drawer faces are expected to be edged with edge beading.
Step 7
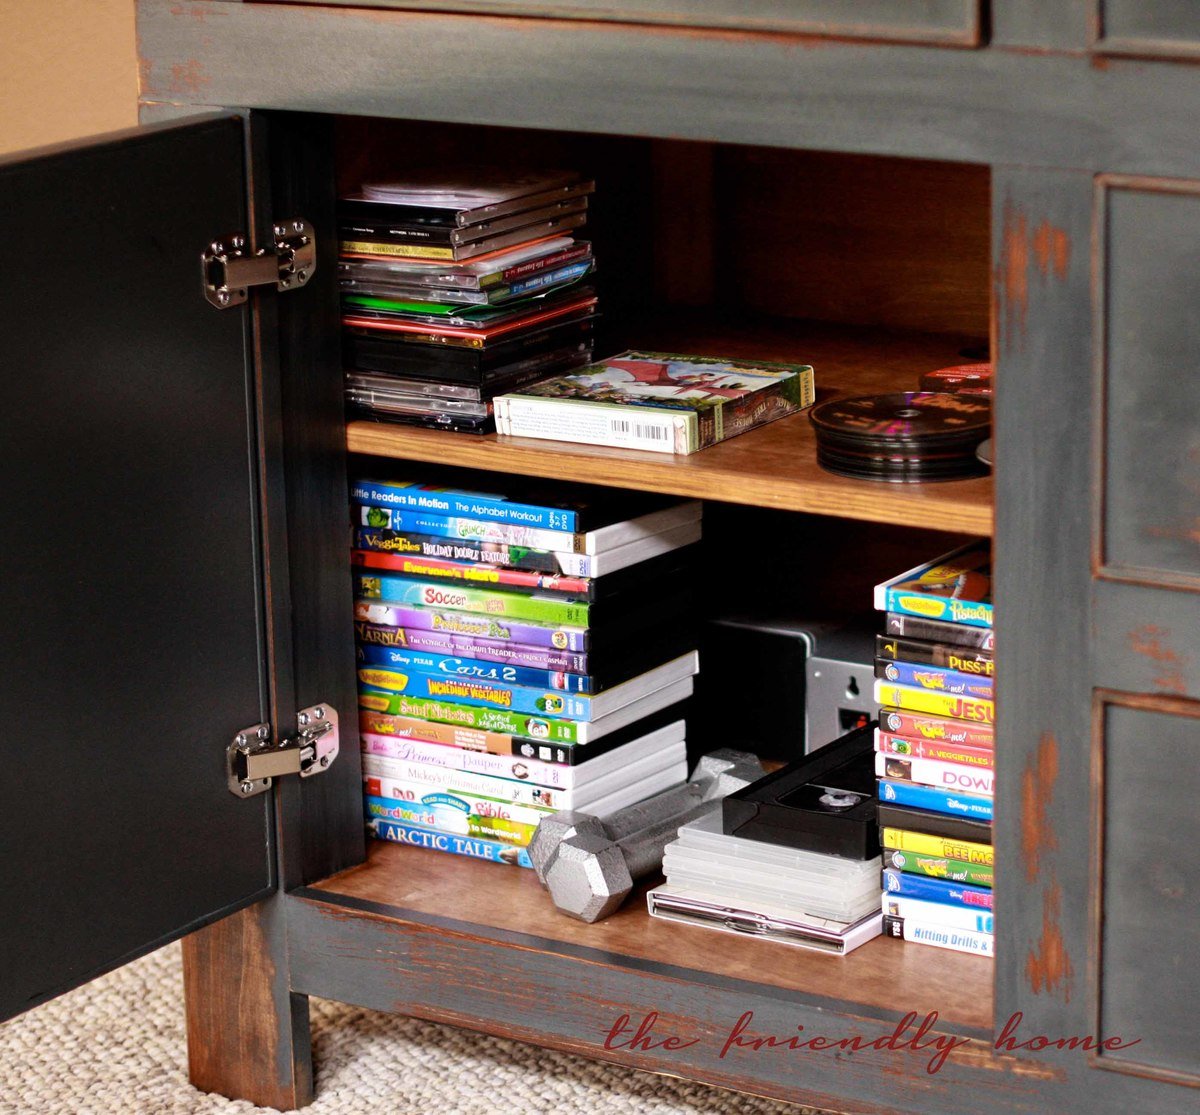
For more details on how Hillary hung her doors - please stop over and visit Hillary here.
Finishing
Sand all surfaces, starting with a medium grit and finishing with fine. Wipe off the dust, fill any holes or gaps with wood filler, and sand smooth once dry. Apply primer if you're painting, then finish with your choice of paint or stain and seal with a durable clear topcoat. For outdoor projects, use exterior-rated primer, paint or stain, and sealer so the piece stands up to the weather.
Source (temporary): https://www.ana-white.com/woodworking-projects/dawsen-media-console