Daybed with Storage Trundle Drawers
to build an easy daybed with storage trundle drawers! Gain tons of storage with this clever design!
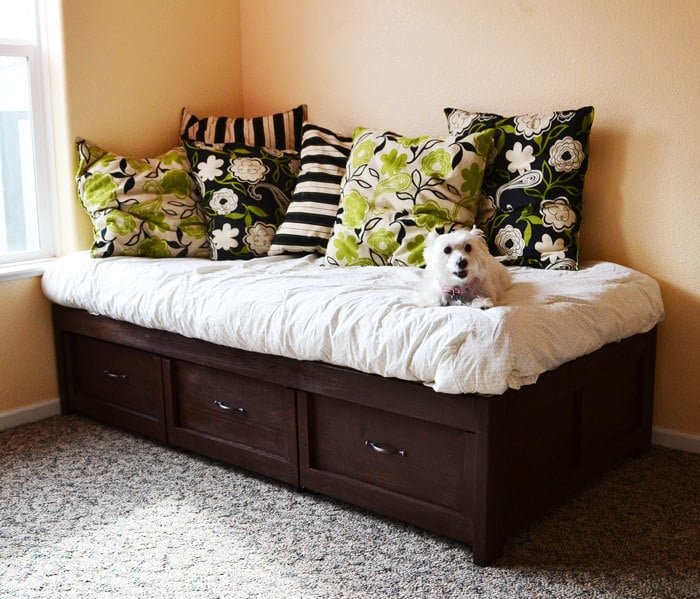
Specifications
| Project type | Daybed |
|---|---|
| Room | Kids and Toys |
| Style | Children's and Kid's Room Furniture and Toy Plans |
| Difficulty | Intermediate |
Dimensions
Use the size-specific shopping and cut lists below.
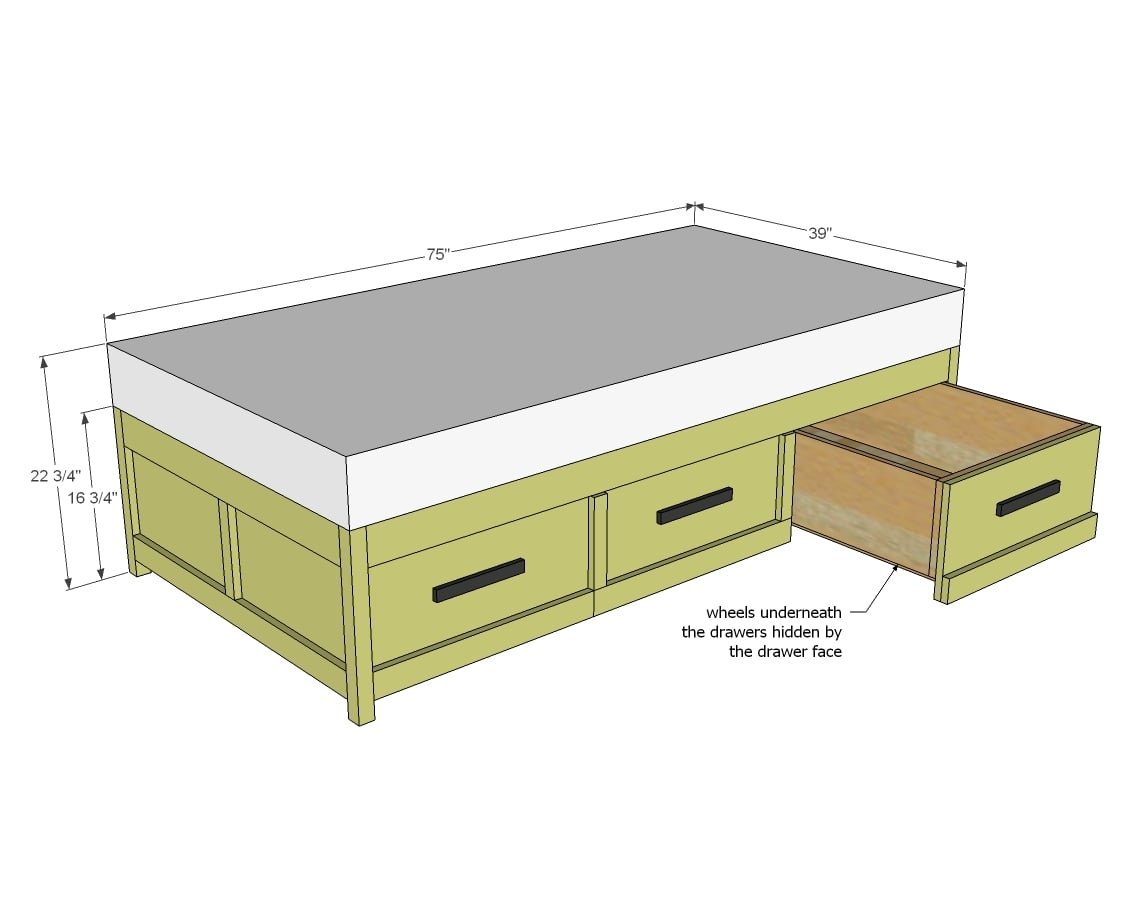
Shopping List
3 - 1x8 @ 10 feet long
2 - 1x12 @ 6 feet long
6 - 2x4 @ 8 feet long
2 - sheets 1/4" plywood (for drawer bottoms and bed top)
2 - 1x3 @ 8 feet long
1 - 1x2 @ 8 feet long
3 sets of straight caster wheels (non swiveling kind)
2 1/2" and 1 1/4" PH screws
Cut List
ENDS
2 – 2x4 @ 32”
2 – 1x12 @ 32”
4 – 2x4 @ 16 ¾”
2 – 1x2 @ 9”
2 – 1x3 @ 32”
FRAME
2 – 2x4 @ 72”
2 – 2x4 @ 69”
2 – 2x4 @ 36”
DRAWERS
6 – 1x8 @ 36”
6 – 1x8 @ 22”
2 – ¼” plywood 23 ½” x 36”
DRAWER FACES
3 – 1x12 @ 23 ½”
3 – 1x3 @ 23 ½”
6 – 1x2 @ 8 ¾”
Tools
- measuring tape
- square
- pencil
- safety glasses
- hearing protection
- kreg-jig
- drill
- circular saw
- sander
- countersink drill bit
Step-by-step Instructions
Step 1
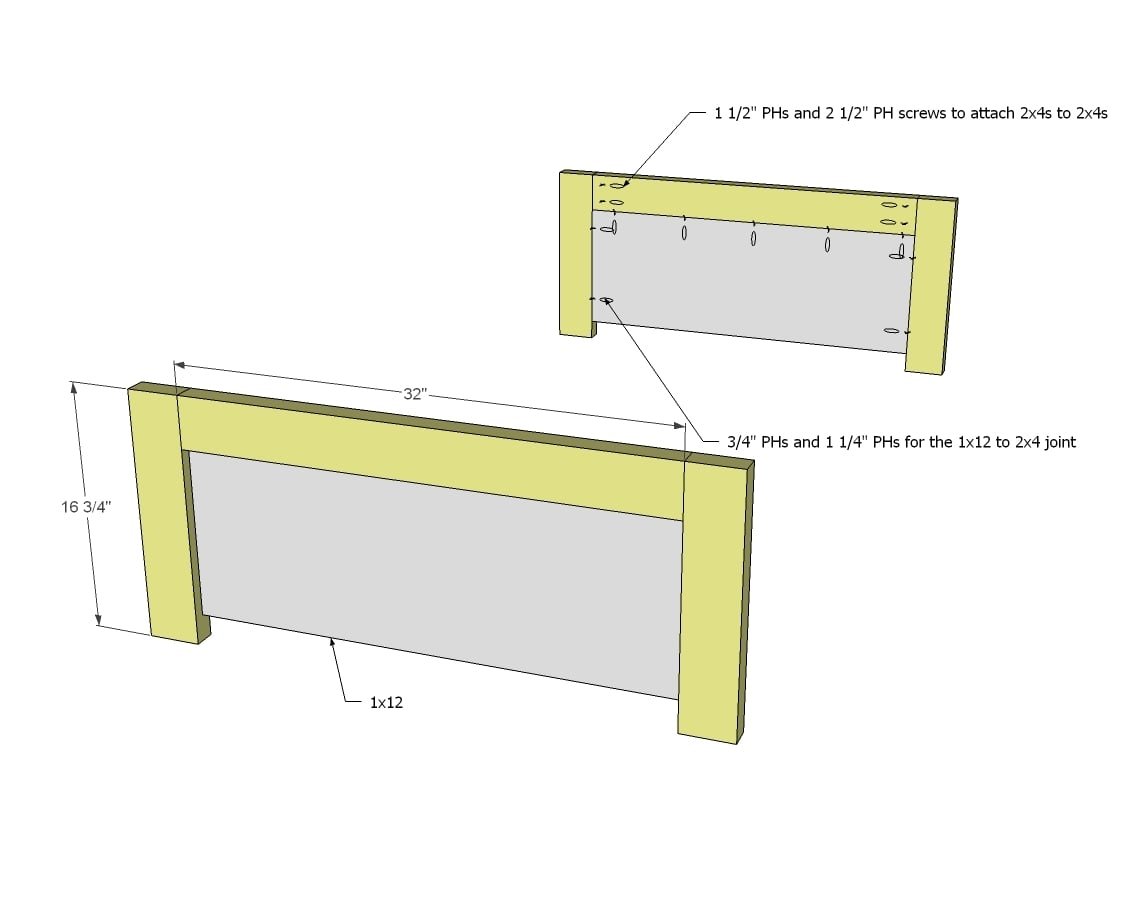
Drill 3/4" PHs around top and sides of end panels. Then attach to top header and legs with 1 1/4" PH screws and wood glue. Keep back edges flush.
Step 2
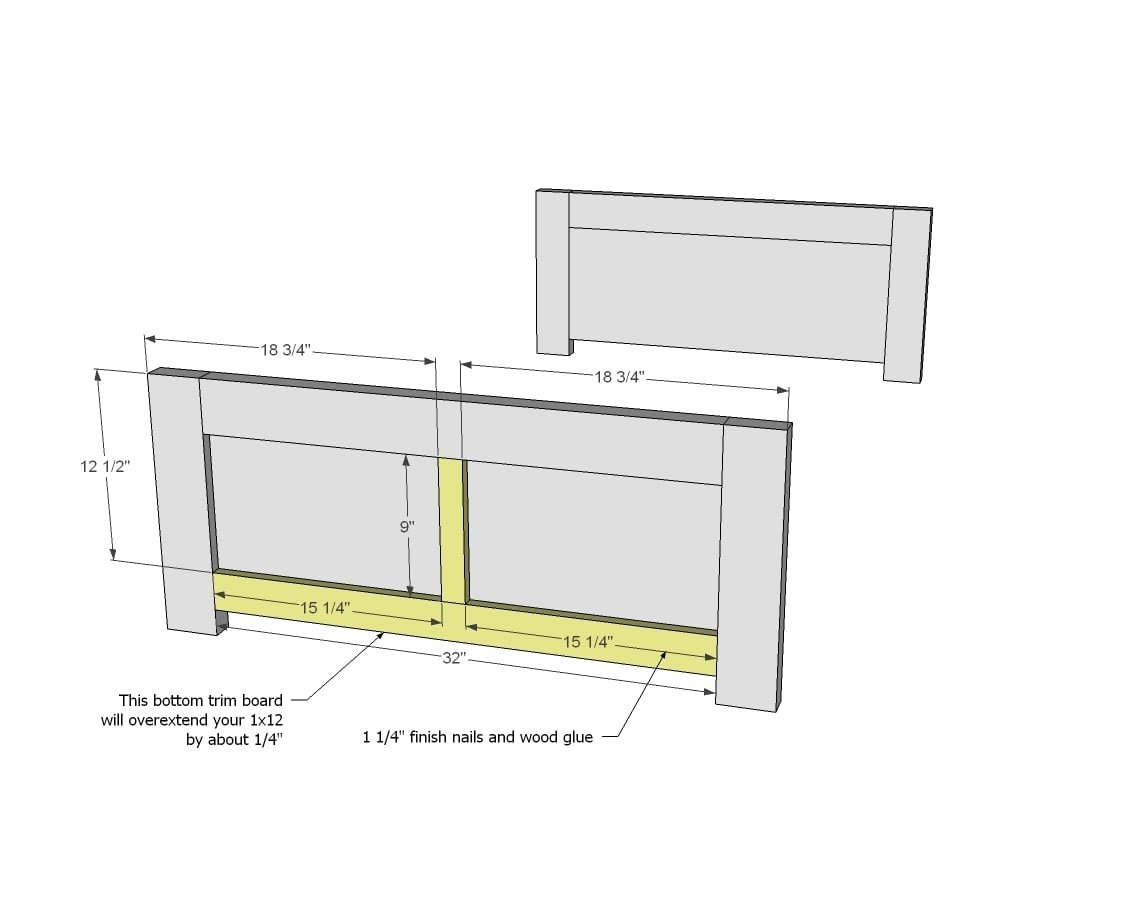
Add decorative trim with 1 1/4" finish nails and wood glue.
Step 3
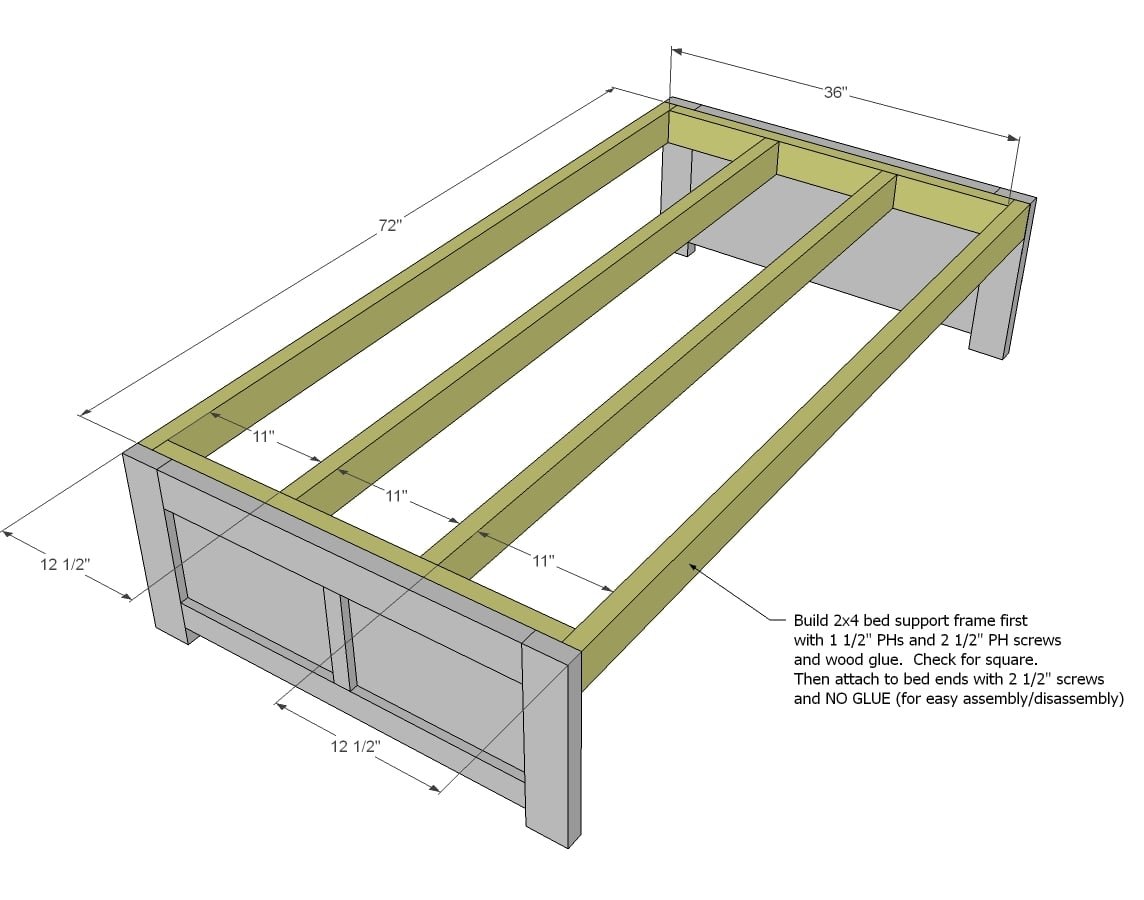
Build frame. You can just frame up with wood screws or attach with 1 1/2" PHs and 2 1/2" PH screws and glue. Attach frame flush to top with ends as shown in diagram using 2 1/2" screws.
Step 4
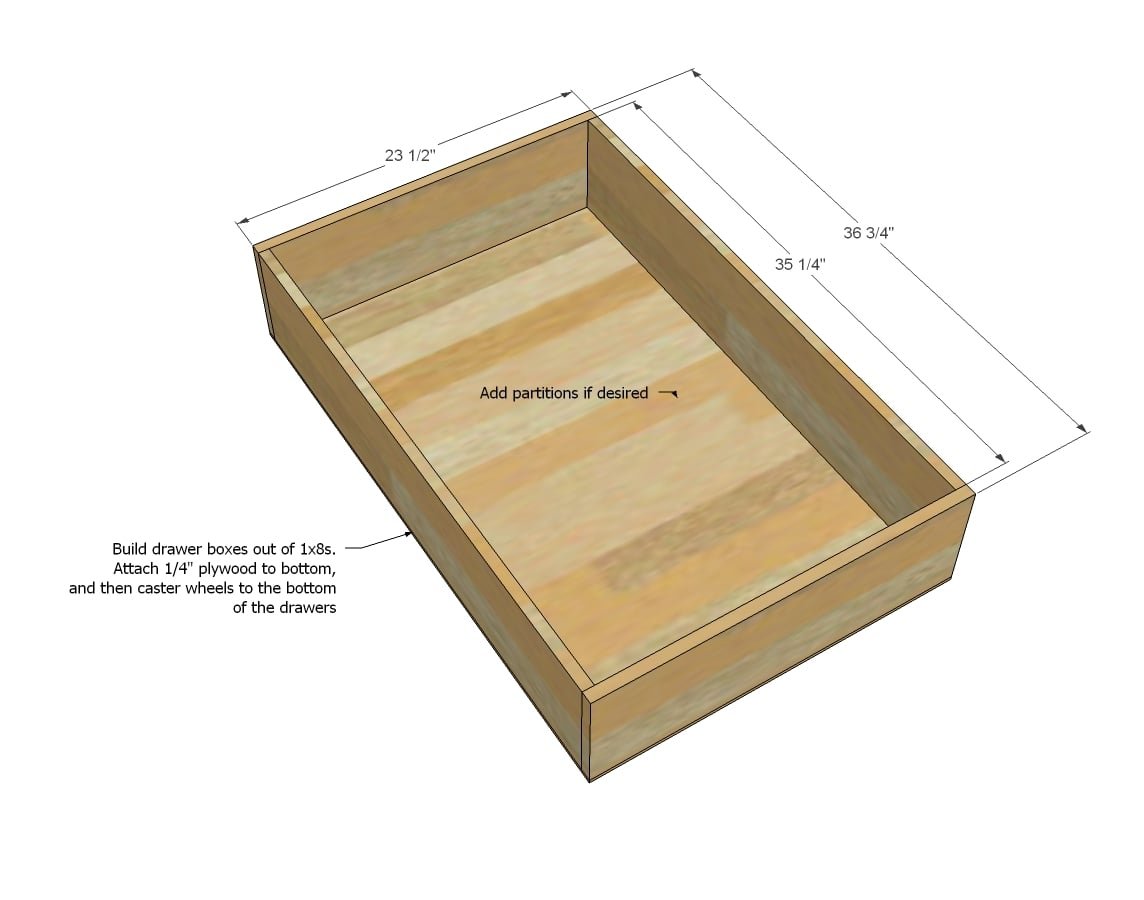
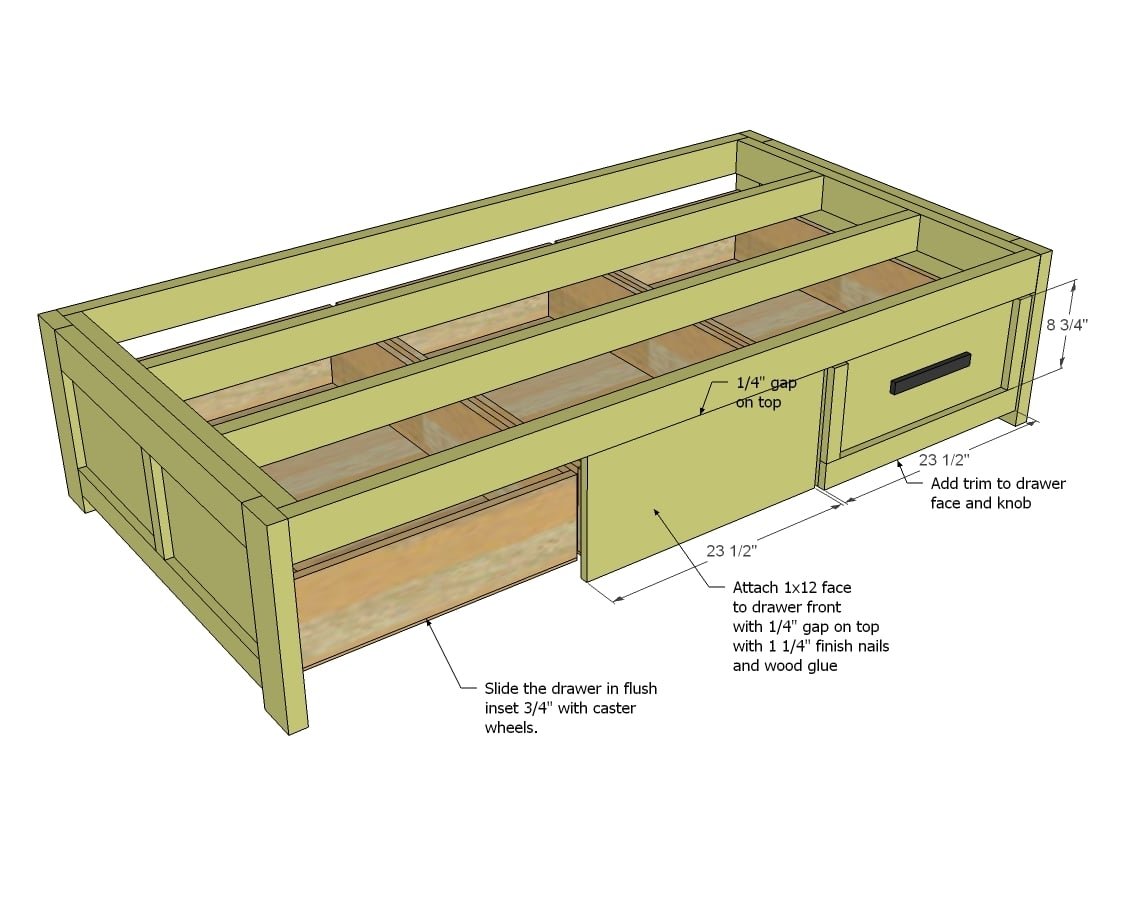
I changed up the drawers so the sides overextend the front in the cut list. If you do this, you can place ¾” PHs on the outsides and attach with 1 ¼” PH screws. Then when you add the drawer faces, it covers the PHs up. I also shortened the drawer to 36” overall length so you can put drawer faces on both sides if desired.
Step 5
Step 6
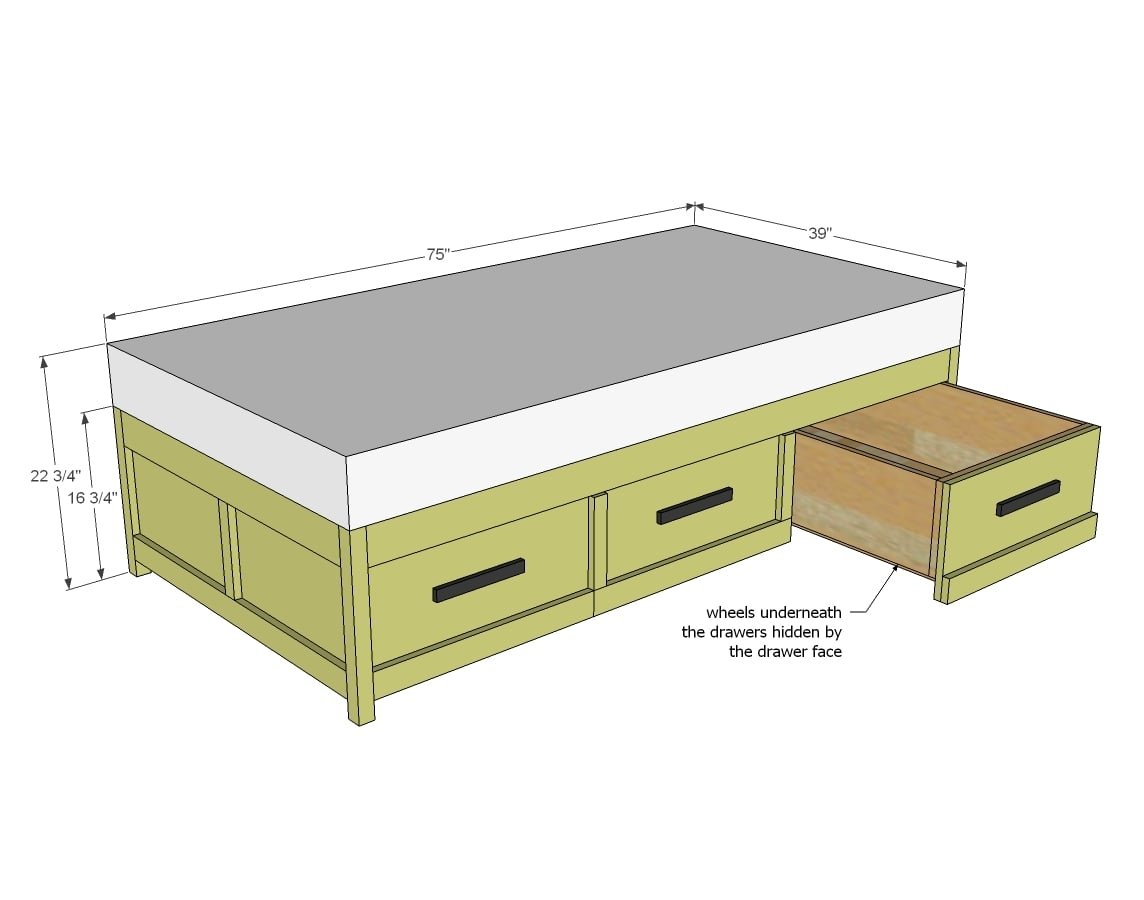
My sister used 1/4" plywood on top of the 2x4 frame.
Step 7
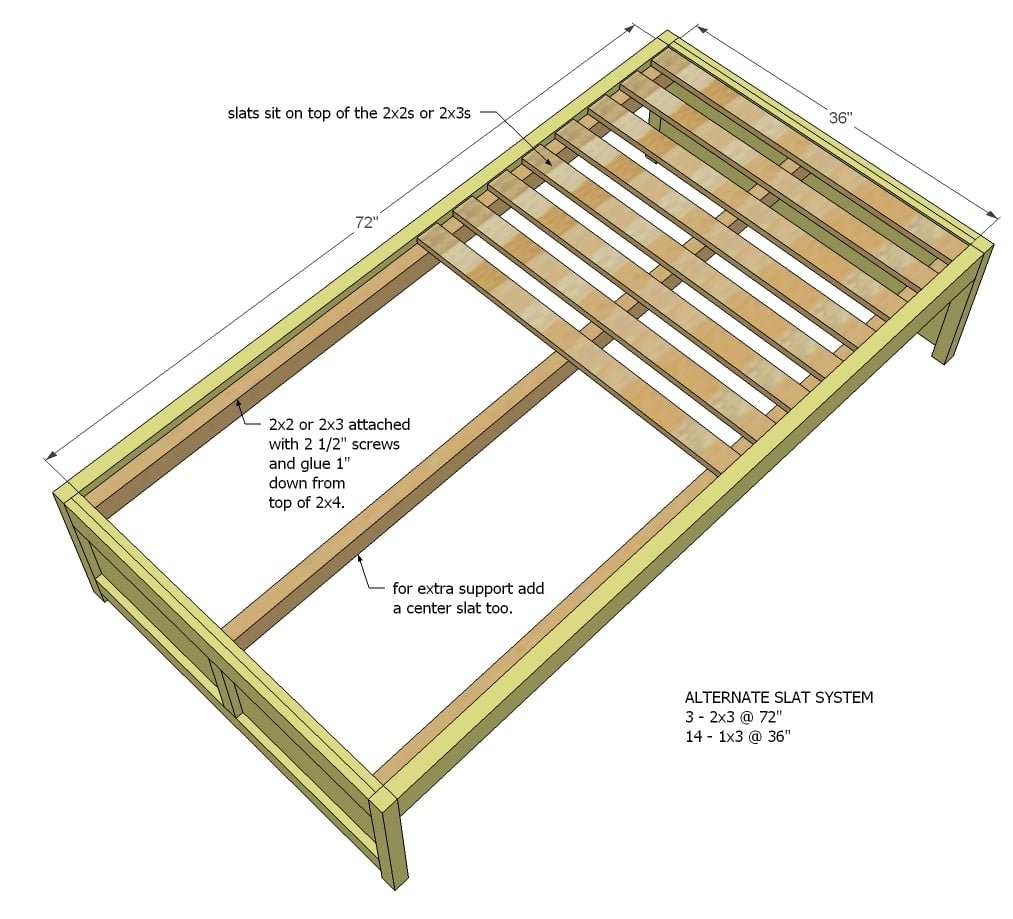
Here's an alternate slat system that you could use if you prefer that.
Finishing
Sand all surfaces, starting with a medium grit and finishing with fine. Wipe off the dust, fill any holes or gaps with wood filler, and sand smooth once dry. Apply primer if you're painting, then finish with your choice of paint or stain and seal with a durable clear topcoat. For outdoor projects, use exterior-rated primer, paint or stain, and sealer so the piece stands up to the weather.
Source (temporary): https://www.ana-white.com/woodworking-projects/daybed-storage-trundle-drawers