Deep Console Table with Hutch
How to build a console with tiered hutch - with the extra deep bottom that serves both as a bench and tabletop, and the hutch for storage on top, this unique piece may be perfect for your space. with diagrams, shopping and cut list from

Specifications
| Project type | Console Table Plans |
|---|---|
| Room | Storage Solutions |
| Difficulty | Intermediate |
Dimensions
Use the size-specific shopping and cut lists below.
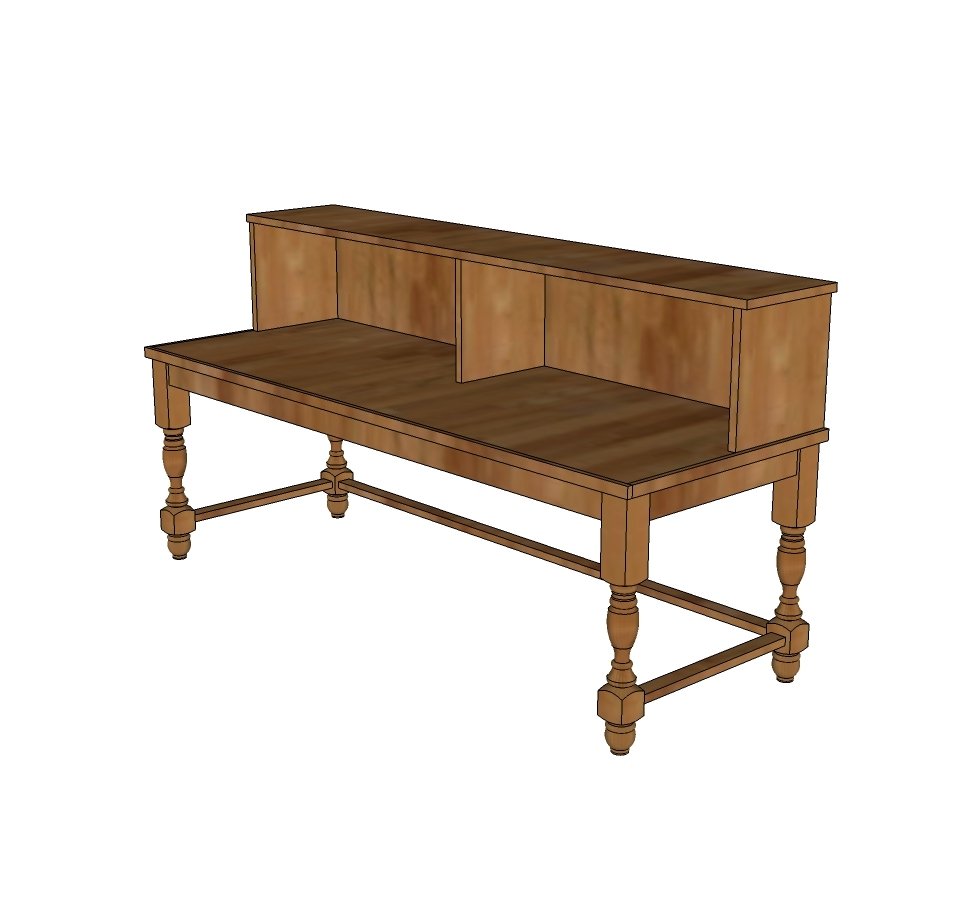
Shopping List
- 2 - 1x3x8
- 1 - 1x3x6
- 1 - 1x12x8
- 1 - 1x12x6
- 1 - 3/4” plywood sheet
- 4 - turned legs
Cut List
TABLE
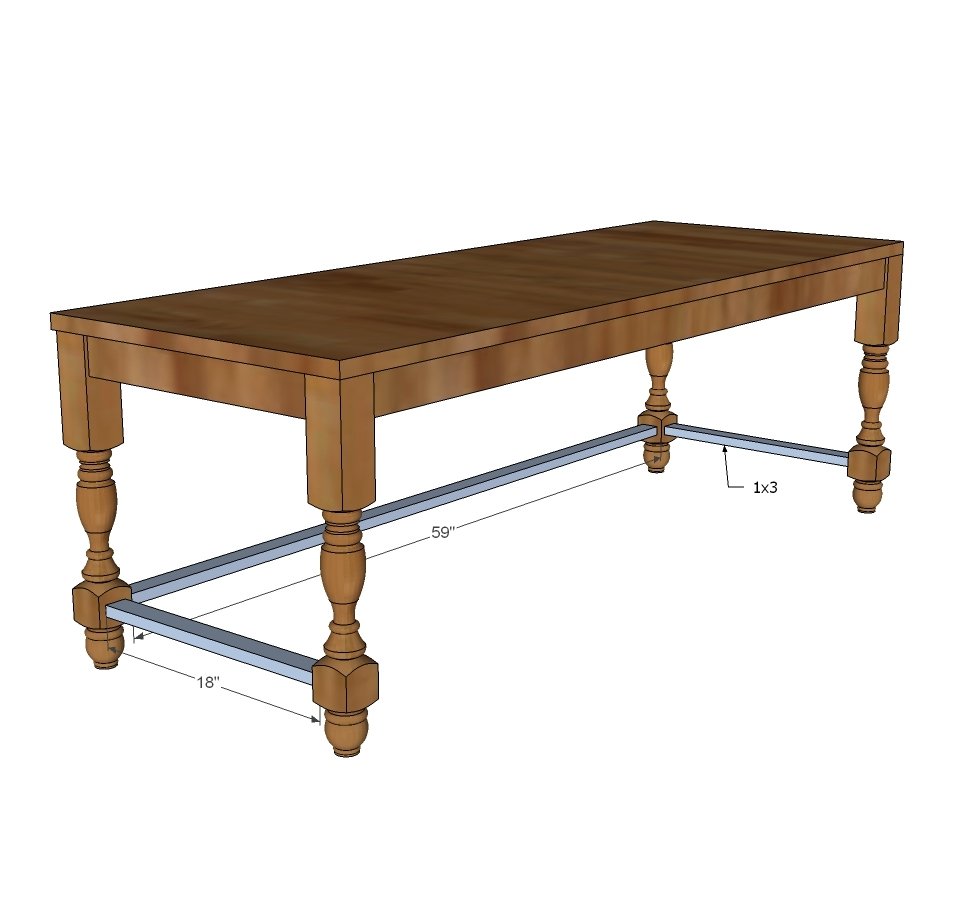
- 3 - 1x3 @ 59"
- 4 - 1x3 @ 18"
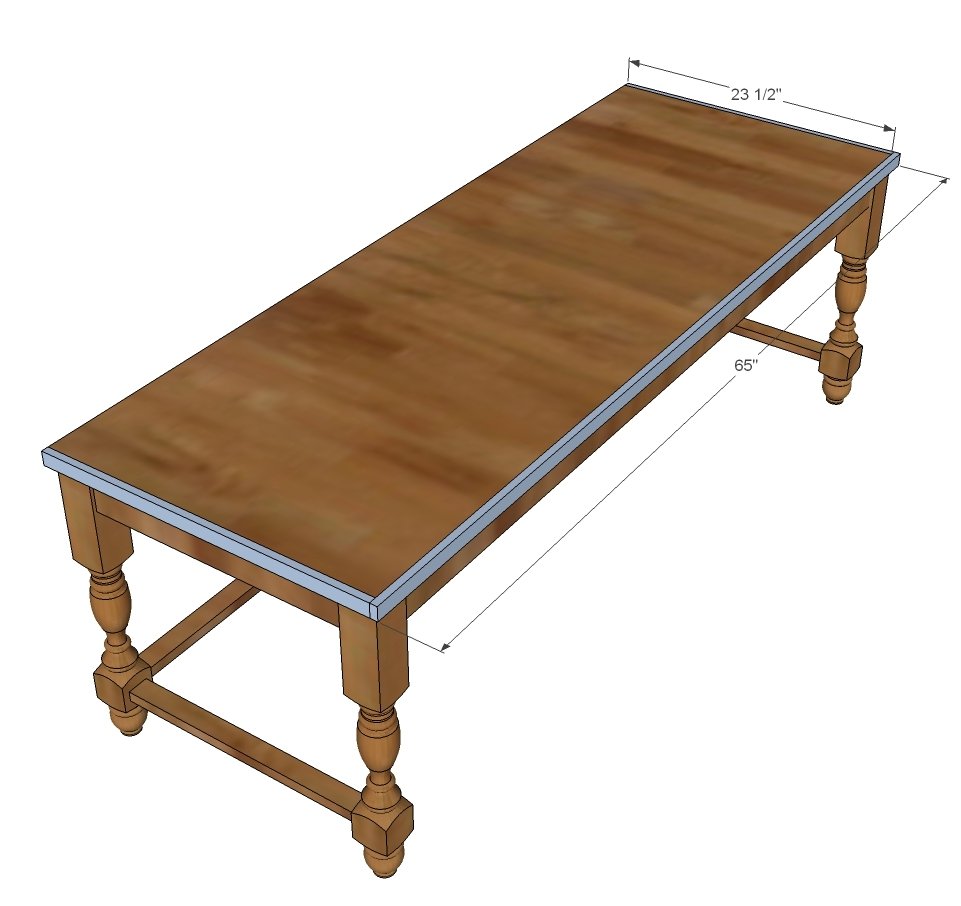
- 1 - 3/4" plywood @ 23-1/2" x 64" (could also use pine project panel for top)
- 1 - 1x2 @ 65"
- 2 - 1x2 @ 23-1/2" for the trim
- Jen also added additional 1x3s underneath table for additional support
HUTCH
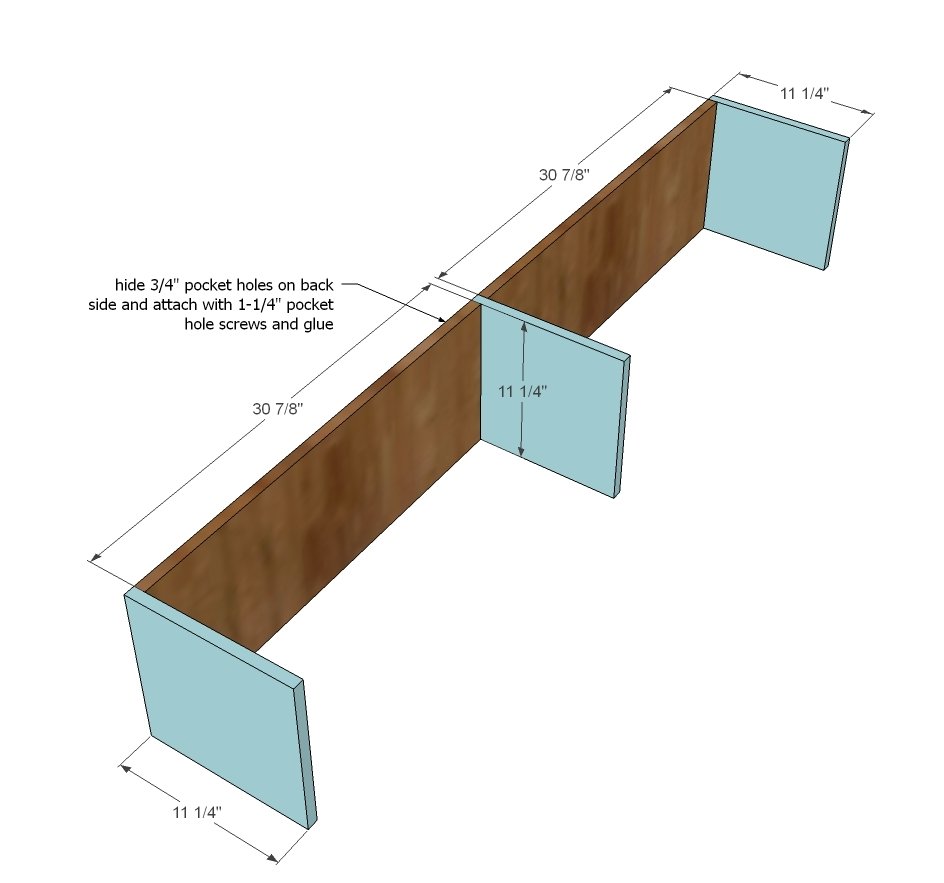
- 3 - 1x12 @ 11-1/4"
- 2 - 1x12 @ 30-7/8"
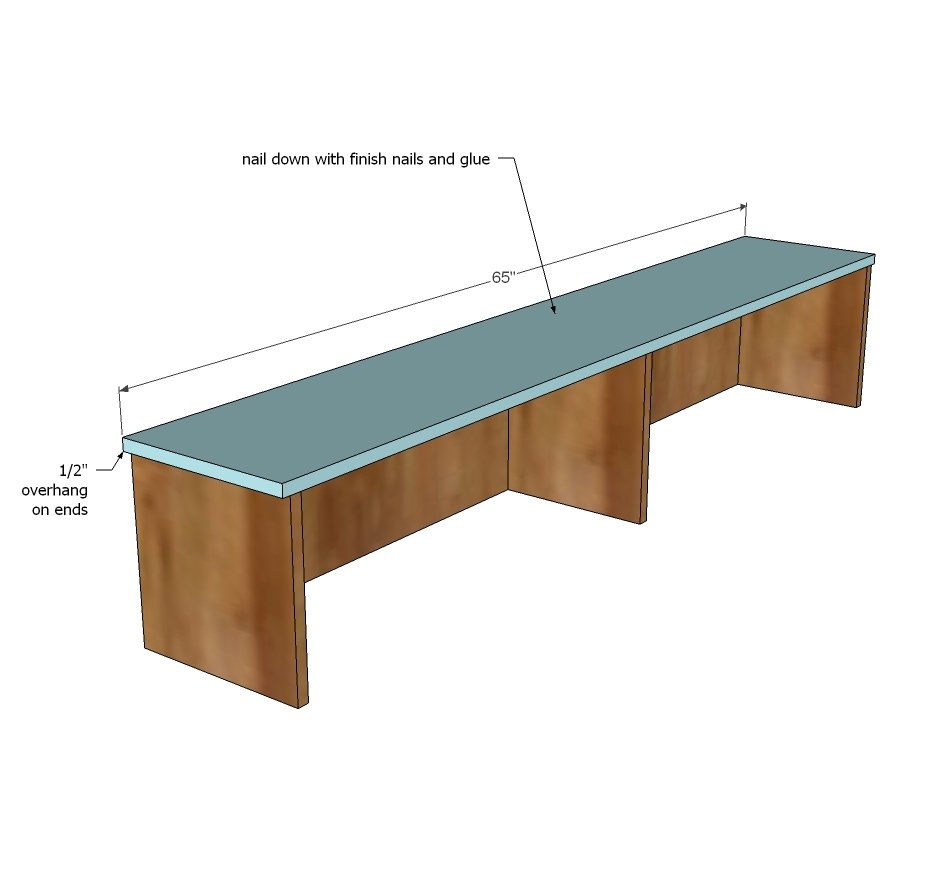
- 1- 1x12 @ 65"
Tools
- measuring tape
- square
- pencil
- safety glasses
- hearing protection
- kreg-jig
- drill
- circular saw
- nailer
- sander
Step-by-step Instructions
Build the basic table shape by attaching aprons to the turned legs.
TIP: Drill 3/4" pocket holes facing upward for attaching tabletop in next step prior to attaching aprons to legs.
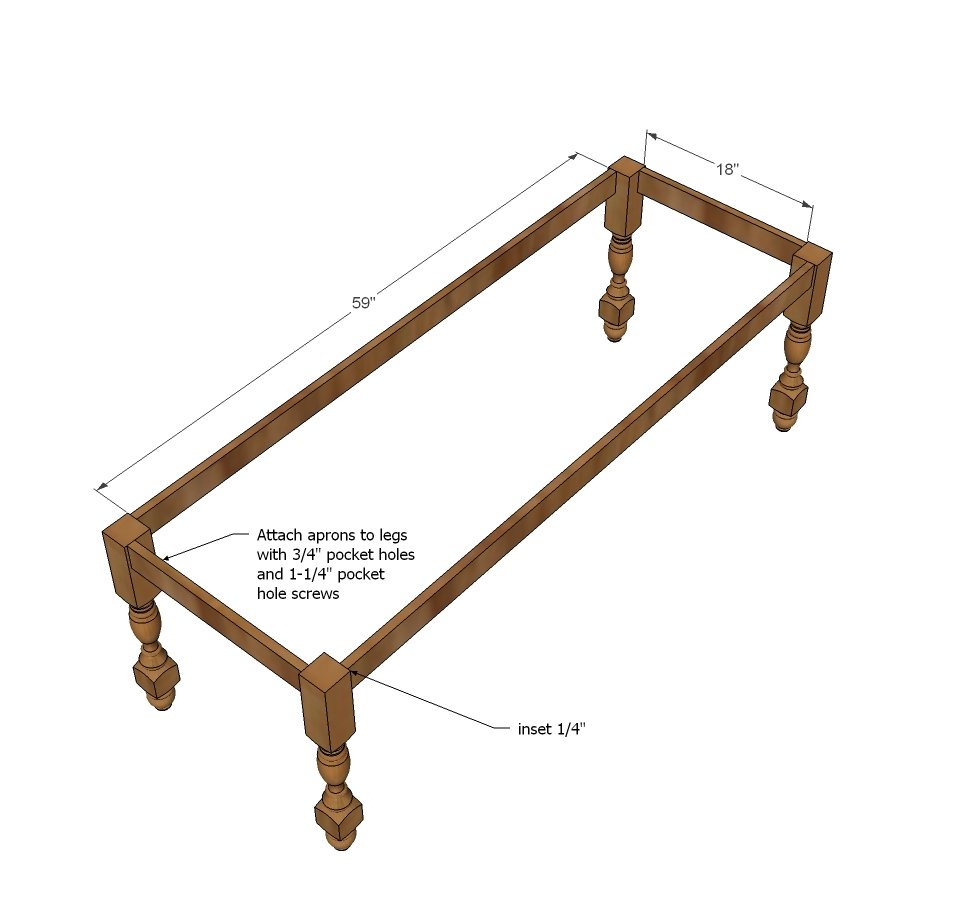
Step 2
Attach tabletop to the aprons. Use 3/4" pocket holes in aprons and 1-1/4" pocket hole screws.
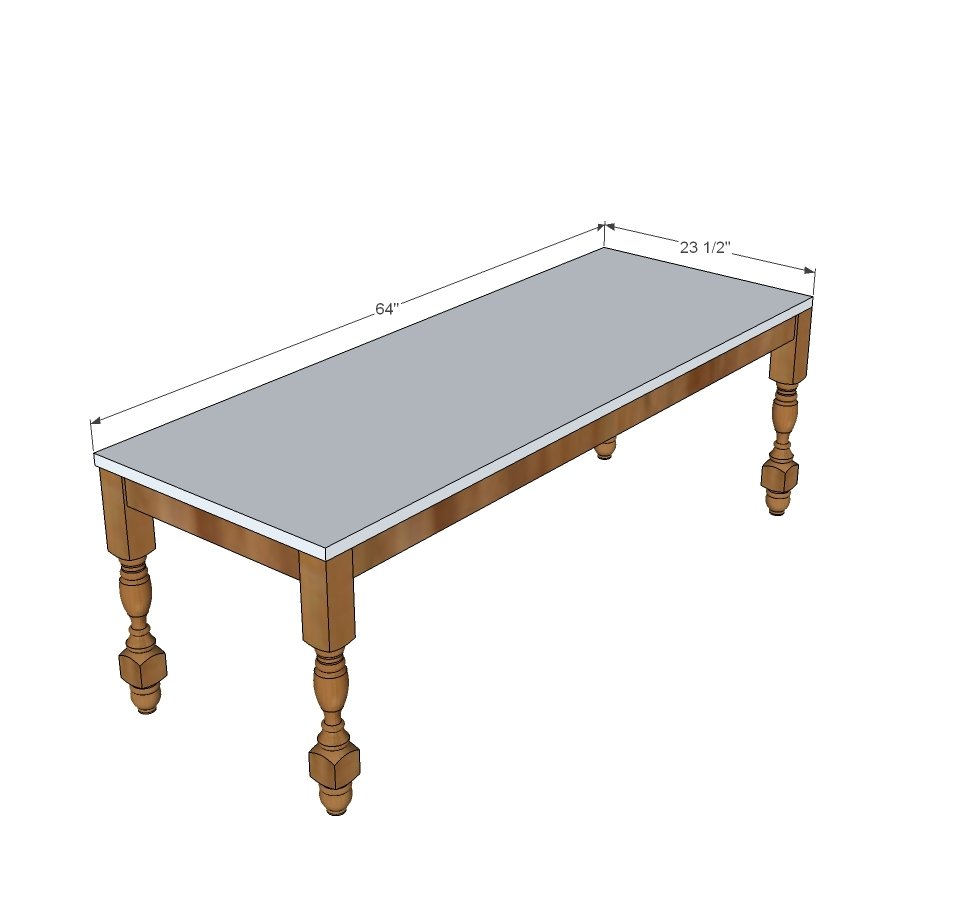
Step 3
Jen added extra support underneath the tabletop by adding additional boards.
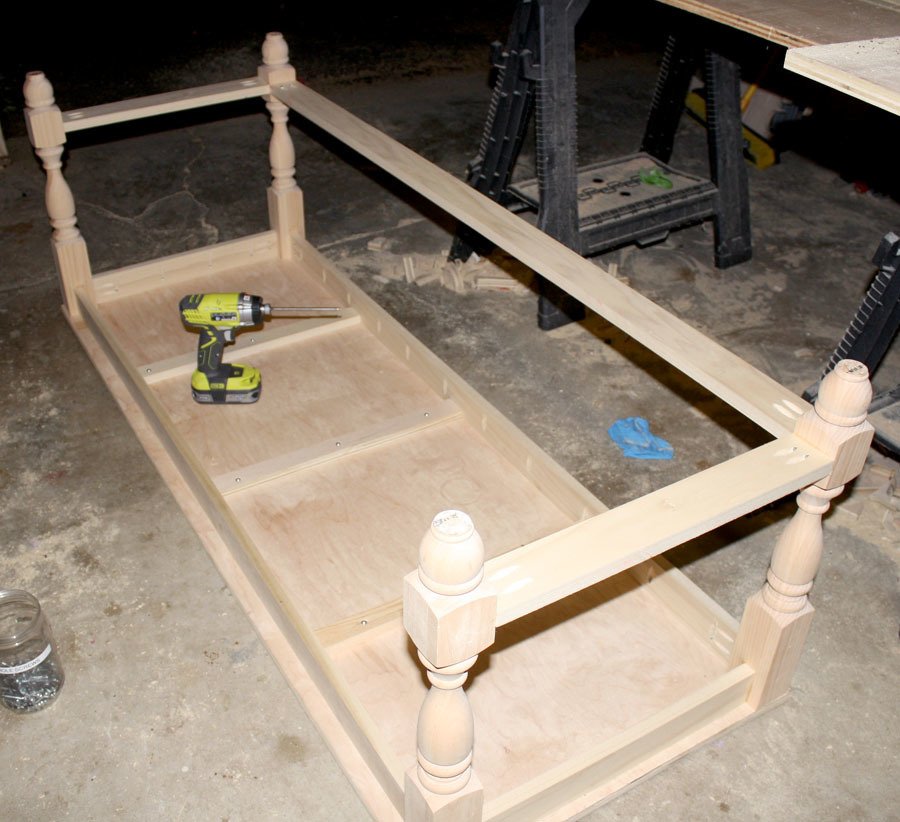
Step 4
Attach stretchers to legs at stretcher blocks. Hide 3/4" pocket holes on underside.
Step 5
Step 6
Attach the back 1x12 boards to the dividers with 3/4" pocket holes and 1-1/4" pocket hole screws.
Step 7
Attach top to hutch framing - can be attached with nails and glue.
Step 8
Attach hutch from underside with screws.
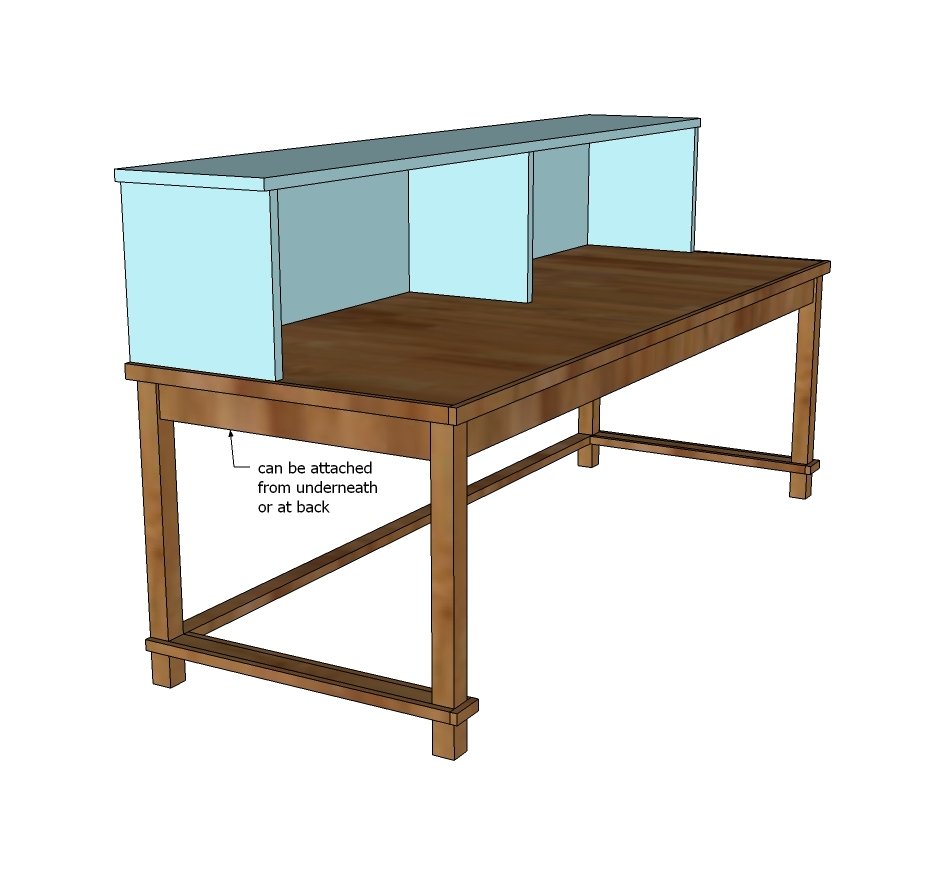
Step 9
Make sure you check out Jen's post on how she finished hers here.
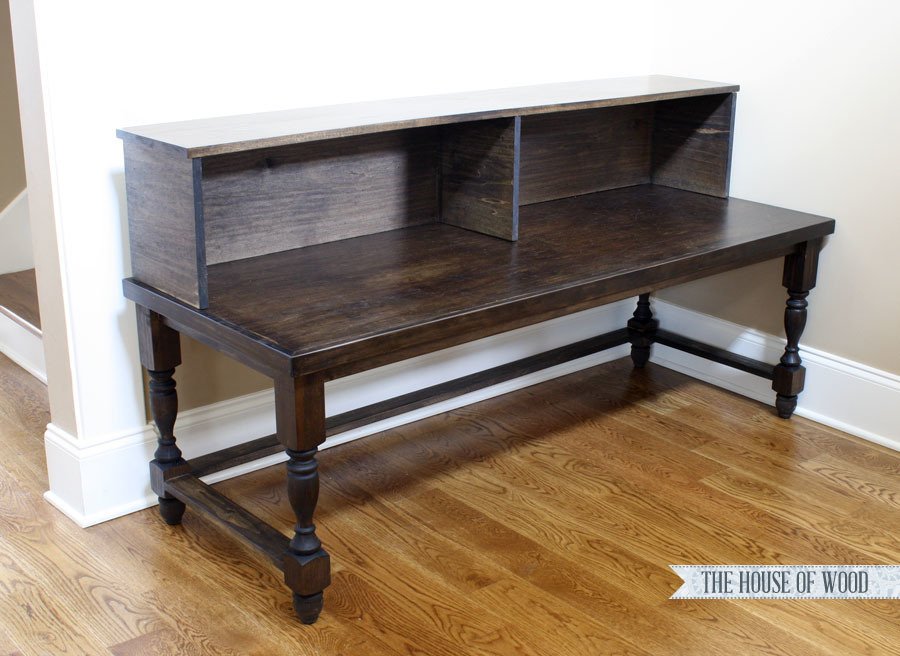
Finishing
Sand all surfaces, starting with a medium grit and finishing with fine. Wipe off the dust, fill any holes or gaps with wood filler, and sand smooth once dry. Apply primer if you're painting, then finish with your choice of paint or stain and seal with a durable clear topcoat. For outdoor projects, use exterior-rated primer, paint or stain, and sealer so the piece stands up to the weather.
Source (temporary): https://www.ana-white.com/woodworking-projects/deep-console-table-hutch