Desk with Drawer and Shelving
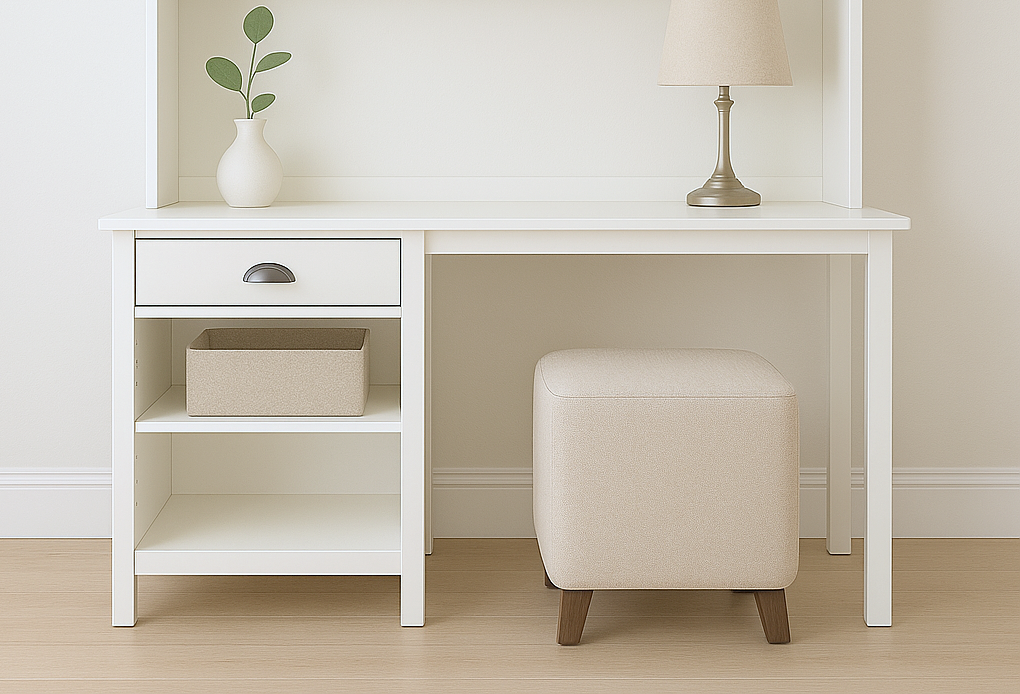
Build-Your-Own Desk Base (!) Ready to build the desk of your dreams? Start with this sturdy desk base! It’s simple, strong, and designed to work on its own—or pair it with our matching hutch for even more storage and style. Why you’ll love it • Free, step-by-step plans with cut list + diagrams • Beginner-friendly build that looks pro…
Specifications
| Project type | Desk, Desk Systems and Project Table Plans |
|---|---|
| Room | Storage Solutions |
| Style | Modern Style Furniture Plans |
| Difficulty | Intermediate |
| Estimated cost | $100-$150 |
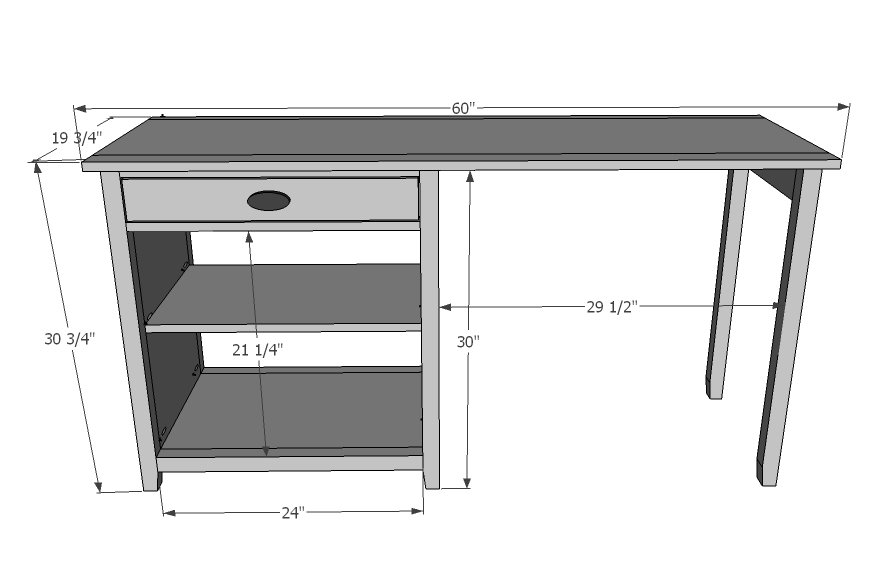
Dimensions
Use the size-specific shopping and cut lists below.
Shopping List
- 1 - Sheet of 3/4" Plywood ripped into 15 3/4" x 8 foot long strips
- 2 - 1x3 @ 8 feet long
- 2 - 2x2 @ 8 feet long
- 2 - 1x2 @ 8 feet long
- 1 - 1x4 @ 4 feet long
- 1 knob or handle
- 1 set of 16" euro style white drawer slides
- 1/4" plywood 23" x 16"
Cut List
- 2 - 3/4" plywood @ 15-3/4" x 28" (Sides)
- 4 - 1x2 @ 15 3/4" (Side Trim)
- 6 - 2x2 @ 30" (Legs)
- 2 - 3/4" plywood @ 15-3/4" x 24" (Shelves - one is optional)
- 3 - 2x2 @ 24" (Front/Back Trim)
- 2 - 1x2 @ 24" (Drawer Trim)
- 1 - 1x16 @ 60" (Top)
- 1 - 1x3 @ 60" (Top)
- 1 - 1x2 @ 60" (Top)
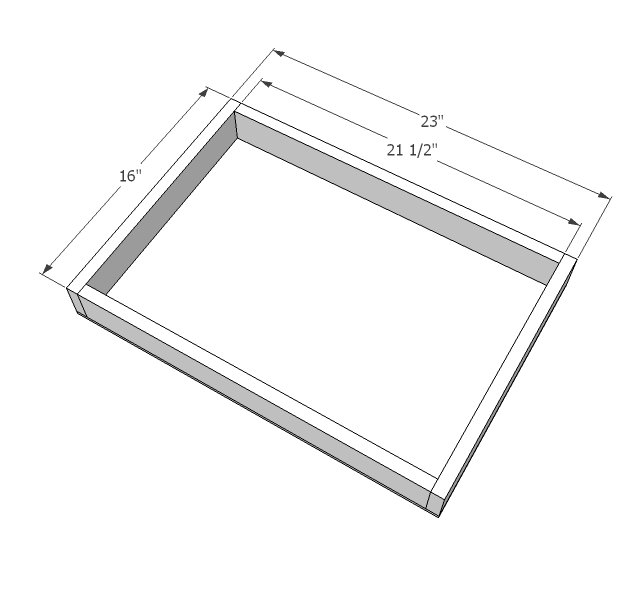
- 2 - 1x3 @ 21 1/2" (Drawer Front/Back)
- 2 - 1x3 @ 16" (Drawer Sides)
- 1 - 1/4" Plywood @ 16" x 23" (Drawer Bottom)
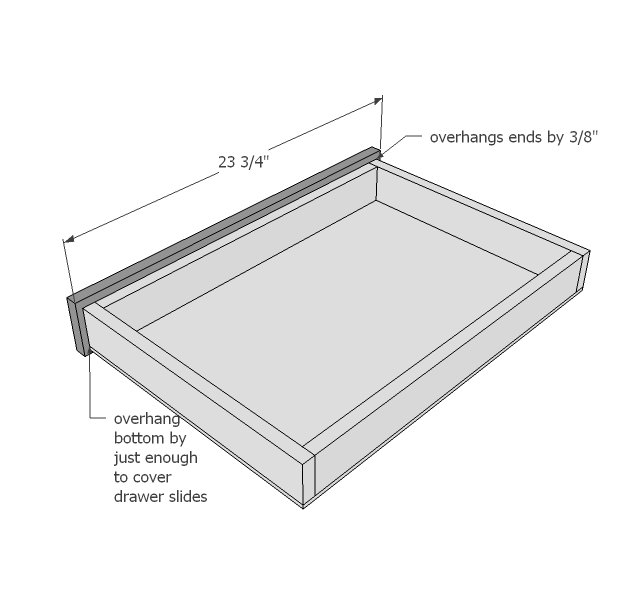
- 1 - 1x4 @ 23 3/4" (Drawer Face)
- 1 - 1x4 @ 15 3/4" - Leg Apron
Tools
- measuring tape
- square
- pencil
- safety glasses
- hearing protection
- kreg-jig
- drill
- circular saw
- nailer
- sander
Step-by-step Instructions
Step 1
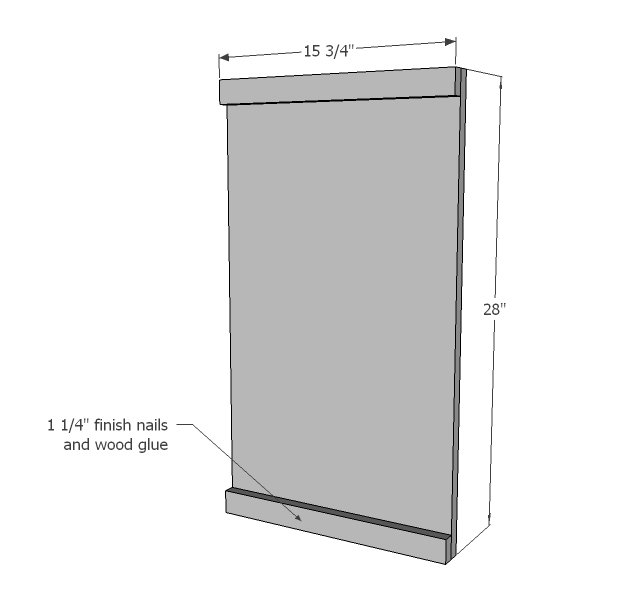
Attach trim to top and bottom of sides. Use 1 1/4" finish nails and wood glue. NOTE: You may wish to predrill pocket holes prior to this step.
Step 2
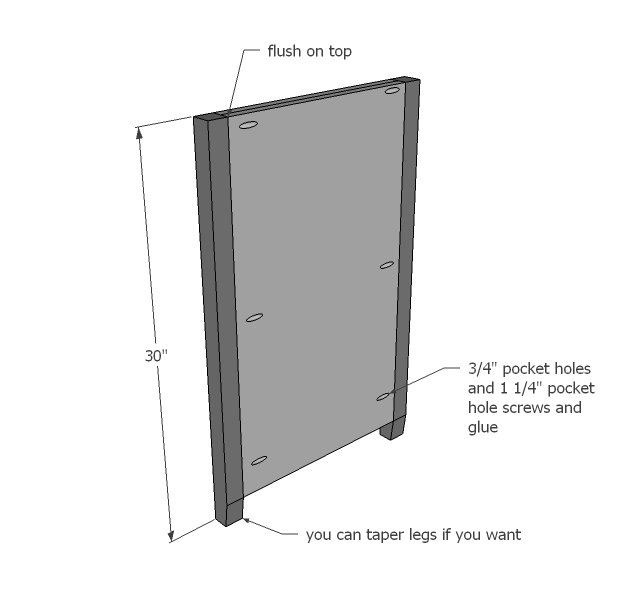
Attach legs to sides as shown in diagram, edges flush to trim, back and top. NOTE: Legs can be tapered as shown.
Step 3
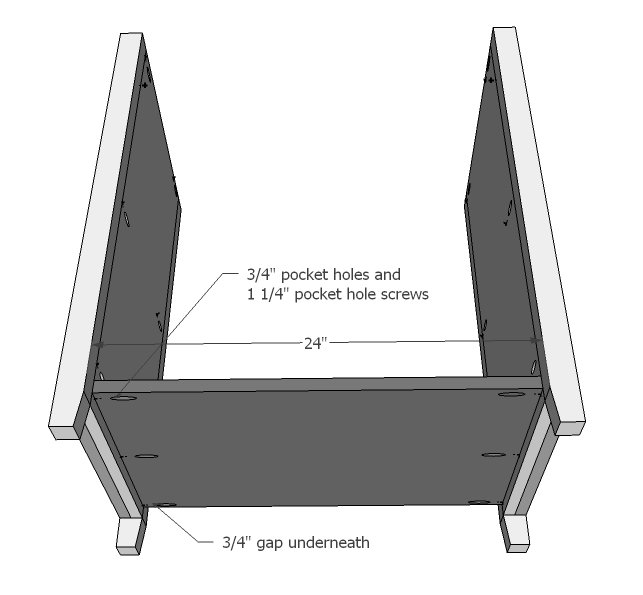
Place bottom shelf and attach with 1 1/4" pocket hole screws. NOTE: You may wish to also drill 3/4" pocket holes along front and back edges for attaching shelf trim (next step).
Step 4
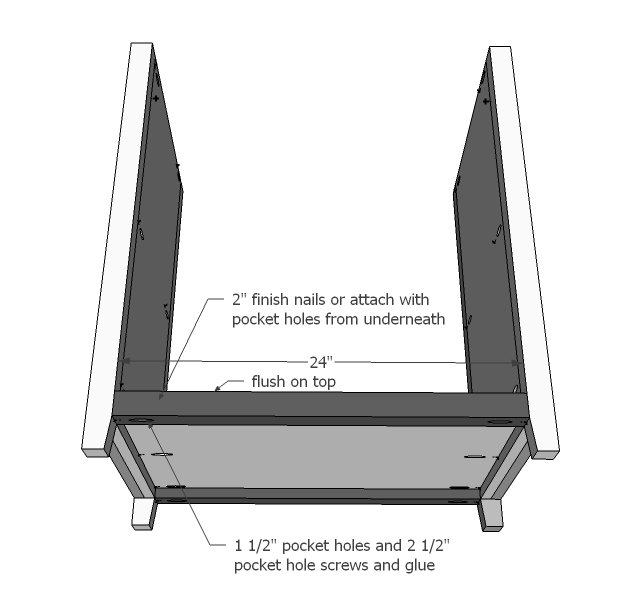
Attach shelf trim either through predrilled pocket holes or with 2" finish nails and glue.
Step 5
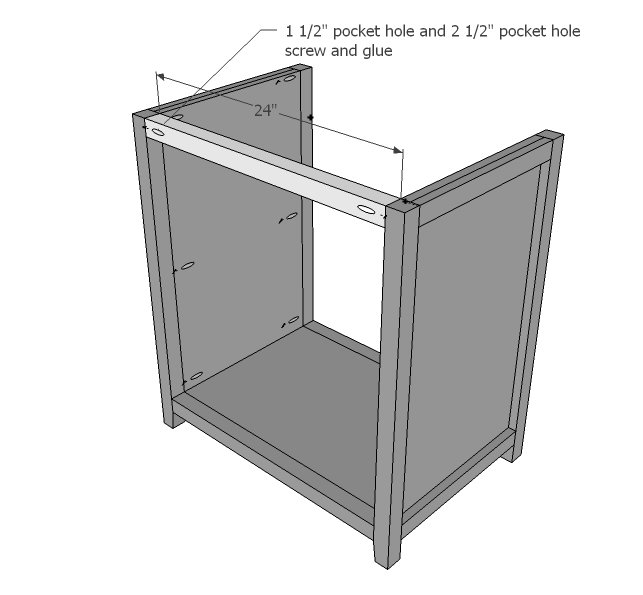
Attach the back trim with 1-1/2" pocket holes and 2-1/2" pocket hole screws.
Step 6
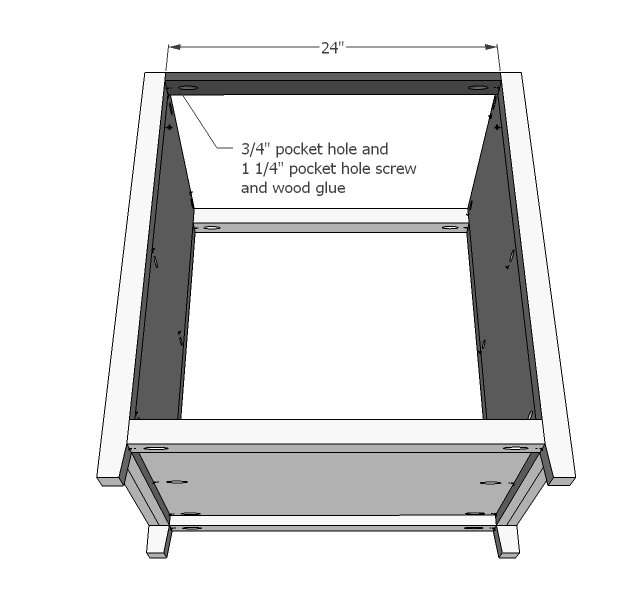
Next is the front trim.
TIP: Watch my video on how to make installing and building a drawer using Euro slides easy:
The drawer is just a box with 1/4" plywood on the bottom. If you use pocket holes, place on outsides - the drawer face will cover them up:)
Step 8
This is up to you - you can attach the drawer face now or wait until after you install the drawer in the cabinet. I like to attach with glue and 1 1/4" finish nails, avoiding hardware locations.
Step 9
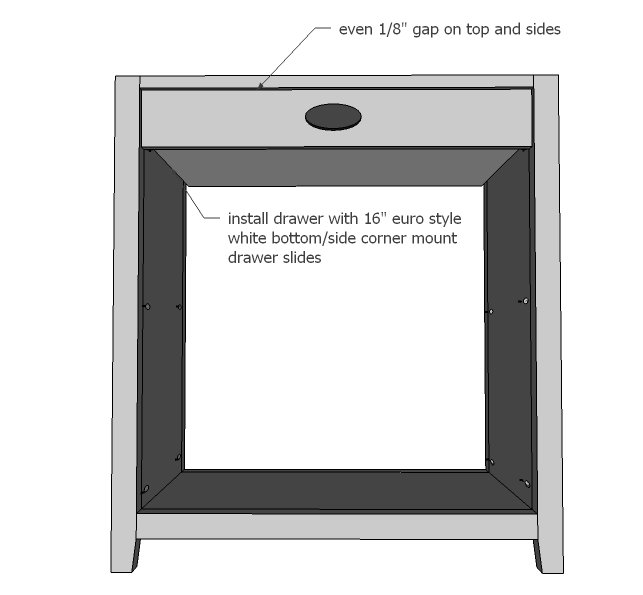
The drawer needs to be installed so there is an even 1/8" gap along top and side edges. If you install drawer box, install leaving room for face (3/4") and then just attach face with an even gap on all sides.
Step 10
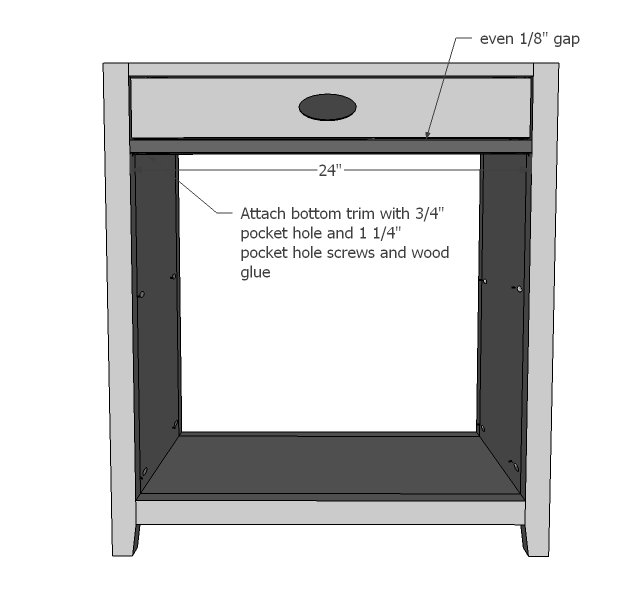
ow simply add the bottom trim. Hard part is ovah!
Step 11
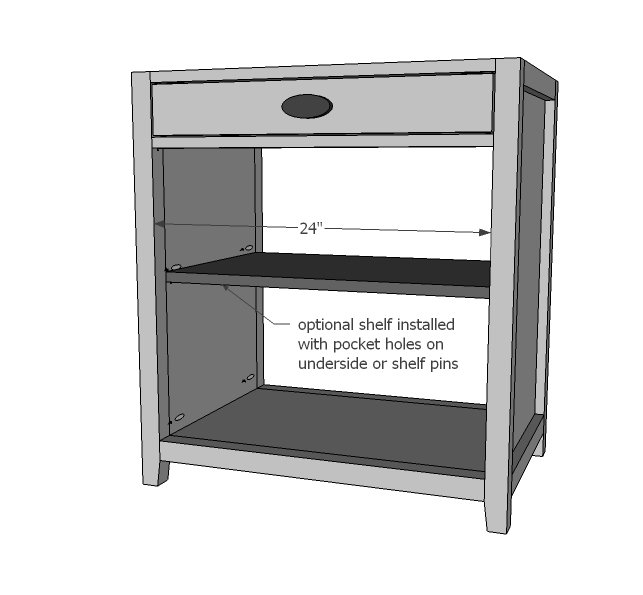
Shelf is optional - you can install fixed with pocket hole screws or make adjustable with shelf pins.
Step 12
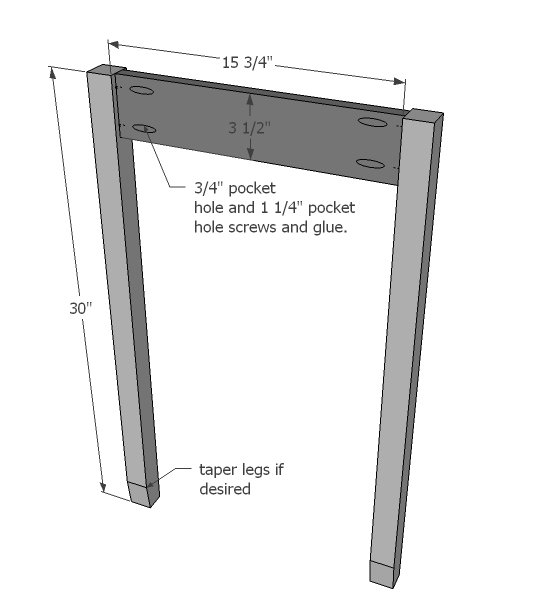
Build the leg end as shown above.
Step 13
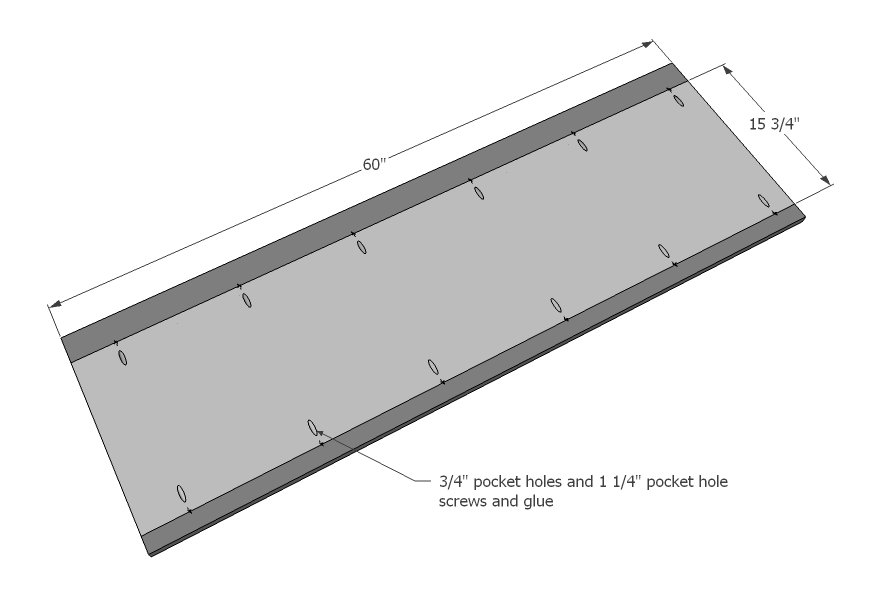
Now the top. Use clamps for a very flat top.
Step 14
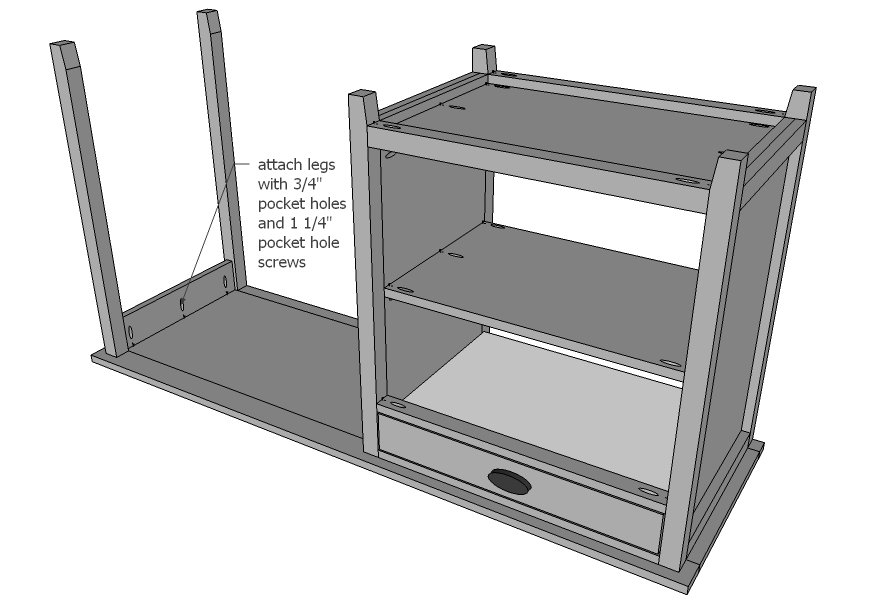
And now just attach all the parts!
Step 15
Just in case you need a little extra support.
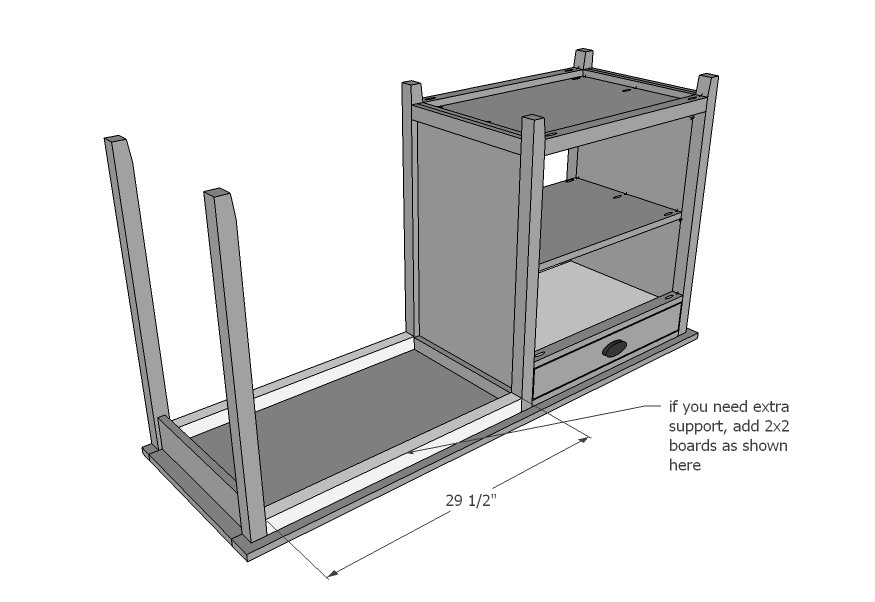
Step 16
Or your legs aren't staying in place.
Finishing
Sand all surfaces, starting with a medium grit and finishing with fine. Wipe off the dust, fill any holes or gaps with wood filler, and sand smooth once dry. Apply primer if you're painting, then finish with your choice of paint or stain and seal with a durable clear topcoat. For outdoor projects, use exterior-rated primer, paint or stain, and sealer so the piece stands up to the weather.
Source (temporary): https://www.ana-white.com/woodworking-projects/desk-drawer-and-shelving