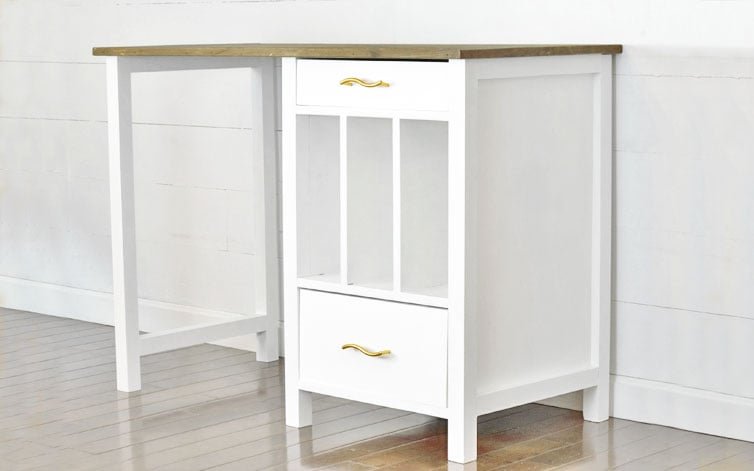
Desk with Drawers and File Cubby Slots
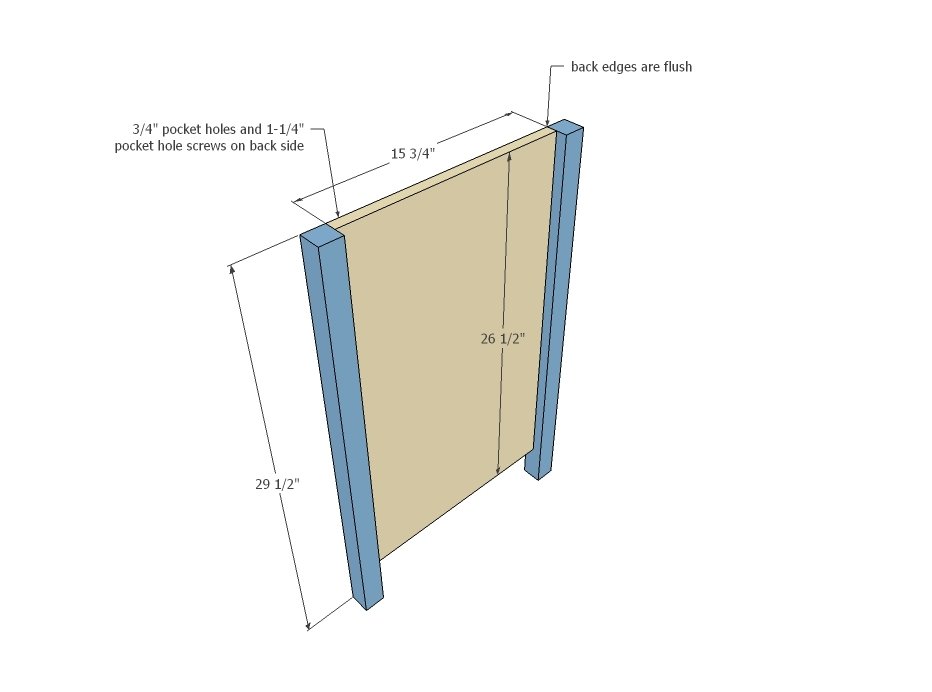
Drill 3/4” pocket holes along side edges of the side panels, every 8” approximately. Attach side panels to the legs, flush on back side and top, with 1-1/4” pocket hole screws and glue. Build two legs sets for each pedestal base.
Specifications
| Project type | Desk, Desk Systems and Project Table Plans |
|---|---|
| Room | Teens |
| Style | Cottage Style Furniture Plans |
| Difficulty | Intermediate |
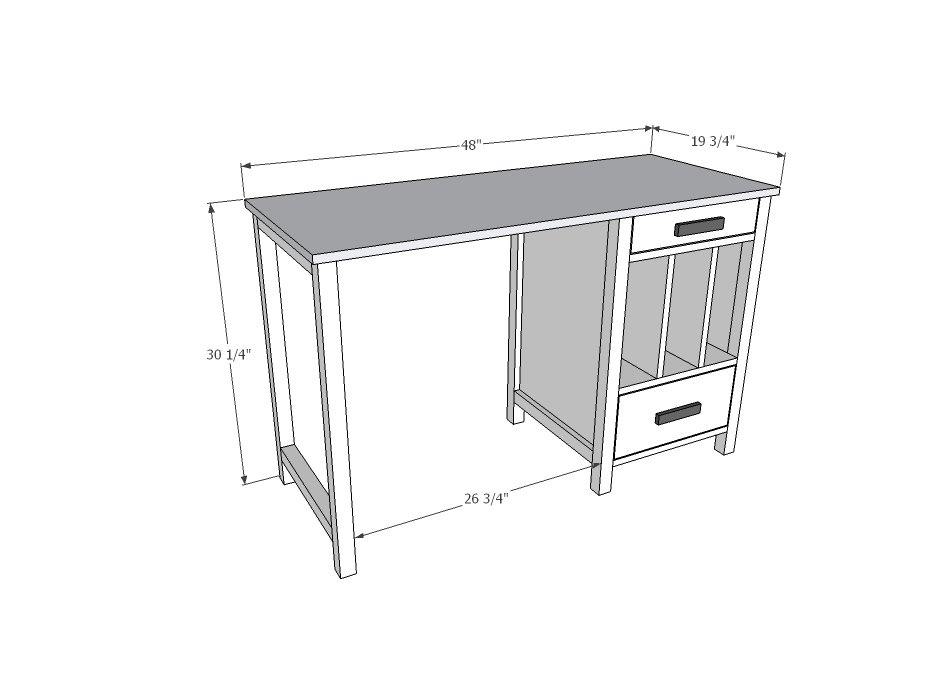
Dimensions
Use the size-specific shopping and cut lists below.
Shopping List
- 3 – 2x2 @ 8 feet long
- Half sheet (48” x 48”) of 3/4” thick hardwood plywood, cut into strips 15-3/4” wide x 48” long
- Quarter sheet (24” x 48”) of 1/4” thick hardwood plywood
- 1x2 @ 8 feet long
- 1 – 1x3 @ 6 feet long
- 1 – 1x6 @ 6 feet long
- 1 – 1x4 @ 16”
- 1 – 1x8 @ 16”
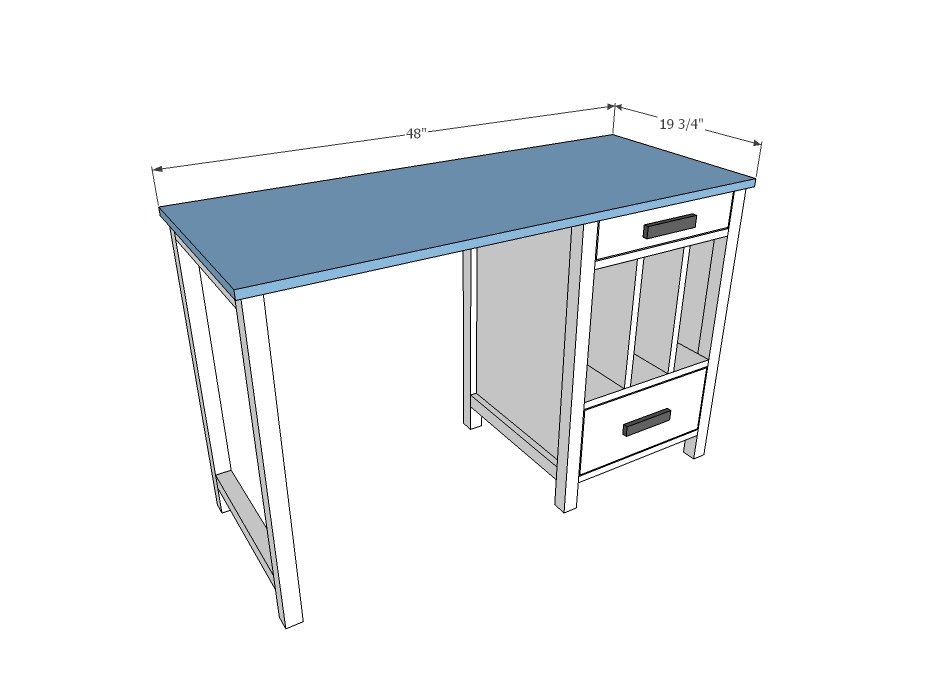
- 1 – 3/4” thick project panel, 48” x 19-3/4” (top) *can also build top
- 2 sets white euro drawer slides, 18” length
- 2 knobs/pulls
- 1-1/4” pocket hole screws
- 3/4" and 1-1/4” brad nails
- Wood glue
Cut List
PEDESTAL BASE (For building one, double for building two)
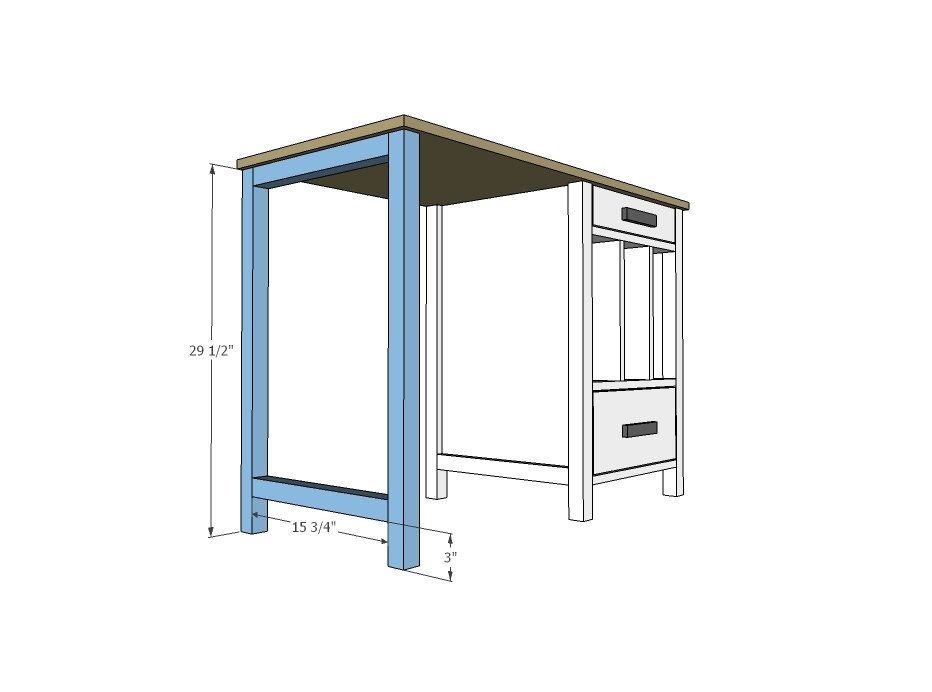
- 4 – 2x2 @ 29-1/2” (legs)
- 2 – 3/4” plywood @ 15-3/4” x 26-1/2” (side panels)
- 4 – 1x2 @ 15-3/4” (side panel trim) optional on insides of pedestal
- 2 – 3/4” plywood @ 15-3/4” x 15-3/4” (top and bottom of cubby area)
- 2 – 3/4” plywood @ 15-3/4” x 13” (cubby dividers)
- 1 – 1/4” plywood @ 15-3/4” x 14-1/2” (cubby area back)
- 2 – 1x2 @ 15-3/4” (bottom trim)
DRAWERS
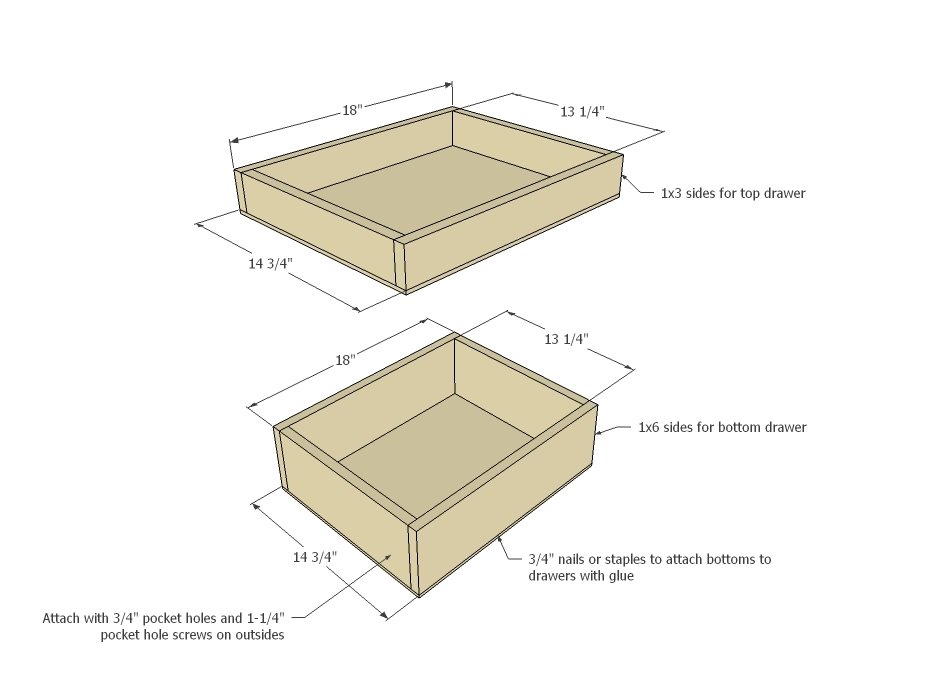
- 2 – 1x3 @ 18” (small drawer sides)
- 2 – 1x3 @ 13-1/4” (small drawer front and back)
- 2 – 1x6 @ 18” (large drawer sides)
- 2 – 1x6 @ 13-1/4” (large drawer front and back)
- 2 – ¼” plywood @ 14-3/4” x 18” (drawer bottoms)
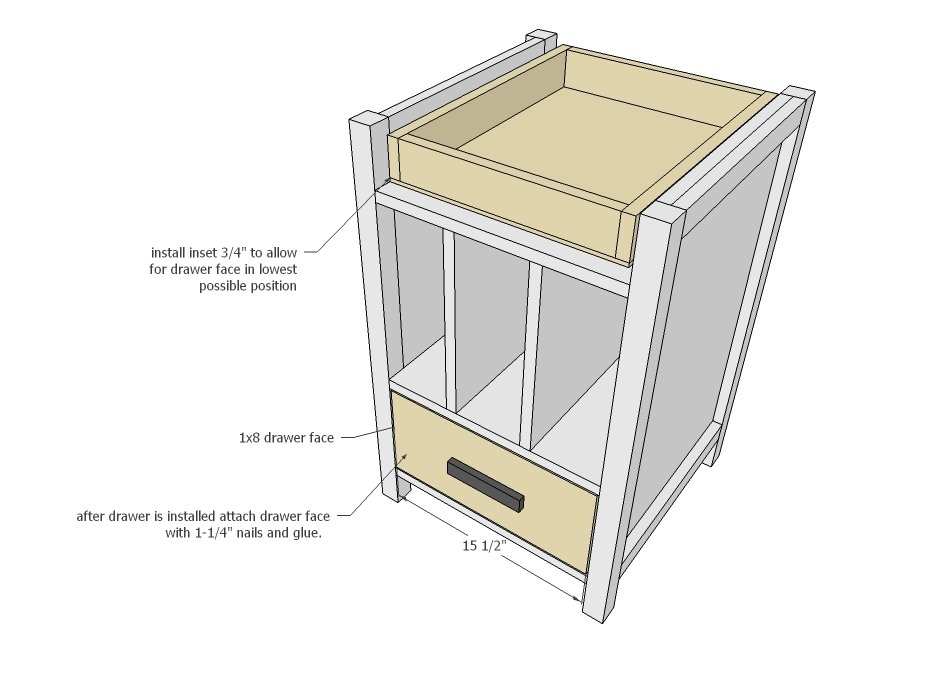
- 1 – 1x4 @ 15-1/2” (small drawer face)
- 1 - 1x8 @ 15-1/2” (large drawer face)
OPEN LEG (for desk with only one pedestal base)
- 2 – 2x2 @ 29-1/2” • 2 – 2x2 @ 15-3/4” TOP • Edge glued project panel 48” x 19-3/4” (cut down to fit size)
Tools
- measuring tape
- square
- pencil
- safety glasses
- hearing protection
- kreg-jig
- drill
- circular saw
- compound miter saw
- nailer
- sander
Step-by-step Instructions
Step 1
Drill 3/4” pocket holes along side edges of the side panels, every 8” approximately. Attach side panels to the legs, flush on back side and top, with 1-1/4” pocket hole screws and glue. Build two legs sets for each pedestal base.
Step 2
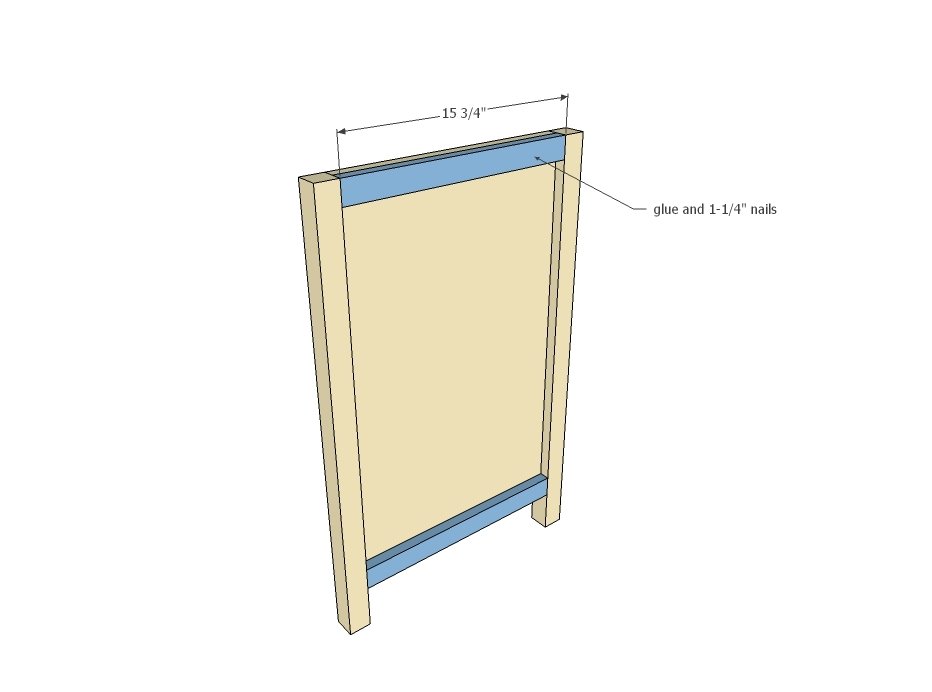
Attach trim with 1-1/4” nails and wood glue to the plywood panels.
Step 3
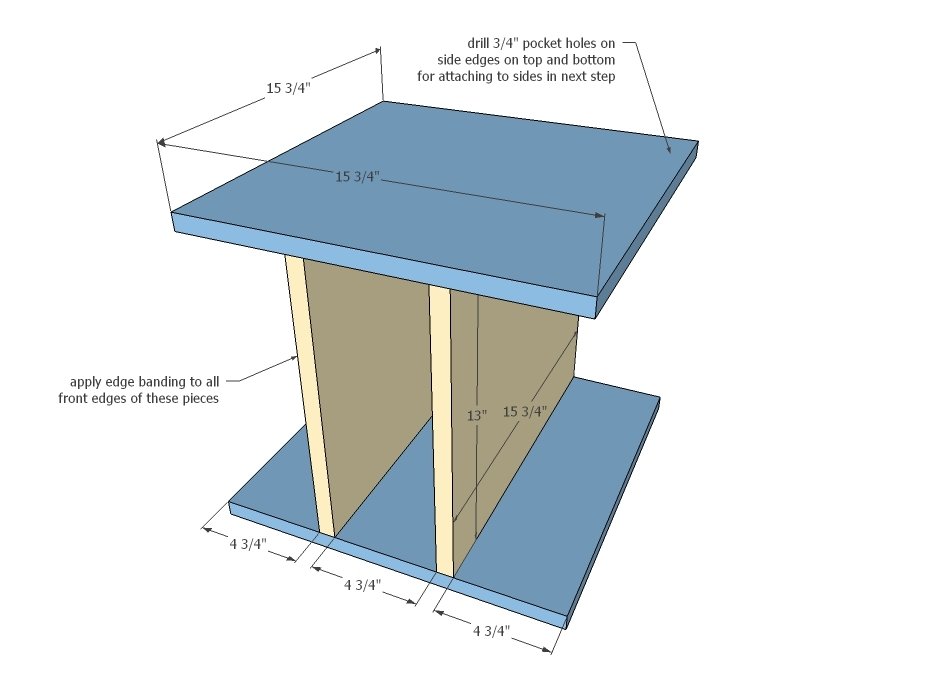
For all cubby area pieces, apply edge banding to front edges (stained finish) or finish front edges by filling any holes with wood filler and sanding (painted finish). Drill 3/4” pocket holes along side edges of top and bottom pieces. Then attach the top and bottom to the dividers with 1-1/4” nails and wood glue, so the pocket holes are on the top and bottom. Adjust for square.
Step 4
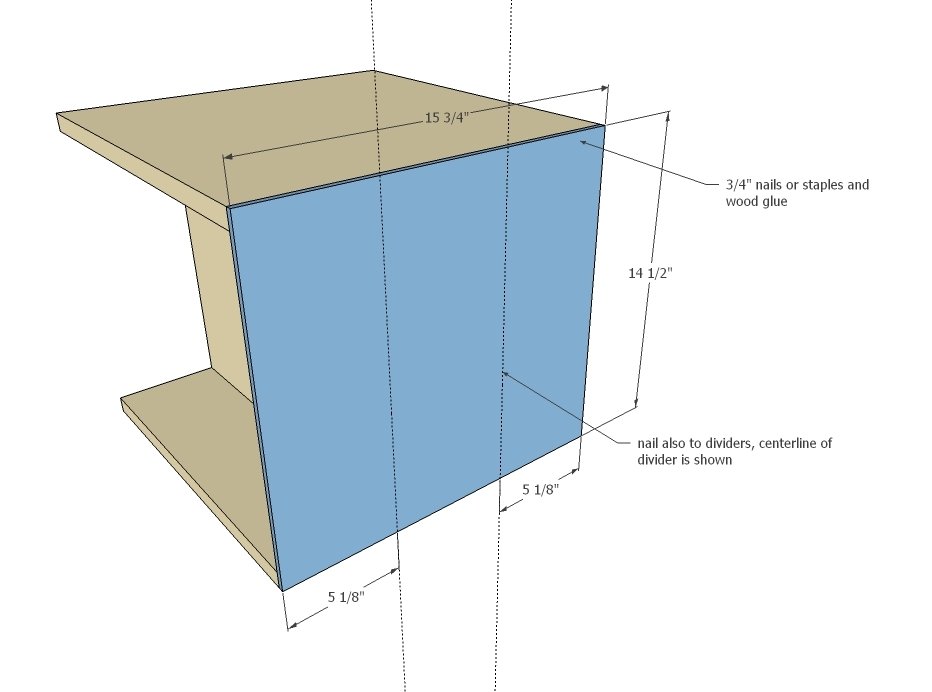
Attach to the back edges 1/4” plywood with glue and ¾” nails.
Step 5
Step 6
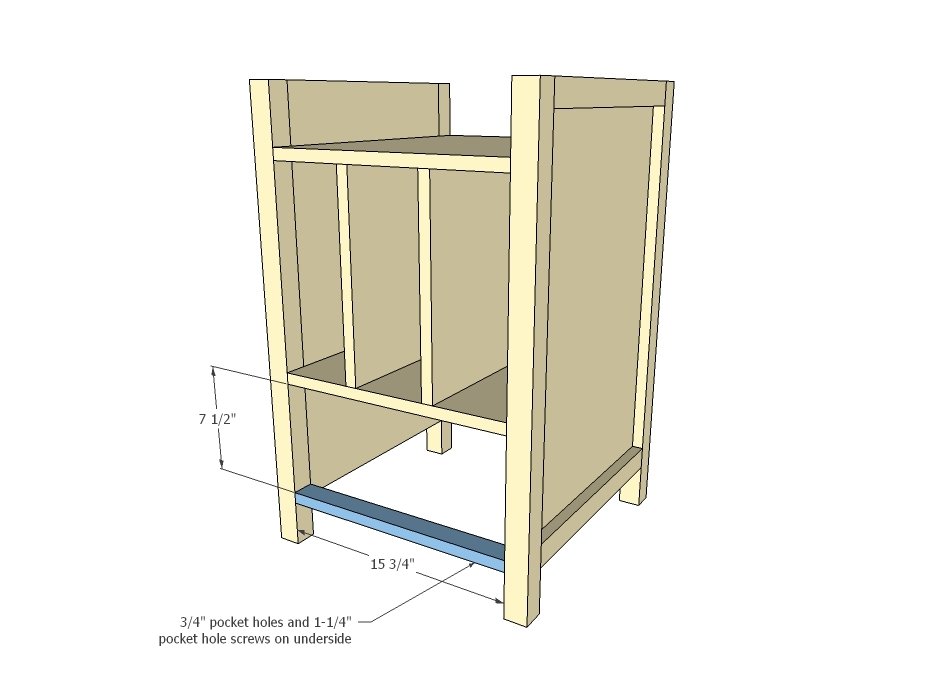
Drill ¾” pocket hole on each end of the remaining 1x2s and attach to base of legs with 1-1/4” pocket hole screws and glue.
Step 7
For drawer slides with clearances of ½”, these are the expected drawer sizes. Make sure you measure and build to fit. Place all pocket holes on outsides.
Step 8
Install drawers in project, with drawer box inset ¾”. Then attach drawer face to drawer box with an even gap around all edges with 1-1/4” nails and glue. I also recommend a couple of screws from inside to further attach. TIP: Attach hardware to drawer face first.
Step 9
Build leg set with 1-1/2” pocket holes and 2-1/2” pocket hole screws. Attach to tabletop with 2” screws.
Step 10
Cut tabletop to fit. Attach with 2” screws through 1x2 trim underside on sides of bases.
Finishing
Sand all surfaces, starting with a medium grit and finishing with fine. Wipe off the dust, fill any holes or gaps with wood filler, and sand smooth once dry. Apply primer if you're painting, then finish with your choice of paint or stain and seal with a durable clear topcoat. For outdoor projects, use exterior-rated primer, paint or stain, and sealer so the piece stands up to the weather.
Source (temporary): https://www.ana-white.com/woodworking-projects/desk-drawers-and-file-cubby-slots