Desktop Office or Vanity Beauty Organizer
Use scrap wood to build a desktop or vanity organizer with cubbies and a drawer!
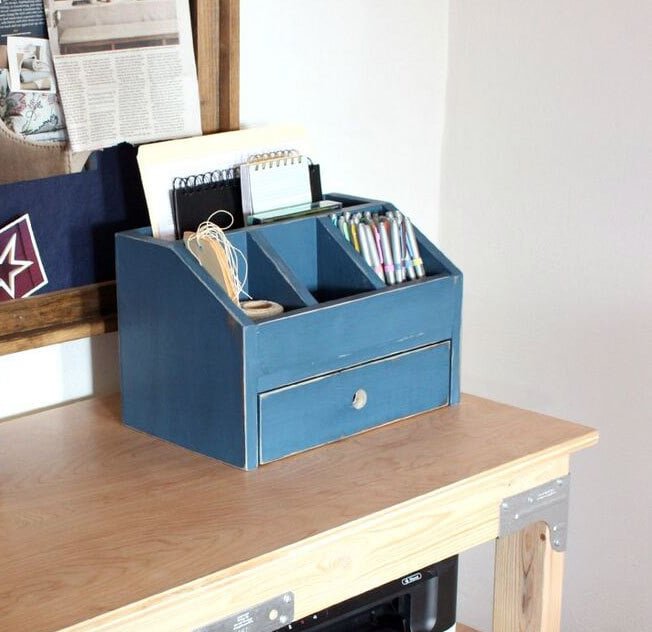
Specifications
| Project type | Cubby Project Plans |
|---|---|
| Room | Storage Solutions |
| Style | Cottage Style Furniture Plans |
| Difficulty | Beginner Projects |
| Estimated cost | Under $20 |
Dimensions
Use the size-specific shopping and cut lists below.
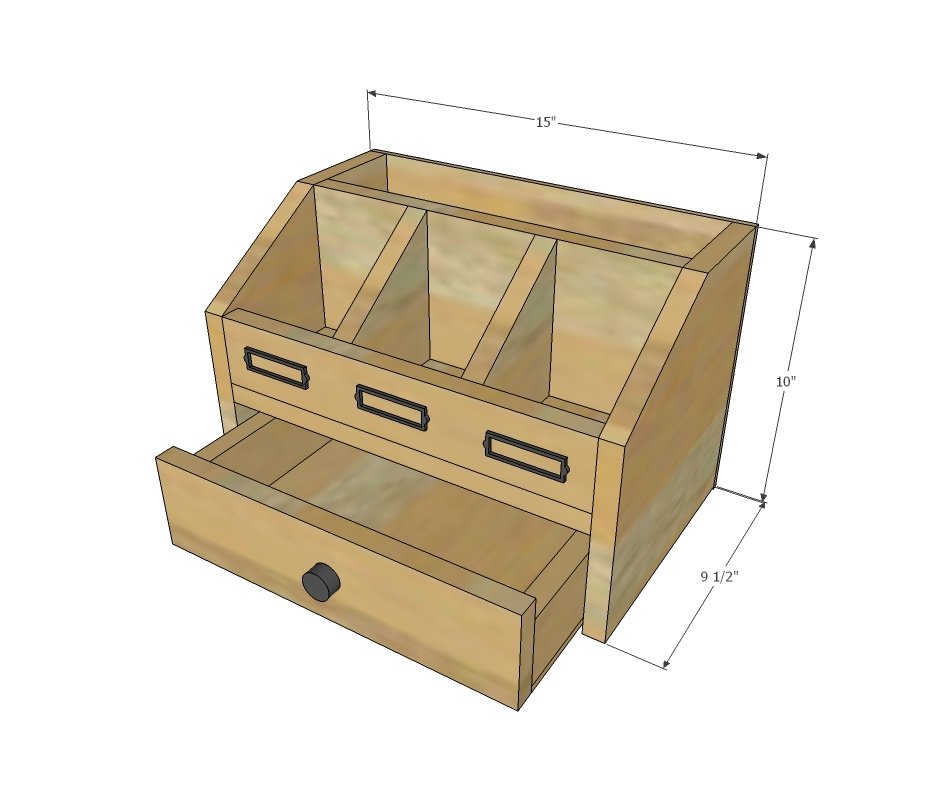
Shopping List
- 34" of 1x10
- 45" of 1x3
- 18" of 1x6
- 14" of 1x4
- 1/4" plywood scraps 8-1/2" x 13-1/4" and 15" x 10"
Cut List
- 1 - 1x10 @ 13-1/2" (middle shelf)
- 1 - 1x3 @ 13-1/2" (front trim)
- 1 - 1x6 @ 13-1/2" (center divider)
- 2 - 1x10 @ 10" (sides)
- 2 - 1x6 @ 4-1/4" (angled dividers cut down in later steps)
- 1 - 1/4" plywood @ 15" x 10" (back)
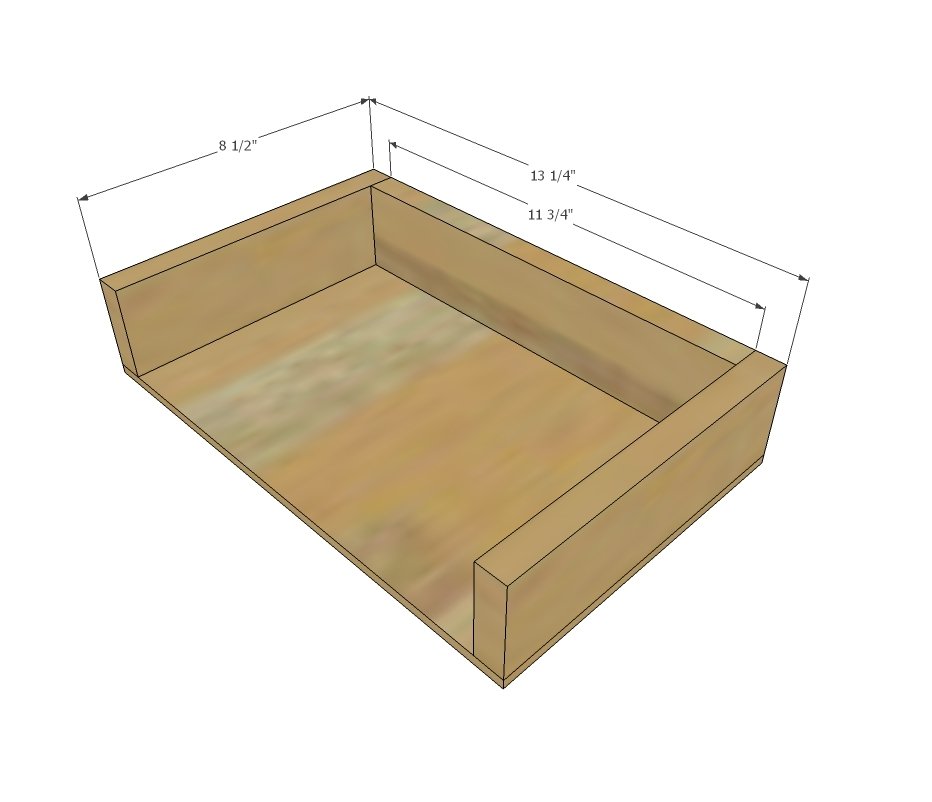
- 2 - 1x3 @ 8-1/2" (drawer sides)
- 1 - 1x3 @ 11-3/4" (drawer back)
- 1 - 1/4" plywood @ 8-1/2" x 13-1/4" (drawer bottom)
- 1 - 1x4 @ 13-1/4" (drawer front)
Tools
- measuring tape
- square
- pencil
- safety glasses
- hearing protection
- jigsaw
- compound miter saw
- table saw
- nailer
- sander
Step-by-step Instructions
Step 1
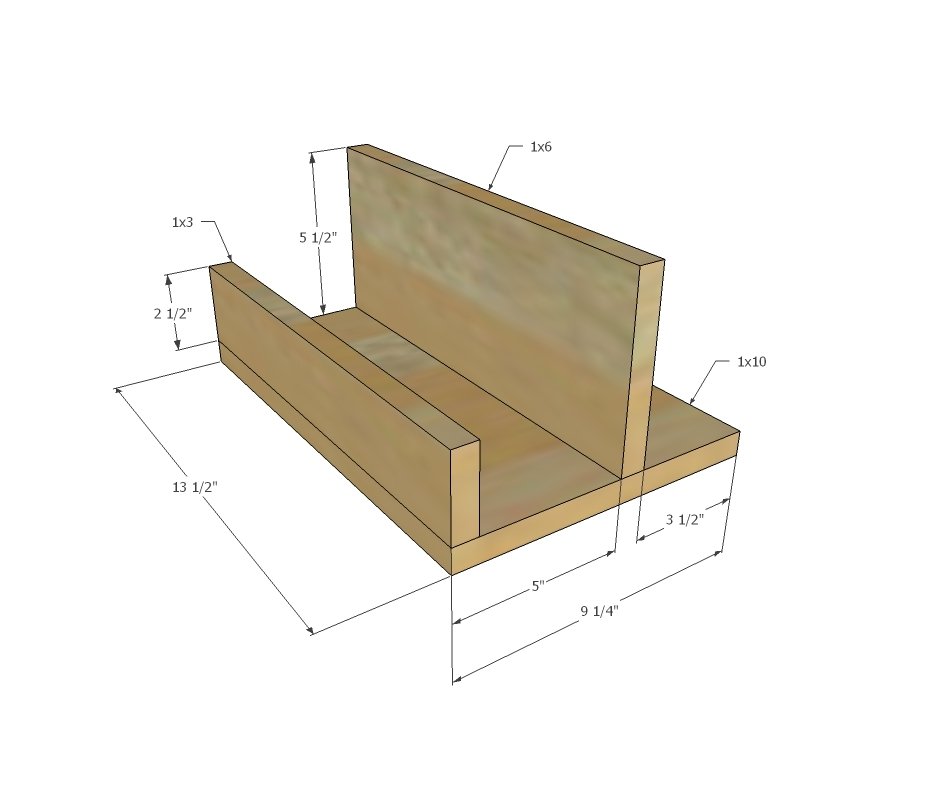
Use 1-1/4" nails and glue to attach divider and front trim to shelf bottom.
Step 2
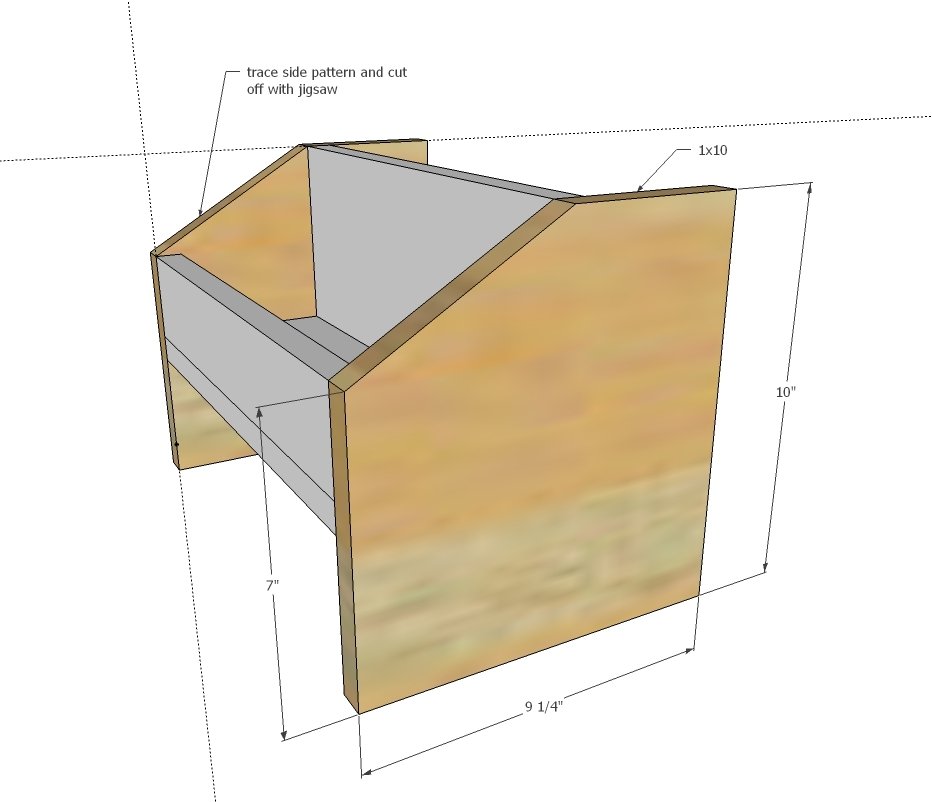
Cut sides off the sides to match the divider piece and attach with 1-1/4" nails and glue.
Step 3
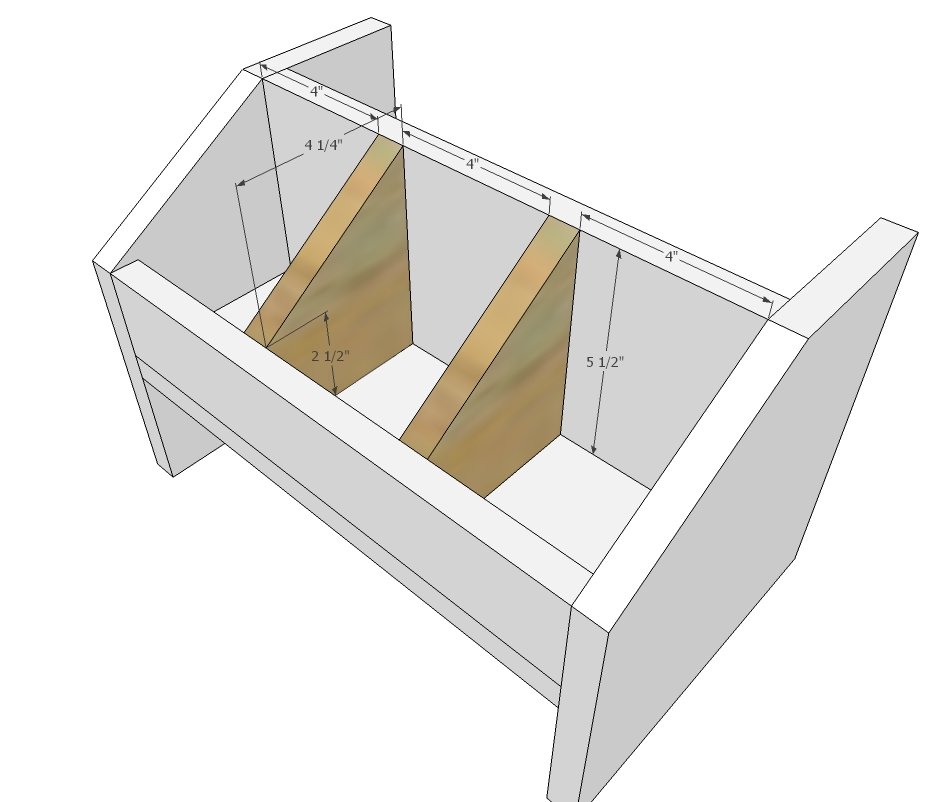
Carefully cut angle off divider pieces, clamping to workbench and cutting. Attach with 1-1/4" nails and glue.
Step 4
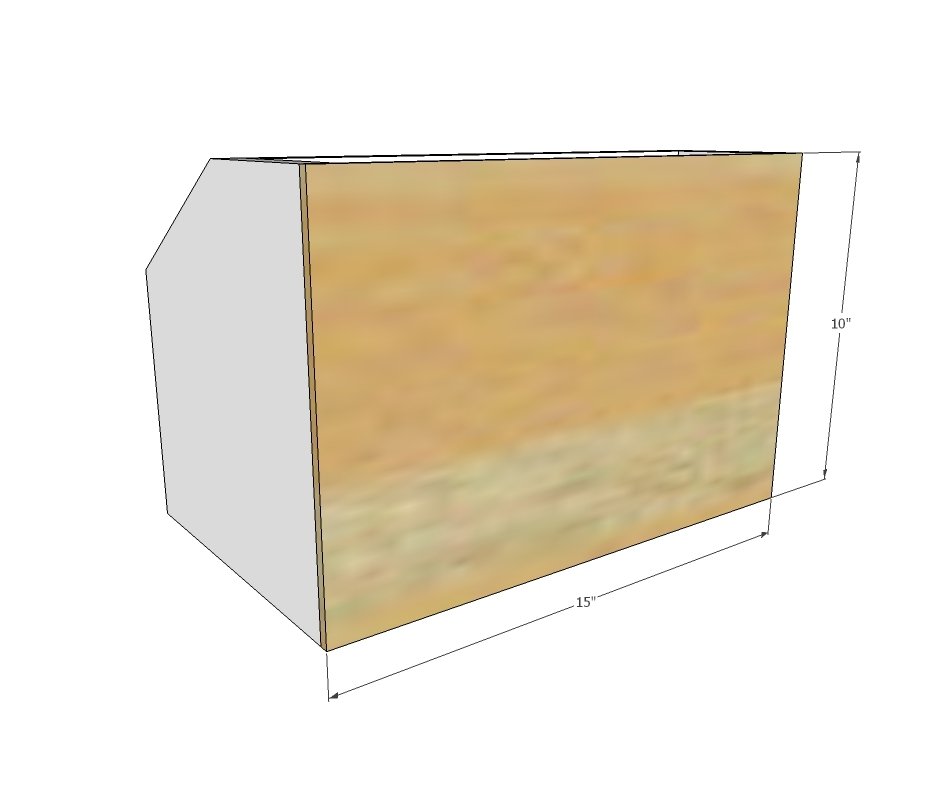
Attach back with 3/4" nails and glue.
Step 5
Step 6
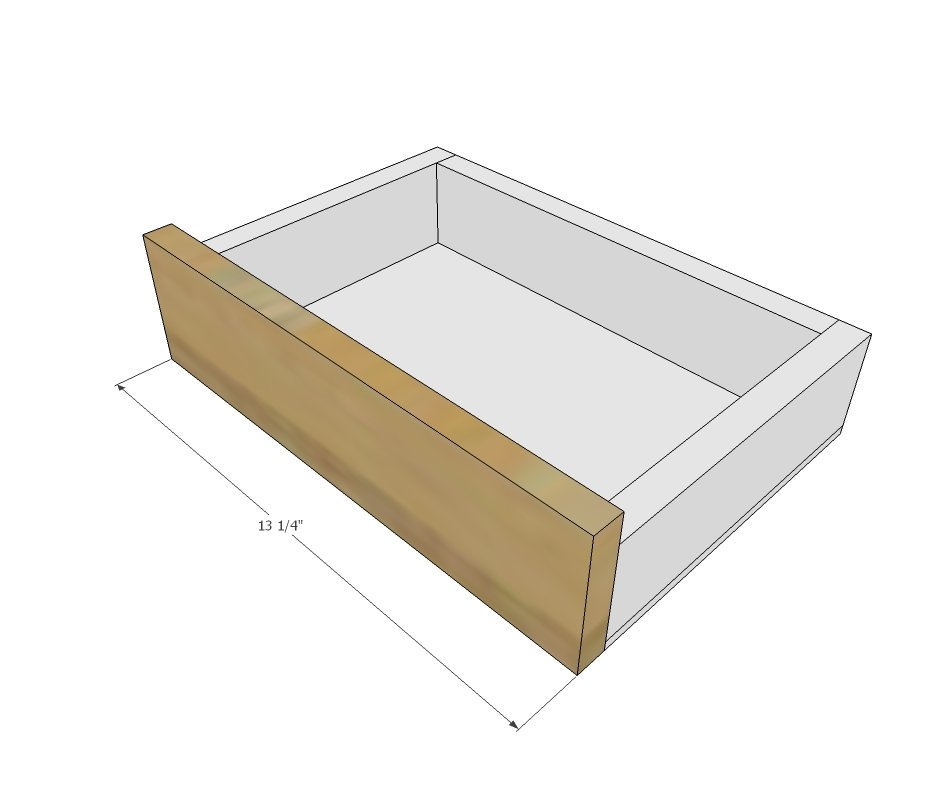
Attach drawer face to drawer sides with 1-1/4" nails.
Finishing
Sand all surfaces, starting with a medium grit and finishing with fine. Wipe off the dust, fill any holes or gaps with wood filler, and sand smooth once dry. Apply primer if you're painting, then finish with your choice of paint or stain and seal with a durable clear topcoat. For outdoor projects, use exterior-rated primer, paint or stain, and sealer so the piece stands up to the weather.
Source (temporary): https://www.ana-white.com/woodworking-projects/desktop-office-or-vanity-beauty-organizer