Desktop with Storage Compartments
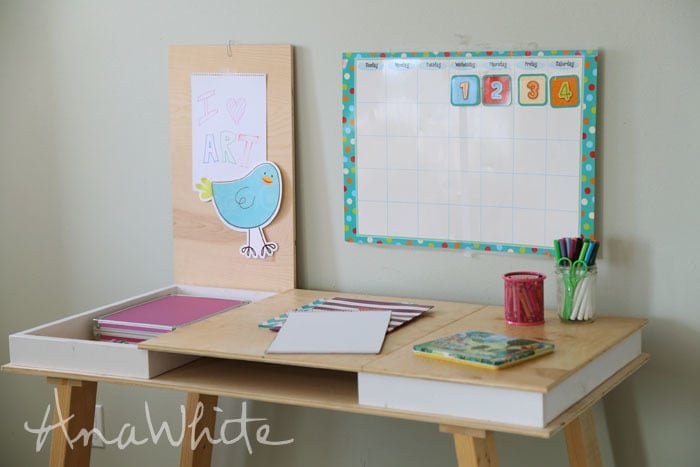
This desktop is easy to make and works great! Add different bases to get the perfect desk! DIY
Specifications
| Project type | Desk, Desk Systems and Project Table Plans |
|---|---|
| Room | Teens |
| Style | Modern Style Furniture Plans |
| Difficulty | Beginner Projects |
| Estimated cost | $20 - $50 |
Dimensions
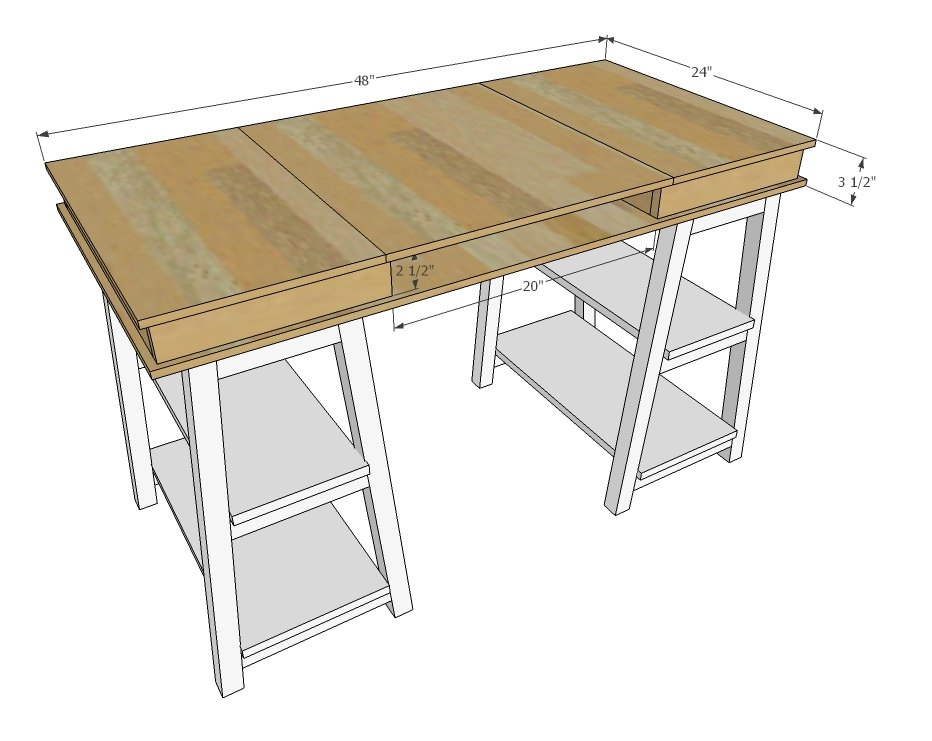
Use the size-specific shopping and cut lists below.
Shopping List
2 - 24" x 48" project panels (available off the shelf) - I used 1/2" thick but 3/4" would be fine too (will make your desktop 1/2" thicker though)
2 - 1x3 @ 8 feet long
2 sets of simple butt hinges
Cut List
4 - 1x3 @ 13-1/2"
4 - 1x3 @ 21-1/2"
1 - 1/2" thick plywood panel @ 24" x48"
1 - 1/2" thick plywood panel @ 24" x 21"
2 - 1/2" thick plywood panels @ 24" x 13-1/2"
Tools
- measuring tape
- square
- pencil
- safety glasses
- hearing protection
- kreg-jig
- drill
- circular saw
- nailer
Step-by-step Instructions
Step 1
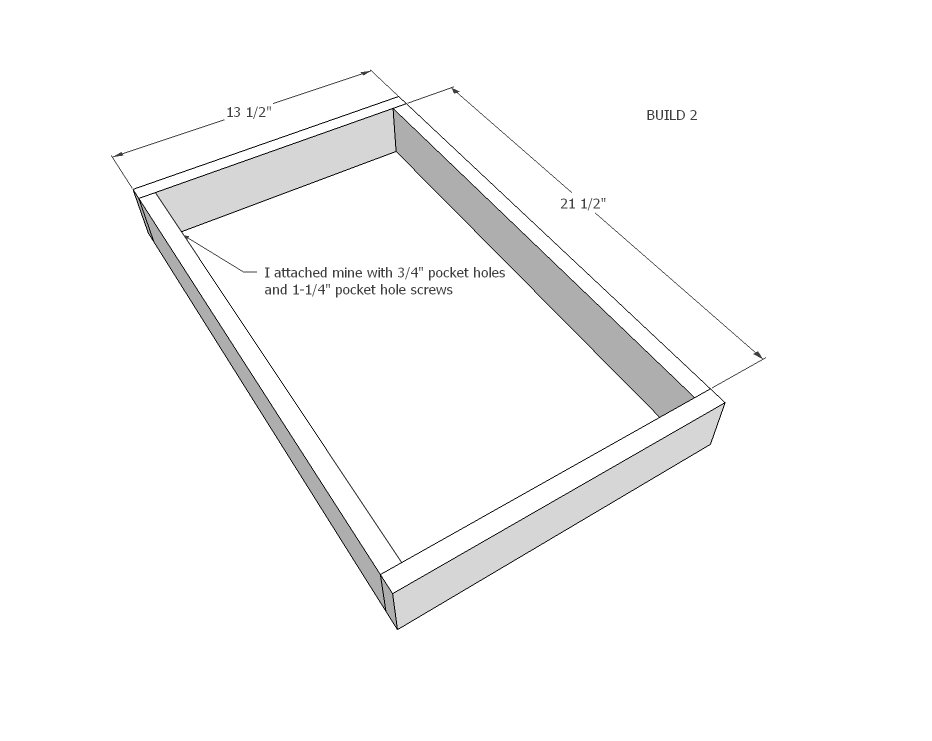
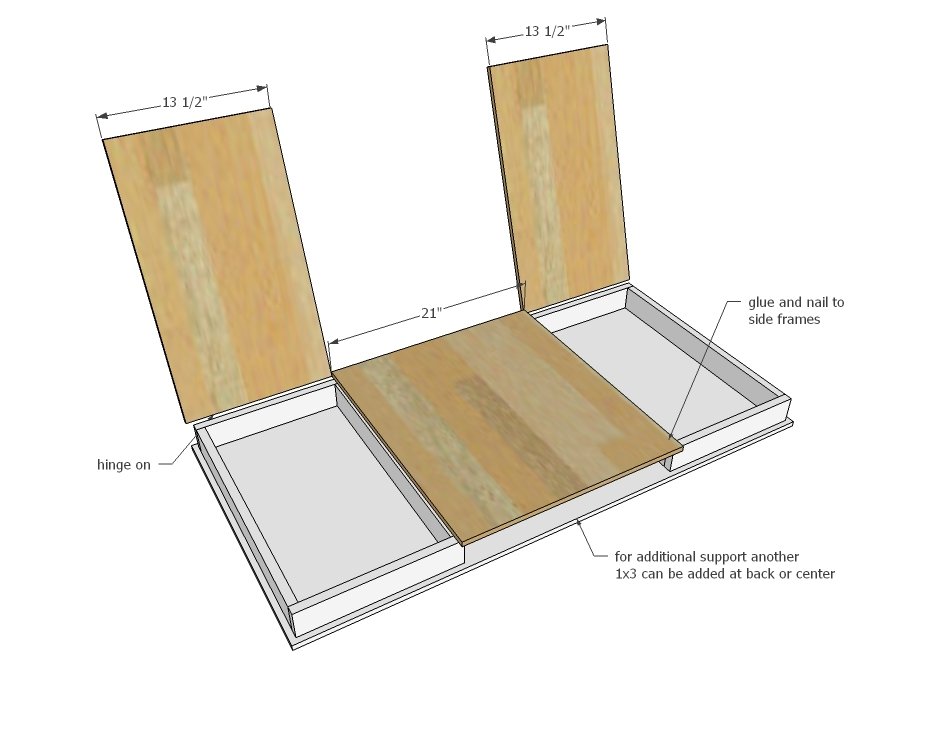
Build two frames out of 1x3s.
Step 2
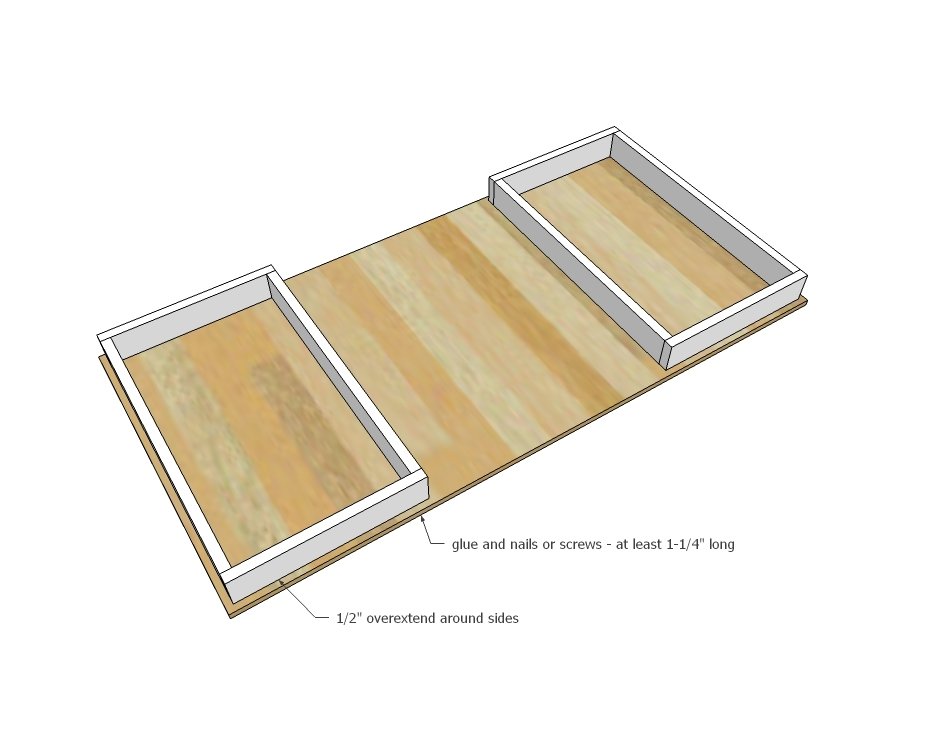
Attach the two frames to the bottom plywood, inset 1/2". TIP: Use 1/2" thick scrap plywood as a spacer to help guide you.
Step 3
Cut the top panel into three pieces and attach center piece on top of the two 1x3 frames. You can also add additional 1x3s underneath to put a "back" or middle divider under the center panel (IDEA - place a power strip in the back and a 1x3 to divide with holes to create a charging area). Hinge the two side panels on with simple hinges so the hinge pin sticks out the back when closed.
Finishing
Sand all surfaces, starting with a medium grit and finishing with fine. Wipe off the dust, fill any holes or gaps with wood filler, and sand smooth once dry. Apply primer if you're painting, then finish with your choice of paint or stain and seal with a durable clear topcoat. For outdoor projects, use exterior-rated primer, paint or stain, and sealer so the piece stands up to the weather.
Source (temporary): https://www.ana-white.com/woodworking-projects/desktop-storage-compartments-build-your-own-desk-collection