Display Cubbies Wall Shelf
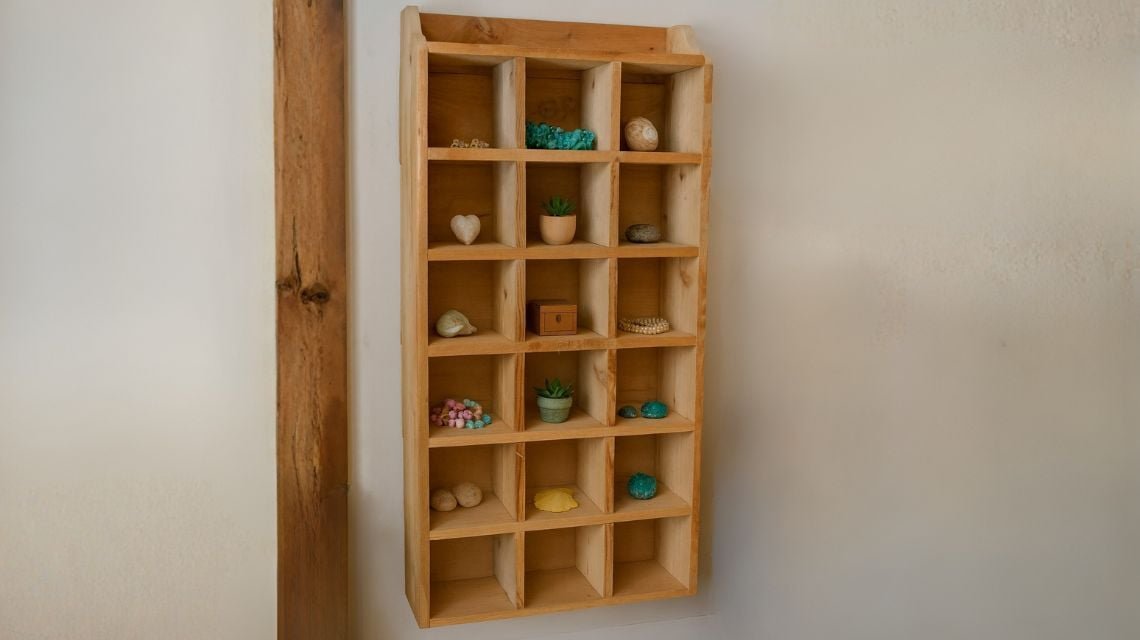
Showcase your favorite keepsakes in style with this handcrafted Display Cubbies Wall Shelf. Designed with both function and charm in mind, this versatile shelf features 18 evenly spaced cubbies perfect for organizing and displaying small decor, collectibles, or natural treasures. Crafted for the DIY enthusiast, we offer so you can create your own custom piece. Whether you use reclaimed wood for a rustic feel or fresh pine for a clean farmhouse look, this wall-mounted shelf brings warmth and character to any space. • Features: • 18 spacious cubbies (6 rows x 3 columns) • Wall-mounted design saves floor space • Ideal for entryways, kitchens, studios, or nurseries • Works great with reclaimed or new wood • included Bring organization and handcrafted beauty to your home—start your next DIY project today!
Specifications
| Project type | Crate Plans and Projects Made with Crates |
|---|---|
| Room | Storage Solutions |
| Style | Farmhouse Furniture |
| Difficulty | Beginner Projects |
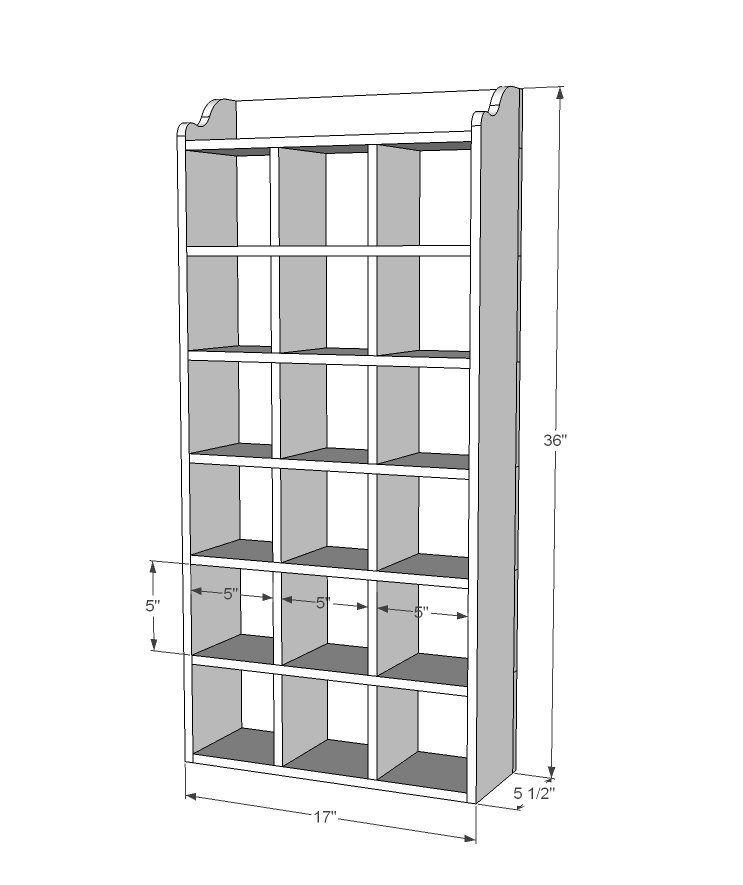
Dimensions
Use the size-specific shopping and cut lists below.
Shopping List
- 5 fence pickets - I used dog eared cedar ones (recommed getting 6 in case one splits or you have to cut around knots)
- 1 1/4" brad nails
- wood glue
Cut List
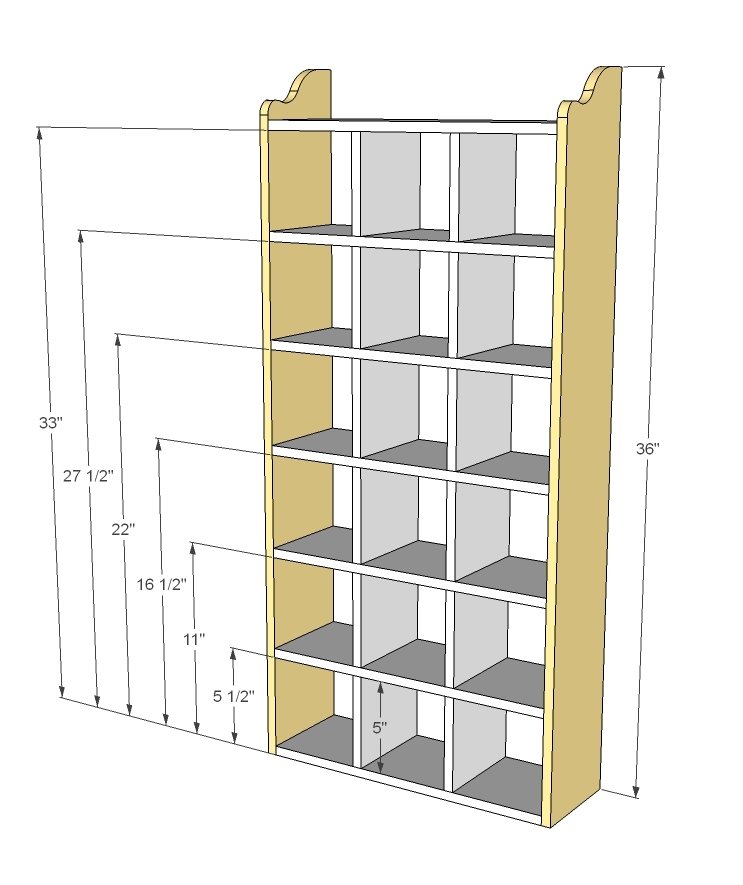
- 2 - 1/2" x 5 1/2" fence pickets @ 32 1/2" long (vertical dividers)
- 7 - 1/2" x 5 1/2" fence pickets @ 16" long (horizontal shelves)
- 2 - 1/2" x 5 1/2" fence pickets @ 36" long (sides)
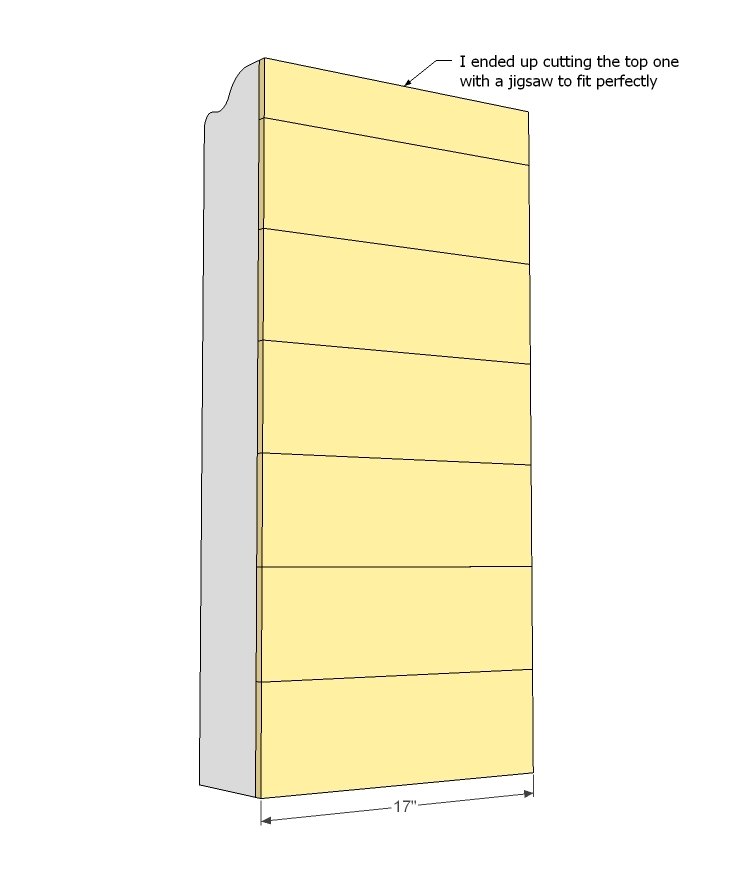
- 7 - 1/2" x 5 1/2" fence pickets @ 17" long (back - optional or you could use plywood)
Tools
- measuring tape
- square
- pencil
- hammer
- safety glasses
- hearing protection
- circular saw
- jigsaw
- nailer
Step-by-step Instructions
Step 1
First cut the vertical dividers. Mark the side you start measuring from - this will be the bottom. Clearly mark this - it is important because if your boards aren't exactly 1/2" thick (mine were almost 1/16 wider in width) you'll be off that much.
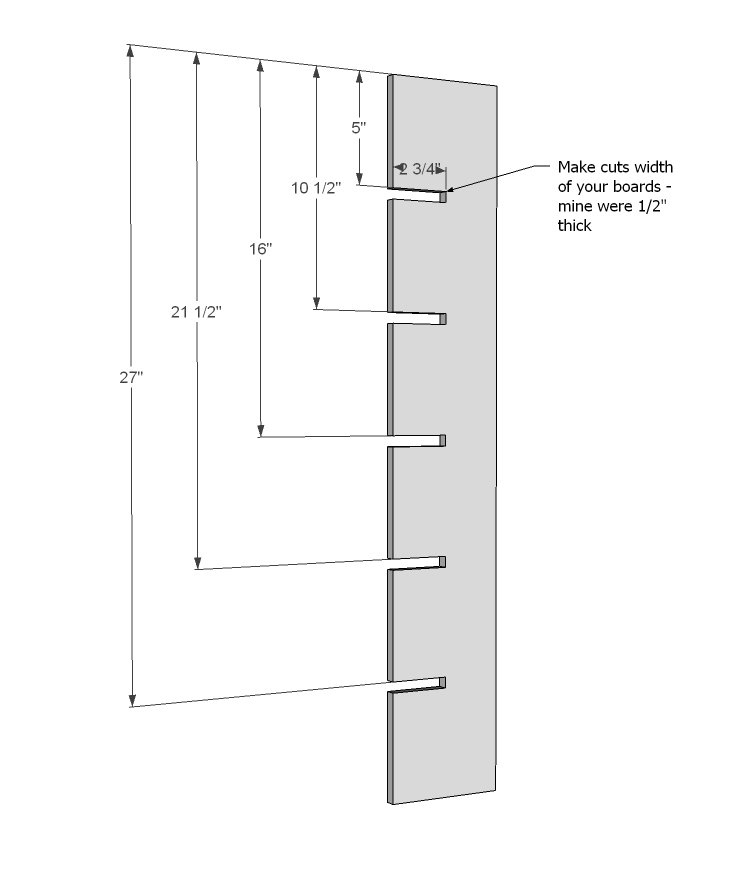
Step 2
Then cut five of the seven boards in notches. Again, mark the side you measure the notch outs to keep everything square and even.
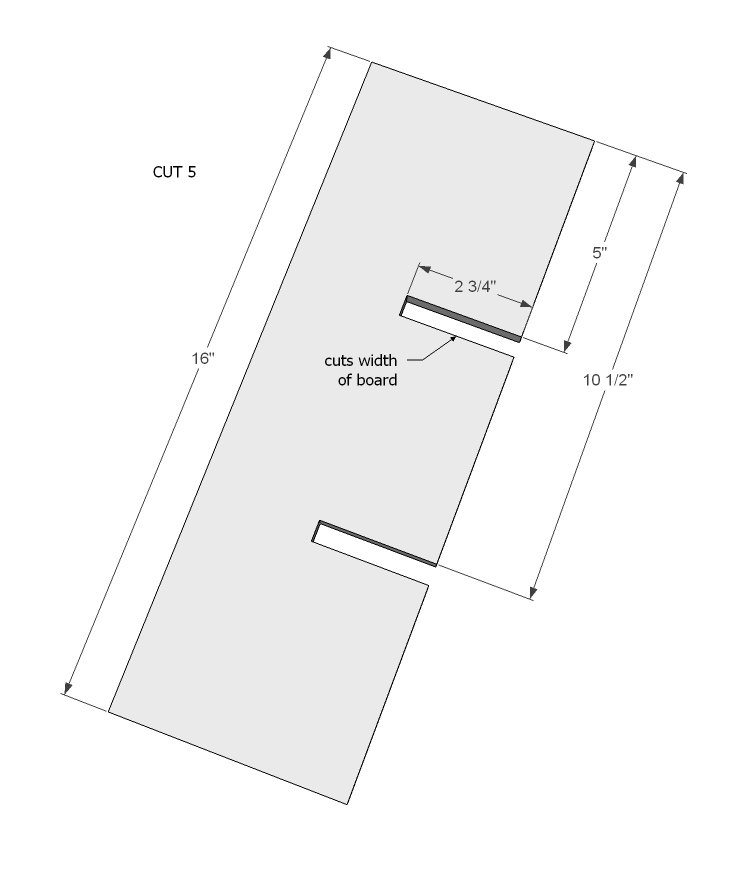
Step 3
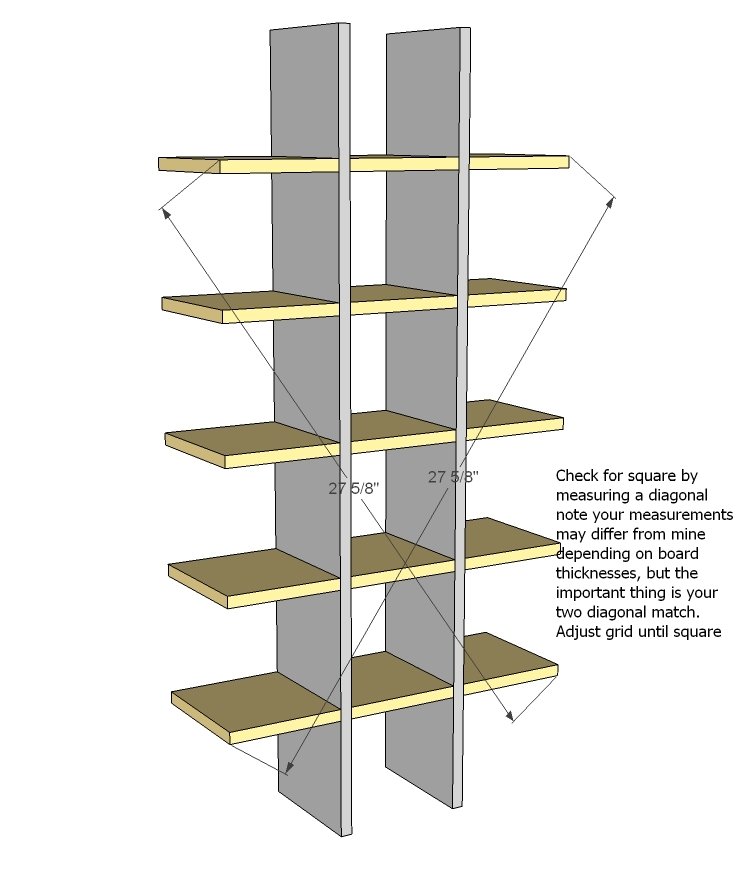
With your vertical divider boards with the marked end down, add the shelves, marked ends all to either the right or left for consistency. You may need to use a mallet to get the notches to go in, or sand some tight spots.
Step 4
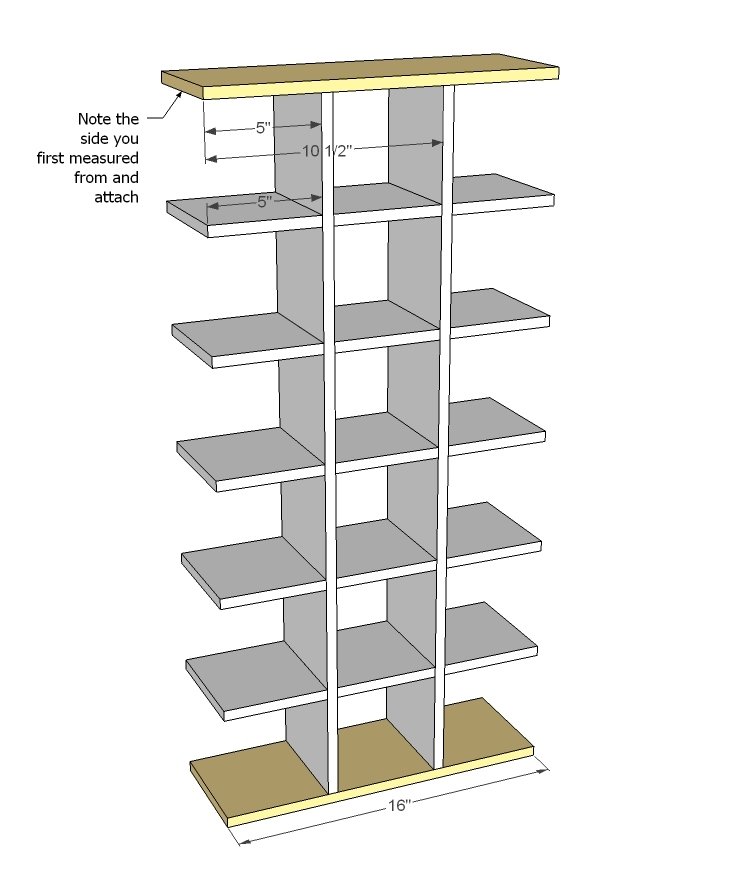
Next, mark the top and bottom shelf 5" and 10 1/2" in to match the notch outs you did in step 2. Match up with the side you measured from matching the marked ends of the notched shelves. I nailed on with 1 1/4" finish nails and glue.
Step 5
Step 6
Originally I was going to slap 1/4" plywood to the back, but thought that the cedar would be prettier and cheaper. So I just cut boards and added to the back. For the top, I simply cut it down to size with the jigsaw.
Finishing
Sand all surfaces, starting with a medium grit and finishing with fine. Wipe off the dust, fill any holes or gaps with wood filler, and sand smooth once dry. Apply primer if you're painting, then finish with your choice of paint or stain and seal with a durable clear topcoat. For outdoor projects, use exterior-rated primer, paint or stain, and sealer so the piece stands up to the weather.
Source (temporary): https://www.ana-white.com/woodworking-projects/display-cubbies-wall-shelf-free-diy-plans