16" Deep Bookshelf Base
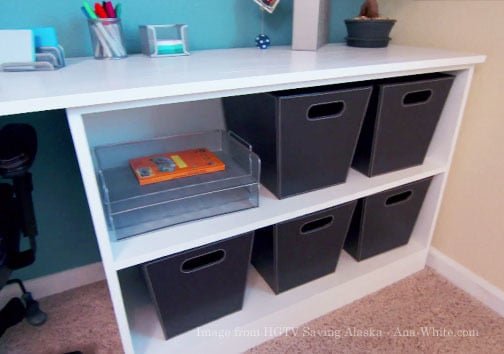
Build your own sturdy, deep bookshelf base with, perfect for creating a custom desk system or maximizing storage space. Designed with a generous 16-inch depth, this bookshelf base holds deeper storage bins and supports a full desktop, making it ideal for home offices, kids’ study stations, or craft areas. As featured on HGTV’s Saving Alaska, this bookshelf design is durable, easy to build, and completely customizable. Key features: • 16” depth for extra stability and deep bin storage • Supports a desktop or tabletop for custom desk systems • Adjustable shelf spacing for flexible storage needs • Perfect for bedrooms, offices, or homeschool setups • Beginner-friendly plan using standard 1x and 2x boards The includes: • Detailed cut list and shopping list • Step-by-step instructions with diagrams and photos • Custom sizing tips to fit your space and needs • Options for finishing and desktop attachment Build one as a standalone bookshelf, or pair two with a top to create a wide, budget-friendly built-in desk with loads of storage. MATCHING PLANS: CPU BASE
Specifications
| Project type | Bookshelf and Bookcase Plans |
|---|---|
| Room | Storage Solutions |
| Difficulty | Intermediate |
Dimensions
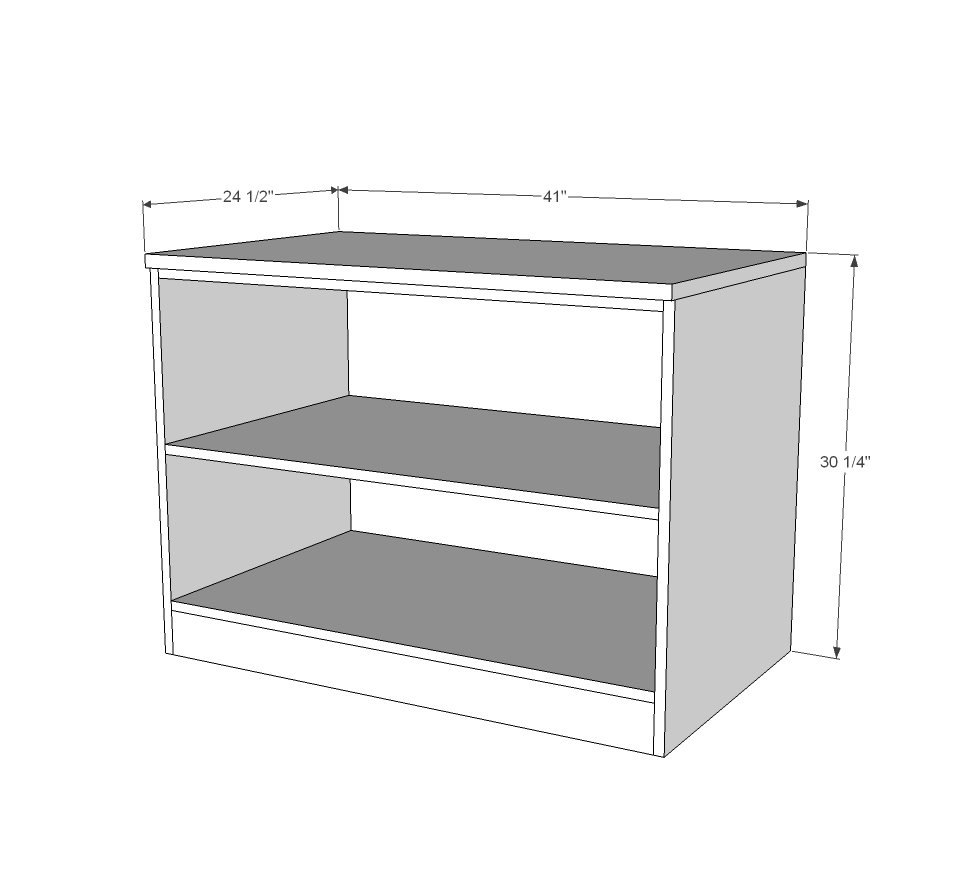
Use the size-specific shopping and cut lists below.
Shopping List
- 1 - 1x2 @ 8 feet long
- 1 - 1x4 @ 8 feet long
- 12 feet of 3/4" plwyood cut into strips 15-3/4" wide (about 1/2 sheet, we used the other 1/2 sheet for making the CPU base)
Cut List
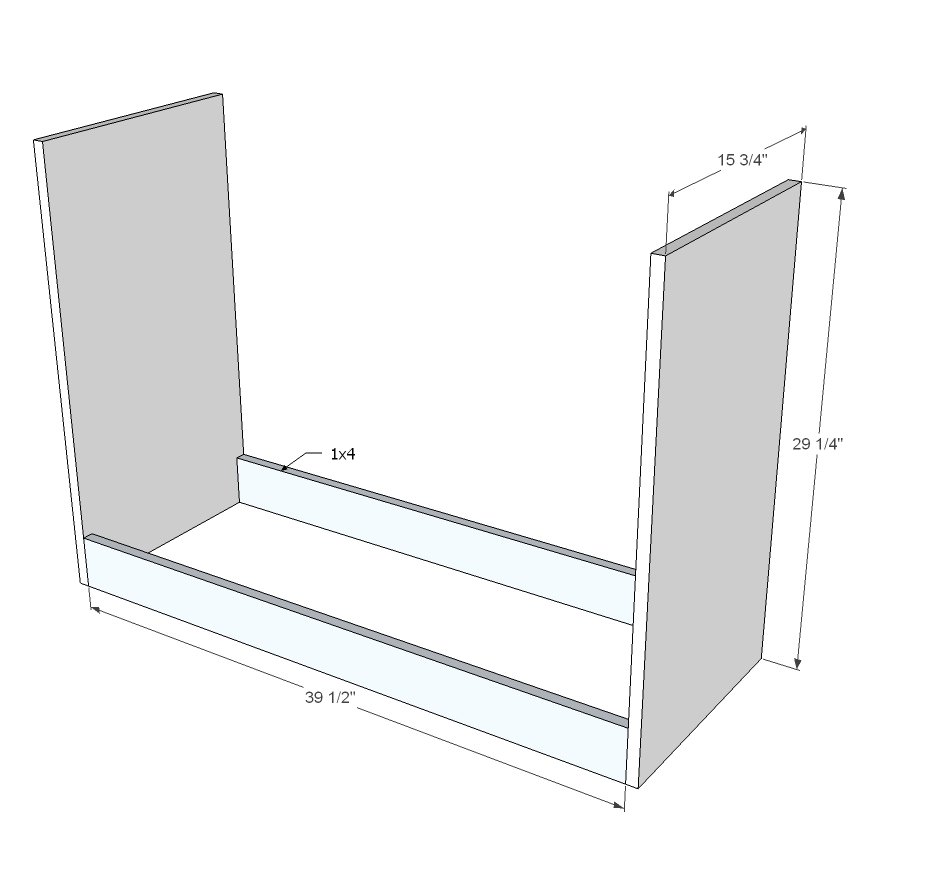
- 2 - 3/4" plywood @ 15-3/4" x 29-1/4" (sides)
- 2 - 1x4 @ 39-1/2" (bottom footer)
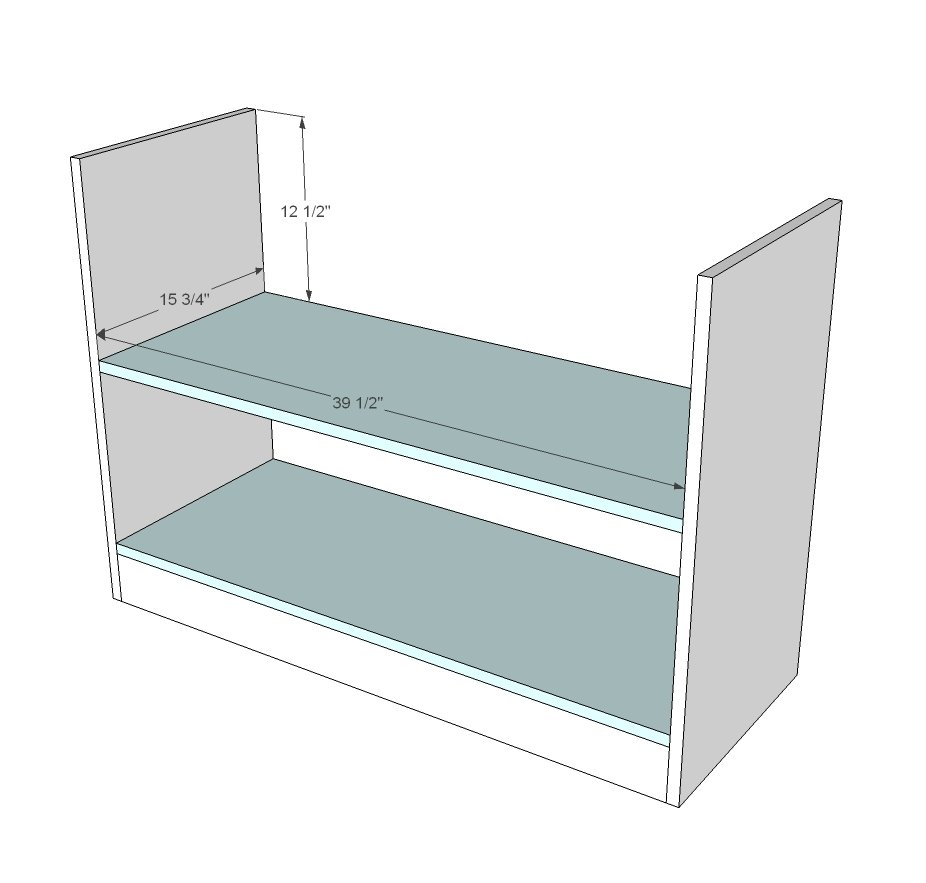
- 2 - 3/4" plywood @ 15-3/4" x 39-1/2" (shelves)
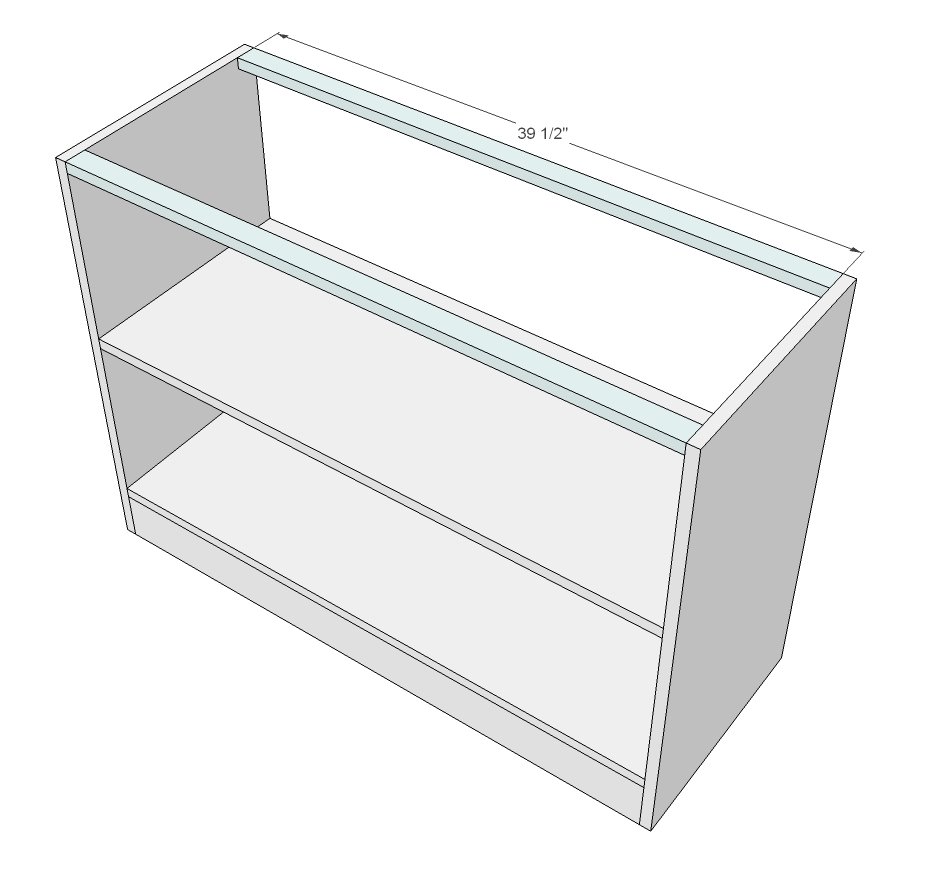
- 2 - 1x2 @ 39-1/2" (top supports)
- Desktop minimum of 16" wide x 41" long
Tools
- measuring tape
- square
- pencil
- safety glasses
- hearing protection
- kreg-jig
- drill
- circular saw
- nailer
Step-by-step Instructions
Step 1
We built this with our Kreg Jig, all on the 3/4" setting with 1-1/4" pocket hole screws. We attached the 1x4s to the bottom to the sides with pocket holes.
Step 2
We made these shelves fixed with pocket holes as well. We also attached shelf to the 1x4s with 1-1/4" finish nails and glue.
Step 3
We attached the 1x2s on the top with pocket holes on the top (desktop will hide them). Desktop is attached from underside to these 1x2s. We also added a back out of 1/4" plywood, attaching back to the center shelf for additional support.
Finishing
Sand all surfaces, starting with a medium grit and finishing with fine. Wipe off the dust, fill any holes or gaps with wood filler, and sand smooth once dry. Apply primer if you're painting, then finish with your choice of paint or stain and seal with a durable clear topcoat. For outdoor projects, use exterior-rated primer, paint or stain, and sealer so the piece stands up to the weather.
Source (temporary): https://www.ana-white.com/woodworking-projects/diy-16-deep-bookshelf-base-free-plans-desk-or-storage-system