Apothecary Style Kitchen Cabinets
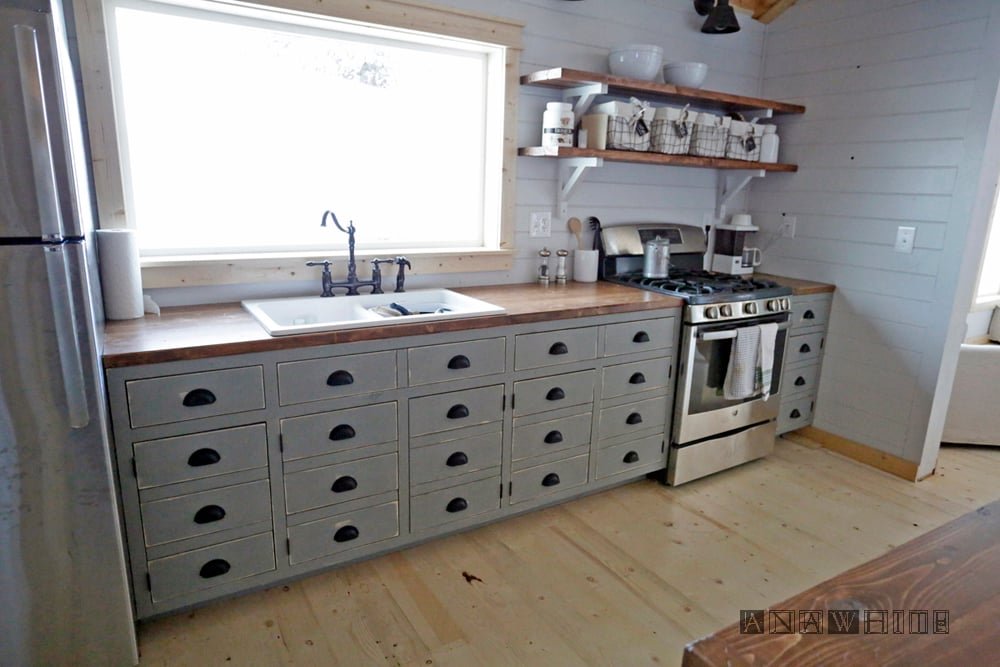
The easiest and fastest way to build kitchen cabinets! All these base cabinets for $400!
Specifications
| Project type | Kitchen Cabinet Plan, Accessories and Serving |
|---|---|
| Room | kitchen |
| Style | Cottage Style Furniture Plans |
| Difficulty | Intermediate |
Shopping List
3/4" plywood - prefinished PureBond recommend for easier finishing, ripped into strips 23-1/4 wide (for 24" overall width cabinet including doors). Measure appliances and adjust if necessary for the right width. 1x2 boards, a true 1-1/2" wide for face frame and doors 1x6 boards, a true 5-1/2" wide for doors and drawer faces scrap 1x material (1x3 or wider width) for supports 2x4s for the toekick 1/4"plywood for attaching to back
Tools
- measuring tape
- square
- pencil
- safety glasses
- hearing protection
- kreg-jig
- drill
- compound miter saw
- table saw
- nailer
Step-by-step Instructions
Step 1
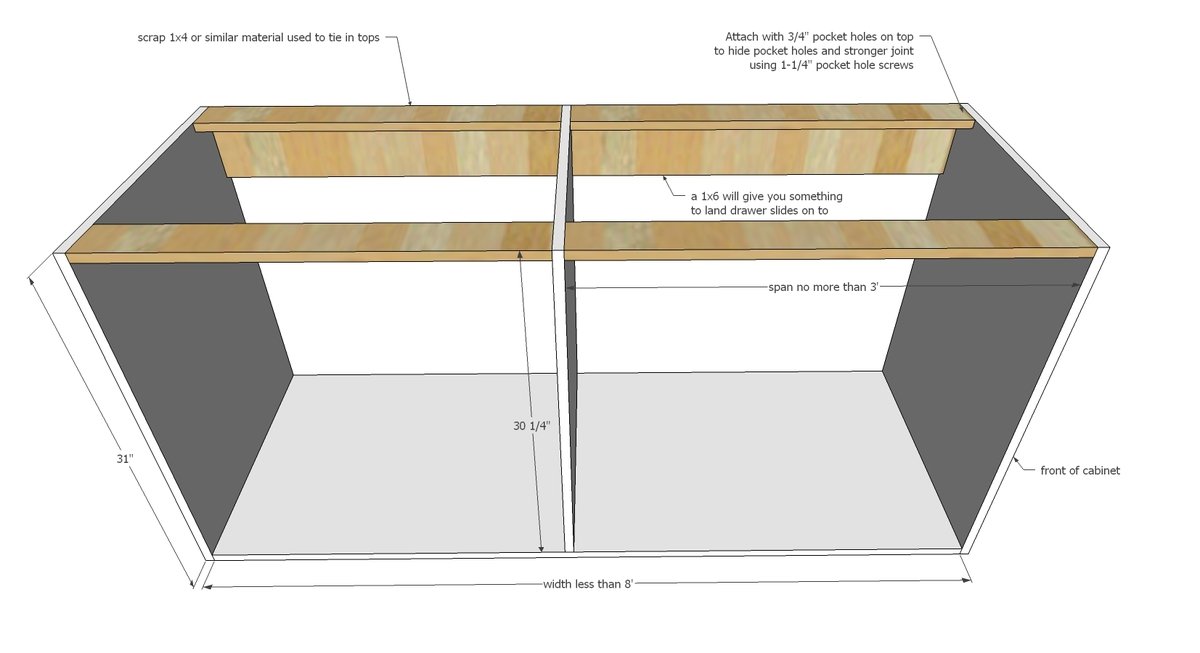
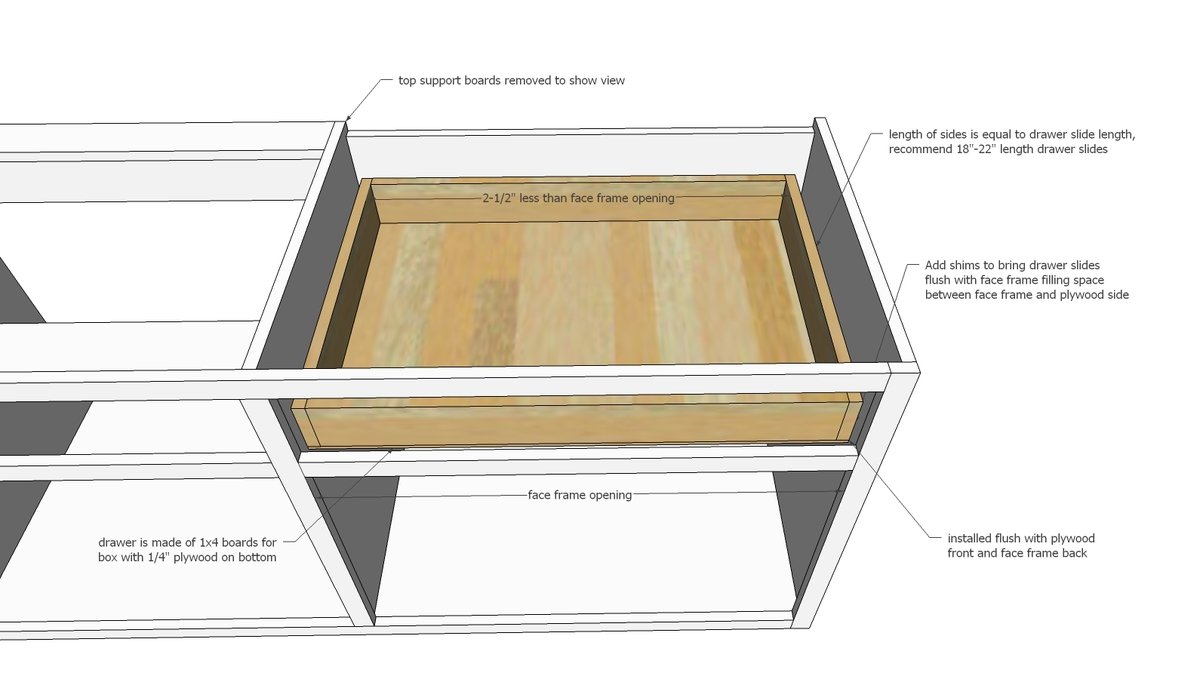
Carcass - The carcass is just 3/4" plywood and then scrap 1x material (or 3/4" plywood strips) as support on the top. I use 3/4" pocket holes and 1-1/4" pocket hole screws to build the carcasses. If I know the cabinet will be hidden on outside sides, I place my pocket holes on outsides. Do not span more than 3 feet per cabinet - perhaps even less if you plan on using a granite or concrete or other heavy countertop material. Drawers tend to work best less than 24" in width - an larger and they start to not slide as well.
Step 2
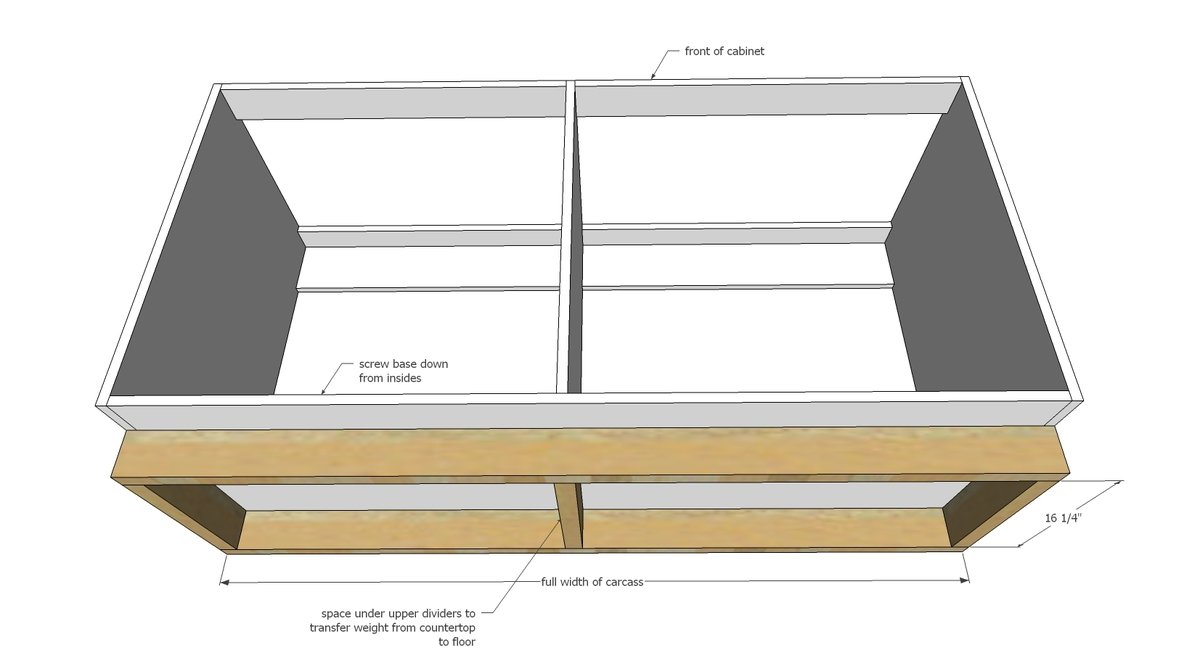
Toekick Base - This is an easy step, just cut and screw or nail together. Make sure boards are placed under all dividers in the carcass so the weight of the counter-top is transferred directly to the floor. You can use pocket holes, wood screws, even framing nails to build this base. On installation, 2" screws through the bottom of the cabinet is the easiest way to attach. You could also attach from underneath by using pocket holes (set for 3/4" stock and 1-1/4" pocket hole screws even though you will be drilling into 2x4s).
Step 3
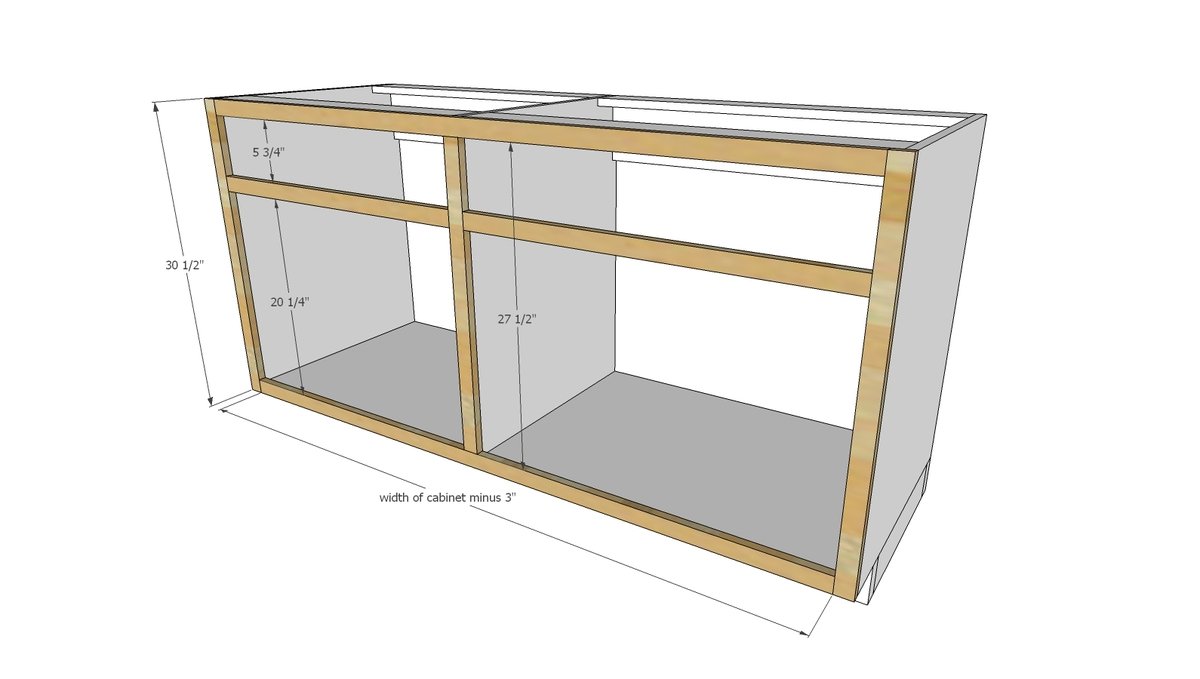
Face Frame - The face frame covers all of the plywood edges. Make sure your 1x2s are 1-1/2" wide. Use 3/4" pocket holes and 1-1/4" pocket hole screws to build. Attach to front of plywood cabinet with glue and 1-1/4" brad nails (I recommend building doors and fitting drawers before attaching. You could even attaching the door hinges to the face frame before installing face frame on carcass).
Step 4
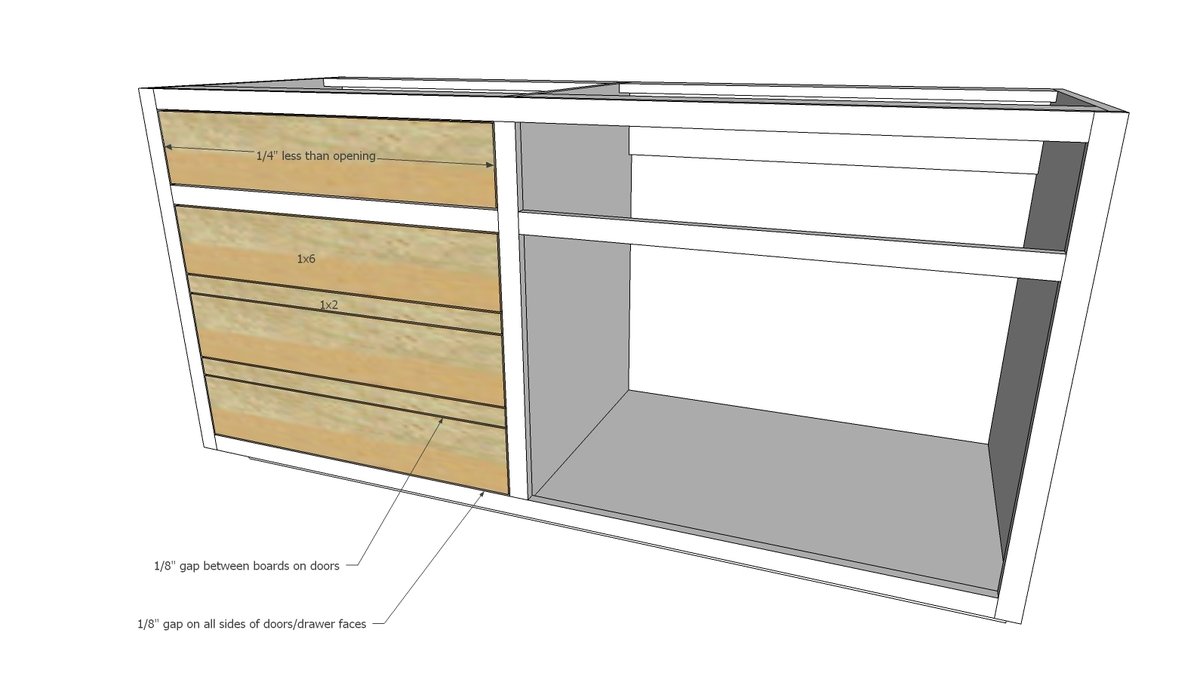
Doors and Drawers - Place all of your drawer/door boards inside the face frame, with the face frame face down. Use 1x2 boards to connect the door boards together. Remember there should be an 1/8" gap around all doors and drawer faces, and in between door boards. Use 1-1/4" screws and glue.
Step 5
Finishing
Sand all surfaces, starting with a medium grit and finishing with fine. Wipe off the dust, fill any holes or gaps with wood filler, and sand smooth once dry. Apply primer if you're painting, then finish with your choice of paint or stain and seal with a durable clear topcoat. For outdoor projects, use exterior-rated primer, paint or stain, and sealer so the piece stands up to the weather.
Source (temporary): https://www.ana-white.com/woodworking-projects/diy-apothecary-style-kitchen-cabinets