Barn Style Greenhouse
DIY Greenhouse plans - build your own DIY greenhouse! This amazing has been built thousands of times by people everywhere. Featuring a unique design to make it easy to build and sturdy, see why this greenhouse plan is so popular. Plans include step by step diagrams, shopping list and cut list, photos and lots of reader submitted photos, from
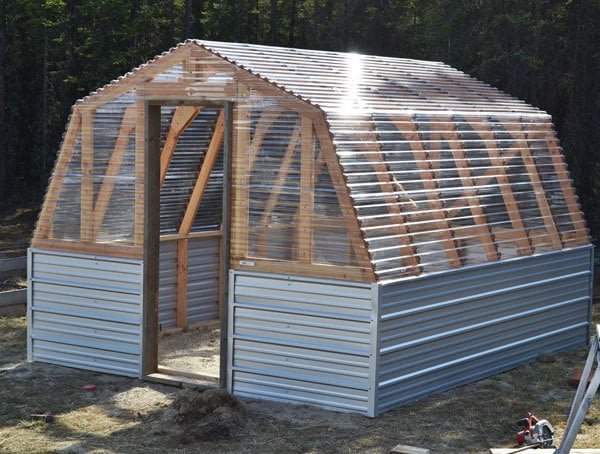
Specifications
| Project type | Planters, Garden Beds, and Greenhouses |
|---|---|
| Room | Outdoor |
| Style | Primitive or Early American Style Furniture Plans |
| Difficulty | Intermediate |
Dimensions
Use the size-specific shopping and cut lists below.
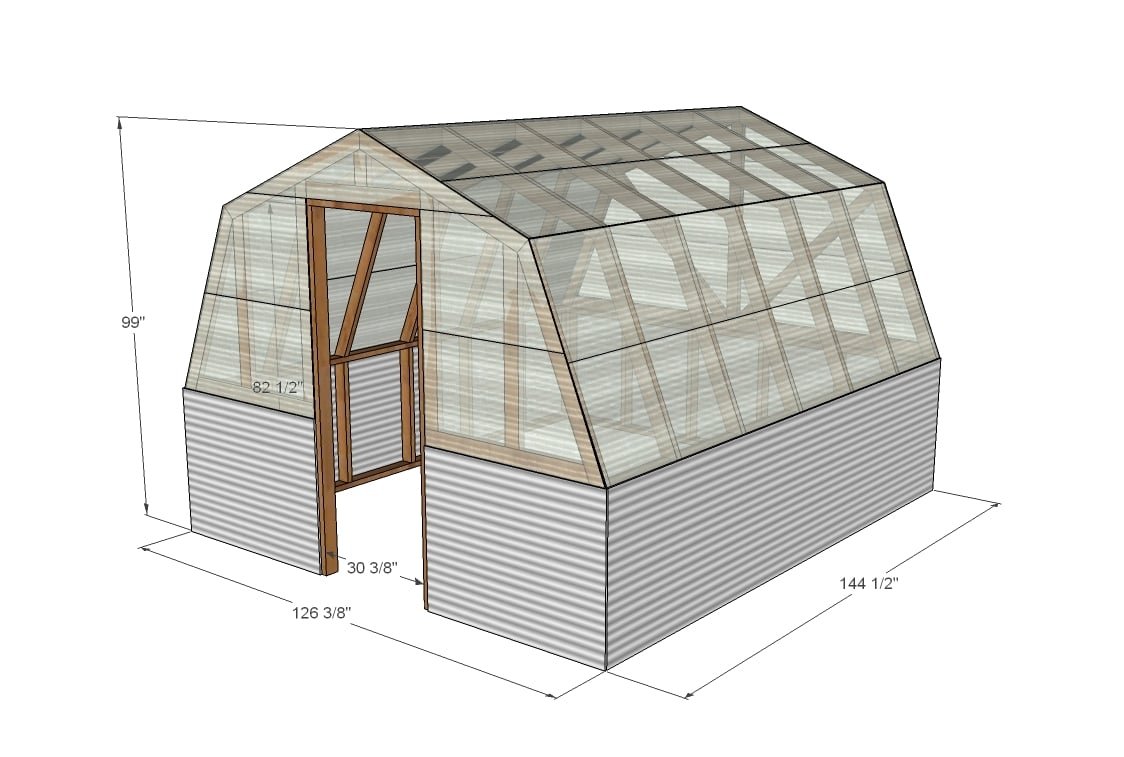
Shopping List
- 3 - 2x4 @ 10 feet long - use on back wall
- 5 - 2x4 @ 12 feet long - use on sides/ridgepole DO NOT CUT
- 32 - 2x4 @ 8 feet long
- 11 - 12 foot x 26" standard corrugated plastic greenhouse panels
- 1 - 8 foot long x 26" wide standard corrugated plastic greenhouse panel (use on door side)
- 3 - 12 foot long tin panels (use on sides and back)
- 1 - 8 foot long tin panel (use on front)
- Tin screws
- 28 - 4' long ribbing strips
- L flashing (optional for the corners and peak)
- You'll need either metal gussets for the trusses or to cut plywood ones from 1/2" plywood
Cut List
Cut list is in plan at each step
Tools
- measuring tape
- square
- pencil
- hammer
- safety glasses
- hearing protection
- kreg-jig
- drill
- circular saw
- compound miter saw
- level
- countersink drill bit
Step-by-step Instructions
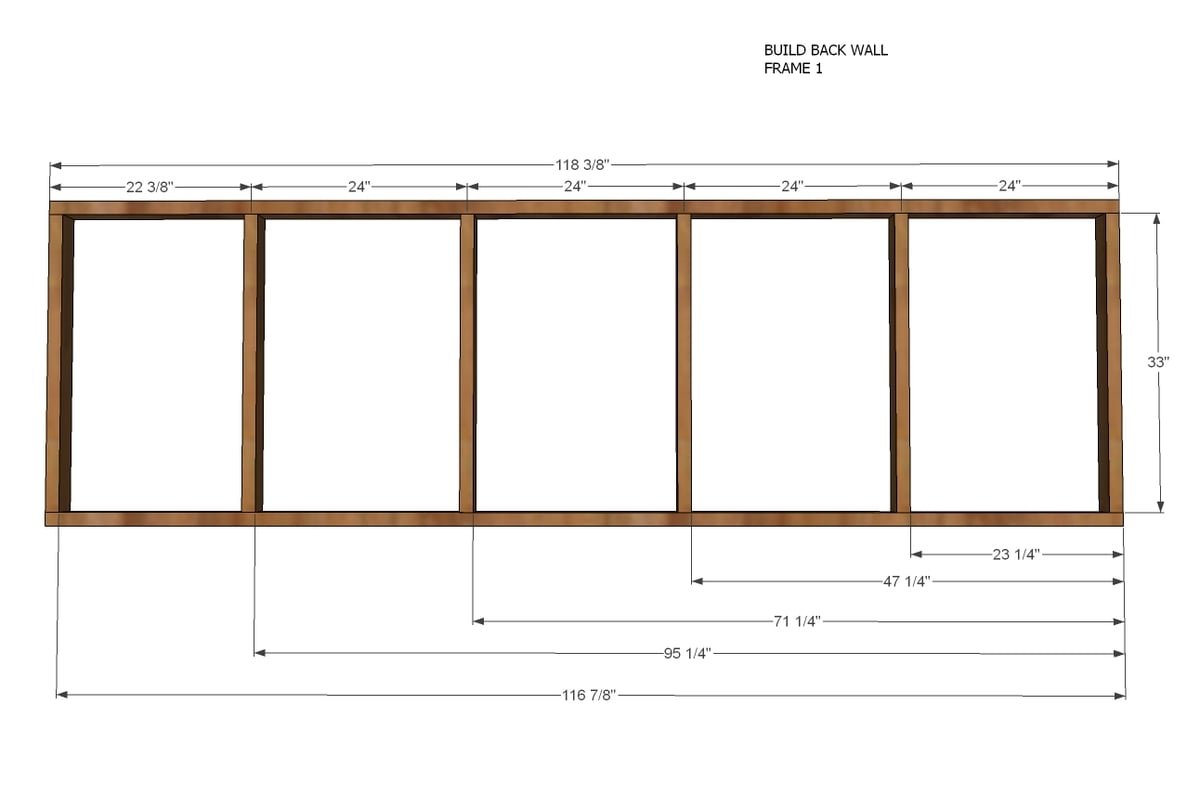
Back wall framing. Cut 2x4s as listed below. Screw together with 3" screws or nail together.
• 2 – 2x4 @ 118 3/8” • 6 – 2X4 @ 32”
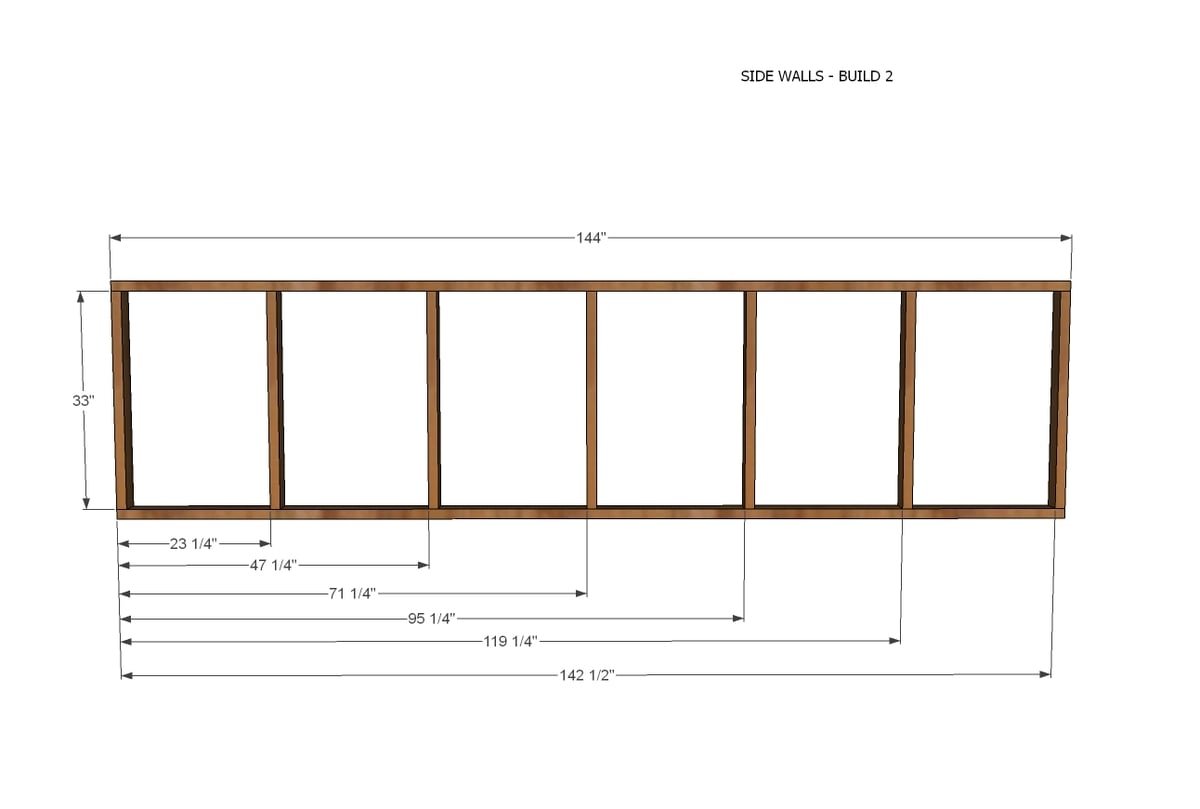
Side Wall Framing - Build TWO
• 4 – 2X4 @ 144” • 14 – 2X4 @ 32”
Front Wall Framing
• 4 – 2X4 @ 32” • 4 – 2X4 @ 42 ½” • 2 – 2X4 @ 81 ½” • 1 – 2X4 @ 33 3/8” Build the front walls as shown.
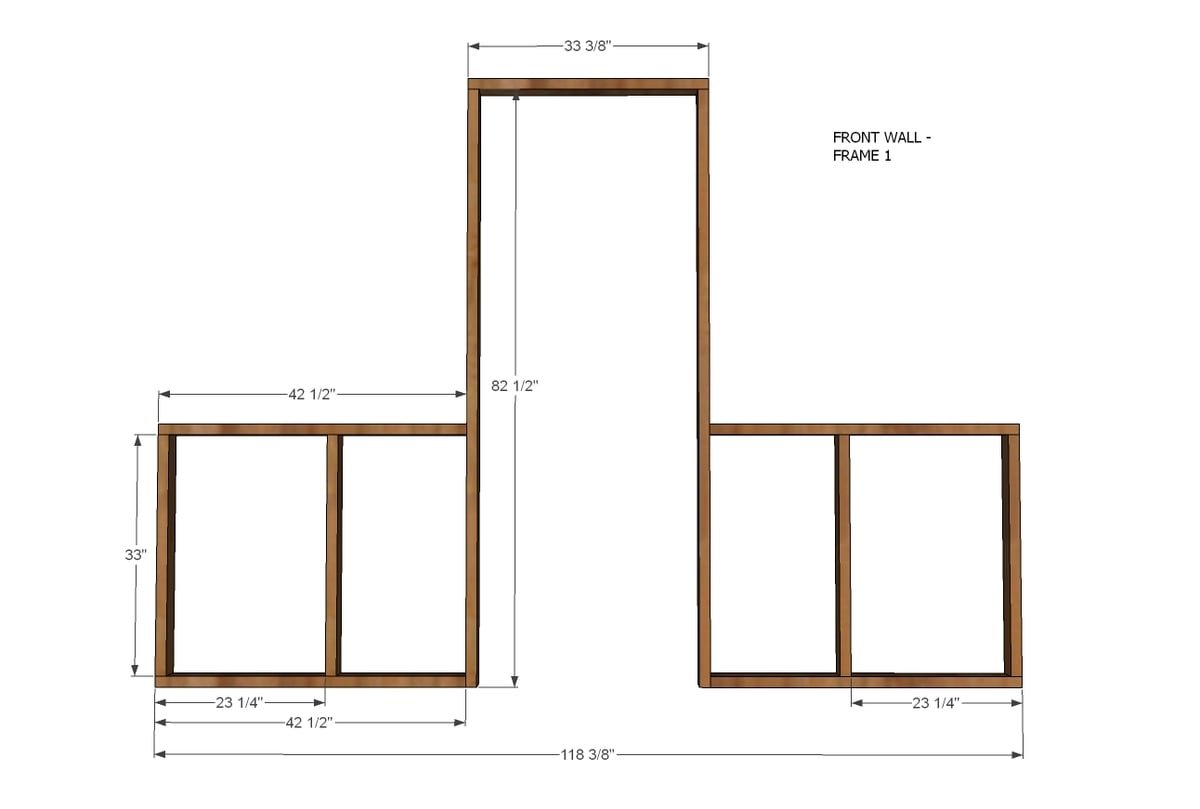
Step 4
Attach the four walls together with 3" screws at corners.
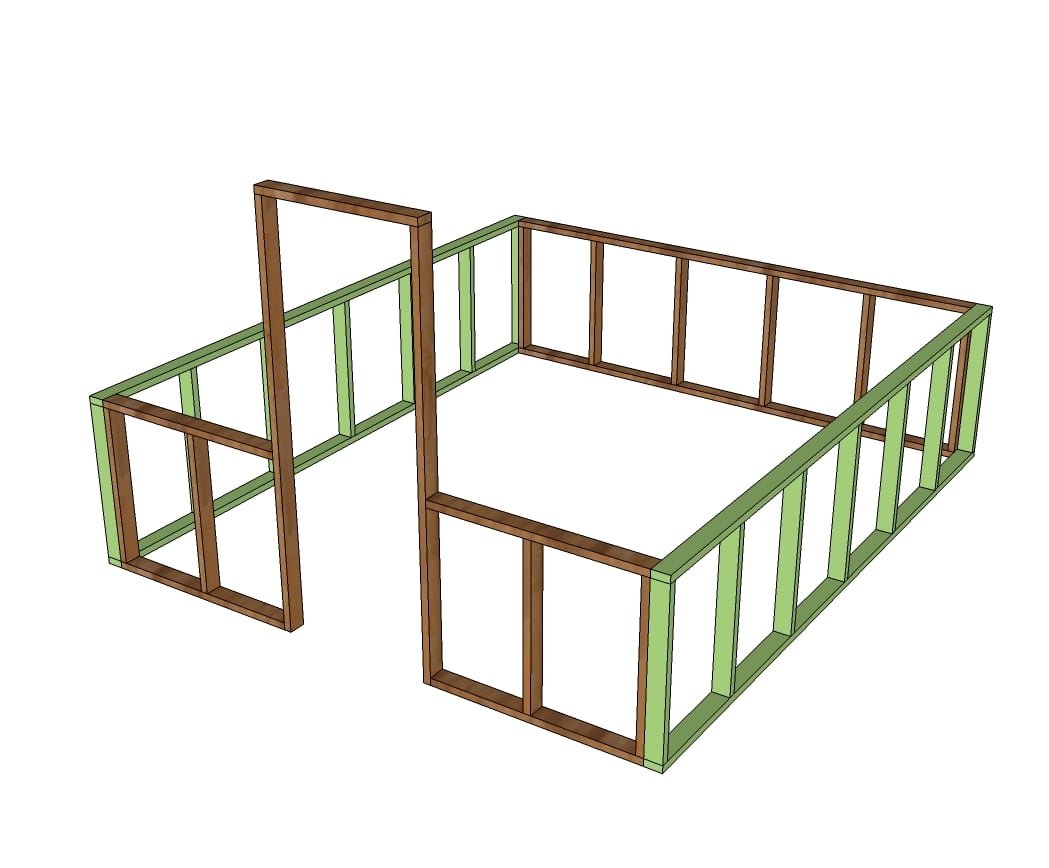
Step 5
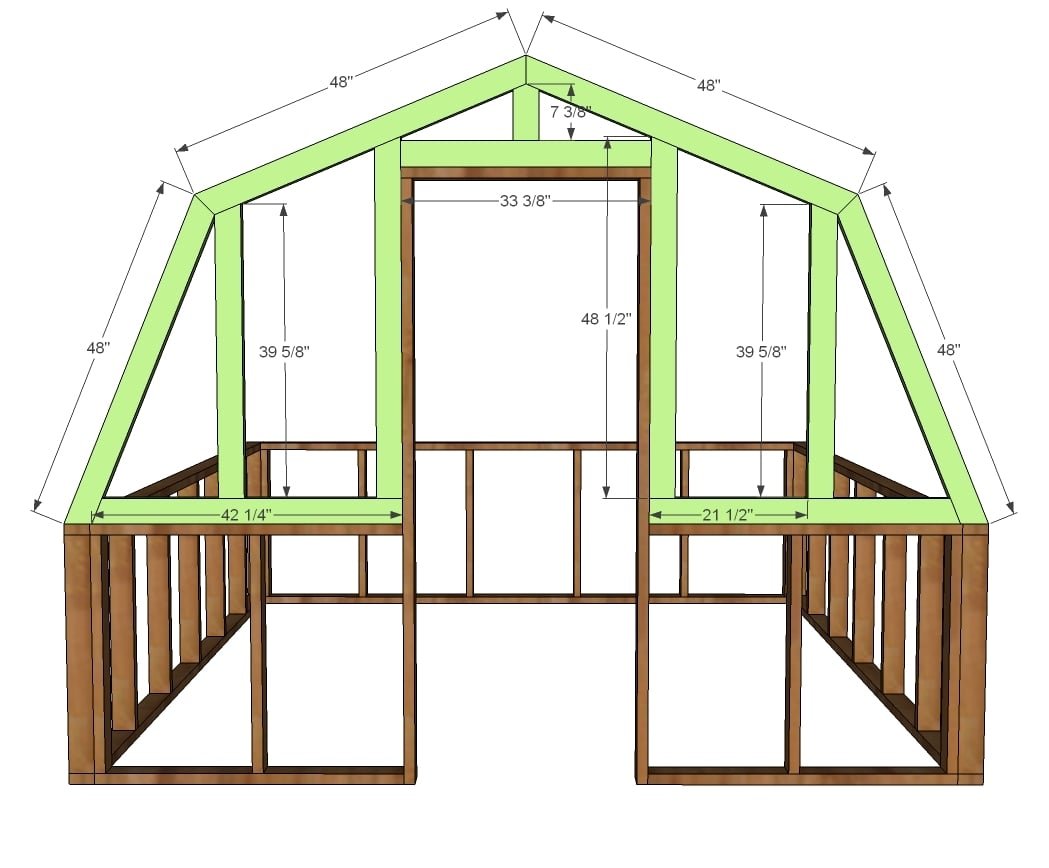
• 4 – 2X4 @ 48” (BOTH ENDS CUT AT 22 ½ DEGREES, ENDS NOT PARALLEL)
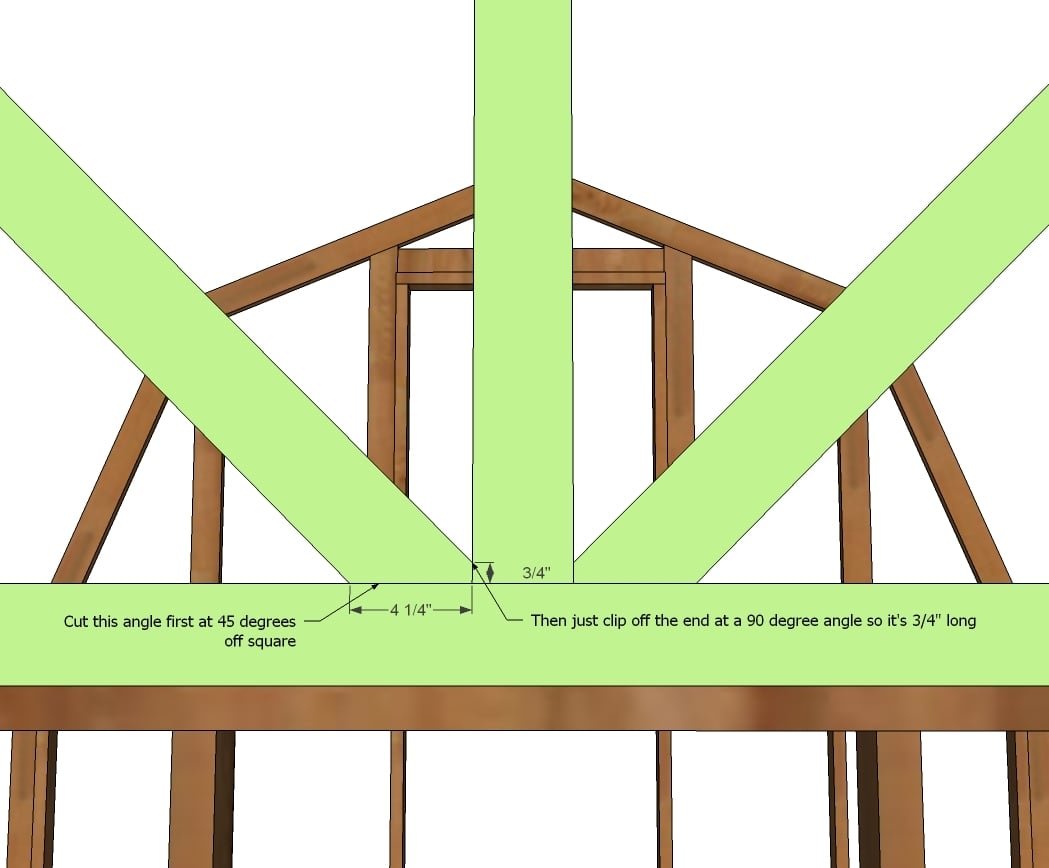
• 1 – 2X4 @ 117 7/8” (BOTH ENDS CUT AT 22 1/2" DEGREES, ENDS NOT PARALLEL) • 1 – 2X4 @ 55 3/8 (TOP CUT TO DOGEARED POINT, 22 ½ DEGREES) • 2 – 2X4 @ 55 ¼” (TOP CUT TO DOGREARED POINT, BOTTOM CUT 45 DEGREES OFF SQUARE, END CLIPPED) The back truss is built same as front. See next step for close up of the center cuts
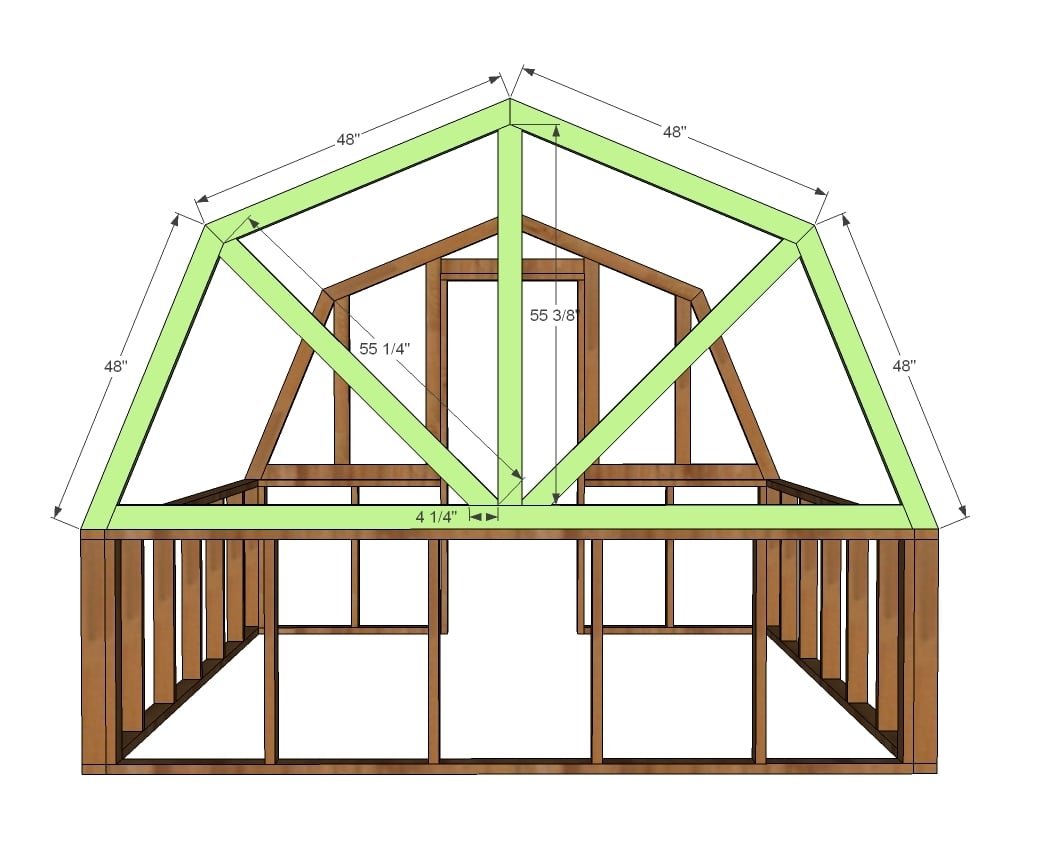
Step 7
This board was a little tricky to cut - practice first!
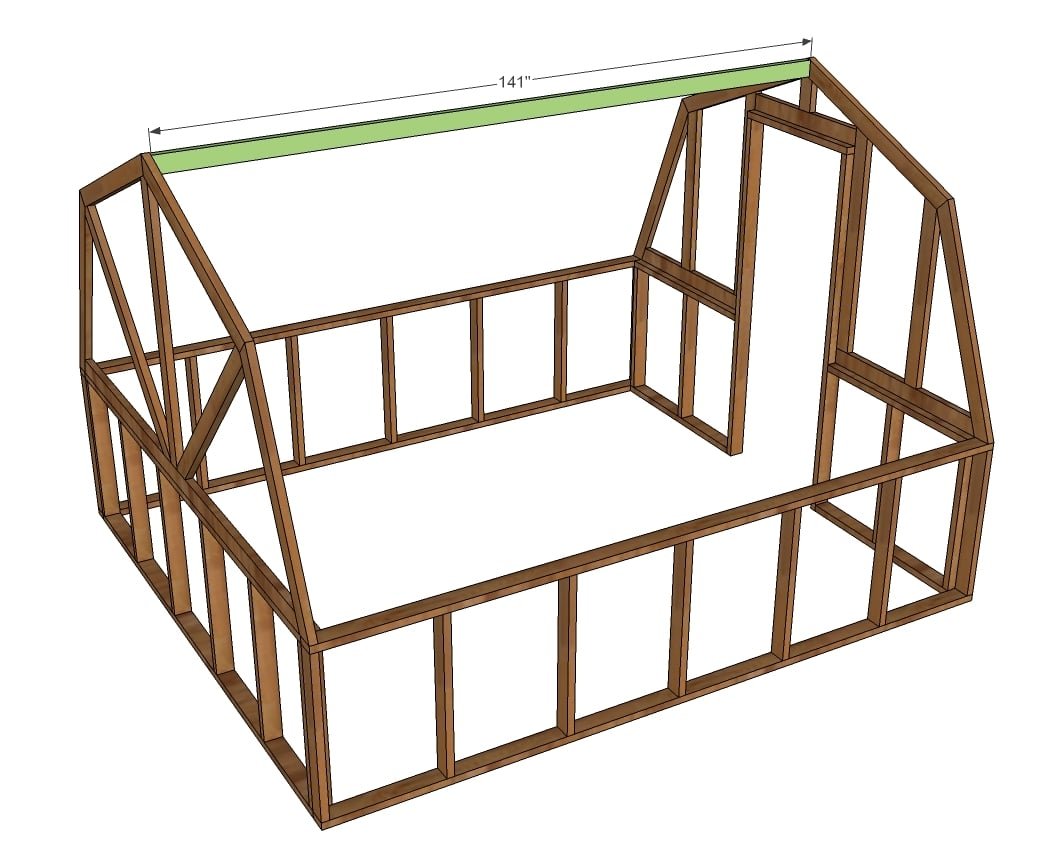
1 – 2X4 @ 141”
NOTE: If you use gussets - we used 1/2" plywood - this will affect your ridgepole length.
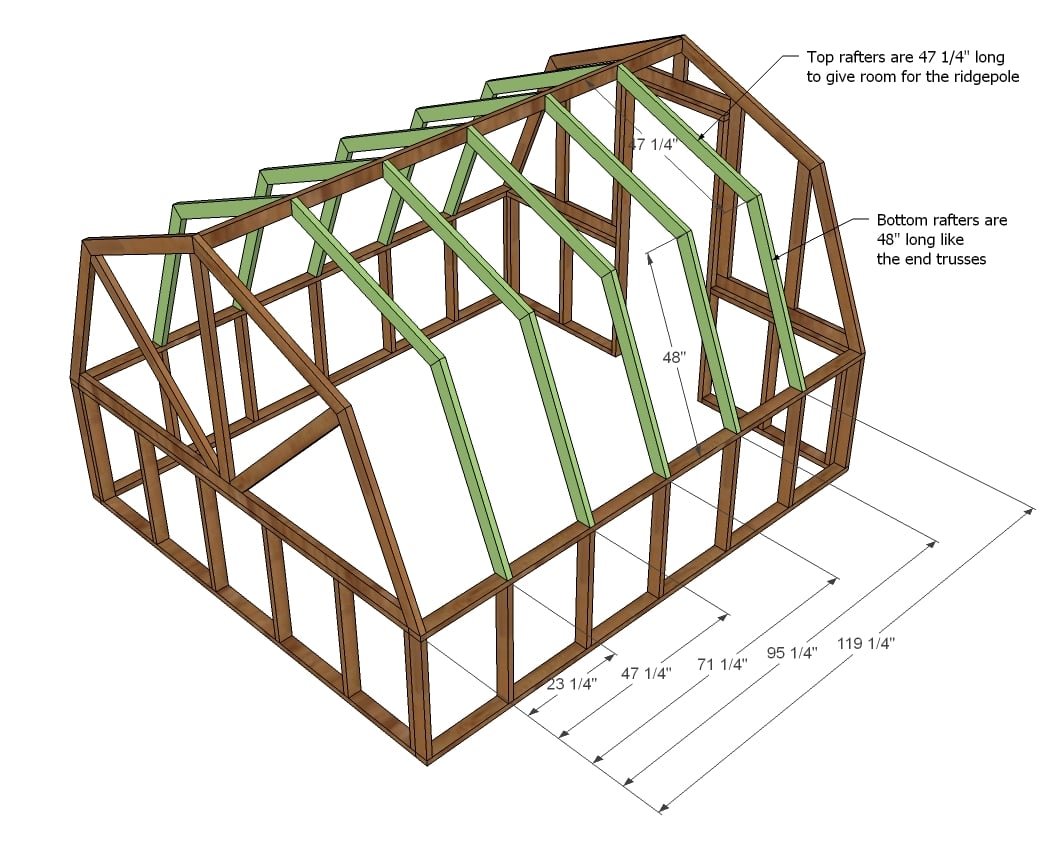
• 10 2X4 @ 48” (BOTH ENDS CUT AT 22 ½ DEGREES ENDS NOT PARALLEL)
• 10 2X4 @ 47 1/4” (BOTH ENDS CUT AT 22 ½ DEGREES ENDS NOT PARALLEL) - shorter rafters go up to meet the ridgepole. I marked all shorter rafters to avoid confusion. For the common rafters of this barn style greenhouse, we ended up using plywood gussets to save money. After cutting quite a few, I figured out how to cut gussets the super quick and easy way - got gusset cutting down to less than a minute each. We put gussets on both sides of each rafter joint with glue and screws. We made all of the small trusses first on the ground, then it was just a matter of stacking them on the ridgepole and attaching to the studs. We used 8 screws per gusset. Common rafters are installed flush to top of ridgepole and flush to outside of side walls. We had to "toenail" the screws in - meaning they are screwed in at an angle. We used glue and 3" screws from both sides.
The plan will get you through the framing.
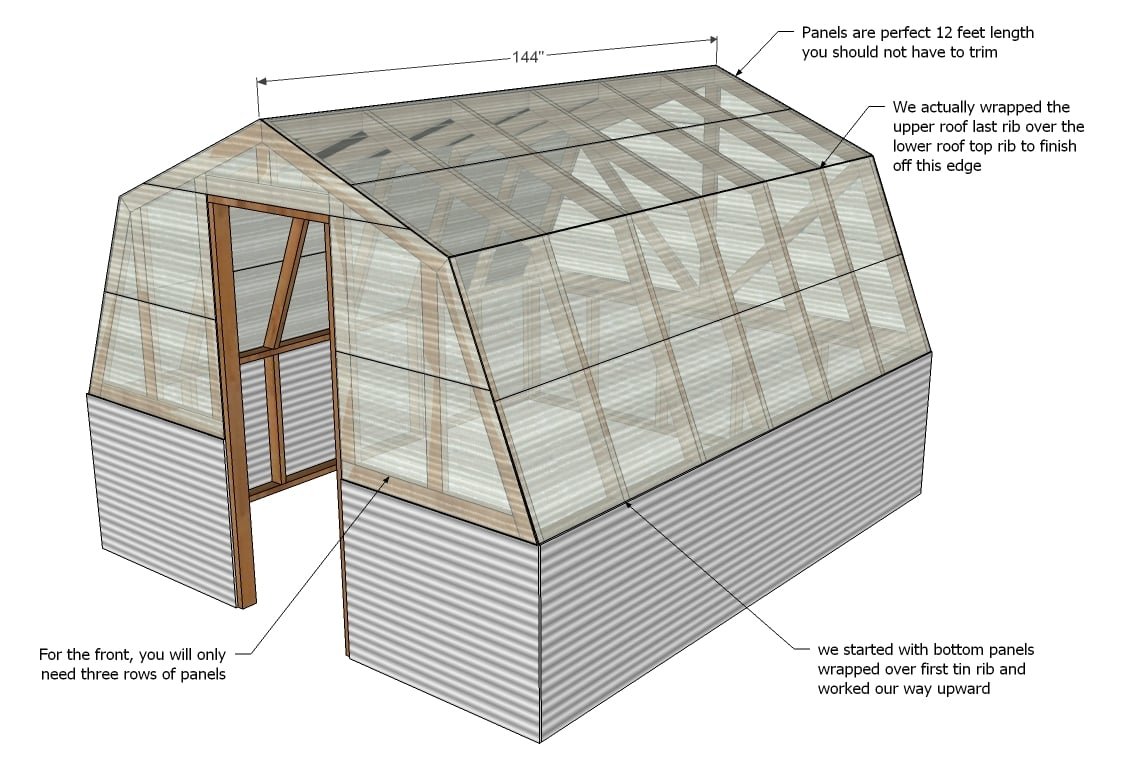
At this point, you could use plastic paper, lexan glass panels, you name it to seal the frame in. We used the corrugated plastic panels detailed earlier for installation. IMPORTANT: If you do not use panels you will need some sort of lateral support to keep the greenhouse from swaying side to side. Try 12 foot long 2x4s.
Finishing
Sand all surfaces, starting with a medium grit and finishing with fine. Wipe off the dust, fill any holes or gaps with wood filler, and sand smooth once dry. Apply primer if you're painting, then finish with your choice of paint or stain and seal with a durable clear topcoat. For outdoor projects, use exterior-rated primer, paint or stain, and sealer so the piece stands up to the weather.
Source (temporary): https://www.ana-white.com/woodworking-projects/diy-barn-style-greenhouse-free-plans