Bath Vanity Hutch with Recessed Lights
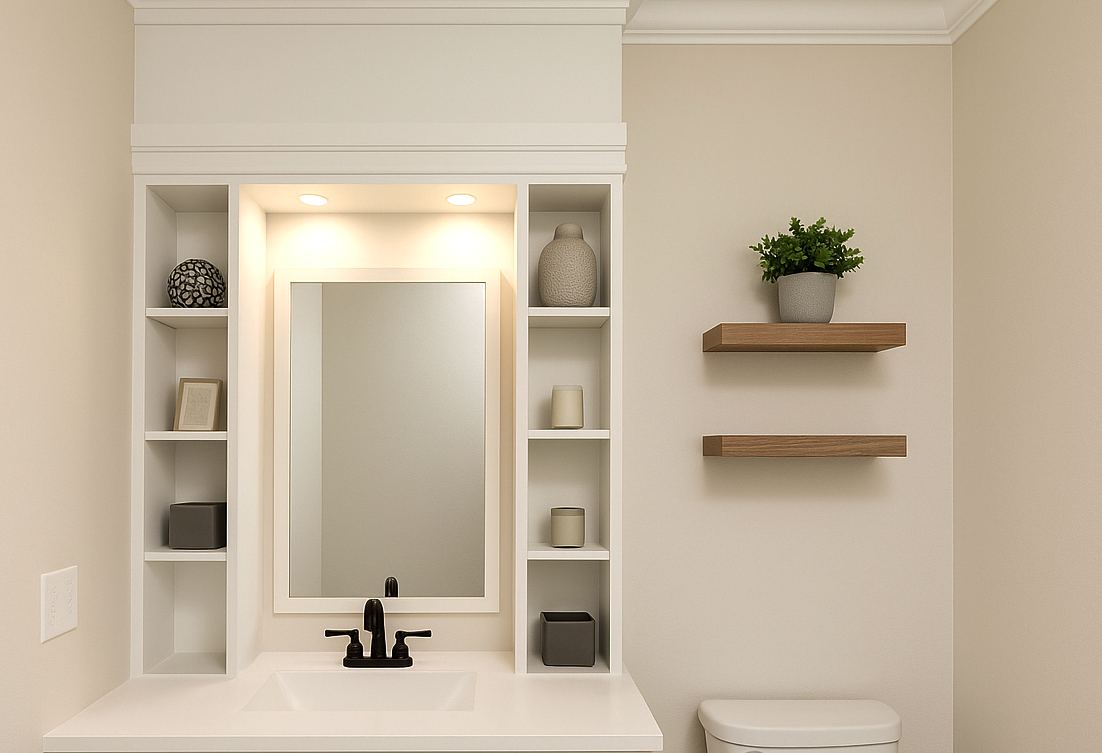
Vanity Hutch with Built-In Shelves – Take your bathroom vanity to the next level with this custom hutch project! Designed to fit right over a standard sink and countertop, this hutch adds both style and storage with open shelving, recessed lighting, and elegant crown moulding. The shelves are perfect for baskets, greenery, and décor, giving you both function and a high-end, built-in look. Beginner-friendly and built with basic tools, this project transforms a simple vanity into a custom centerpiece. With, you can create a beautiful, organized bathroom that looks designer-made—without the price tag.
Specifications
| Project type | Hutch Plans |
|---|---|
| Room | Bathroom |
| Style | Cottage Style Furniture Plans |
| Difficulty | Intermediate |
| Estimated cost | $50 - $100 |
Dimensions
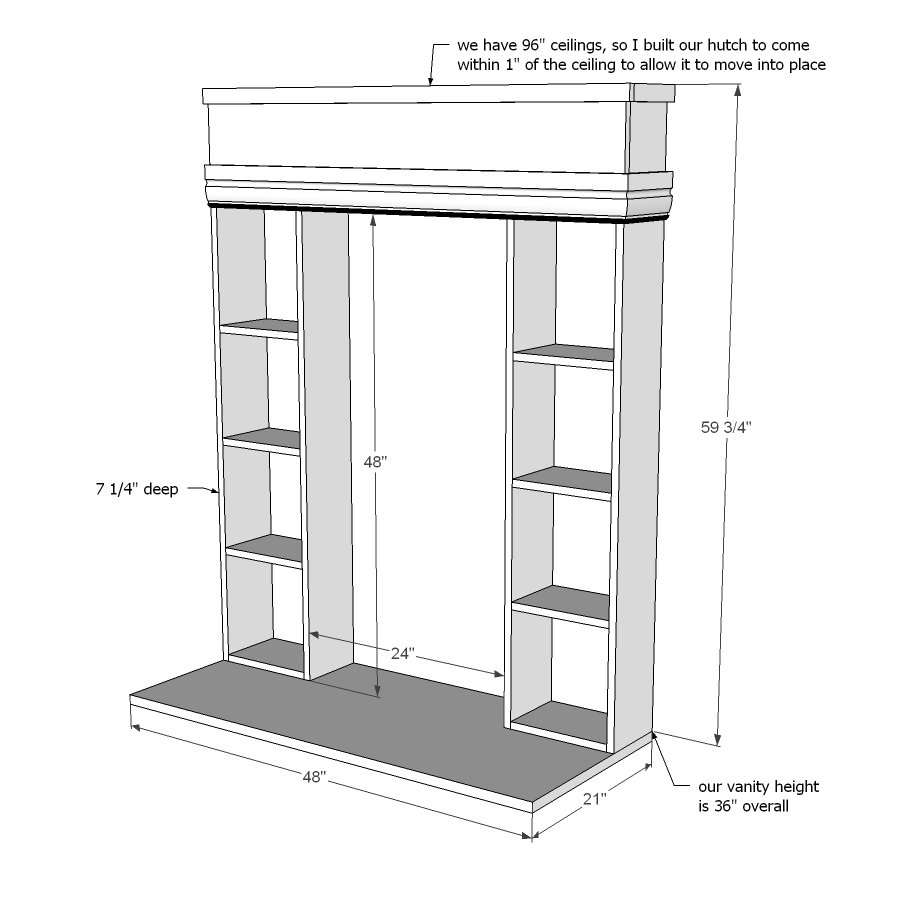
Use the size-specific shopping and cut lists below.
Shopping List
- 6 - 1x8 @ 8 feet long (I used primed MDF boards)
- 1 - 1x10 @ 6 feet long (I used primed MDF boards)
- 1 - 1x3 @ 6 feet long
- 1 - 4 1/4" base moulding @ 6 feet long
- 4 recessed cabinet lights
Cut List
TOWERS
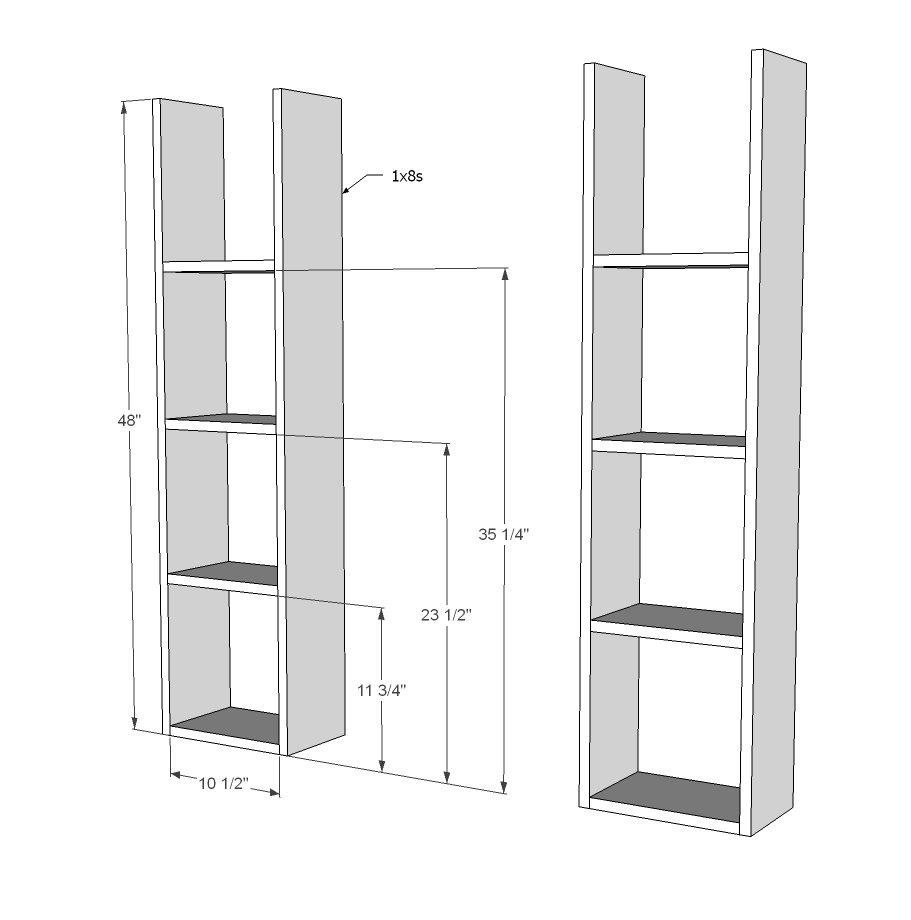
- 5 - 1x8 @ 48" (you can cut these at 47 3/4" if you need to to get two cuts out of a single 8 foot long board)
- 8 - 1x8 @ 10 1/2"
TOP
- 1 - 1x10 @ 48"
- 2 - 1x10 @ 6 1/2" (cut to fit!)
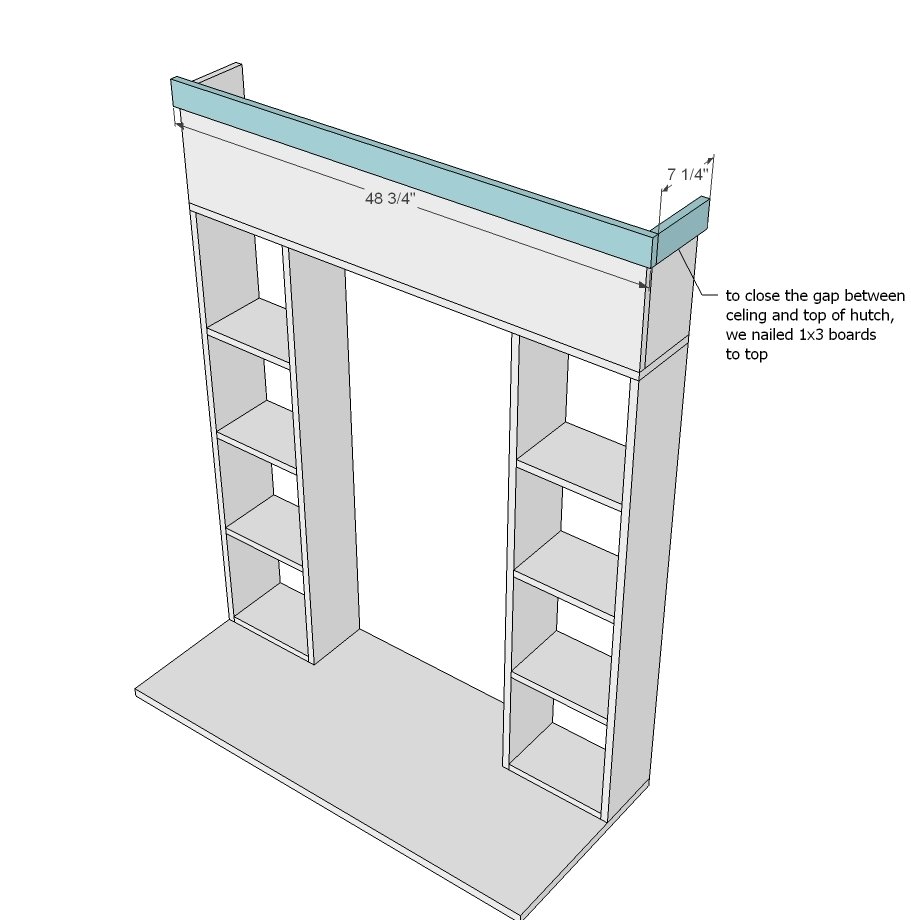
- 1 or 2 1x3 @ 7 1/4 (depends on if your vanity is in a corner)
- 1 - 1x3 @ 48 3/4" or 49 1/2" (depending on if your vanity is in a corner)
- 4 1/4" base moulding cut to fit
Tools
- measuring tape
- square
- pencil
- safety glasses
- hearing protection
- circular saw
- nailer
Step-by-step Instructions
Step 1
First, build two towers. Now, you may need to adjust your tower size depending on where your vanity light is located, how much room you have on top of your vanity, and how wide your vanity/sink is. We build the towers with finish nails (1 1/4") and glue.
Step 2
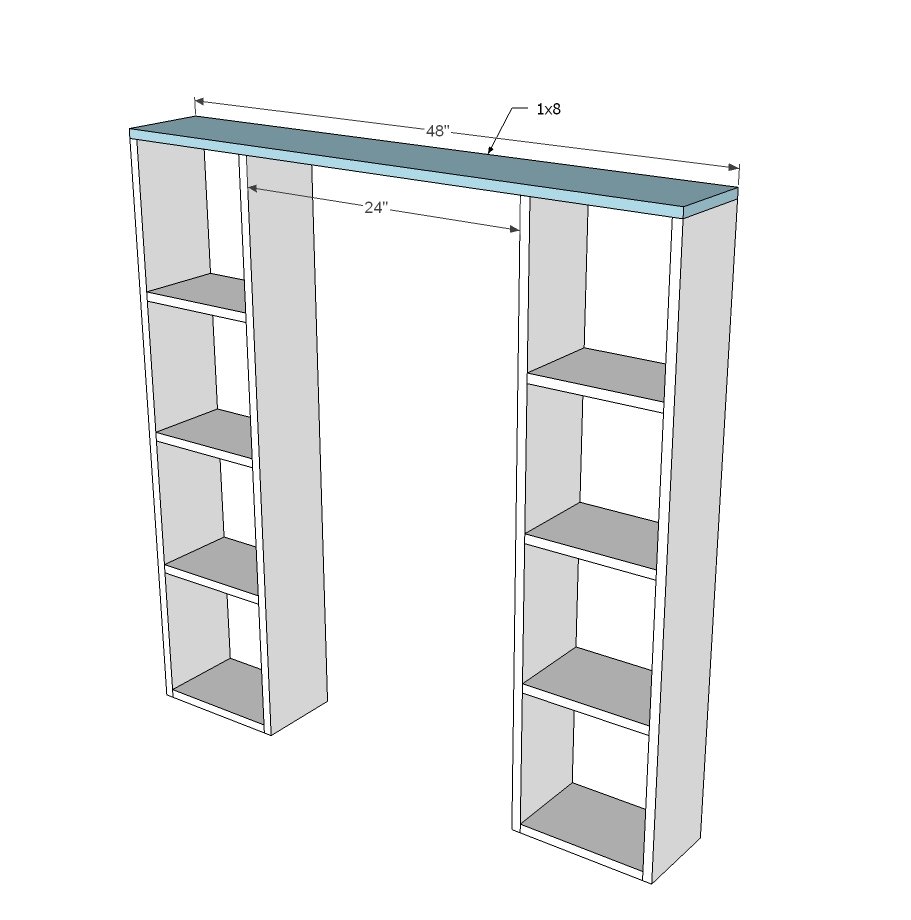
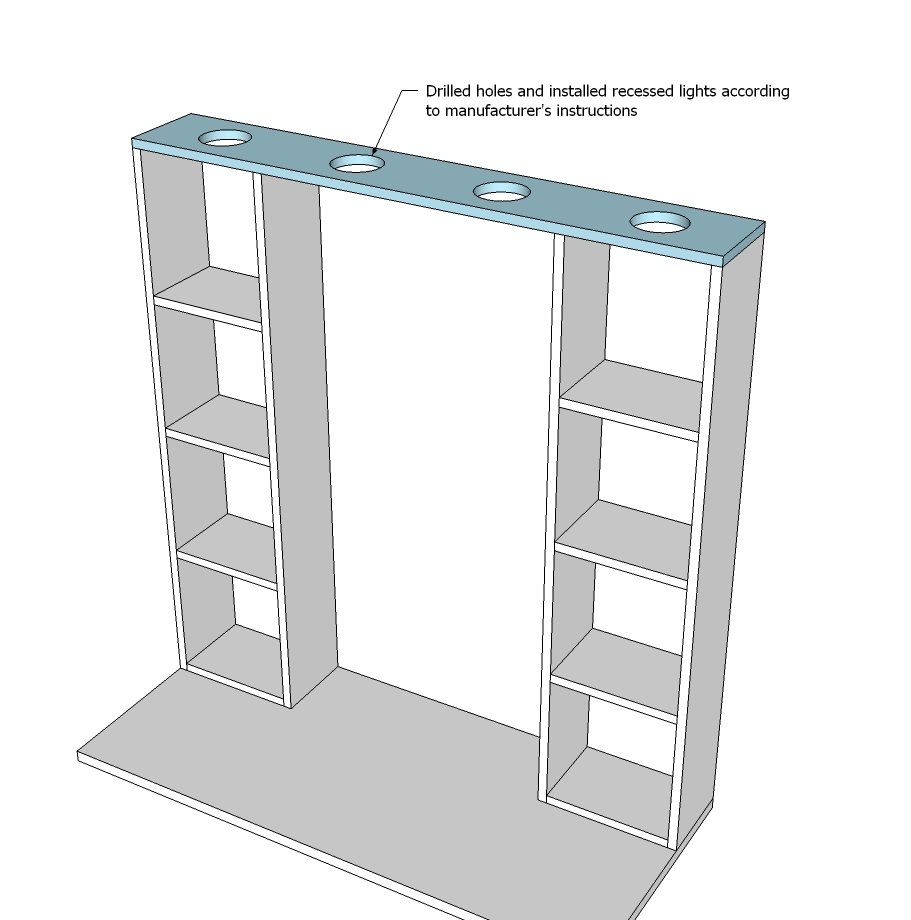
Once the two towers are built, we added a board on top for the recessed lights. we have a standard 48" wide vanity, so this board is 48" long for us. We just nailed it to the two towers.
Step 3
To make things easy, we installed the recessed lights on the ground, and connected all the wires. Then when we put the vanity in place, we just have to wire the fixtures to the vanity light box.
Step 4
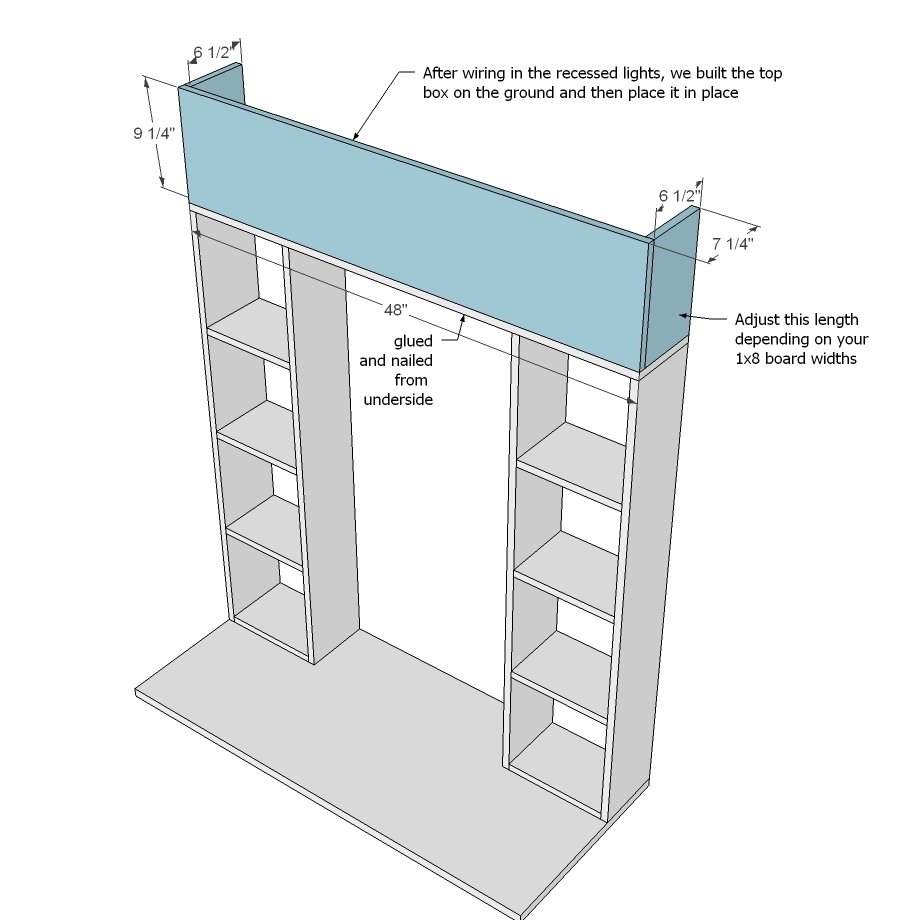
Then we moved the hutch in place. We were able to secure it to the inside wall, but the towers themselves didn't fall on a stud so ours is just resting on our vanity top (acually held in place by the crown moulding) and we haven't had an issue in 7 years. But you can attach yours with brackets or adding cleats to the underside of shelves. We build the box first on the ground and then just slid it in place and nailed through the bottom board to attach. The base moulding (to be added shortly) really beefed up this joint. NOTE: Depending on your ceiling height and vanity light location, you may wish to use a 1x8 or 1x12 on top. Just leave enough room that you can position the box in place without damaging your ceiling.
Step 5
Step 6
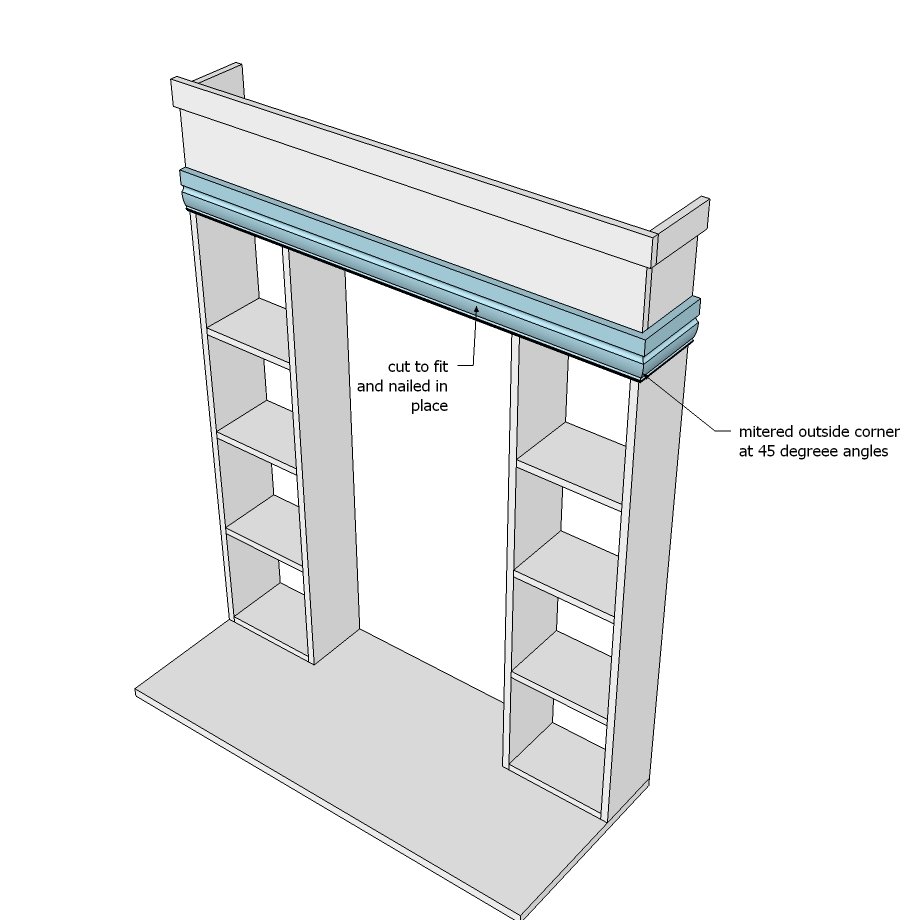
And then the base moulding added a little detail and also strengthened this joint. You'll want to use shorter nails here as the base moulding is usually less than 3/4" thick.
Step 7
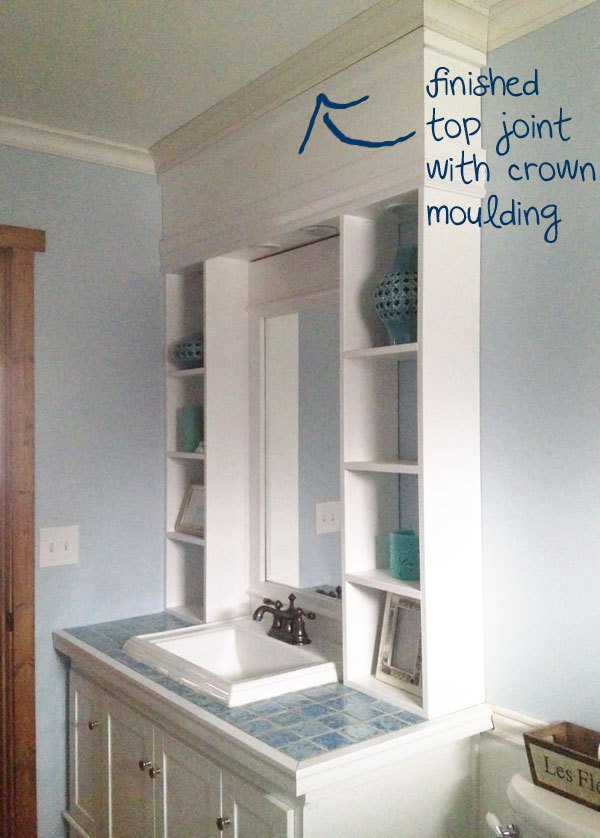
Then we added crown moulding around the entire room, including the vanity itself. This finished out the top joint.
Finishing
Sand all surfaces, starting with a medium grit and finishing with fine. Wipe off the dust, fill any holes or gaps with wood filler, and sand smooth once dry. Apply primer if you're painting, then finish with your choice of paint or stain and seal with a durable clear topcoat. For outdoor projects, use exterior-rated primer, paint or stain, and sealer so the piece stands up to the weather.
Source (temporary): https://www.ana-white.com/woodworking-projects/diy-bath-vanity-hutch-recessed-lights