Chevron Narrow Side Cabinet
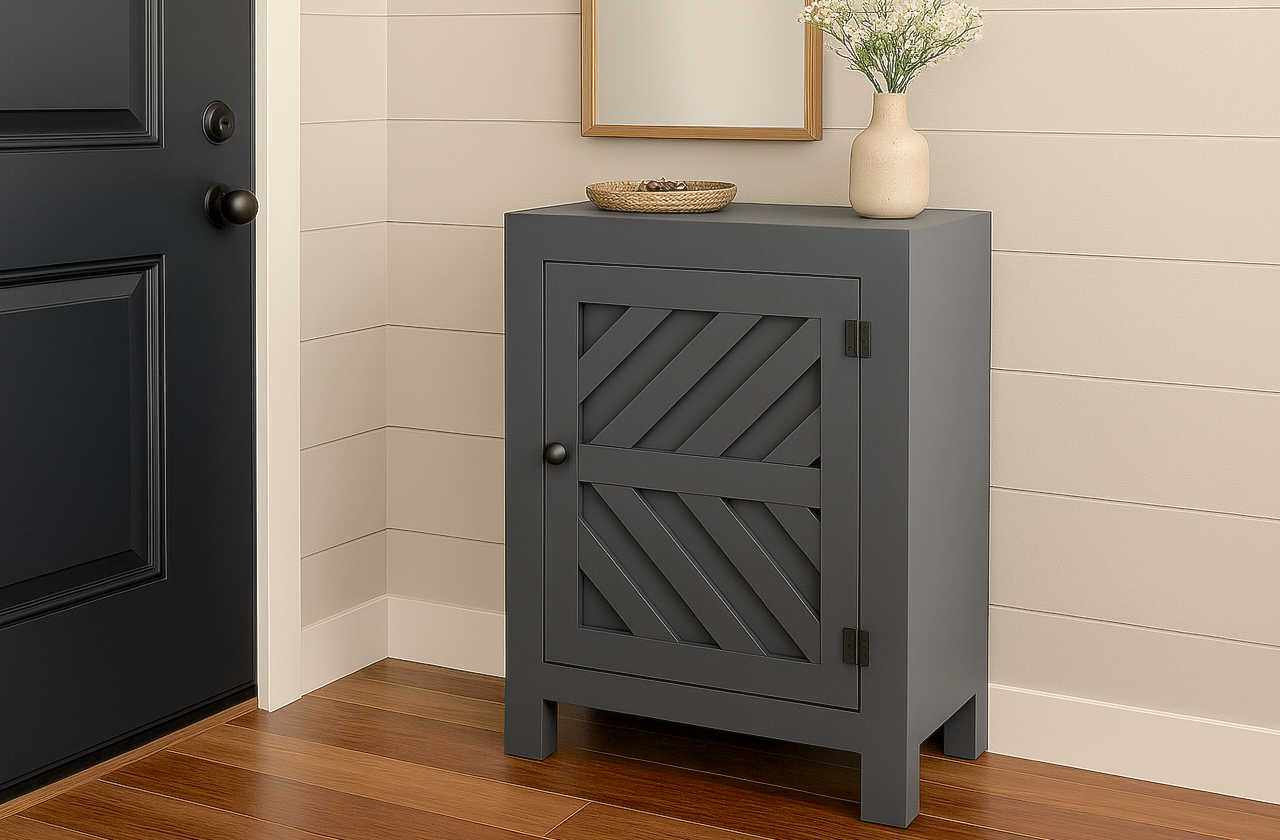
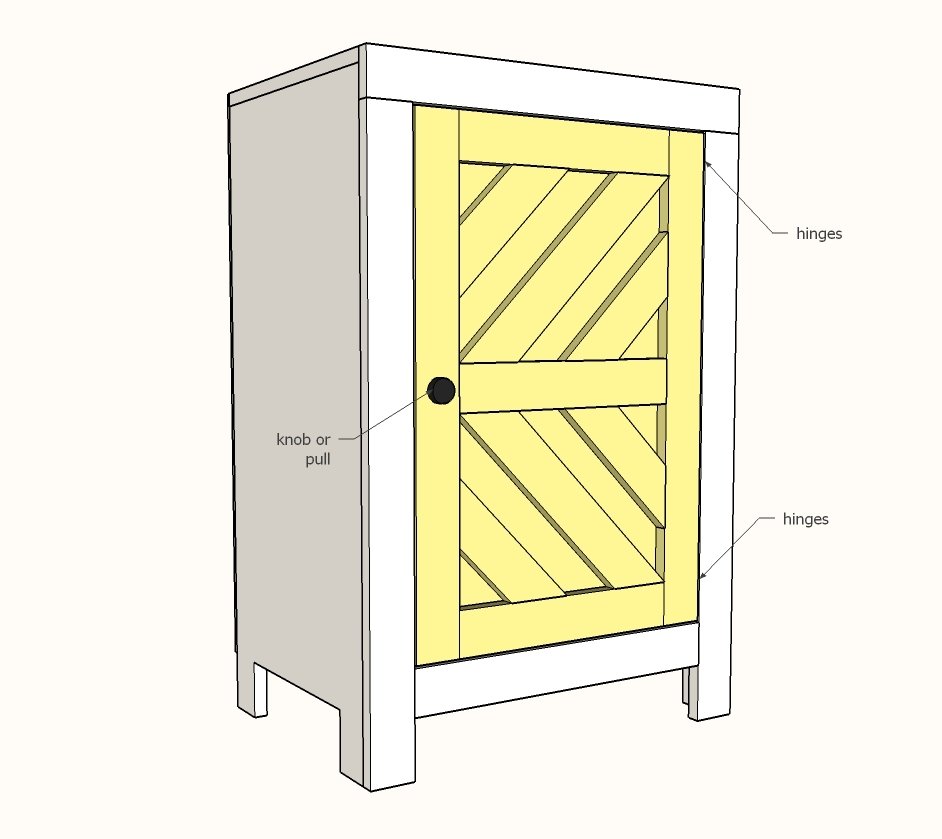
This stylish narrow side cabinet is perfect for maximizing storage in compact areas. With a striking chevron door design and a slim profile, it fits beautifully in entryways, beside a bed as a nightstand, or in dining areas as a petite buffet. Built for both function and style, it's ideal for holding games, linens, or everyday essentials—wherever you need a small but impactful storage solution. Build it yourself from
Specifications
| Project type | Nightstands |
|---|---|
| Room | Storage Solutions |
| Style | Farmhouse Furniture |
| Difficulty | Intermediate |
| Estimated cost | $50 - $100 |
Dimensions
Use the size-specific shopping and cut lists below.
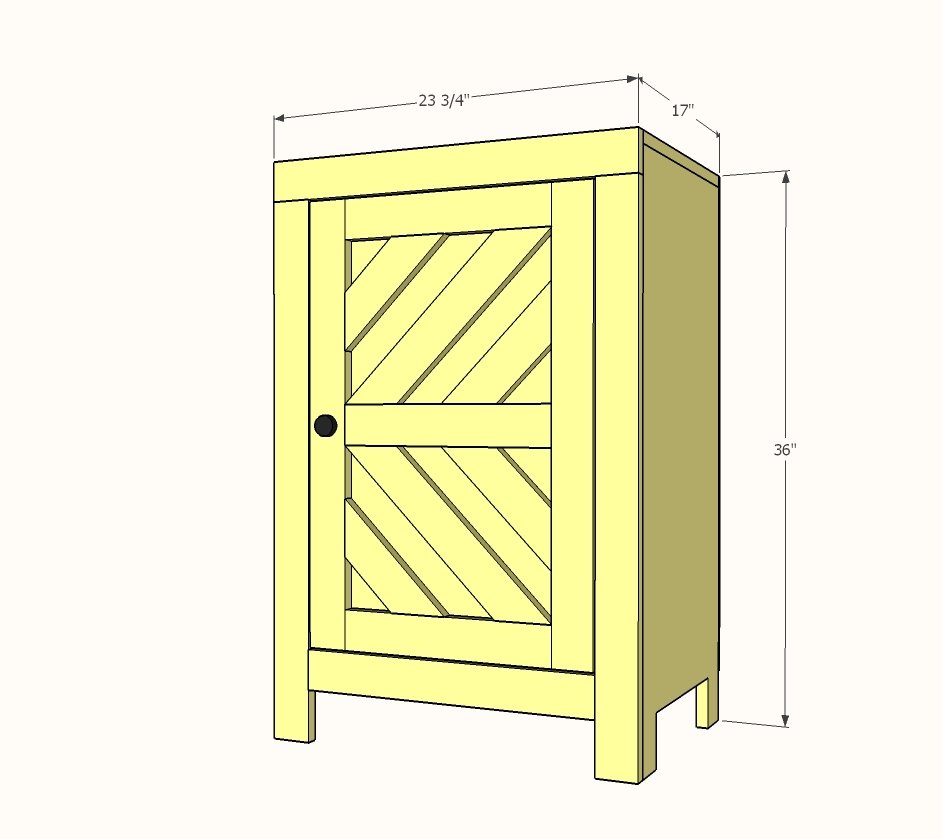
Shopping List
- 1 - sheet of 3/4" plywood ripped into two strips, 15-3/4" wide x 8 feet long (you'll only need about half of this material) OR 12 feet of 1x12 boards (for a narrower depth cabinet)
- 3 - 1x3 @ 8 feet long
- 48" x 48" piece of 1/4" plywood
- 2 small hinges
- 1 knob
- may also need a magnetic clasp or similar to keep door shut
Cut List
Carcass
- 2 - 3/4" plywood @ 15-3/4" x 35-1/4" - sides
- 1 - 3/4" plywood @ 15-3/4" x 23-3/4" - top
- 1 - 3/4" plywood @ 15-3/4" x 22-1/4" - bottom shelf
- 1 - 3/4" plywood @ 15-1/4" x 22-1/4" - middle shelf
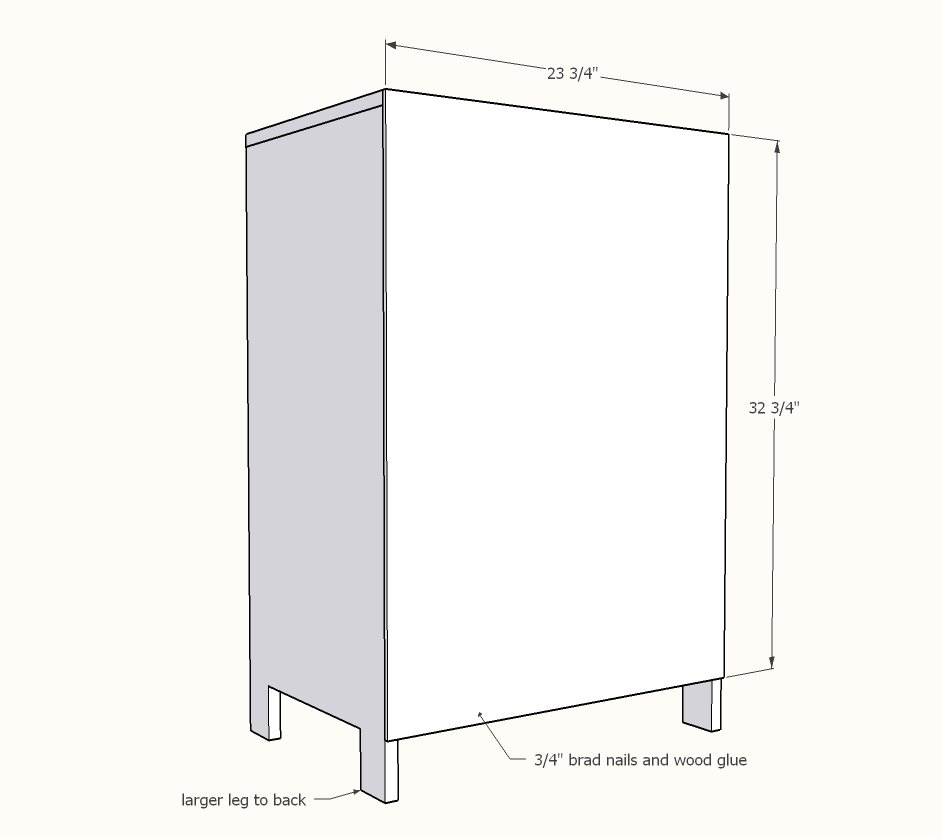
- 1 - 1/4" plywood @ 23-3/4" x 32-3/4" - back
Face Frame
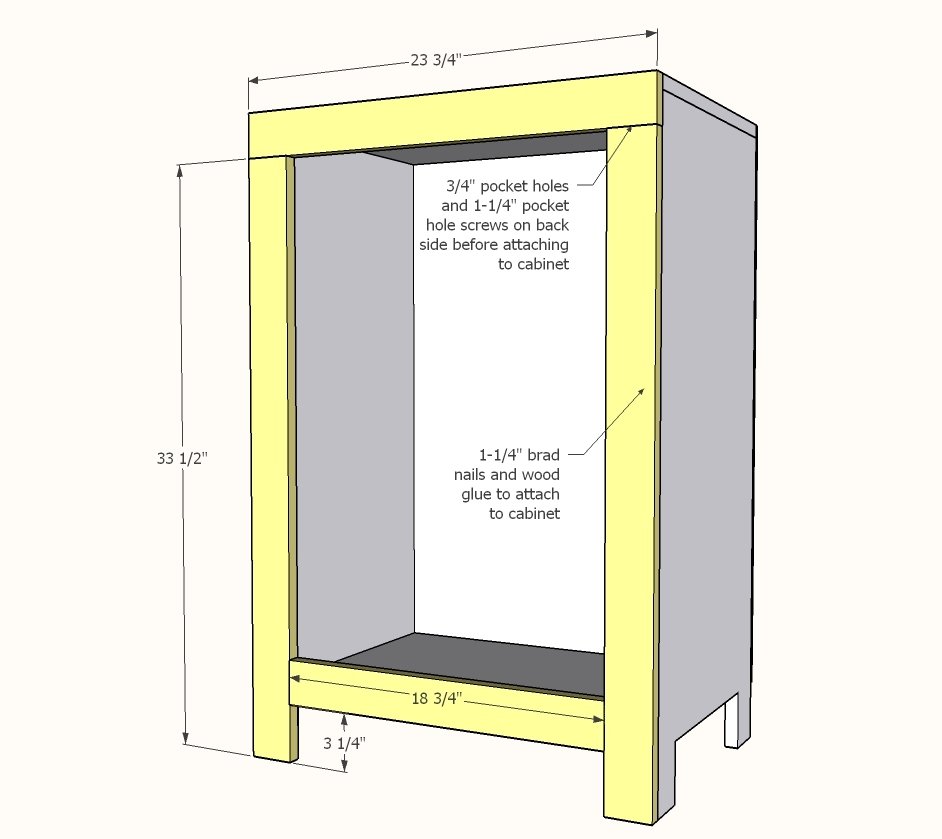
- 1 - 1x3 @ 23-3/4" - face frame top
- 2 - 1x3 @ 33-1/2" - face frame sides
- 1 - 1x3 @ 18-3/4" - face frame bottom
Door
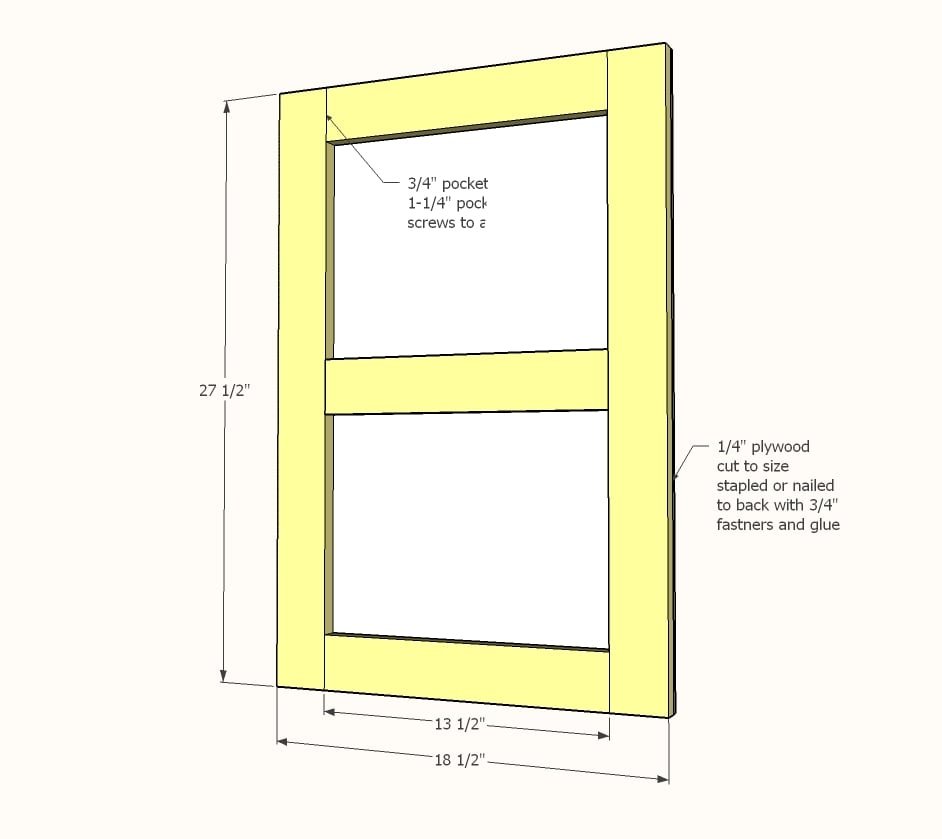
- 2 - 1x3 @ 27-1/2" - door stiles
- 3 - 1x3 @ 13-1/2" - door rails
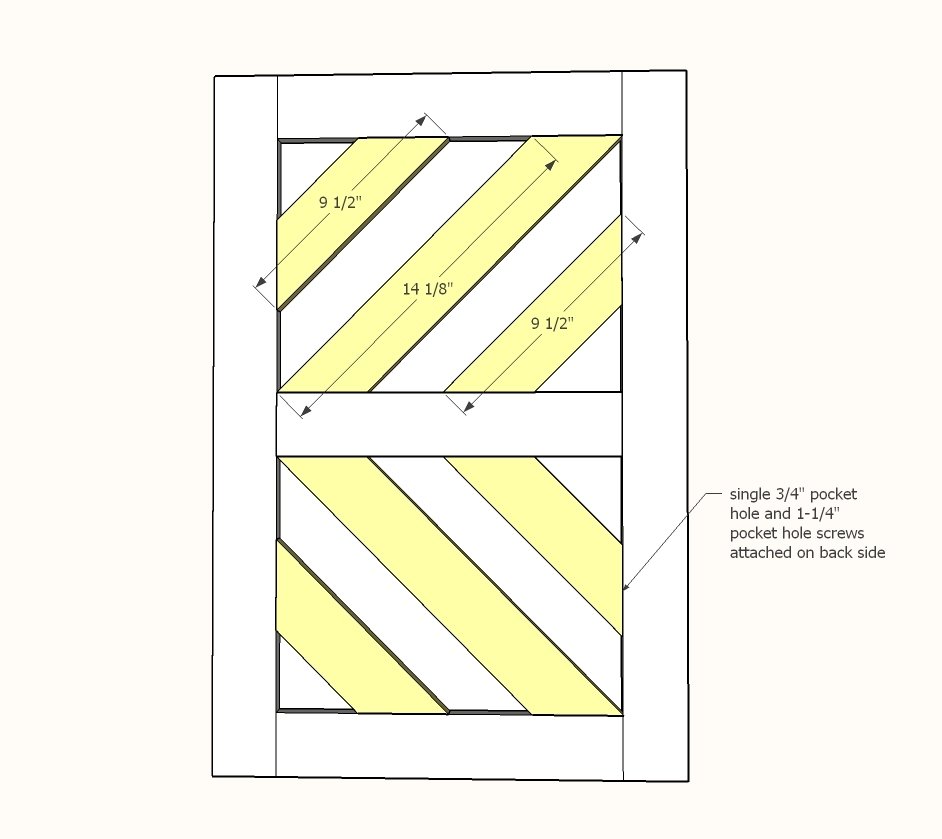
- 2 - 1x3 @ 14-1/8" - long point to short point measurement, both ends cut at 45 degrees, ends ARE parallel
- 4 - 1x3 @ 9-1/2" - long point to long point measurement, both ends cut at 45 degrees, ends are NOT parallel
- 1 - 1/4" plywood @ 27-1/2" x 18-1/2"
Tools
- measuring tape
- square
- pencil
- safety glasses
- hearing protection
- kreg-jig
- drill
- circular saw
- jigsaw
- compound miter saw
- table saw
- nailer
- sander
Step-by-step Instructions
Step 1
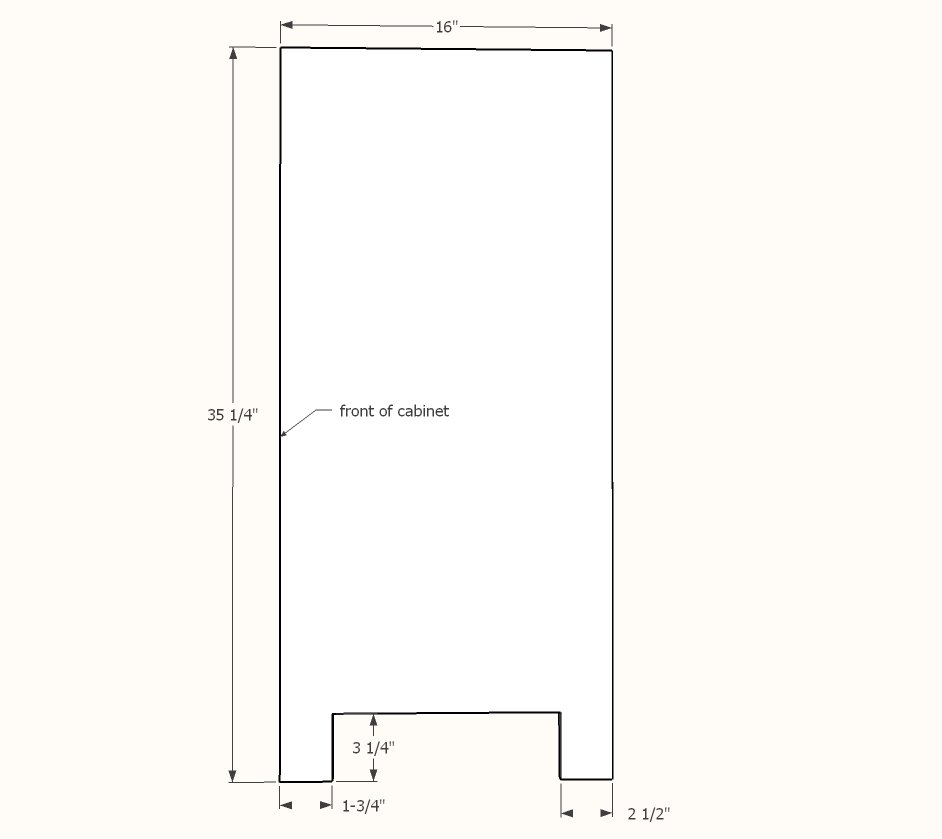
Cut out the bottom of the side panels with a jigsaw or circular saw. The two side panels need to be made in mirror, with the front leg smaller than the back. This will matter if your plywood has a finished side that you'd like to keep on the exterior of the project. Drill three pocket holes along top edge on inside, with pocket hole jig set for 3/4" materials.
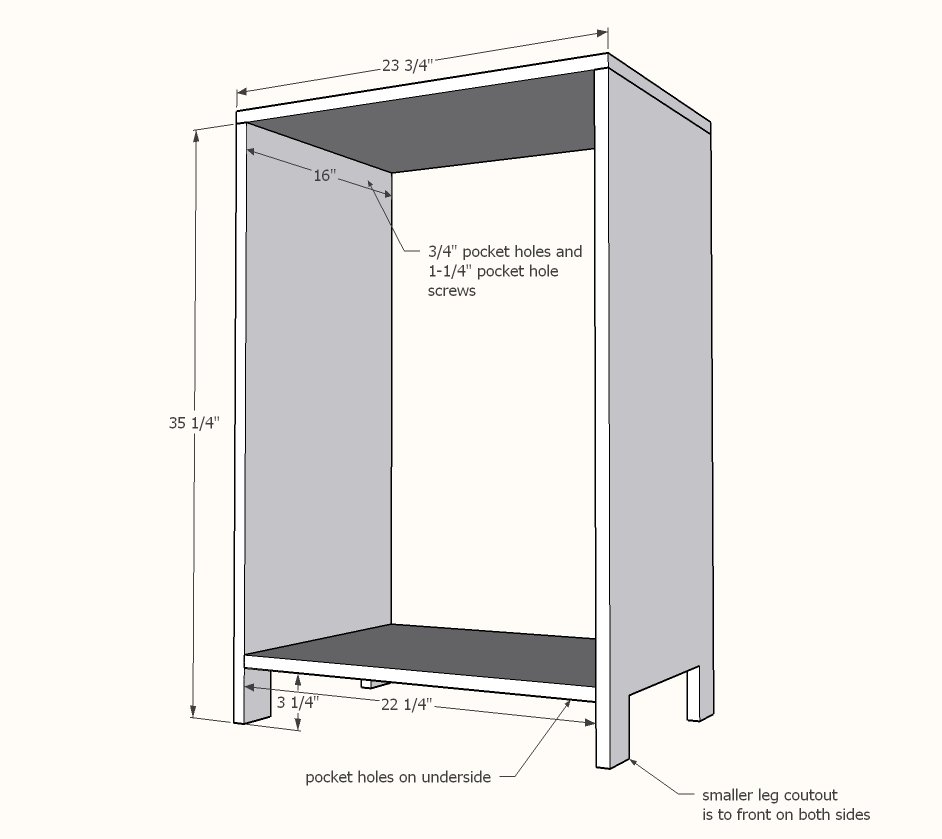
Attach sides to top with 1-1/4" pocket hole screws.
Attach bottom to sides with pocket holes.
Cut back on tablesaw or with circular saw.
Attach with glue and 3/4" brad nails.
Build face frame first with 3/4" pocket holes and 1-1/4" pocket hole screws.
Attach to the front of project with 1-1/4" brad nails and glue.
Step 5
Add inlay pieces.
Attach back with glue and 3/4" brad nails.
Install door with hinges.
Add shelves. Sand and finish as desired.
Finishing
Sand all surfaces, starting with a medium grit and finishing with fine. Wipe off the dust, fill any holes or gaps with wood filler, and sand smooth once dry. Apply primer if you're painting, then finish with your choice of paint or stain and seal with a durable clear topcoat. For outdoor projects, use exterior-rated primer, paint or stain, and sealer so the piece stands up to the weather.
Source (temporary): https://www.ana-white.com/woodworking-projects/diy-chevron-narrow-side-cabinet-versatile-storage-small-spaces