Cubby Dresser with Easy Square Drawers NO Drawer Slides!
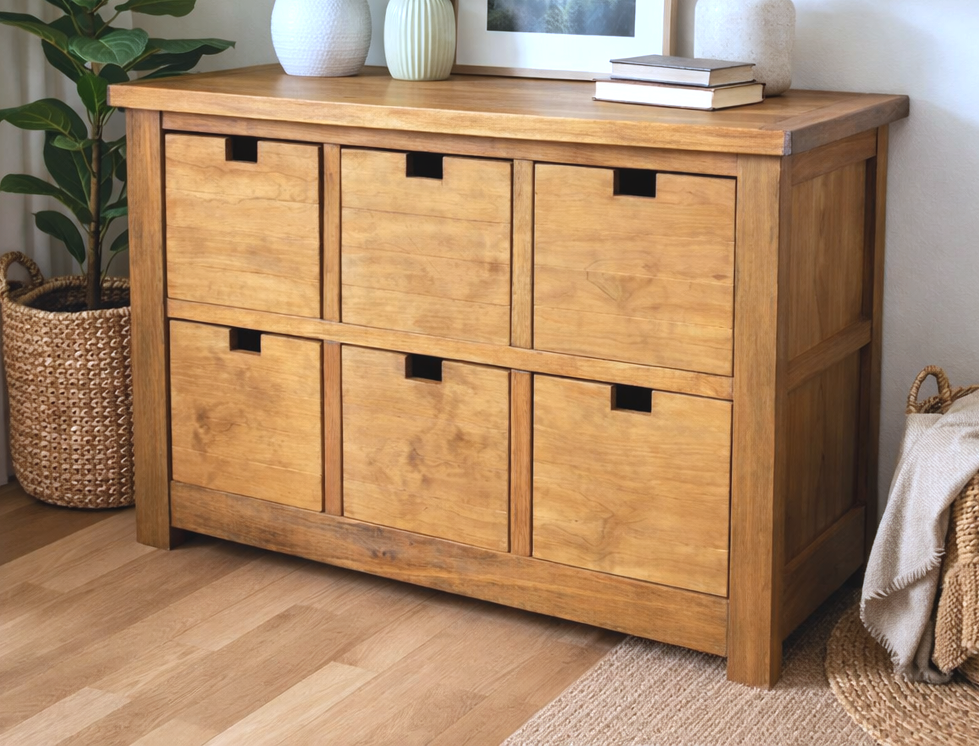
This DIY cubby dresser is a practical storage solution built with families in mind. The six square drawers are easy to pull out, rearrange, and customize, making this dresser perfect for kids’ bedrooms, playrooms, or shared spaces. With a straightforward build and classic proportions, this project is beginner-friendly while still delivering a polished, furniture-quality result.
Specifications
| Project type | Dresser Plans |
|---|---|
| Room | Storage Solutions |
| Difficulty | Advanced |
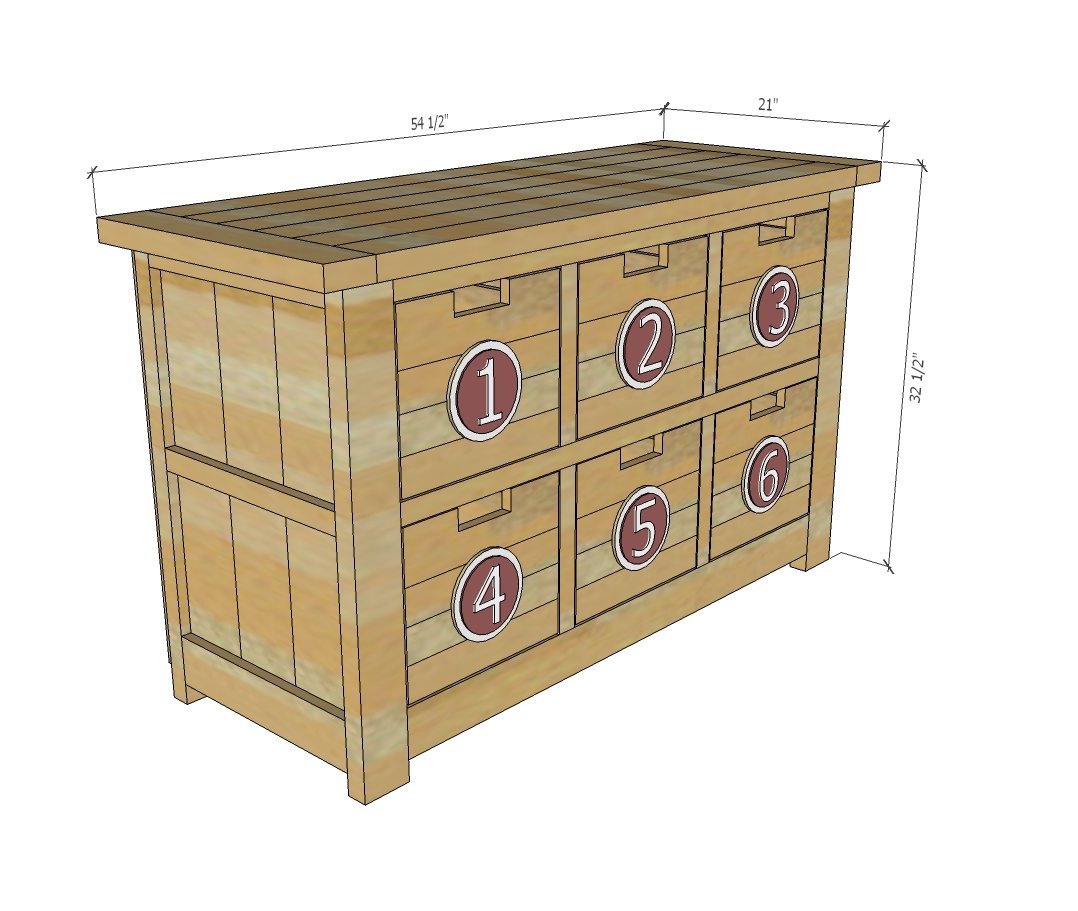
Dimensions
Use the size-specific shopping and cut lists below.
Shopping List
- 8 - 2x4 @ 8 feet long
- 3 - 2x2 @ 8 feet long
- 3 - 1x2 @ 8 feet long
- 1 - 1x4 @ 3 feet long
- 2 - 1x6 @ 8 feet long
- 24 feet of 1x10 boards or other boards for drawer boxes
- 1 - 1x12 @ 8 feet long
Cut List
FACE FRAMES
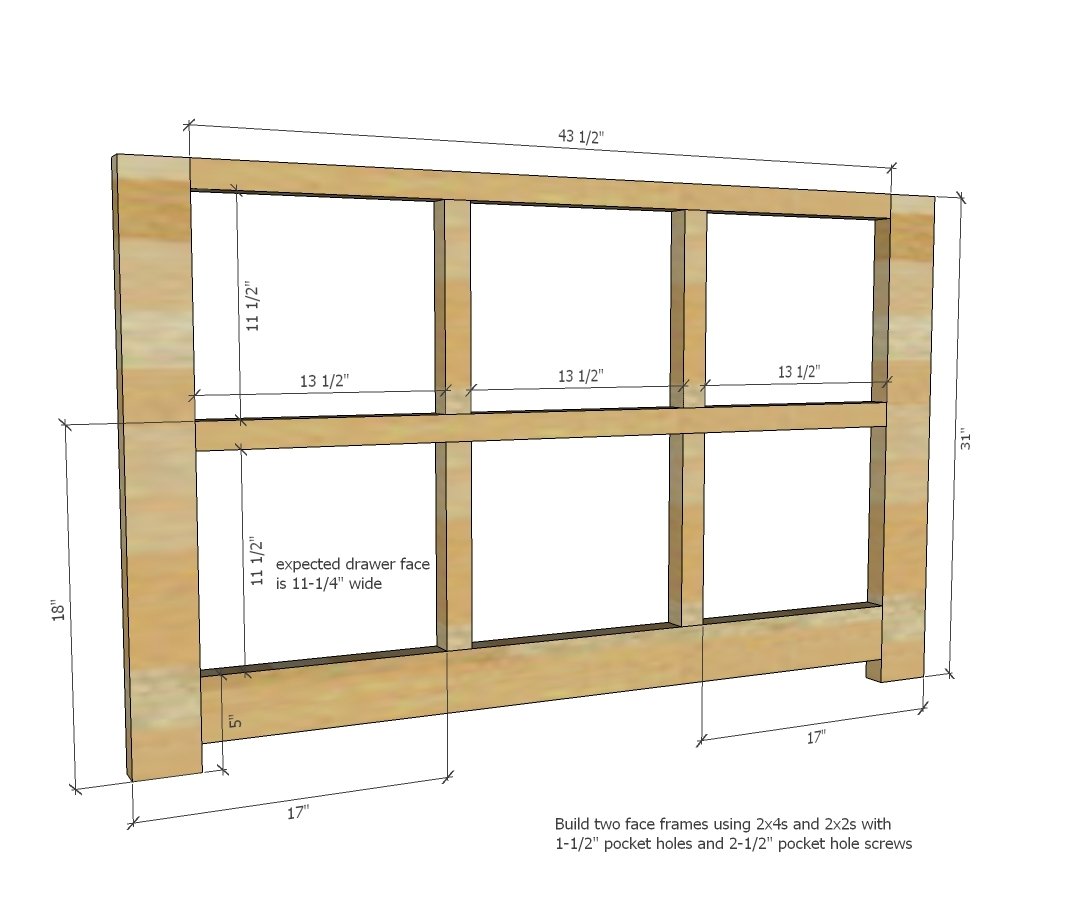
- 4 - 2x4 @ 31"
- 4 - 2x2 @ 43-1/2"
- 2 - 2x4 @ 43-1/2
- 4 - 2x2 @ 11-1/2"
REMAINDER OF CABINET
- 10 - 2x4 @ 16-1/2" (should be equal in length to the width of three 1x6s (see step 6)
- 8 - 1x2 @ 16-1/2" (drawer guides)
- 6 - 1x6 @ 29-1/2"
- 4 - 1x2 @ 16-1/2" (cut to fit)
- 2 - 1x4 @ 16-1/2" (cut to fit)
DRAWERS
- 6 - 1x10 @ 12-1/4"
- 12- 1x10 @ 17"
- 6 - 1/4" plywood @ 17-3/4" x 13-1/4"
- 6 - 1x12 @ 13-1/4"
TOP
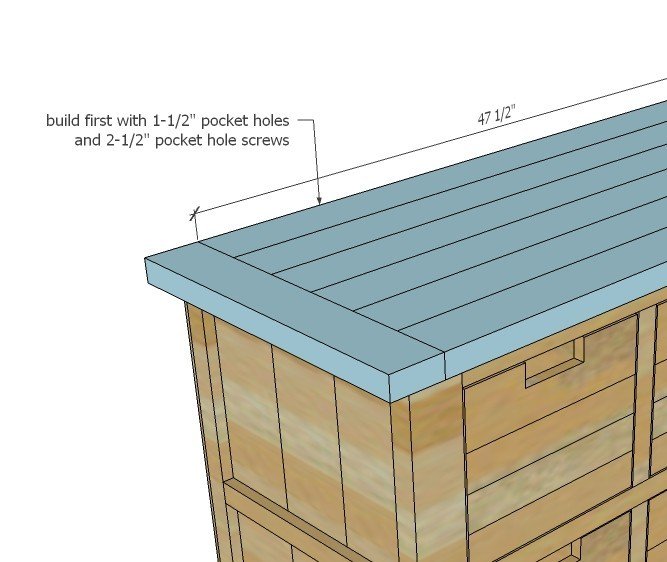
- 6 - 2x4 @ 47-1/2"
- 2 - 2x4 @ 21"
Tools
- measuring tape
- square
- pencil
- safety glasses
- hearing protection
- kreg-jig
- drill
- compound miter saw
- nailer
- sander
Step-by-step Instructions
Step 1
Build the face frames for front and back. It is very important that the face frames be identical to keep the drawers from sliding cockeyed. TIP: You may wish to drill 1-1/2" pocket holes facing up on the inside of the project for attaching the top in later steps.
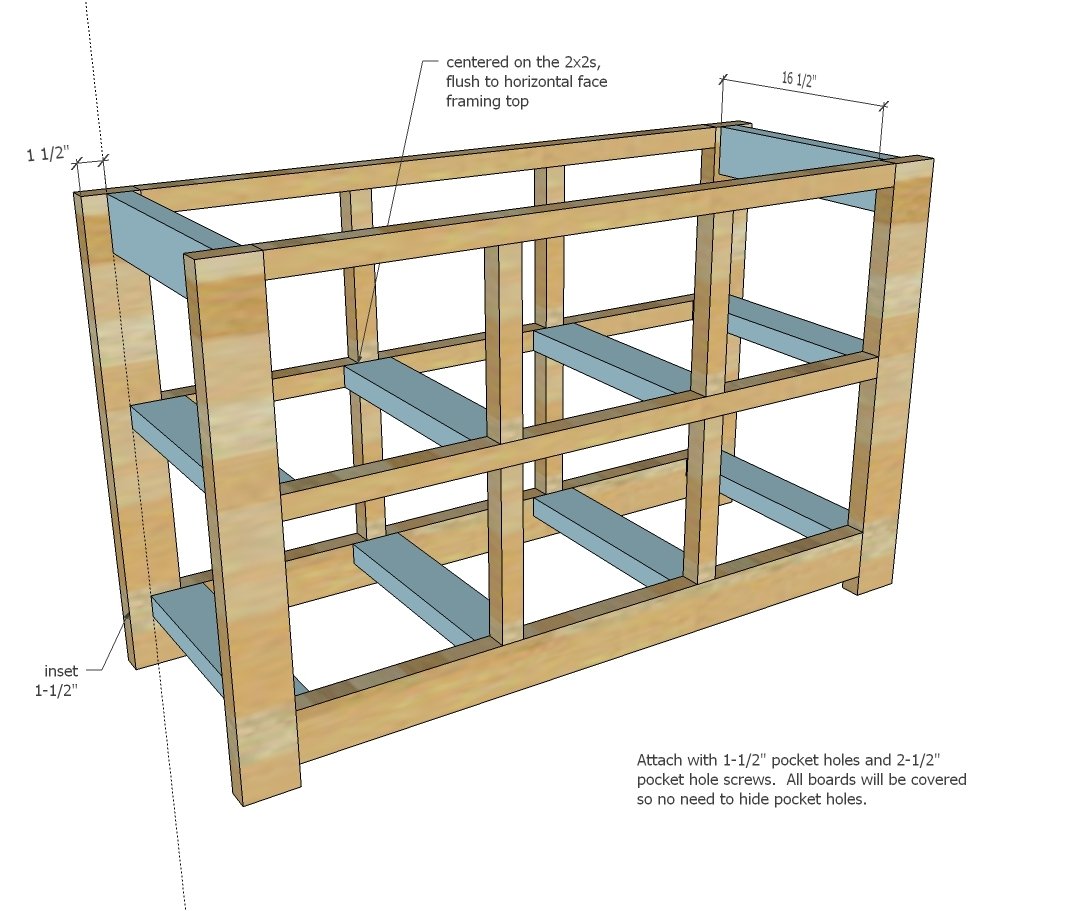
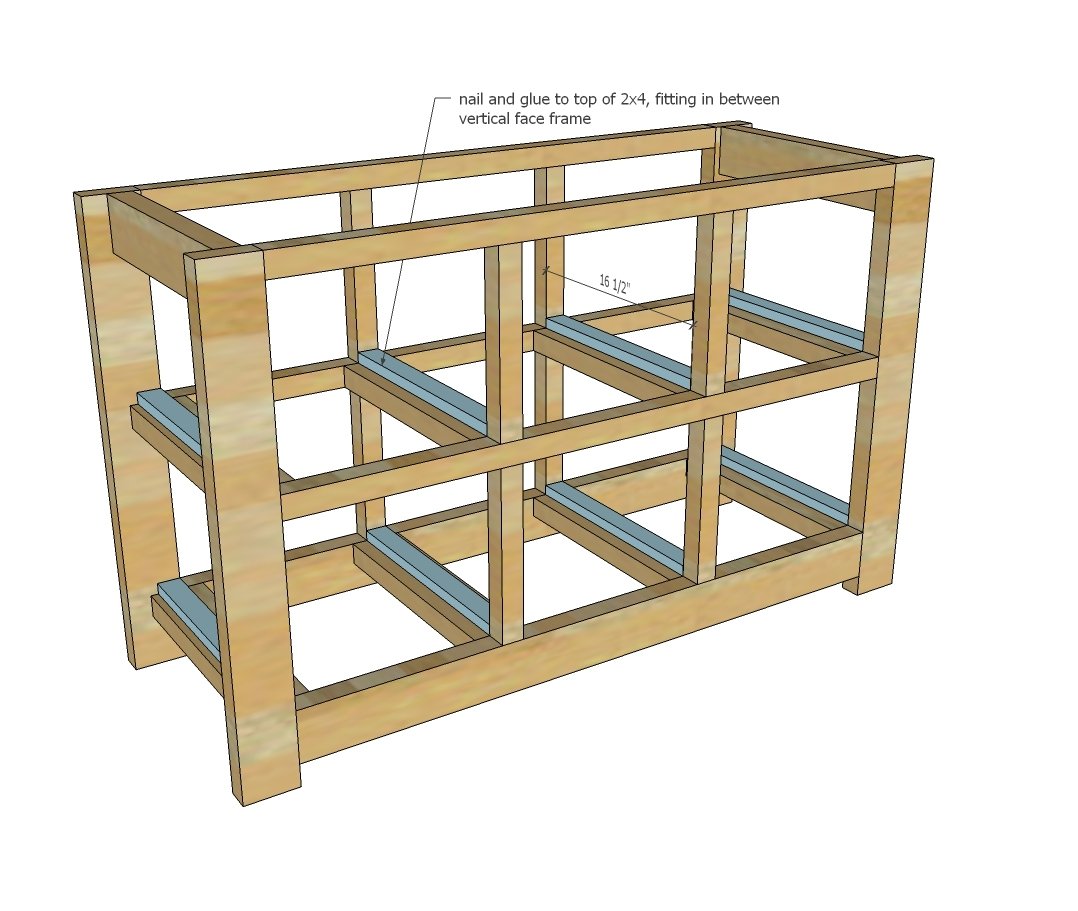
Attach the two frames together with 2x4 boards. The drawers will run along the top of these boards.
Make SURE your face frames are direcltly in line with each other.
Step 3
Add 1x2s on top of 2x4s to guide the drawers as they slide. Make sure the 1x2s are square to the front face frame. Screw these down with just 2 screws so they can be easily adjusted if needed.
Step 4
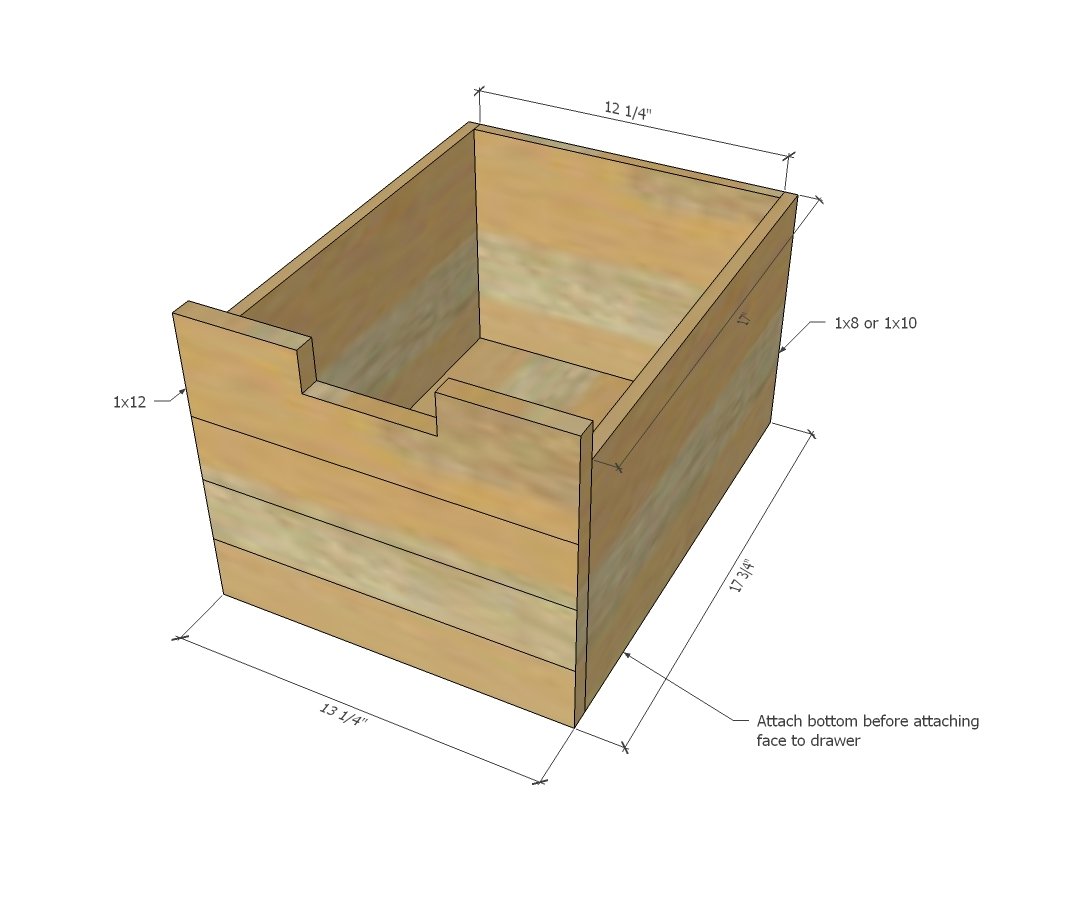
Build the drawer boxes to fit - 1/4" less in width and height than the openings to allow an 1/8" gap on all sides of the drawer.
Step 5
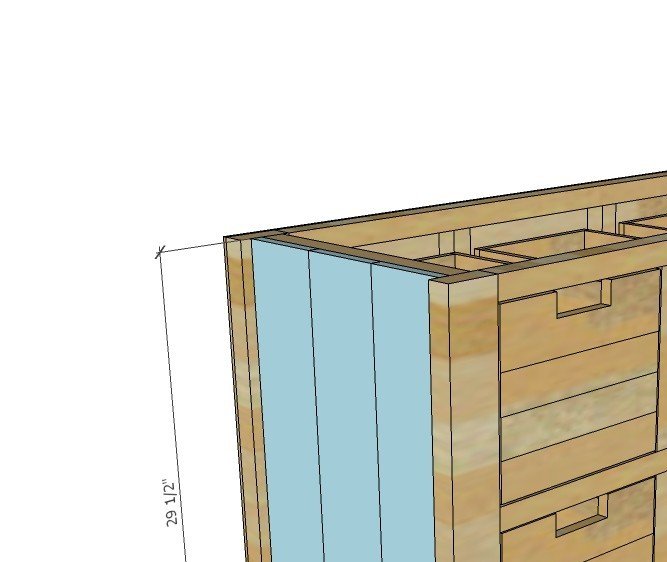
Once you are happy with the drawers, attach 1x6s to side panels.
Step 6
Trim side panels with 1x2s and 1x4s to keep the look consistent.
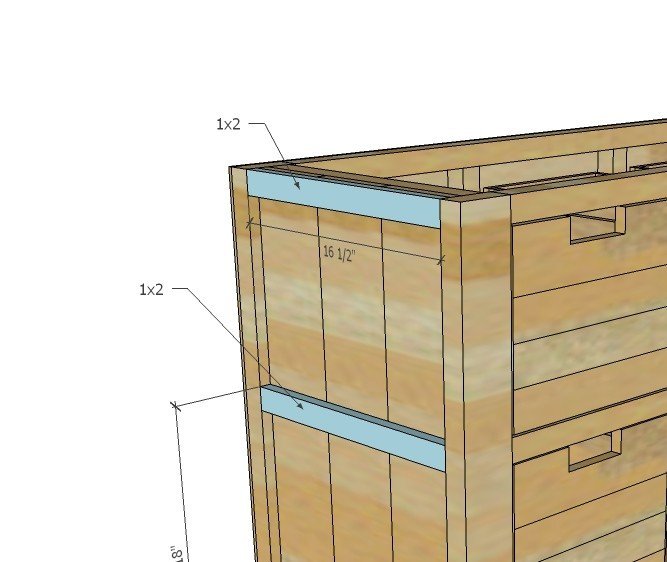
Build top seperately with pocket holes and attach to top.
Add 1/4" plywood to back if desired.
Finishing
Sand all surfaces, starting with a medium grit and finishing with fine. Wipe off the dust, fill any holes or gaps with wood filler, and sand smooth once dry. Apply primer if you're painting, then finish with your choice of paint or stain and seal with a durable clear topcoat. For outdoor projects, use exterior-rated primer, paint or stain, and sealer so the piece stands up to the weather.
Source (temporary): https://www.ana-white.com/woodworking-projects/diy-cubby-dresser-easy-square-drawers-no-drawer-slides-free-plans