Dovetail Beam Console Table
Big, bold furniture is in—but the prices? Not so fun. This DIY dovetail console table gives you that chunky, designer look for under $150 —and it’s built to last. Featuring dovetail-look joinery reminiscent of classic timber beams, this console table brings craftsmanship and presence to any space. Whether you stain it dark, keep it natural, or paint it to match your style— you choose the finish. This includes everything you need to build it yourself: • Cut list • Cut diagrams • Shopping list • Step-by-step diagrams • Video tutorial • Matching plans in the collection Why spend thousands on a trendy accent piece that could go out of style next year? DIY the entire collection for a fraction of the cost—and love every piece for years to come.

Specifications
| Project type | Console Table Plans |
|---|---|
| Room | dining room |
| Difficulty | Intermediate |
Dimensions
Use the size-specific shopping and cut lists below.
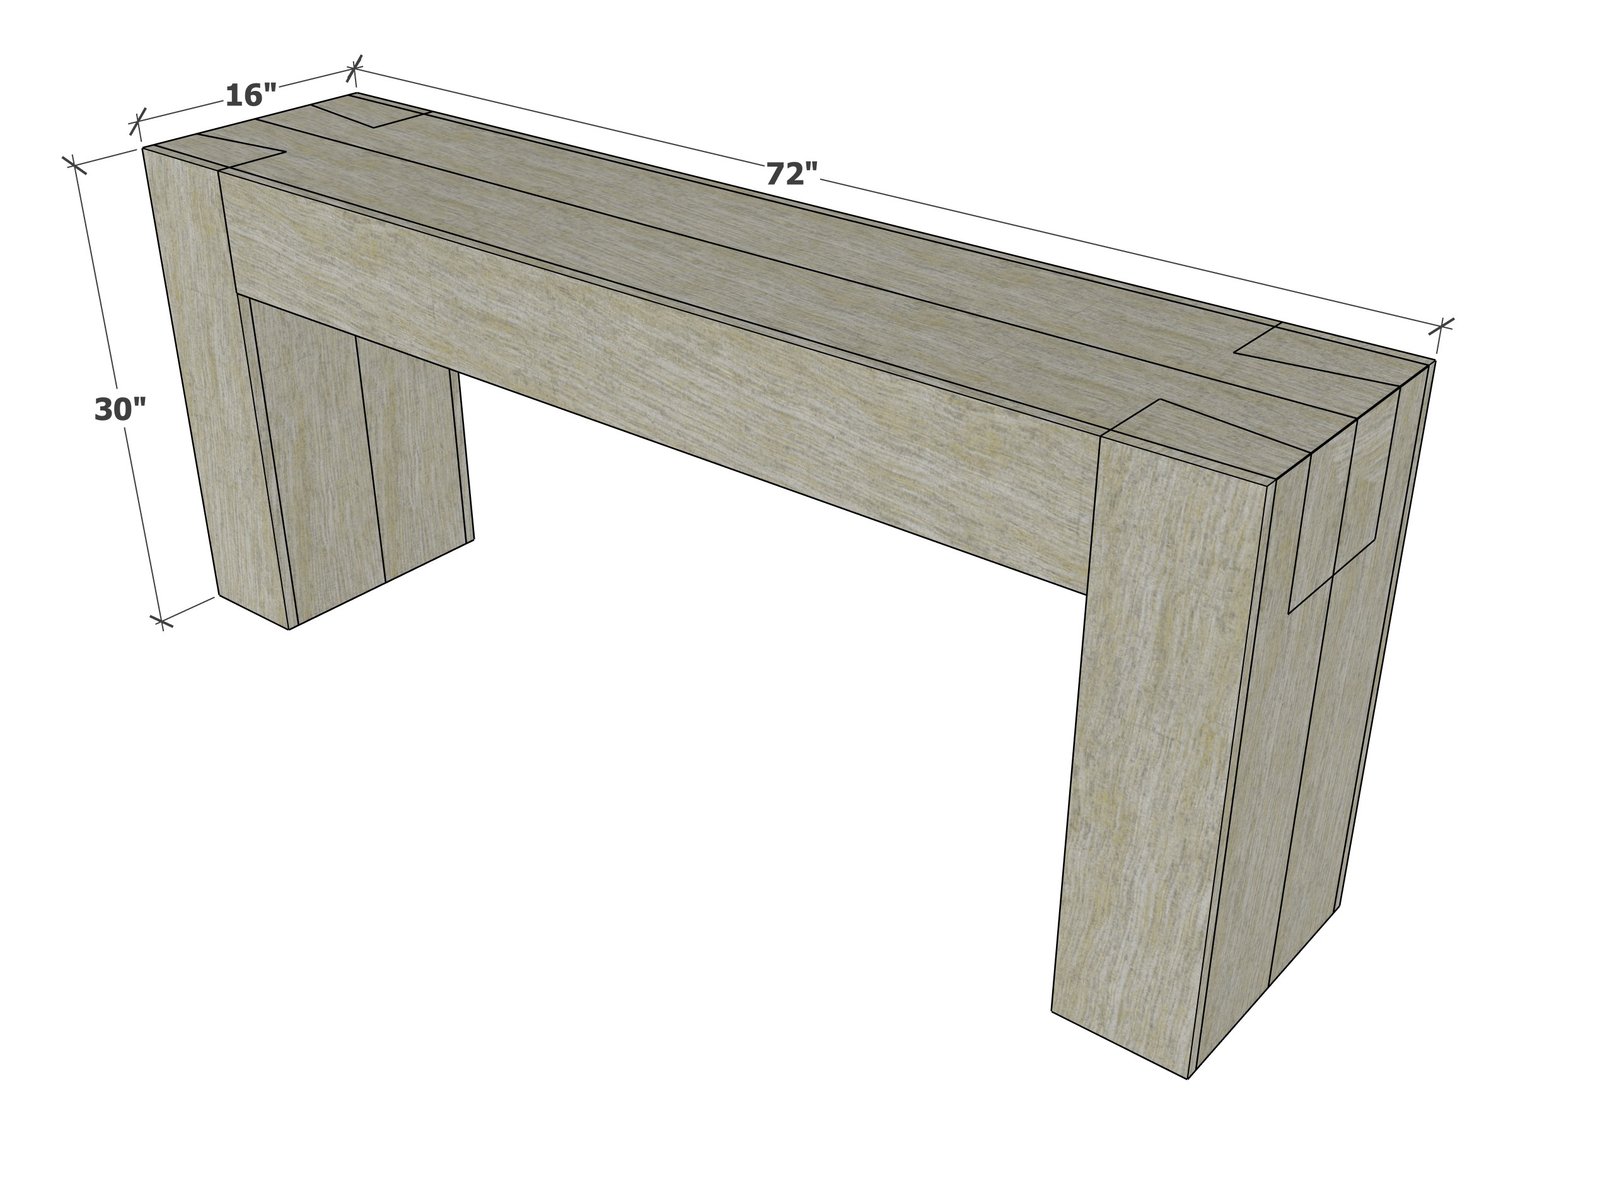
Shopping List
- 5 - 1x8 @ 96" long
- 2 - 1x8 @ 72" long - cut top boards from these boards
- 1-1/4" pocket hole screws (pack of 100)
- 1-1/4" brad nails
Cut List
- 2 - 1x8 @ 72" - both ends beveled at 45 degrees, long point to long point measurement
- 4 - 1x8 @ 30" - one end beveled at 45 degrees, long point measurement
- 4 - 1x8 @ 30"
- 2 - 1x8 @ about 57-1/2" - measure and cut to fit
- 4 - 1x8 @ 29-1/4"
Cutting Layout Diagram
NOTE: The 72" top pieces are cut from the 1x8s @ 72" long
Tools
- measuring tape
- square
- pencil
- safety glasses
- kreg-jig
- drill
- compound miter saw
- nailer
- sander
Step-by-step Instructions
Make sure the two top board pieces are cut to exactly the same length, with ends beveled.
Drill 3/4" pocket holes along one edge of one of the boards. Join together with 1-1/4" pocket hole screws. NOTE: Reference Skill 8 in my 12 Skills to Build Your Own Furniture Course for joining together perfectly without a big work table.
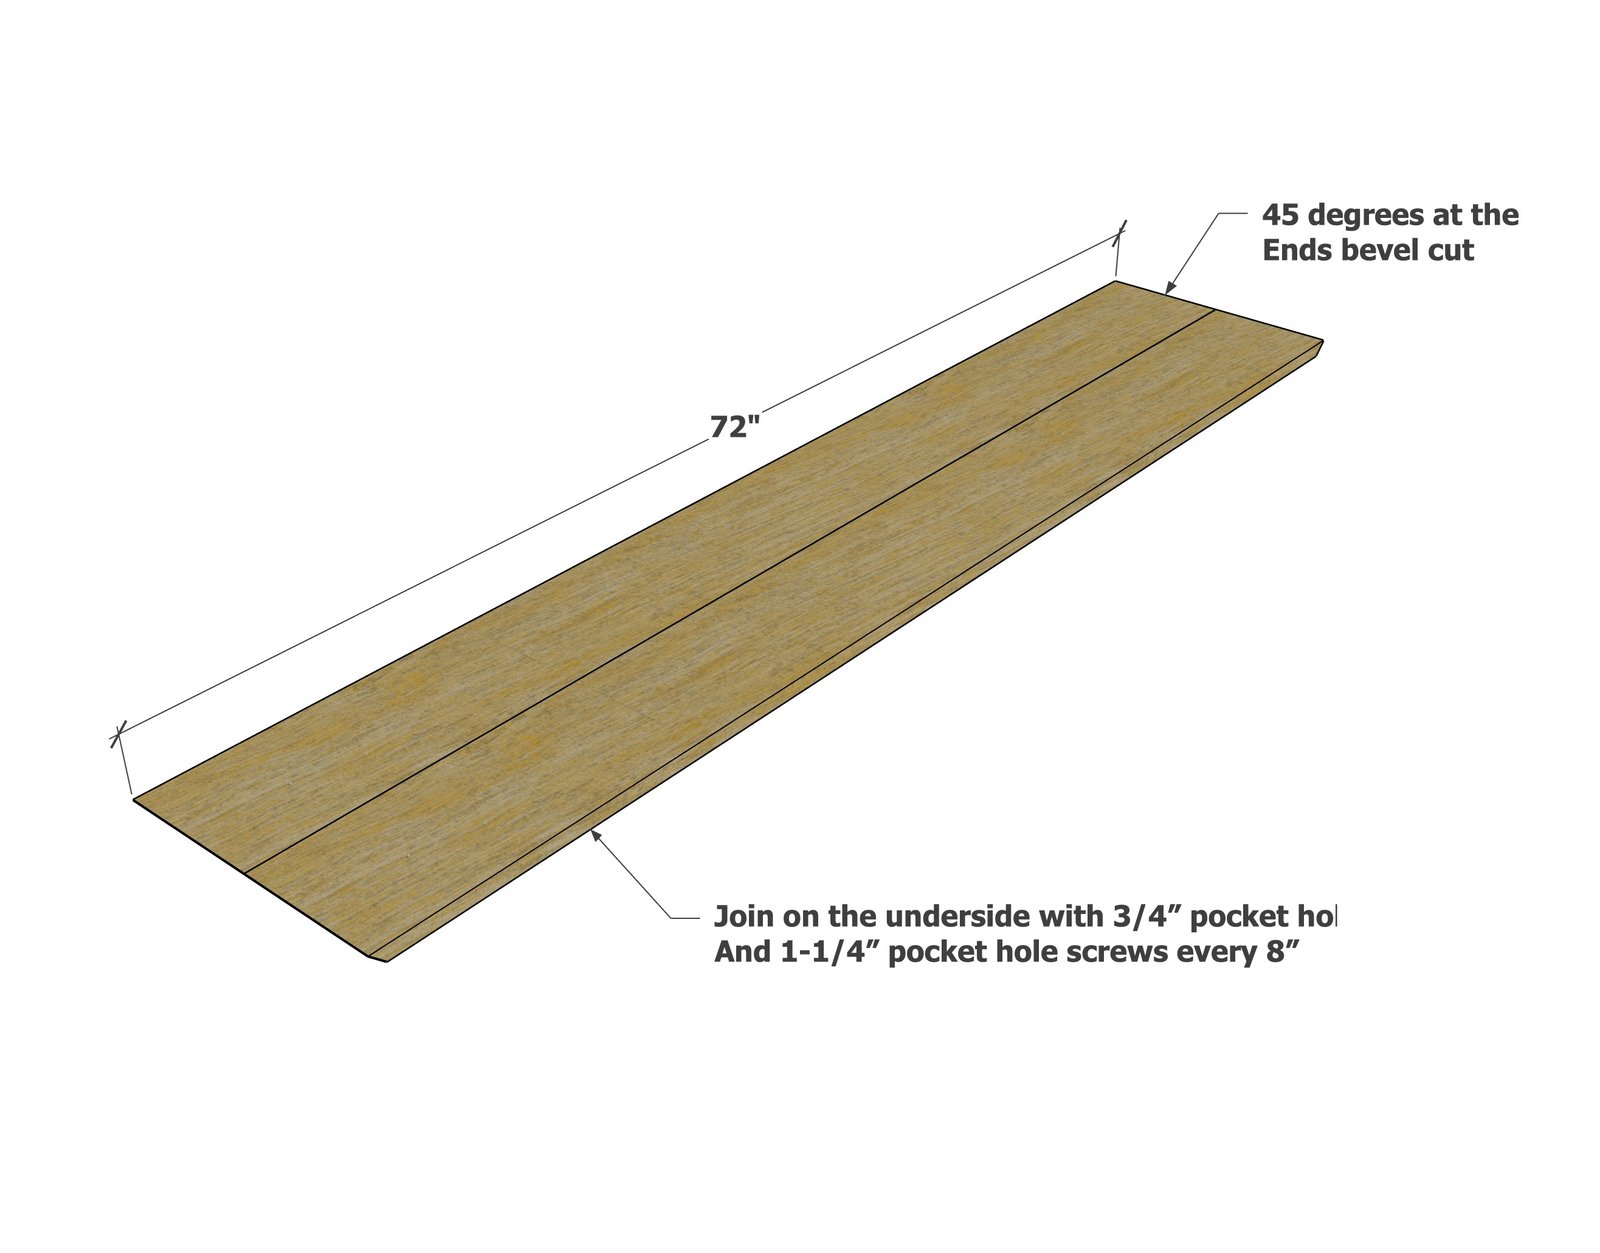
Step 2
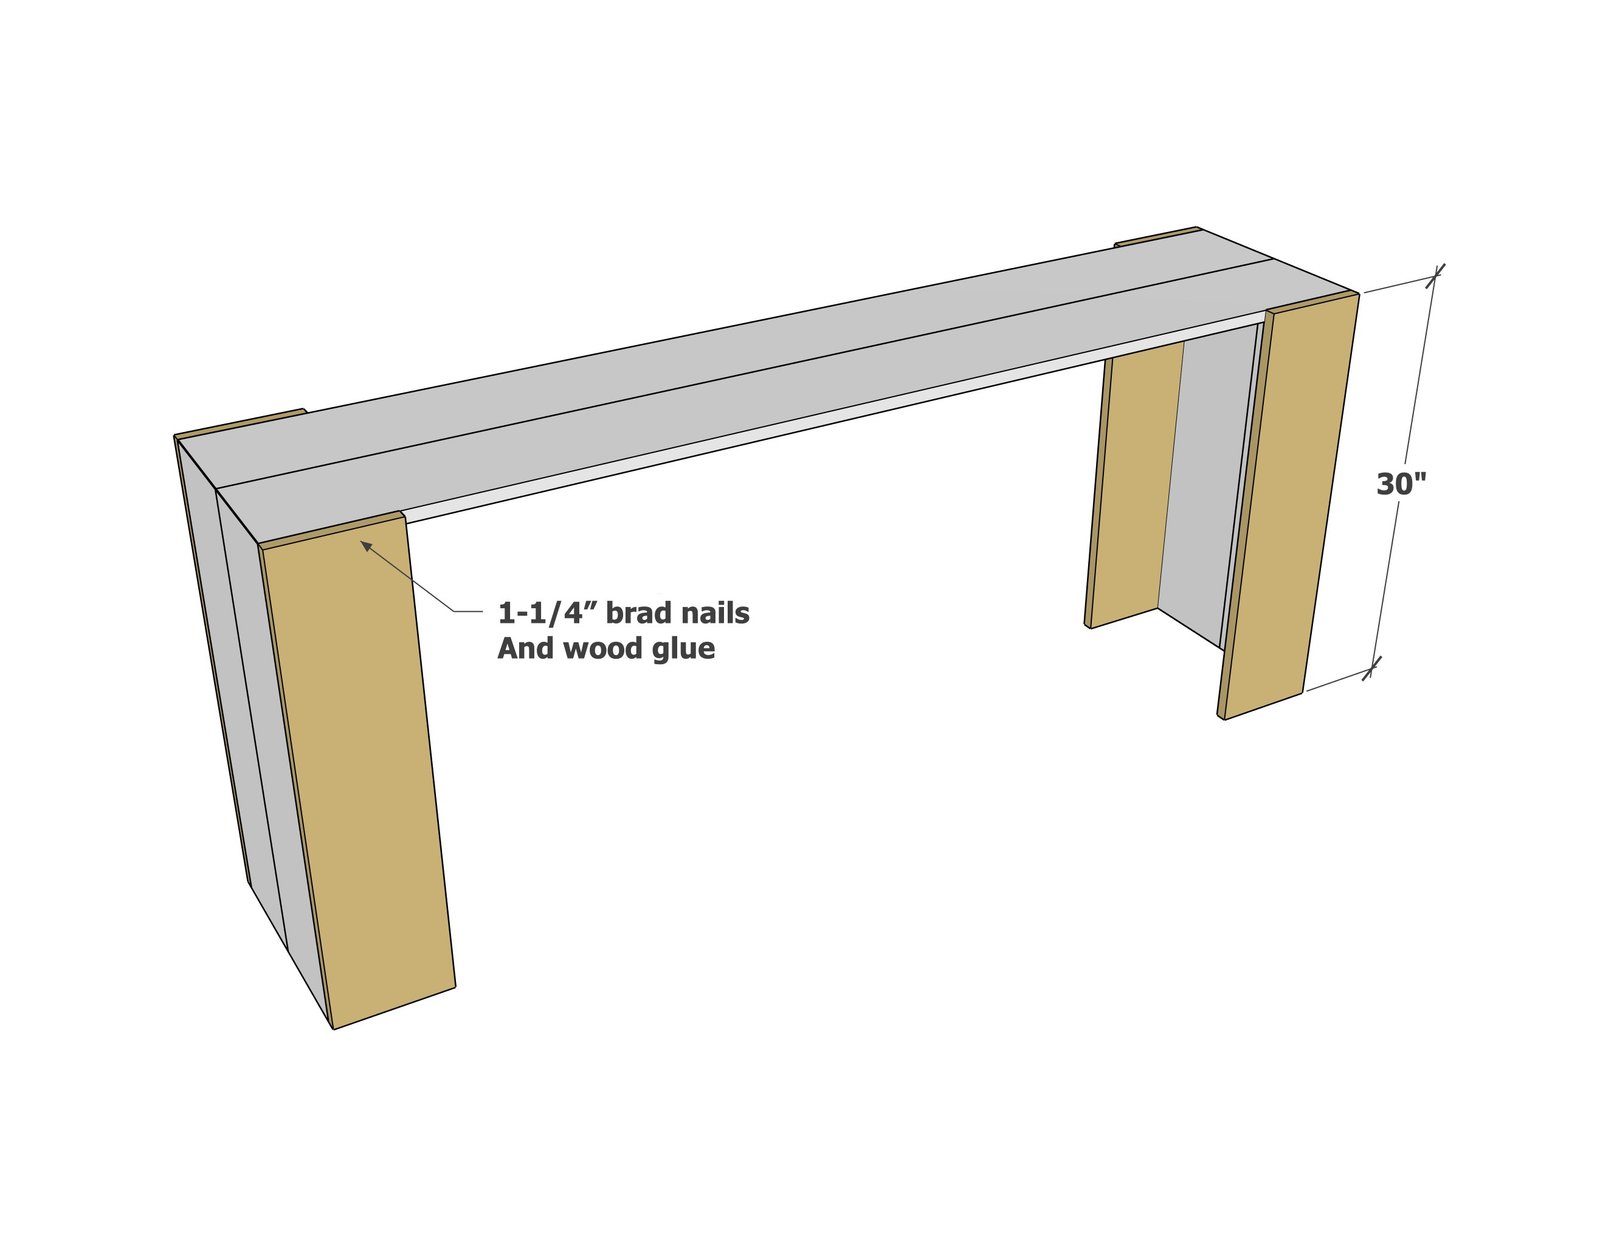
Repeat the steps to make the two leg sides. Then attach to the top with 1-1/4" brad nails and wood glue. NOTE: I ended up adding some blocking as shown in the photo using 1x8 scraps to further secure this joint.
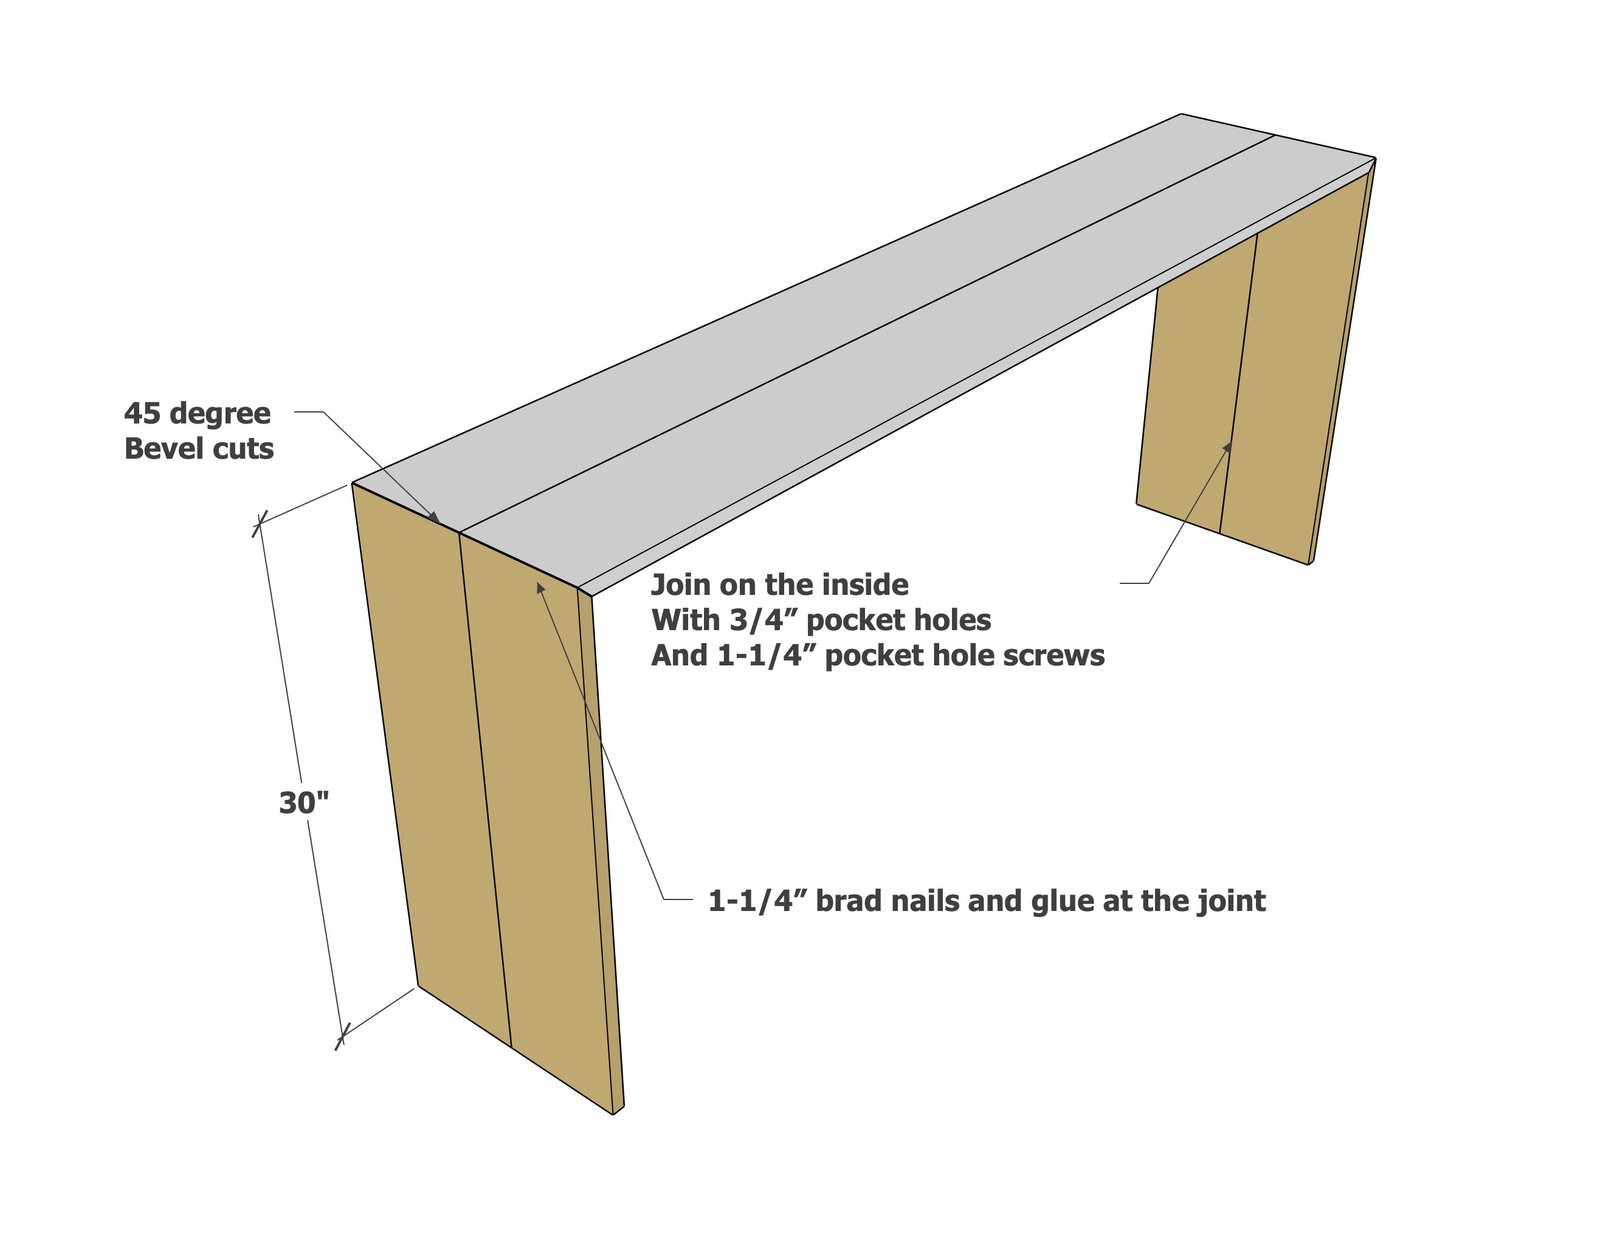
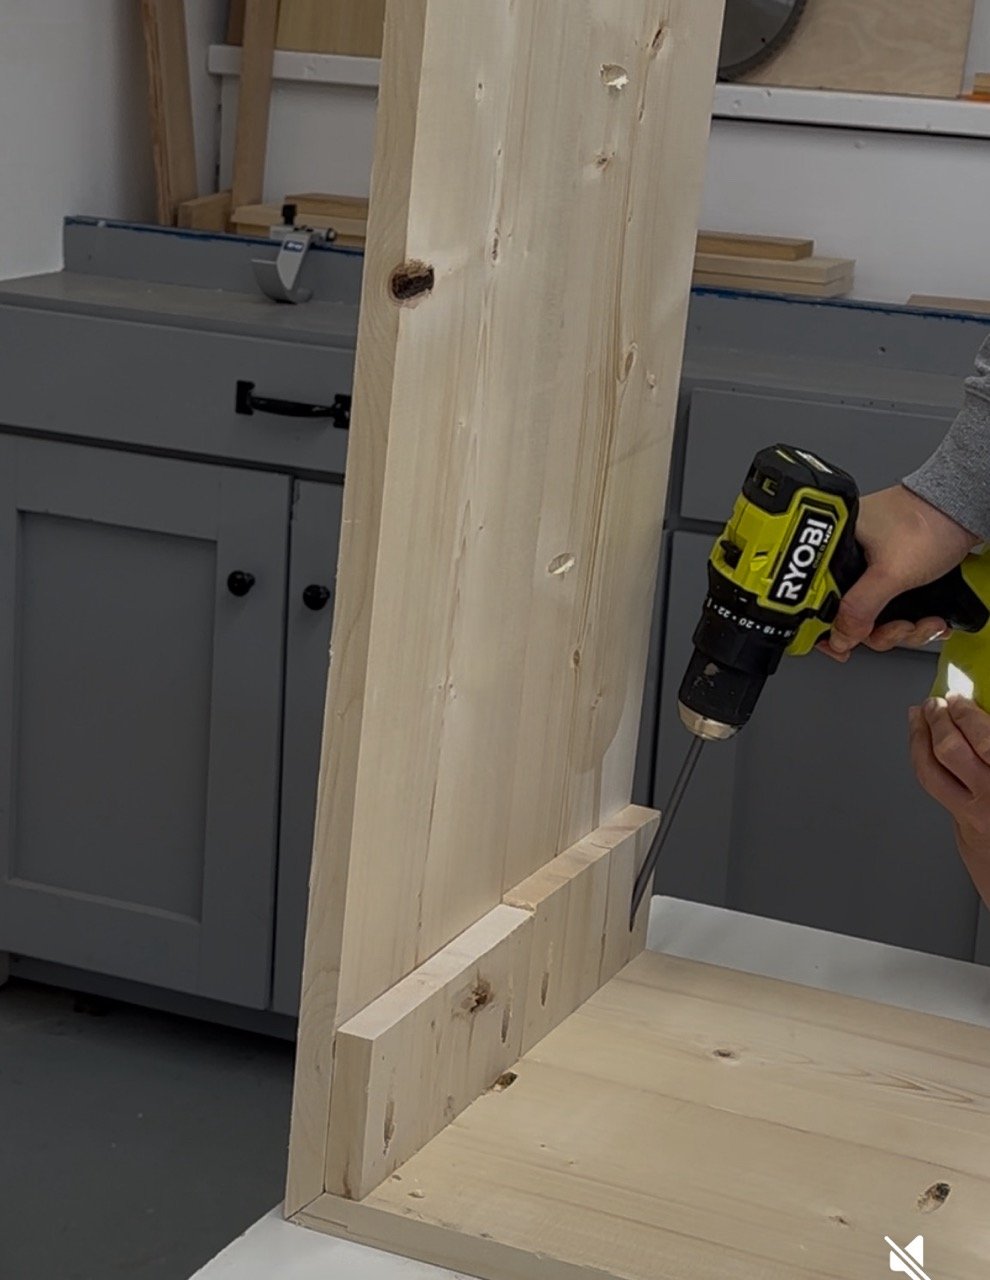
Step 3
Attach the front part of the legs to the top and outer legs, using 1-1/4" brad nails and wood glue, all outside edges are perfectly flush.
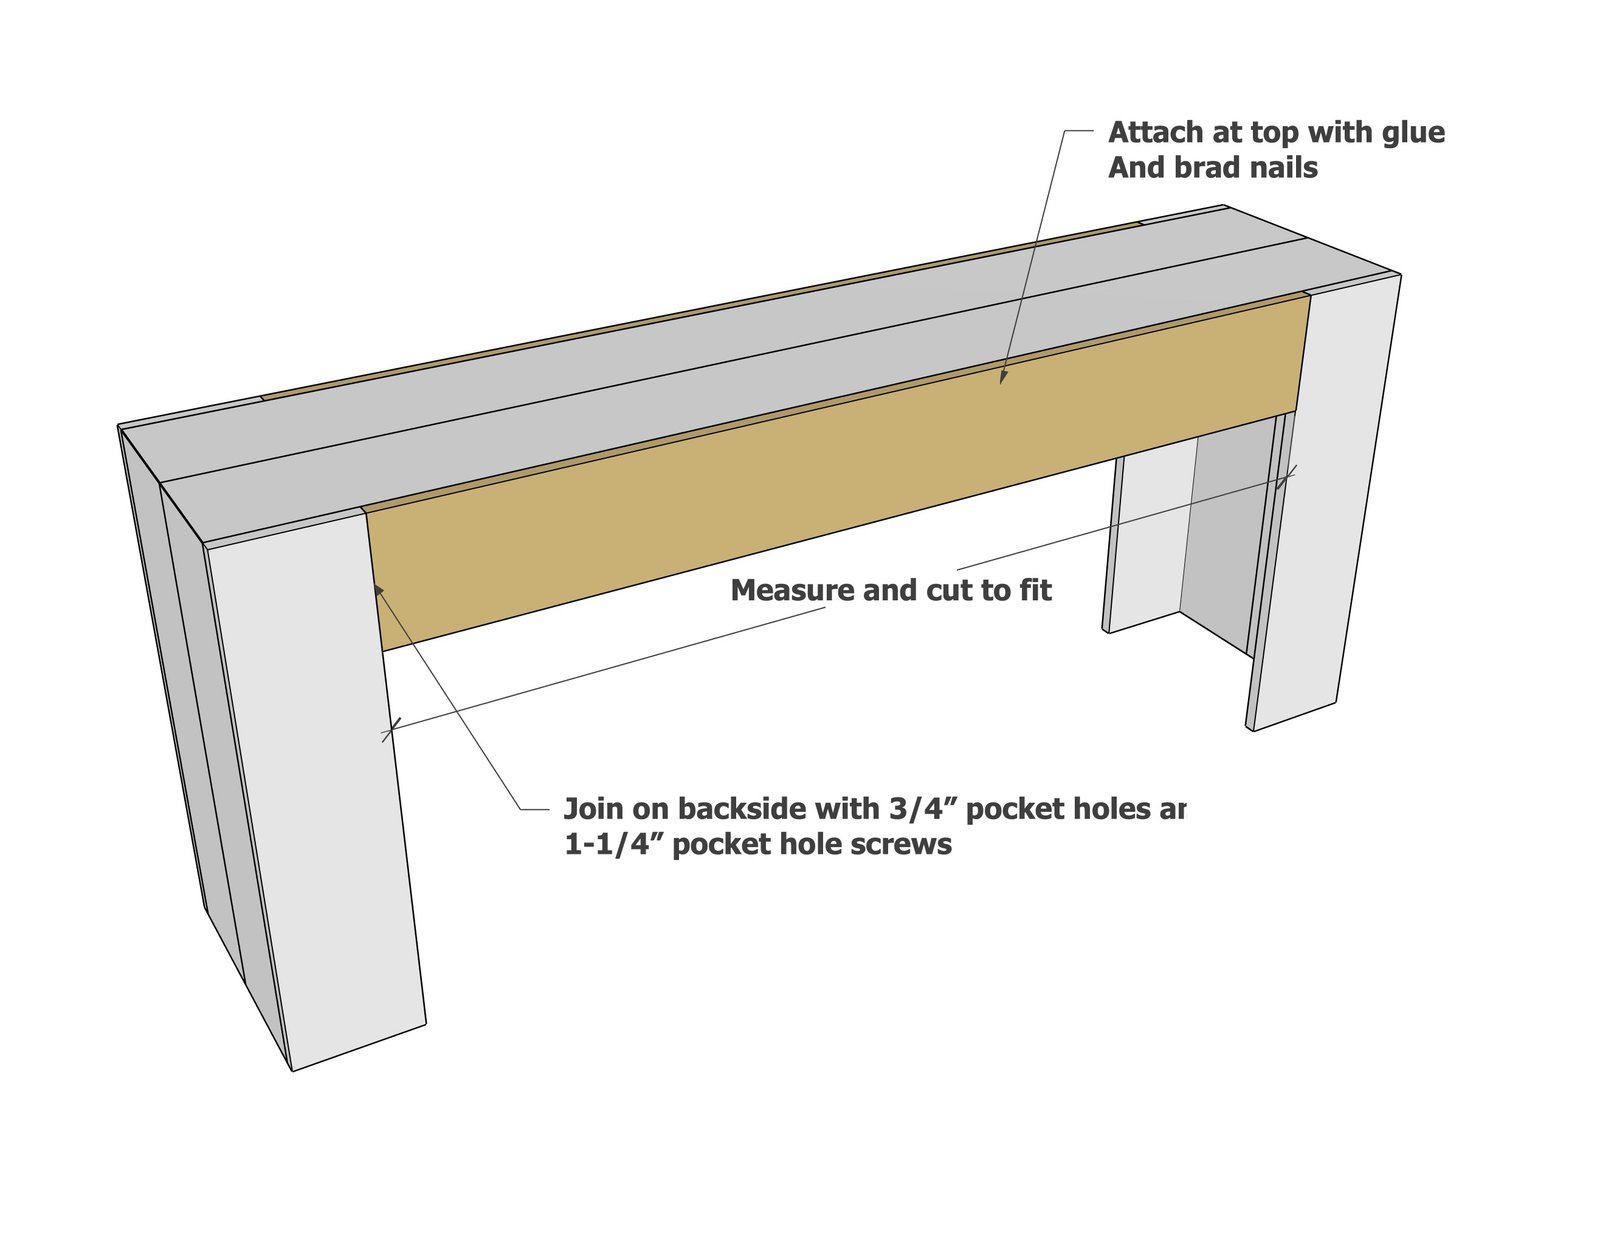
Measure and cut to fit the center piece, drill 3/4" pocket holes on the ends.
I attached first with brad nails and glue at the top, then went back and screwed the pocket holes from the inside.
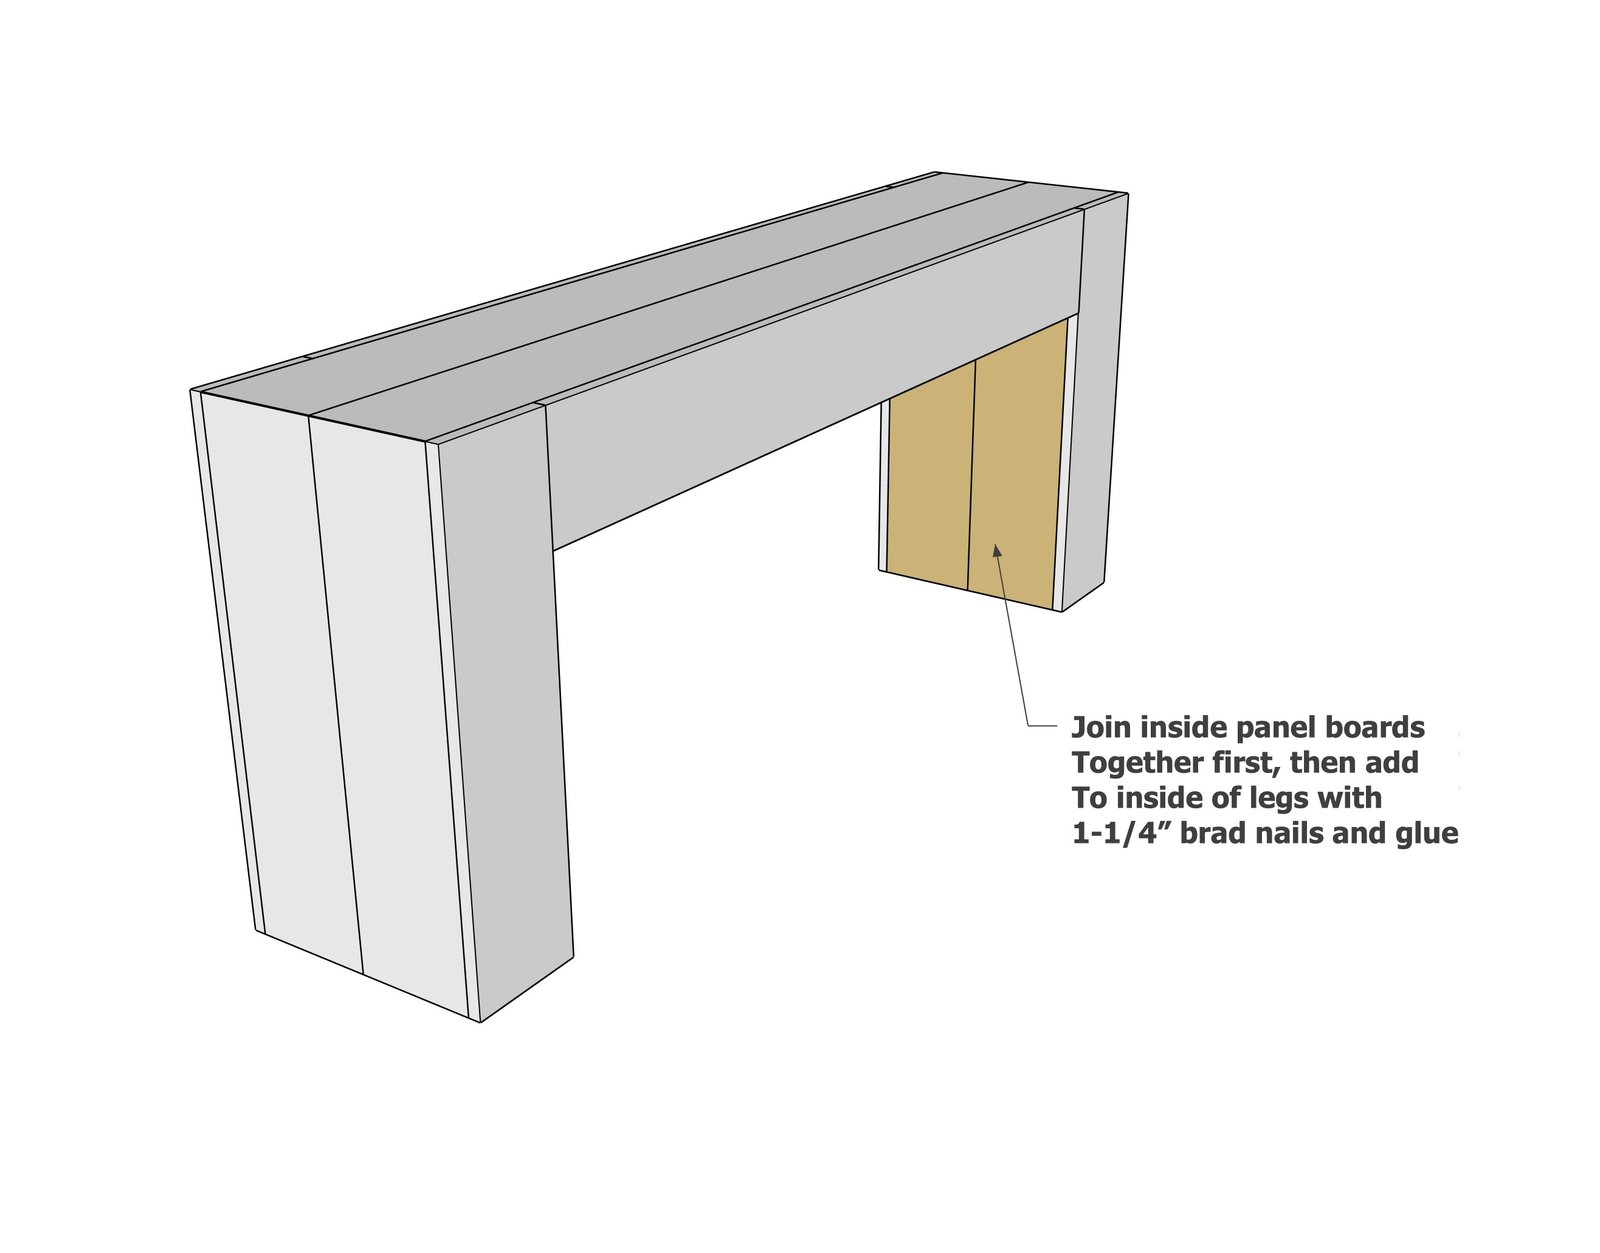
Join the final inside leg pieces together.
I drilled two 3/4" pocket holes on the panels, on the FINISHED side, at the TOP so I could attach the panels the top, on the underside. Then I set the panels in place and attached with brad nails to the legs. Then I attached on the inside to the underside of the top through the pocket holes.
Step 6
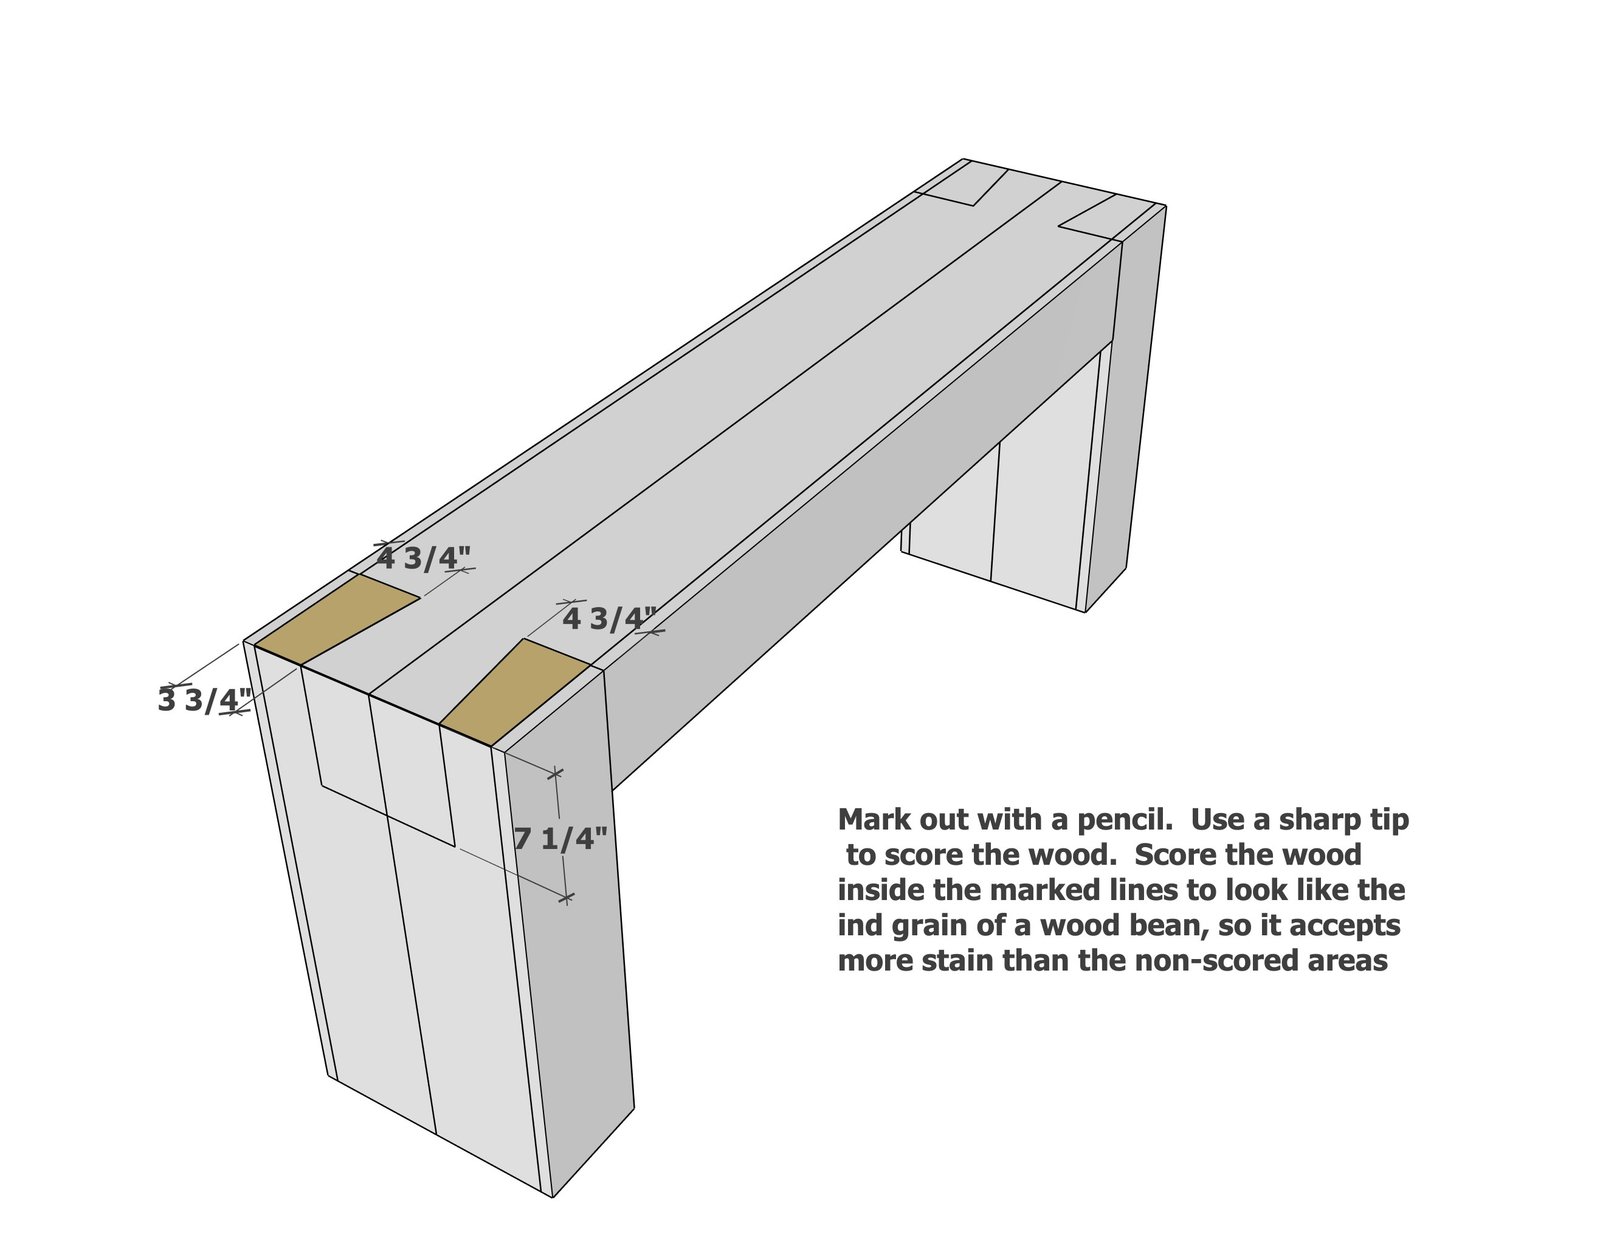
Mark out the dovetail joinery look. Score with a flat headed screw driver, to give the look of cut lines. Then score inside the areas to give the look of an end grain, also roughing up the wood so it will accept more stain (as an end grain does).
Finishing
Sand all surfaces, starting with a medium grit and finishing with fine. Wipe off the dust, fill any holes or gaps with wood filler, and sand smooth once dry. Apply primer if you're painting, then finish with your choice of paint or stain and seal with a durable clear topcoat. For outdoor projects, use exterior-rated primer, paint or stain, and sealer so the piece stands up to the weather.
Source (temporary): https://www.ana-white.com/woodworking-projects/diy-dovetail-beam-console-table-free-plans