Hockey Scoreboard
to make your own home scoreboard! This DIY scoreboard features a sliding scoring system, so no remotes, screen timeout or setup time to get playing - it always works! The sliding system also has a series row, so you can keep track of the series standings too! Add an inexpensive kitchen timer to give this scoreboard a professional feel. Customize to make this scoreboard a beautiful decor element - perfect for sport courts, mancaves, garages, or playrooms! This is a free step by step project plan - we'll show you everything you need and how to build it. From
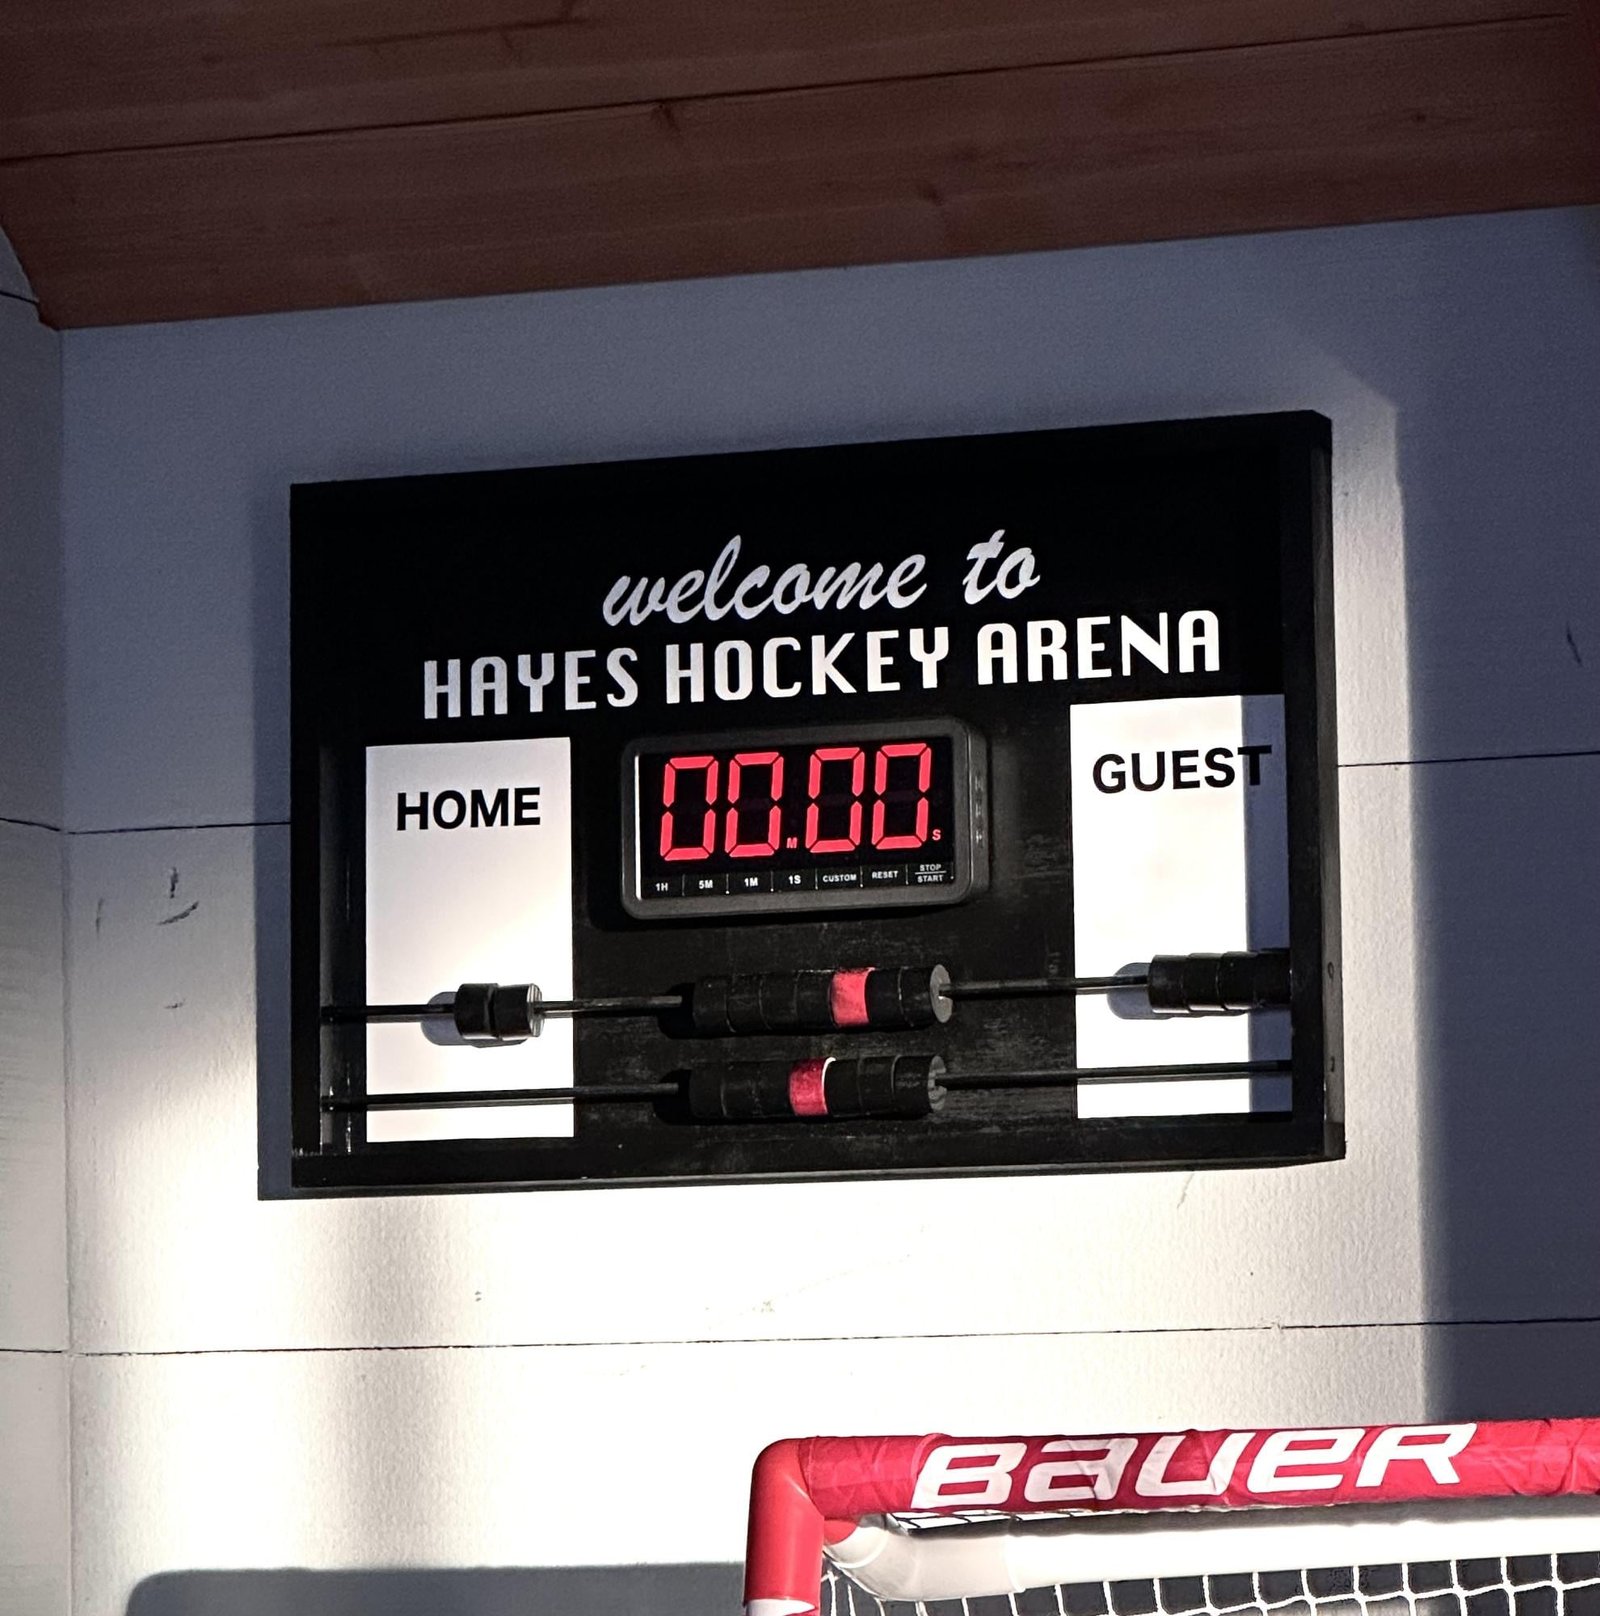
Specifications
| Project type | Toys |
|---|---|
| Room | Kids and Toys |
| Difficulty | Beginner Projects |
Dimensions
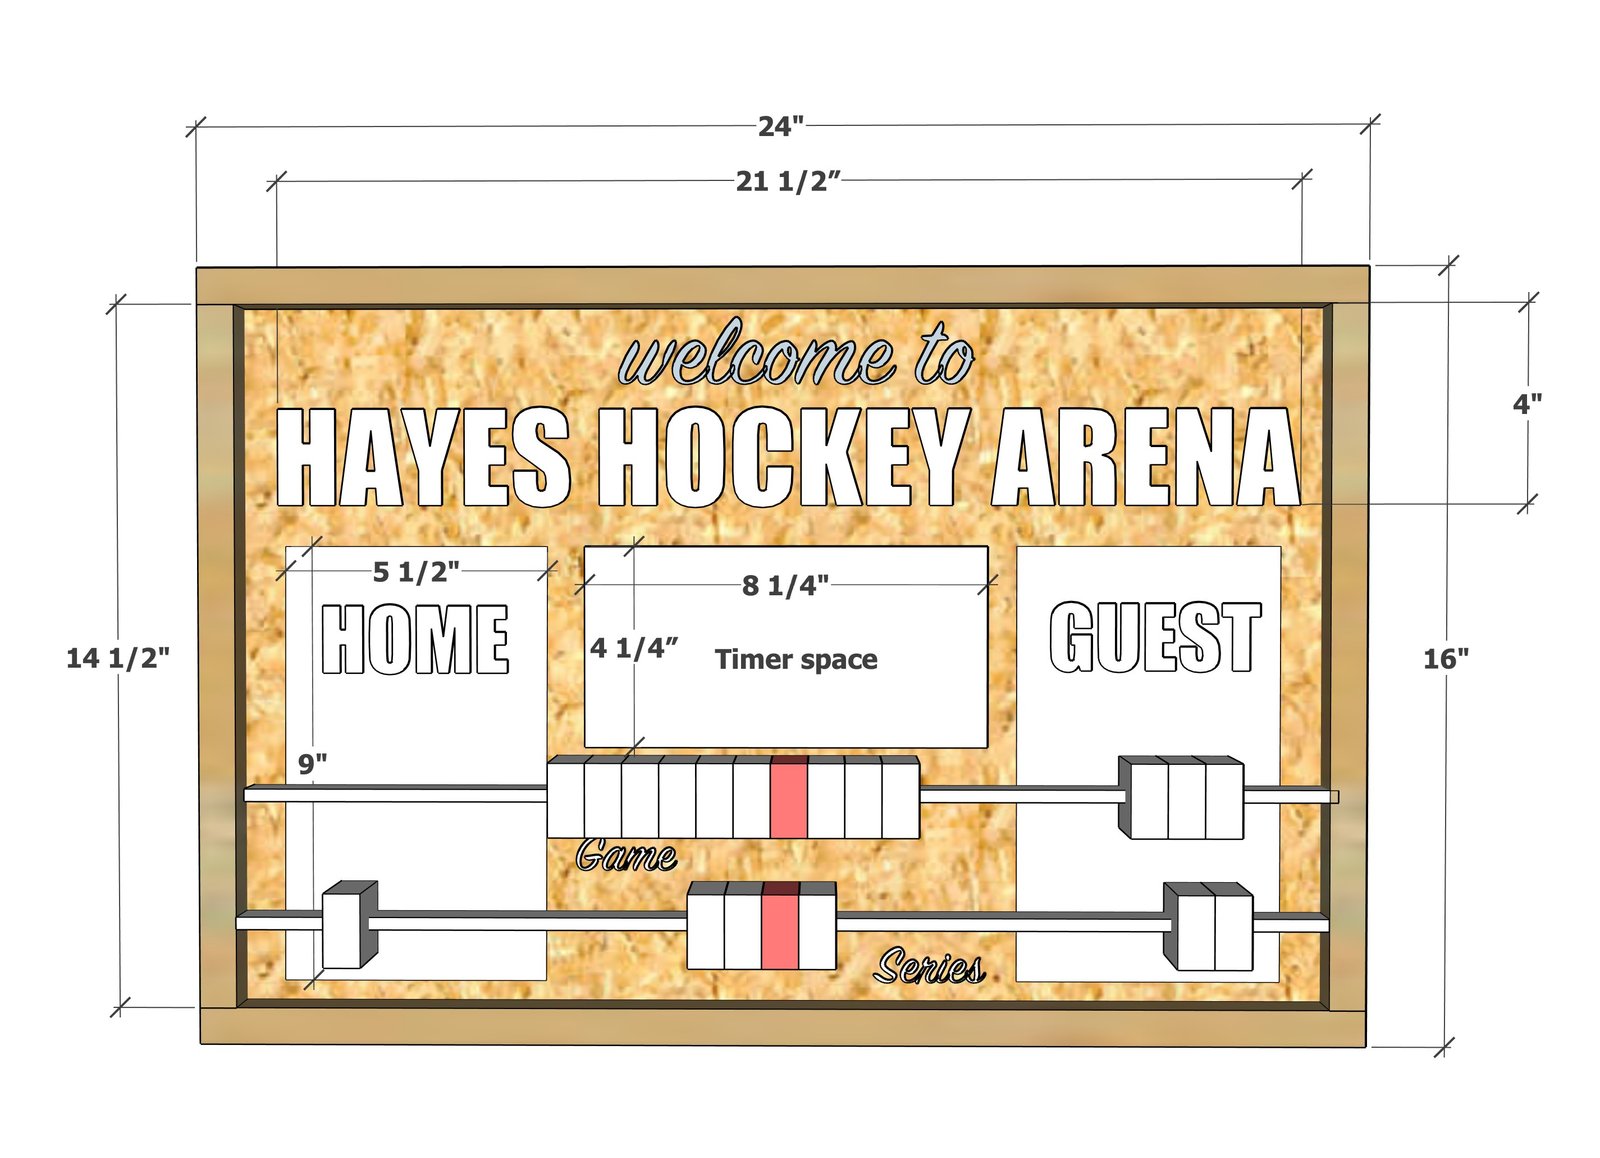
Use the size-specific shopping and cut lists below.
Shopping List
- 1 - 1x2 @ 8 feet long
- 1 - 1/4" plywood panel 24" x 16"
- 2 - 24" metal rods, 1/4" diameter
- 20 - 1-1/4" wood wheels or cut your own with a wood dowel and drill out center with 5/16" bit
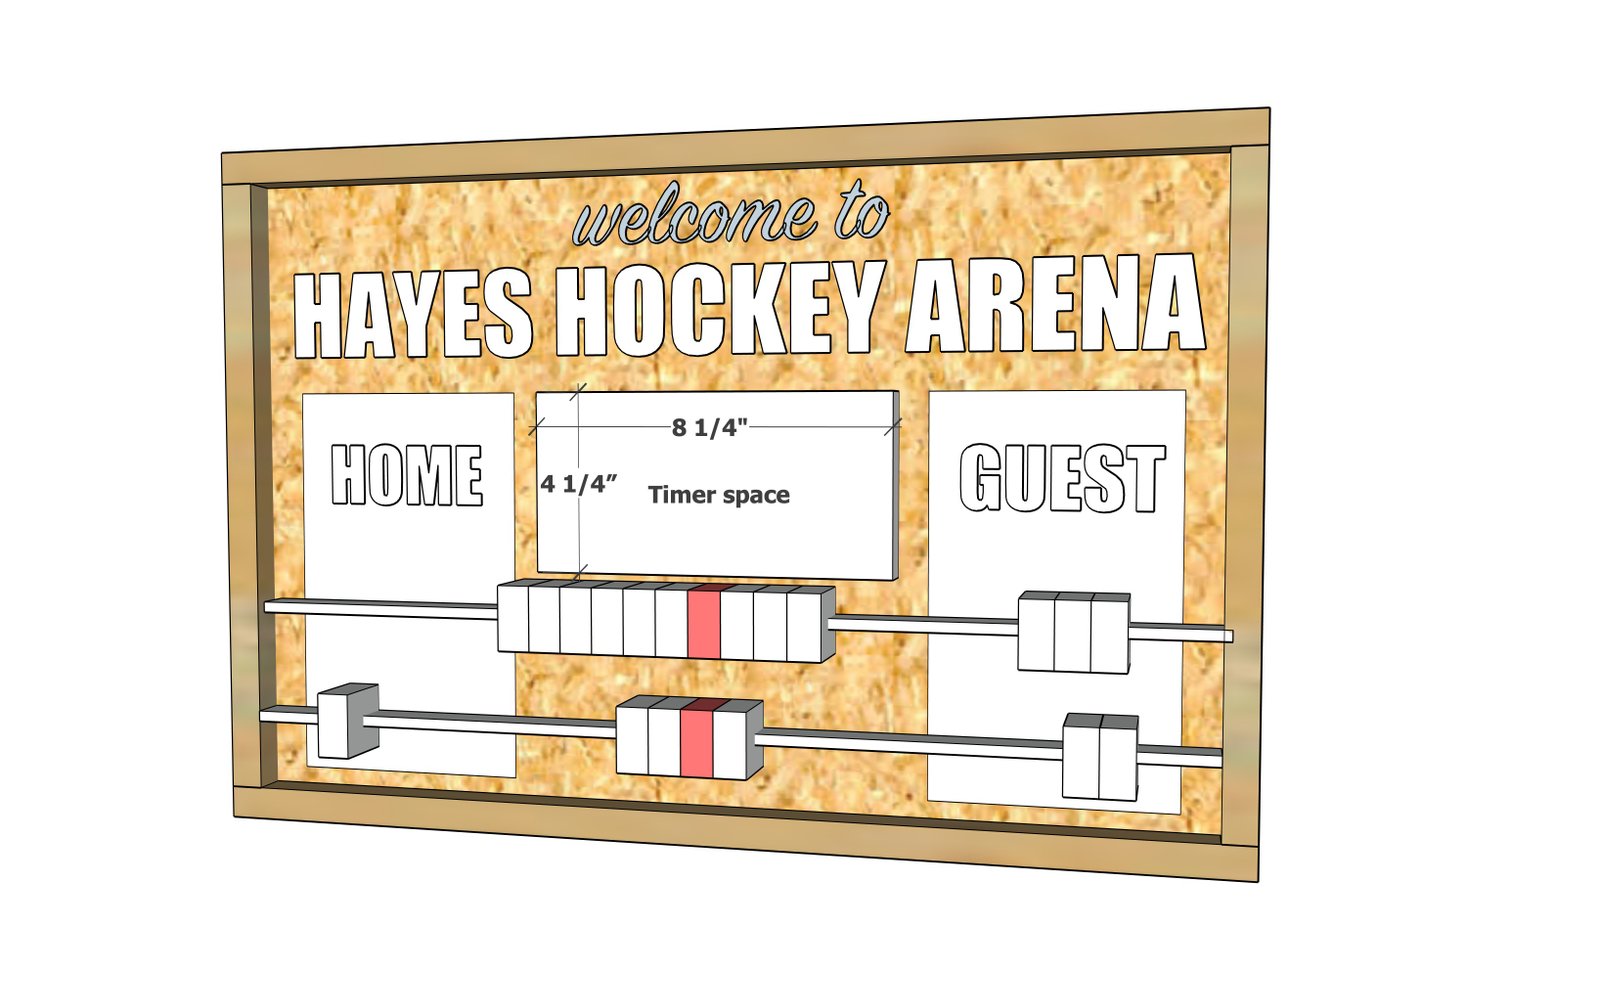
- Kitchen timer ( I used this one ) approximate outside dimensions 8" x 4"
- White permanent vinyl for decals and scoring boxes (I used a Cricut Joy)
- 1-1/4" and 3/4" brad nails
- wood glue
- black spray paint
- wood screws for hanging
Cut List
Frame
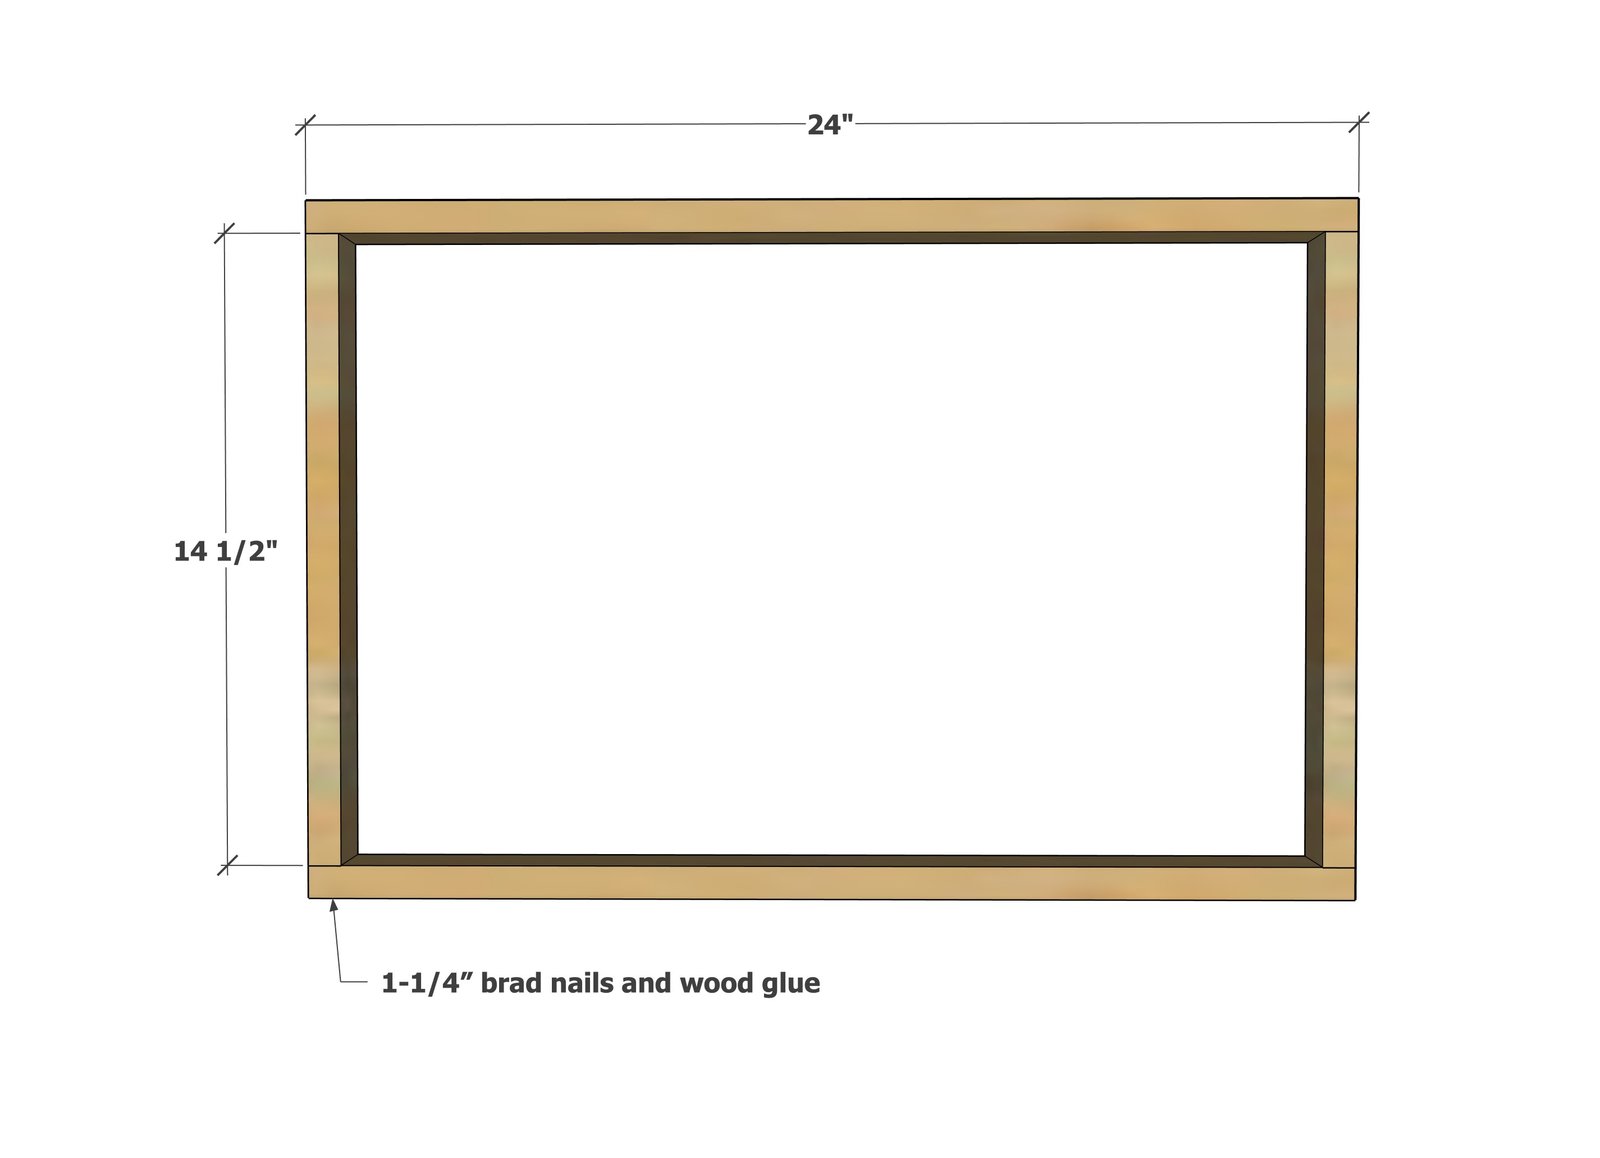
- 2 - 1x2 @ 24"
- 2 - 1x2 @ 14-1/2"
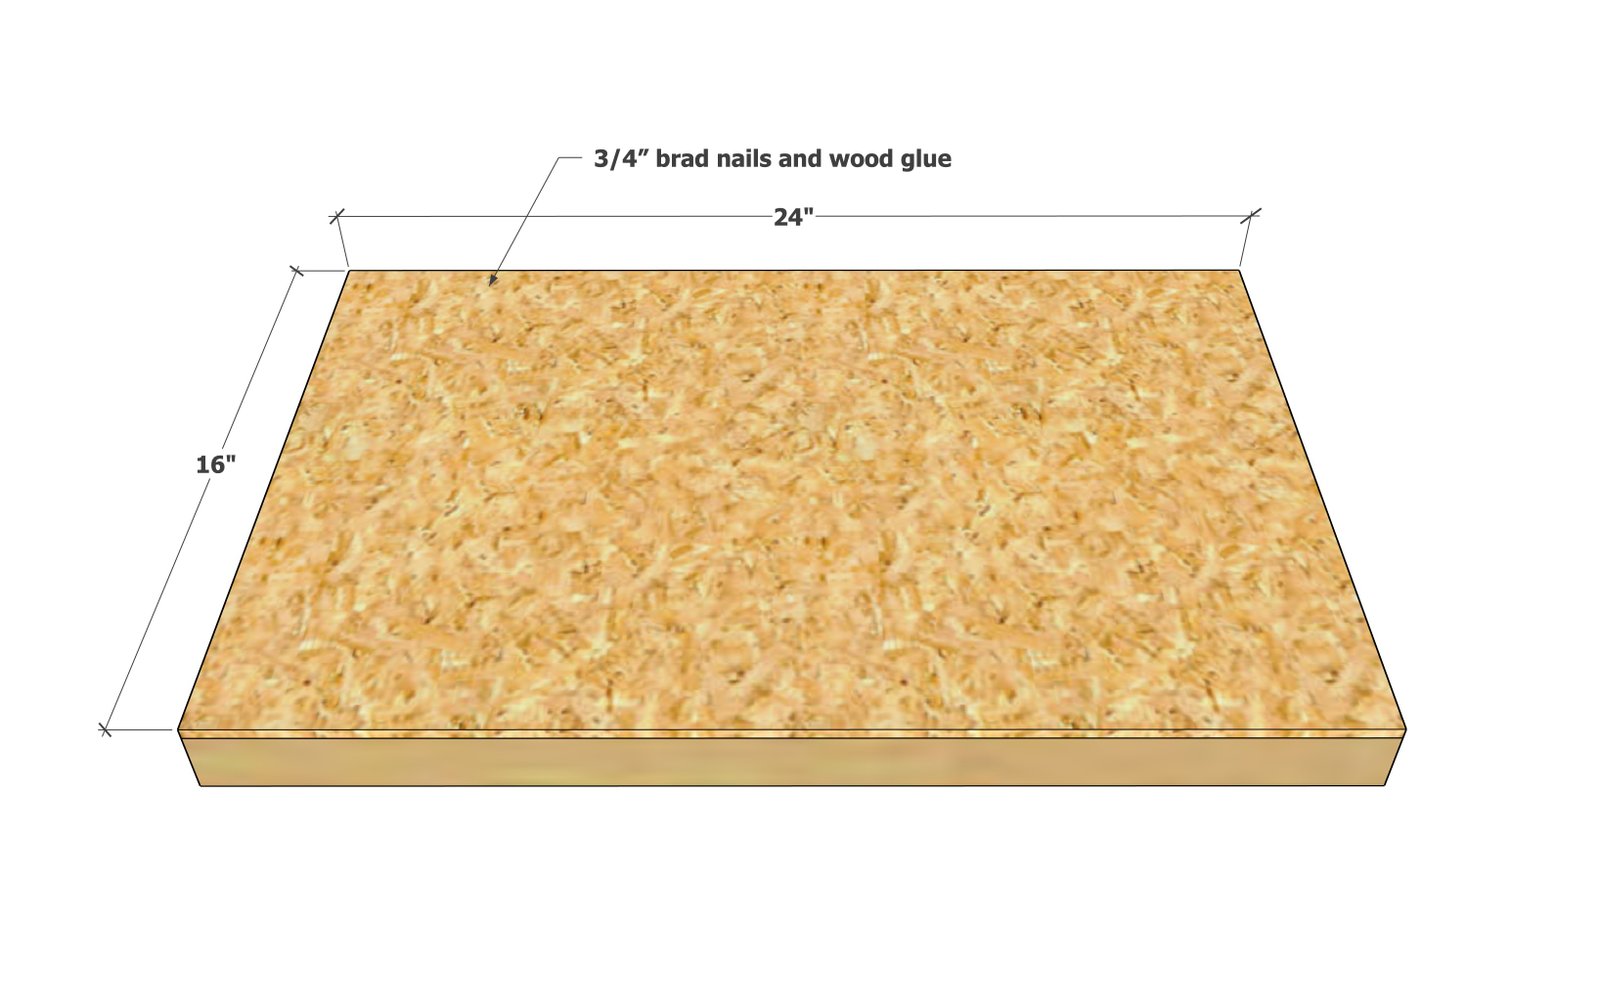
- 1 - 1/4" plywood @ 24" x 16"
Vinyl Pieces
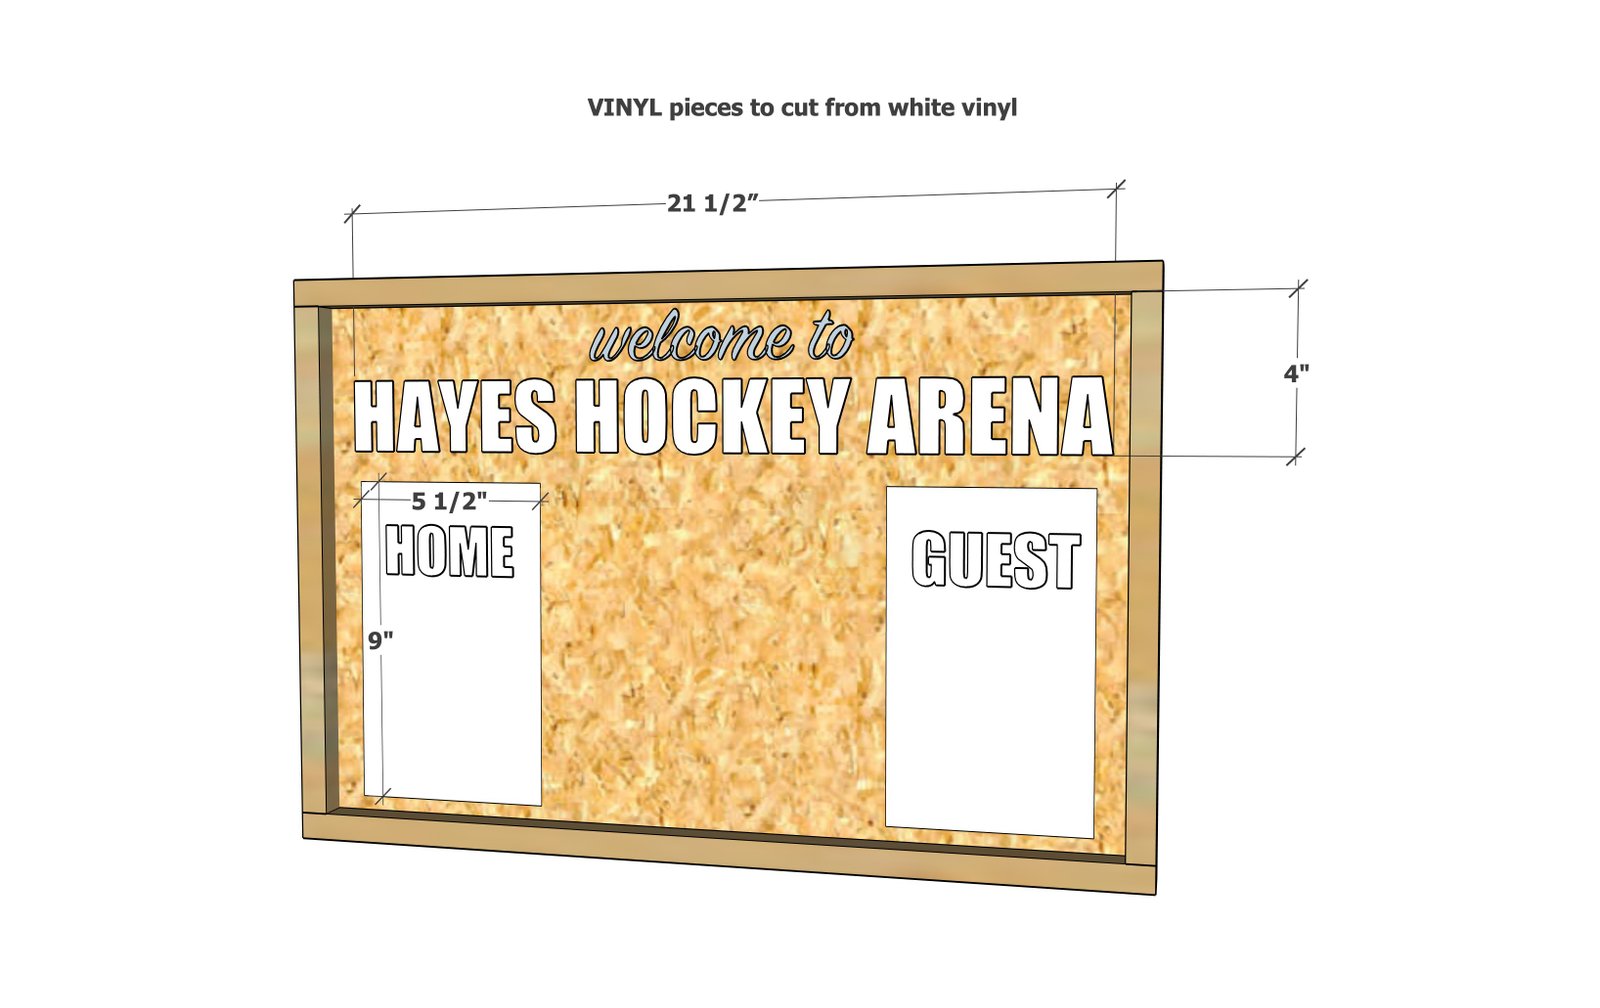
- 5-1/2" x 9" white blocks for home and guest scoring boxes
- 4" x 21-1/2" header size
Scoring Abacus Pieces
- 2 - 24" metal rods
- 20" wood wheels, maximum diameter 1-1/2",
Tools
- measuring tape
- pencil
- drill
- circular saw
- nailer
- sander
Step-by-step Instructions
Step 1
Build the frame with brad nails and wood glue.
Attach the back to the frame with 3/4" brad nails and wood glue.
Spray paint the frame, wood wheels (reserve 2 to paint red), and metal rods black. For the two remaining wood wheels, I actually colored with a red sharpie.
Step 3
Create the vinyl pieces and transfer to the wood frame.
Step 4
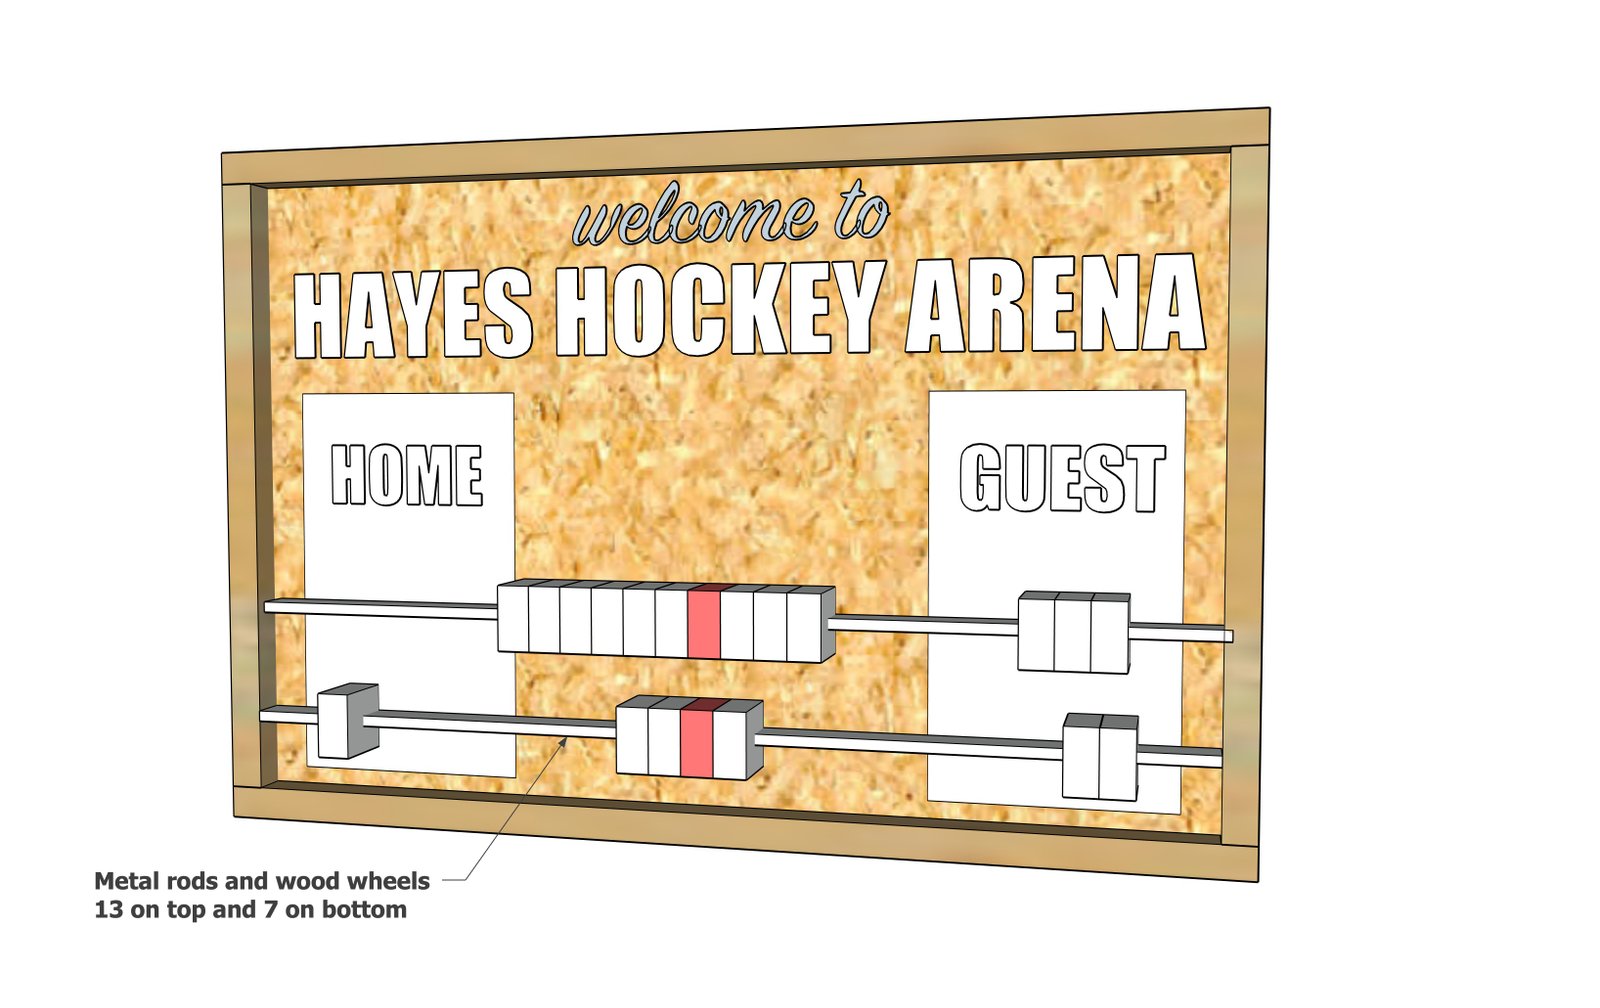
Install the metal rods with the wood beads on them by drilling through the sides, leaving enough clearance for the wood pieces to slide easily on the metal rod. Use hot glue to hold the metal rods in place.
Step 5
Hang the frame on the wall with a wood screw through the back to a stud in the wall. Alternatively you can use a French cleat hanger, just make sure the piece is hung well on the wall and won't move with use. Use a screw to install the timer clock in the empty space.
Finishing
Sand all surfaces, starting with a medium grit and finishing with fine. Wipe off the dust, fill any holes or gaps with wood filler, and sand smooth once dry. Apply primer if you're painting, then finish with your choice of paint or stain and seal with a durable clear topcoat. For outdoor projects, use exterior-rated primer, paint or stain, and sealer so the piece stands up to the weather.
Source (temporary): https://www.ana-white.com/woodworking-projects/diy-hockey-scoreboard