Kids Pretend Play Vendor Cart
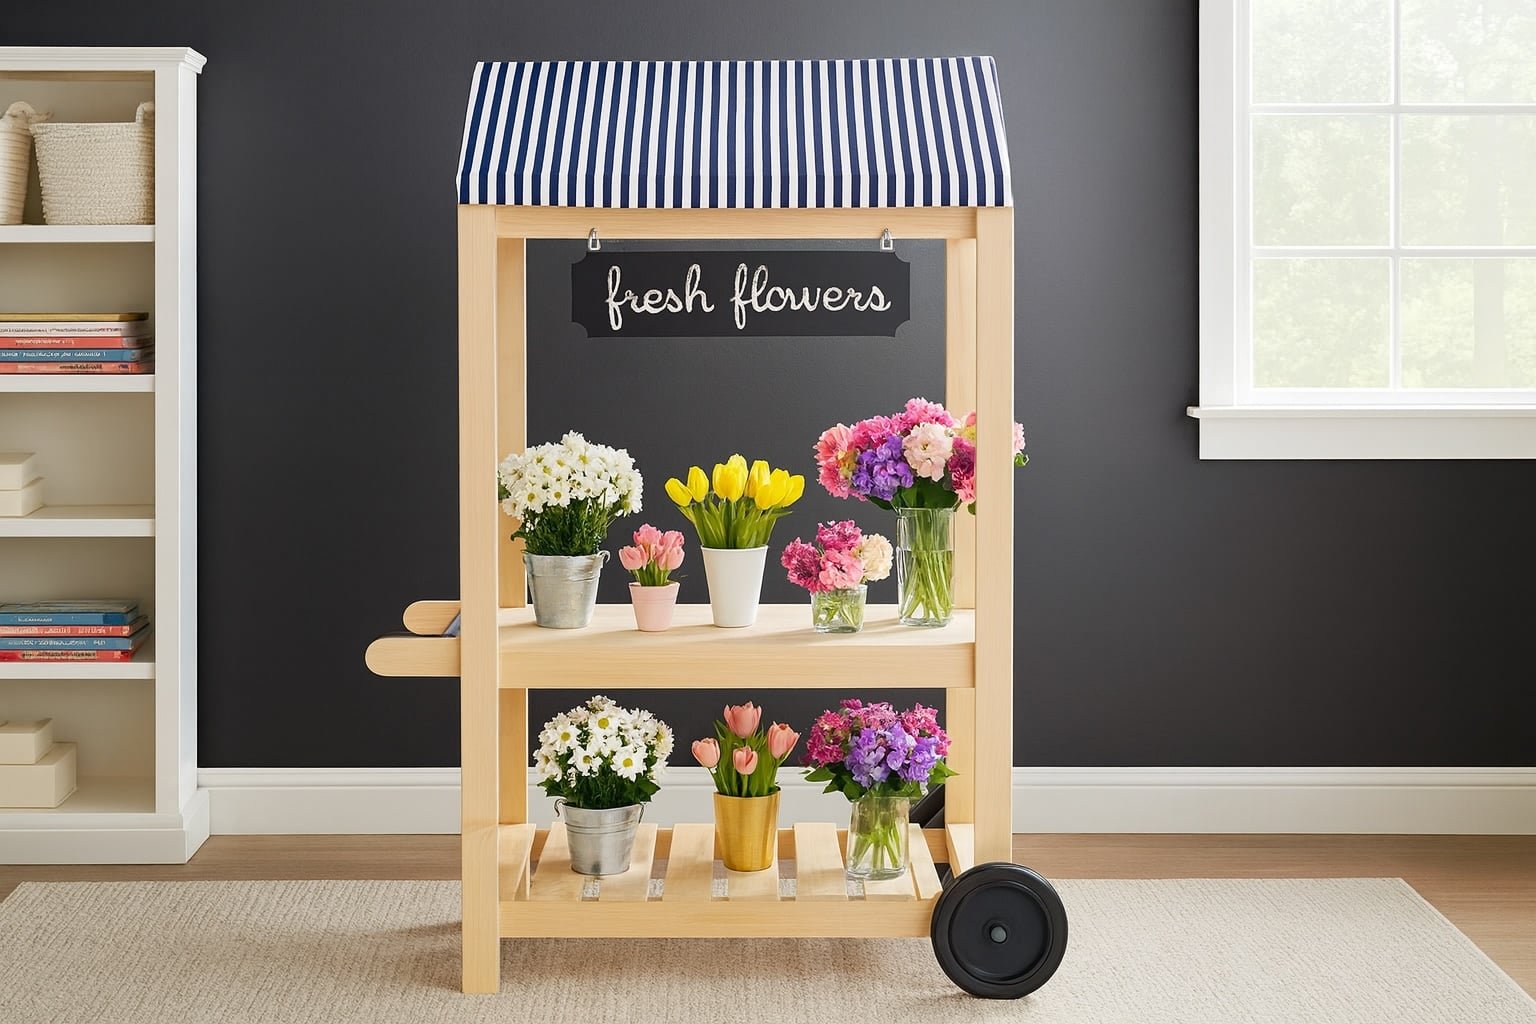
Create hours of imaginative play with this charming DIY vendor cart, perfect for kids who love pretend play! Whether they’re selling bakery treats, fresh flowers, handmade crafts, or pretend produce, this versatile cart brings creativity to life. Featuring, the cart includes a striped canopy, chalkboard sign, and spacious shelves for displaying goodies. It’s ideal for indoor playrooms and makes a memorable handmade gift. Sturdy, stylish, and completely customizable — download the and start building your little one’s dream market stand today!
Specifications
| Project type | Toys |
|---|---|
| Room | Kids and Toys |
| Style | Children's and Kid's Room Furniture and Toy Plans |
| Difficulty | Beginner Projects |
| Estimated cost | $50 - $100 |
Dimensions
Use the size-specific shopping and cut lists below.
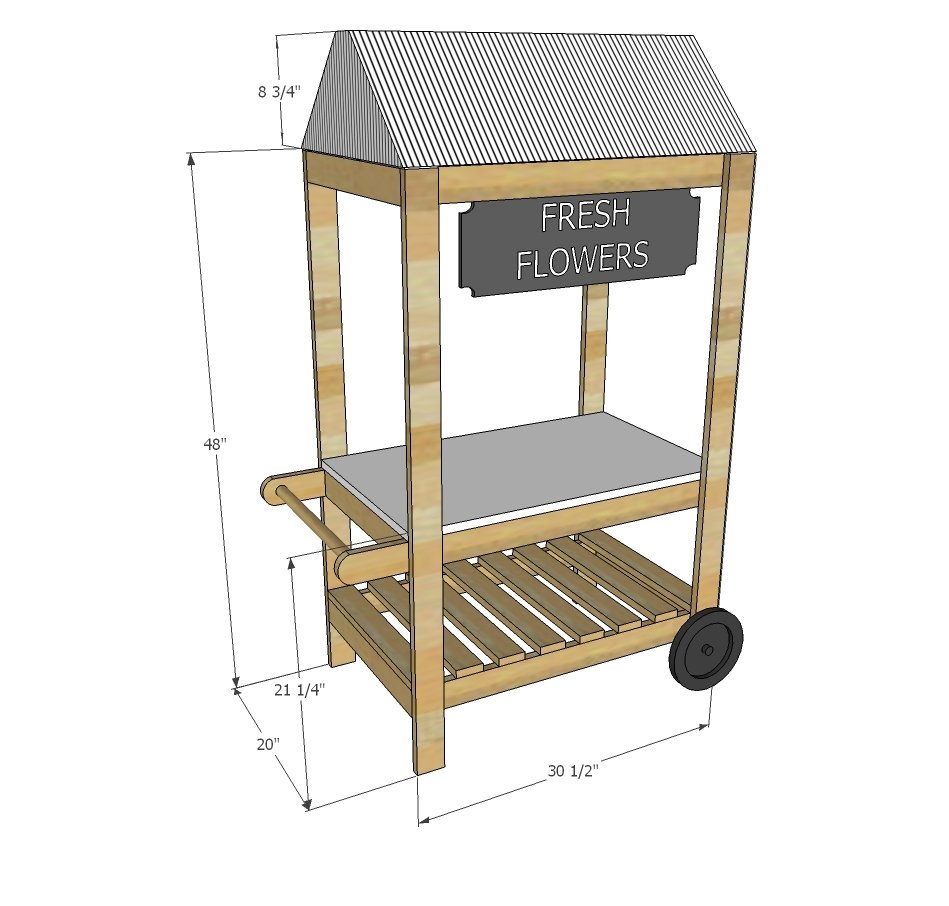
Shopping List
- 8 - 1x3, 8 feet long (can use furring strips, just make sure good quality and straight)
- 1 - 3/4" plywood @ 18-1/2" x 30-1/2" or you can use 1x3s
- 1 dowel rod, 3/4" diamenter, 18" long
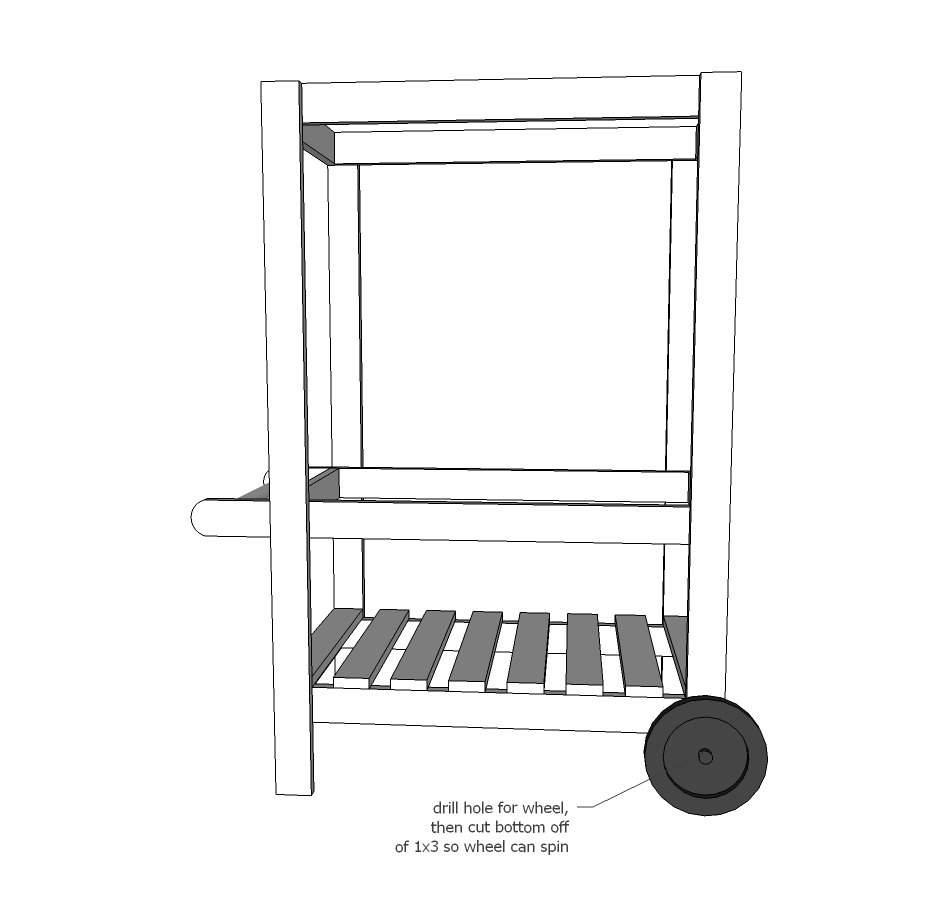
- 2 - wheels, may also need a bolt to hold wheels on
- 1 - 1/4" screws
- 1-1/4" brad nails may be used in some places
- For awning, you'll also need 1-1/4" pocket holes screws.
Cut List
FRAMES
- 4 - 1x3 @ 29"
- 5 - 1x3 @ 18-1/2"
- 1 - 1x3 @ 17"
- 2 - 1x3 @ 35-1/2"
LEGS
- 4 - 1x3 @ 48"
TOPS
- 8 - 1x3 @ 18-1/2"
- 1 - 3/4" plywood @ 18-1/2" x 30-1/2" or you can use 1x3s
AWNING
- 1 - 1x3 @ 30-1/2"
- 2 - 1x3 @ 8"
- 4 - 1x3 @ 12-3/8" - long point to long point measurement, both ends cut at 45 degrees, not parallel
Tools
- measuring tape
- square
- pencil
- safety glasses
- hearing protection
- kreg-jig
- drill
- compound miter saw
- nailer
- sander
Step-by-step Instructions
Step 1
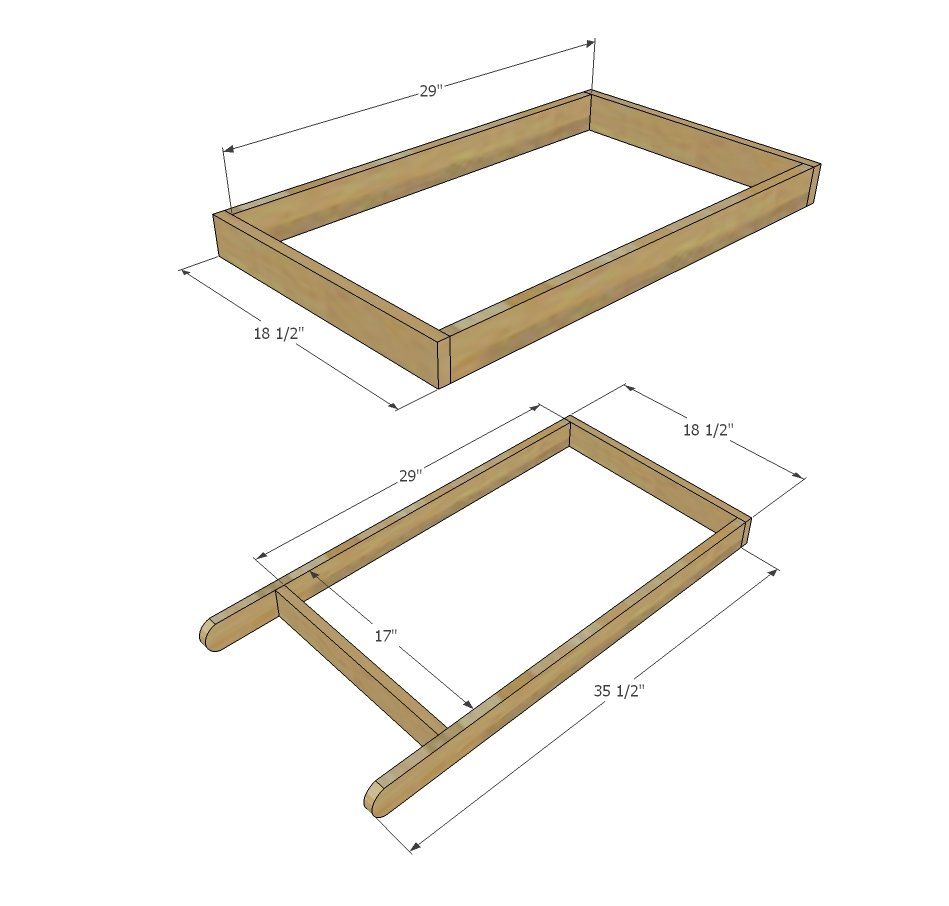
Build the frames for top and bottom, and middle shelf. I recommend using a Kreg Jig here on 3/4" setting, with 1-1/4" pocket hole screws to attach.
Step 2
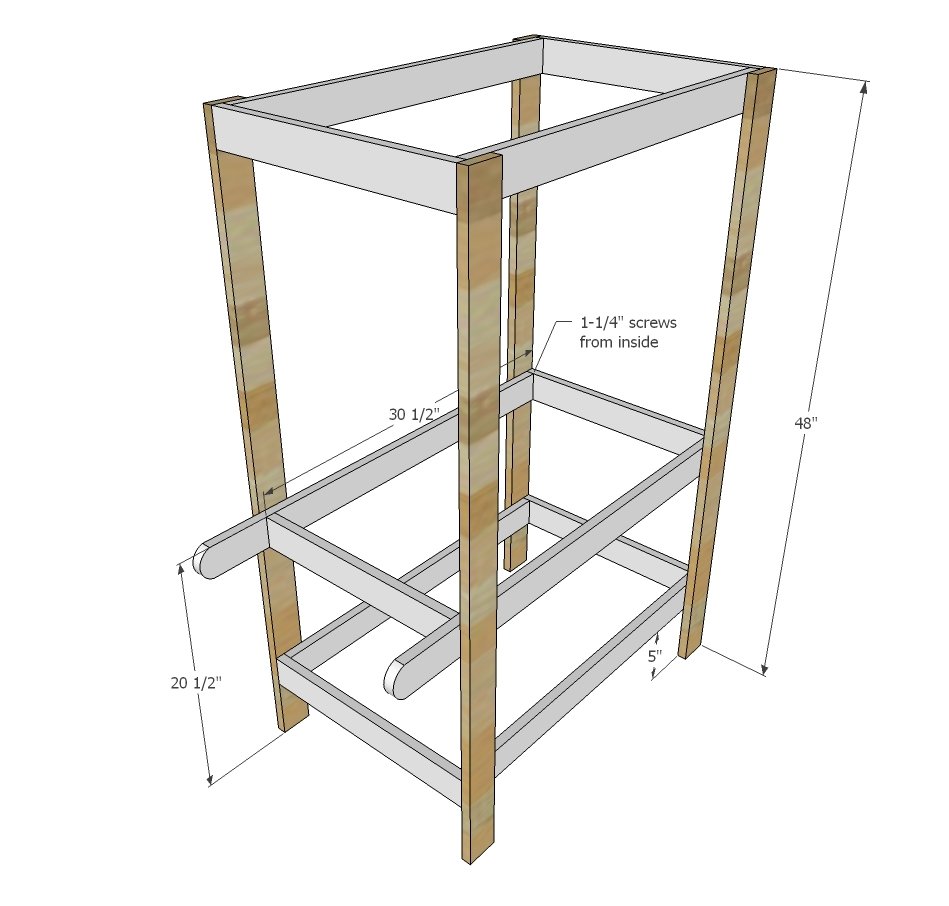
Then add the legs to the frames with 1-1/4" screws from insides (yes, you can use Kreg screws here too to avoid buying more wood screws)
Step 3
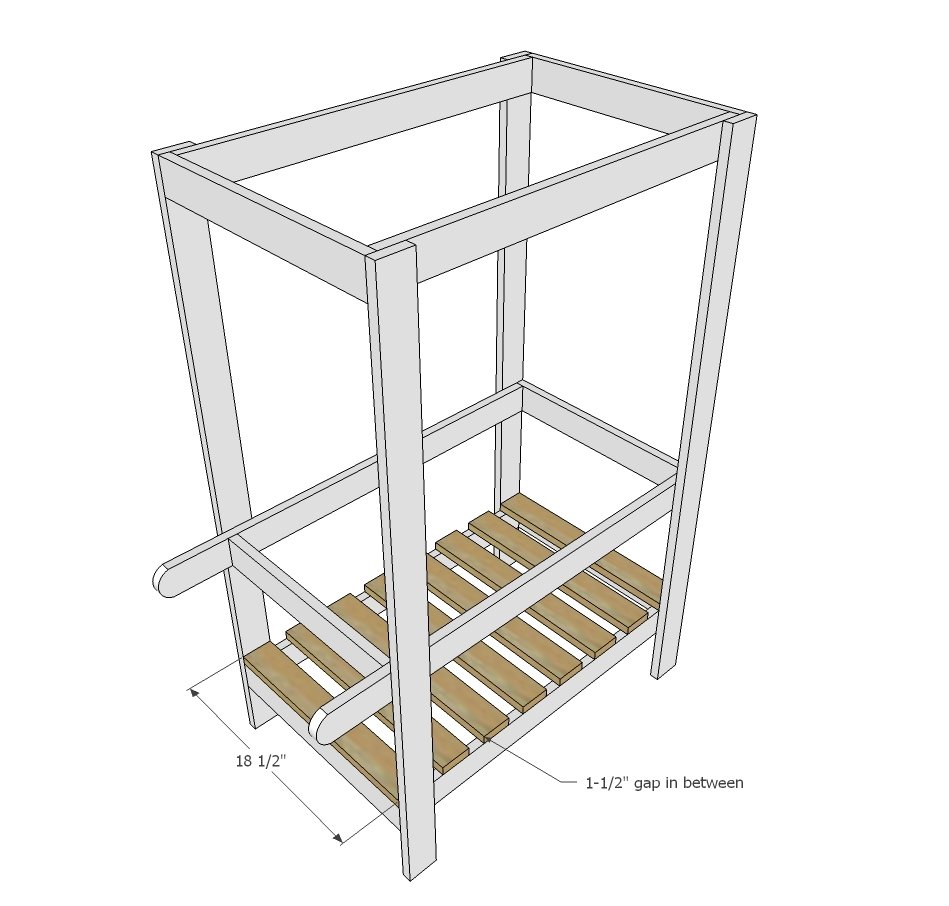
The slats can be nailed and glued down unless you are using outdoors in wet weather that may cause the wood to swell, and pull the nails out - then use exterior grade wood screws, 1-1/4" to 2" length.
Step 4
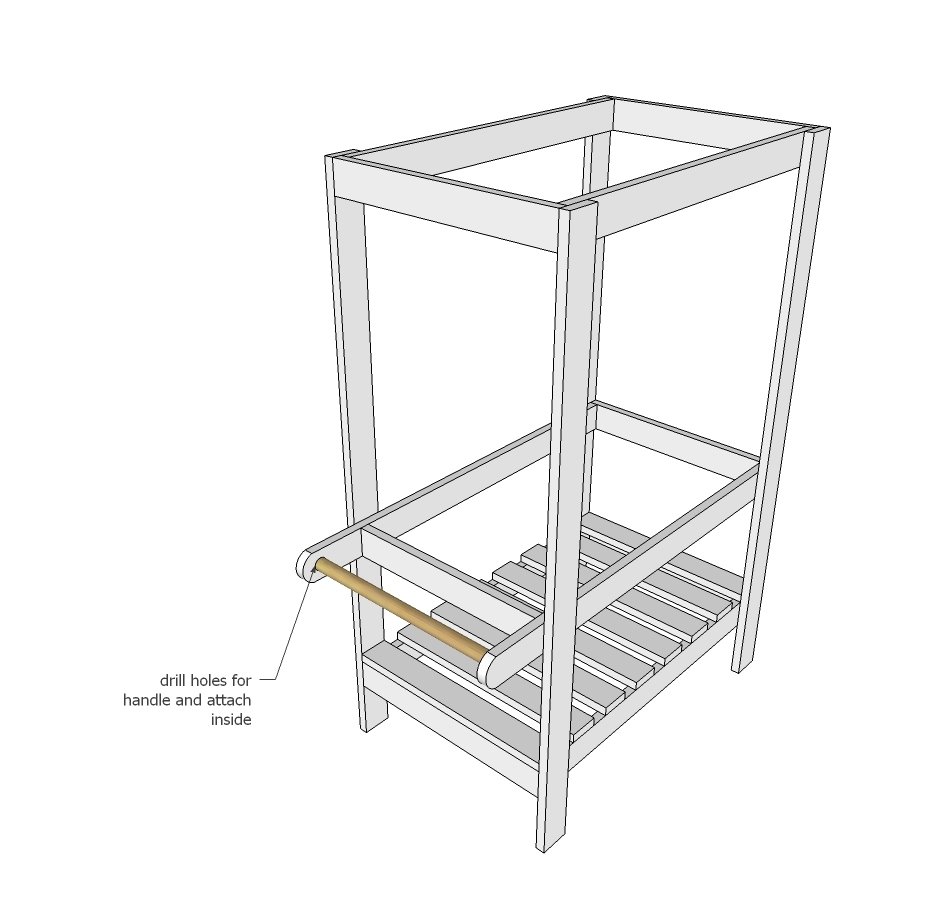
Measure and cut the hande and attach either by drilling holes or screwing from outside.
Step 5
Step 6
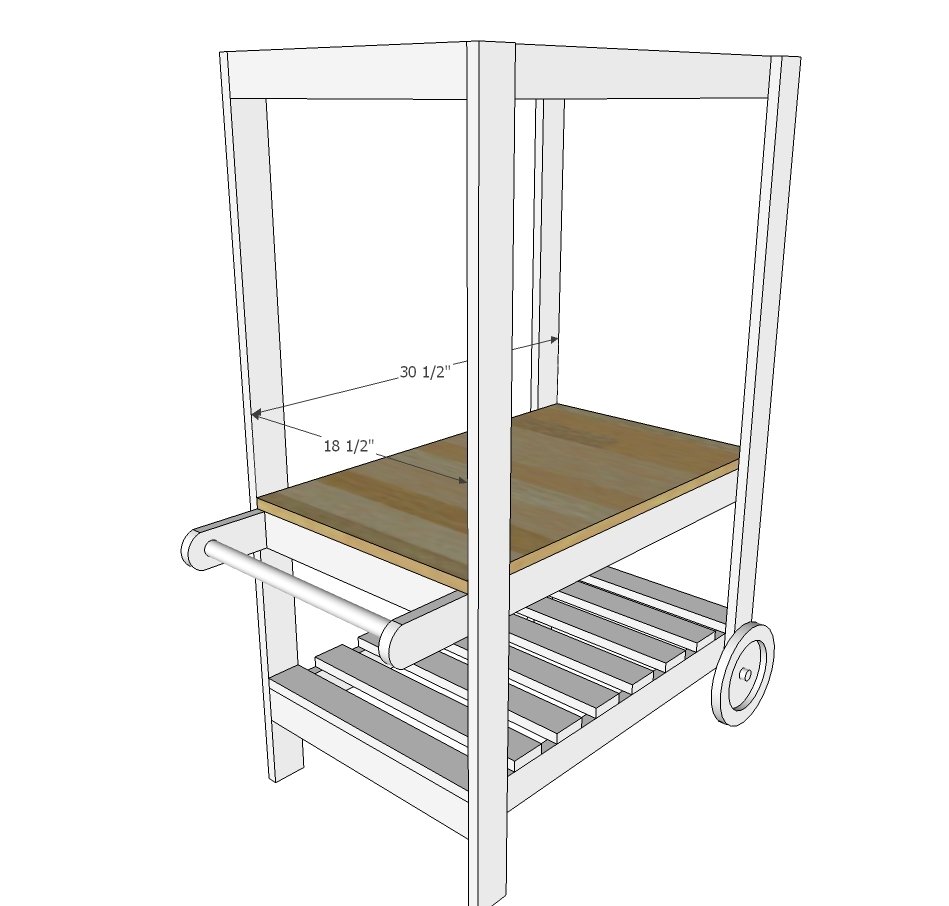
Attach top to middle frame. You can also use 1x3s as Jaime did.
Step 7
For the awning, attach to top with pocket holes on 3/4" setting.
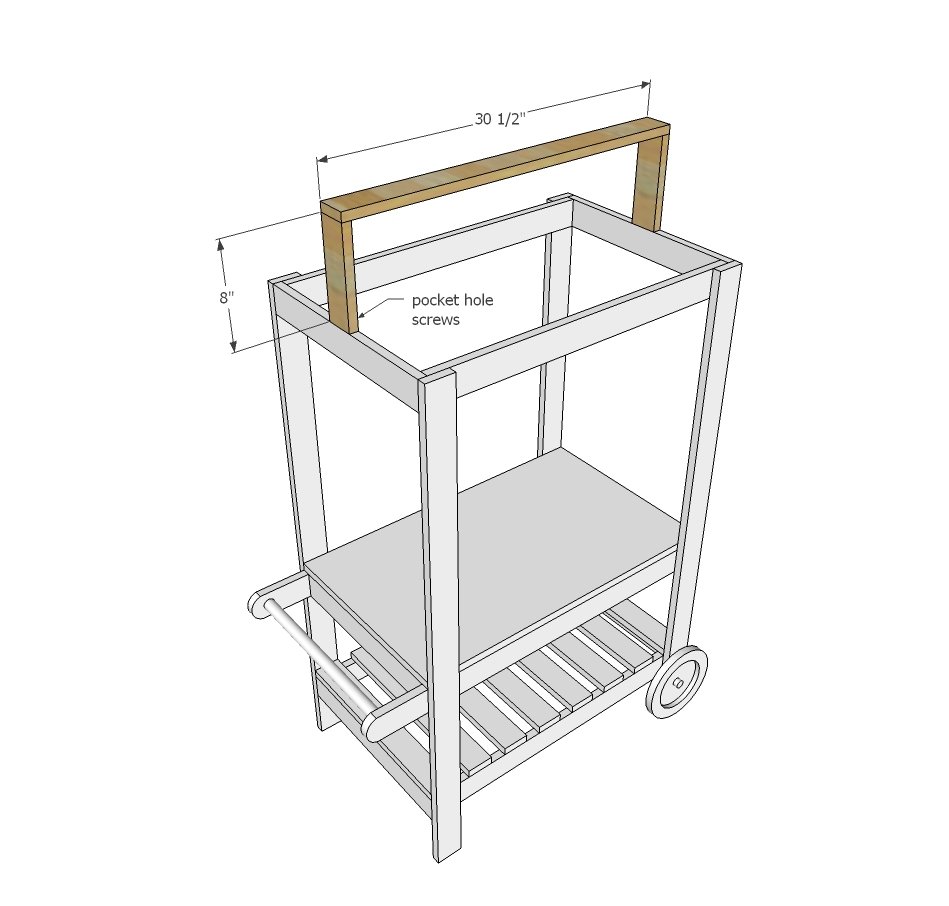
Step 8
For awning sides, attach angled boards with glue and brad nails.
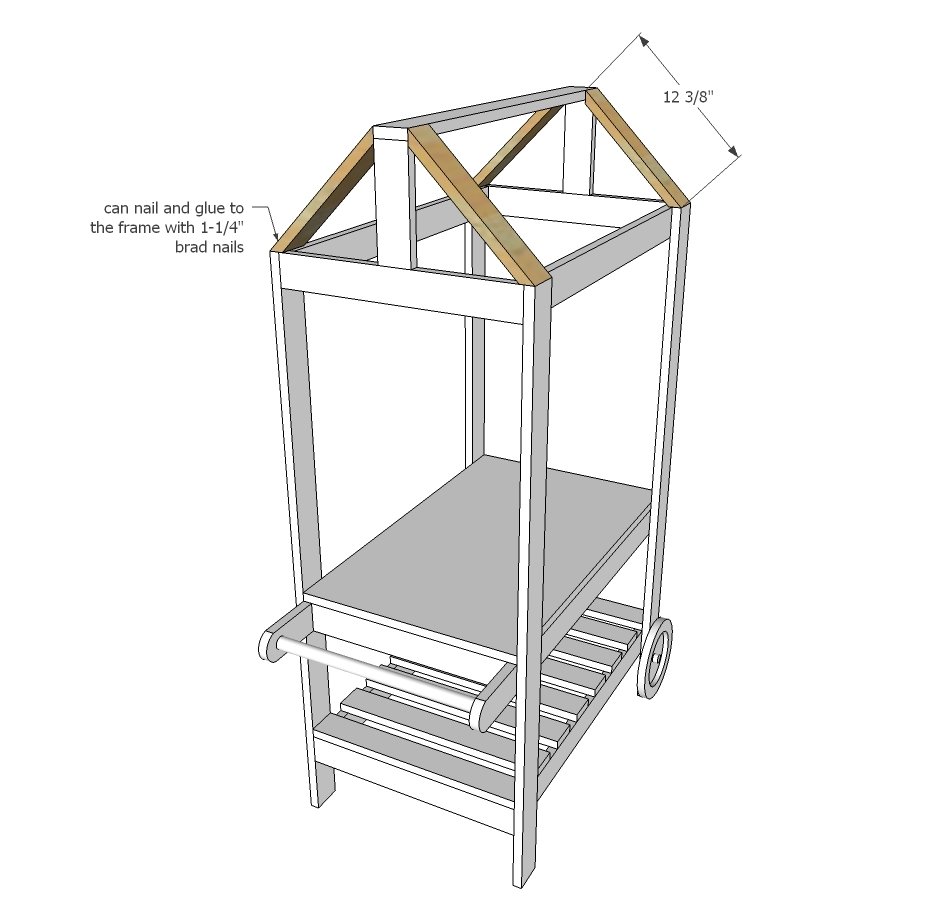
Finishing
Sand all surfaces, starting with a medium grit and finishing with fine. Wipe off the dust, fill any holes or gaps with wood filler, and sand smooth once dry. Apply primer if you're painting, then finish with your choice of paint or stain and seal with a durable clear topcoat. For outdoor projects, use exterior-rated primer, paint or stain, and sealer so the piece stands up to the weather.
Source (temporary): https://www.ana-white.com/woodworking-projects/diy-kids-pretend-play-vendor-cart-free-building-plans