Leaning Shelf with Mirror
INSTANTLY add storage and a mirror to any space with NO HOLES drilled in the wall with this leaning shelf with mirror project. Build your own DIY leaning vanity or entryway dropzone with! Perfect for small spaces, this stylish, space-saving piece features open shelving and a mirror, making it ideal for bedrooms, dorms, or entryways. Beginner-friendly, easy to customize, and includes step-by-step instructions, diagrams, shopping list, and video tutorial.
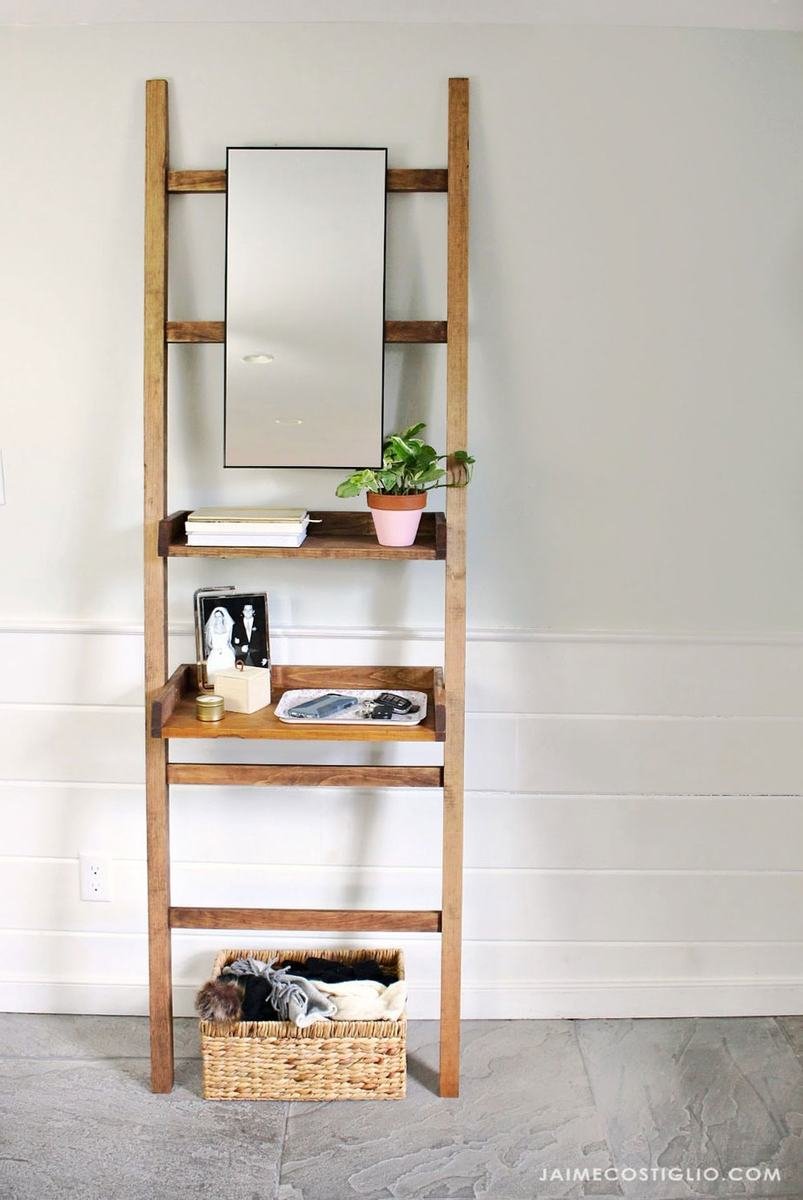
Specifications
| Project type | shelves |
|---|---|
| Room | Teens |
| Style | Farmhouse Furniture |
| Difficulty | Intermediate |
| Estimated cost | $20 - $50 |
Dimensions
Use the size-specific shopping and cut lists below.
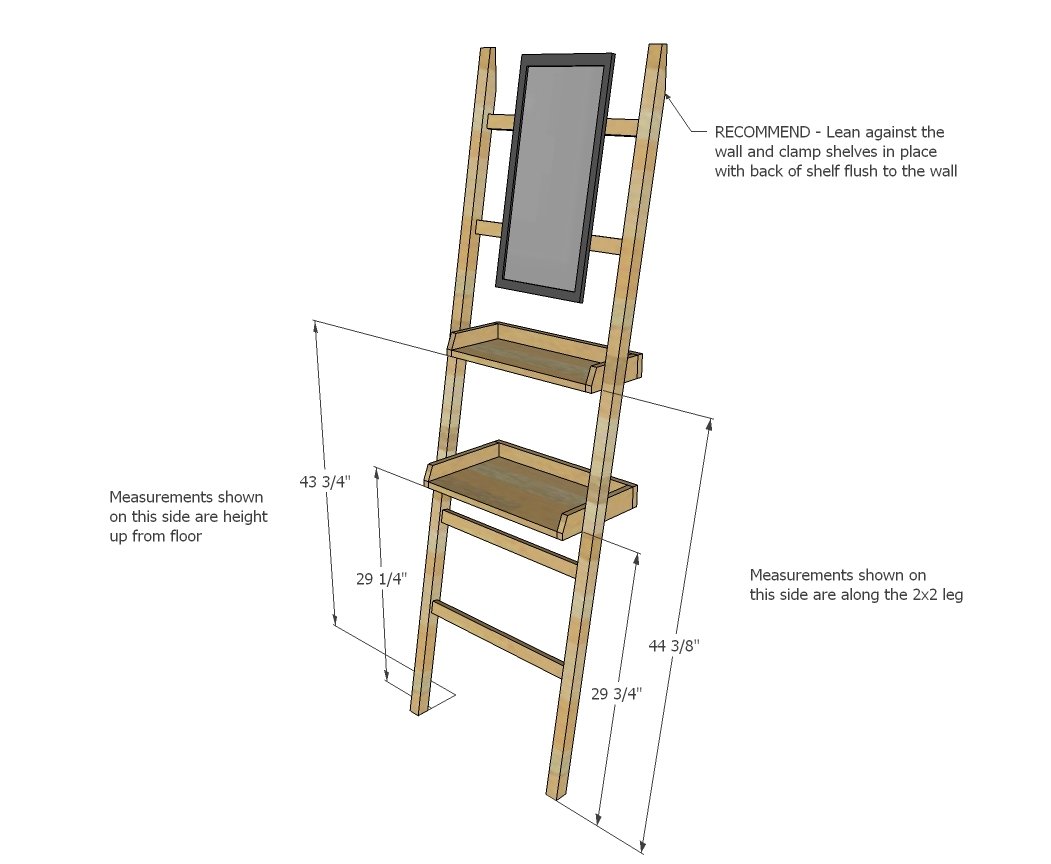
Shopping List
2 - 2x2 @ 8 feet long
1 - 1x2 @ 8 feet long
1 - 1x3 @ 8 feet long
1 - 1x8 @ 2 feet long
1 - 1x12 @ 2 feet long
small mirror, less than 24" tall and 20" wide
Cut List
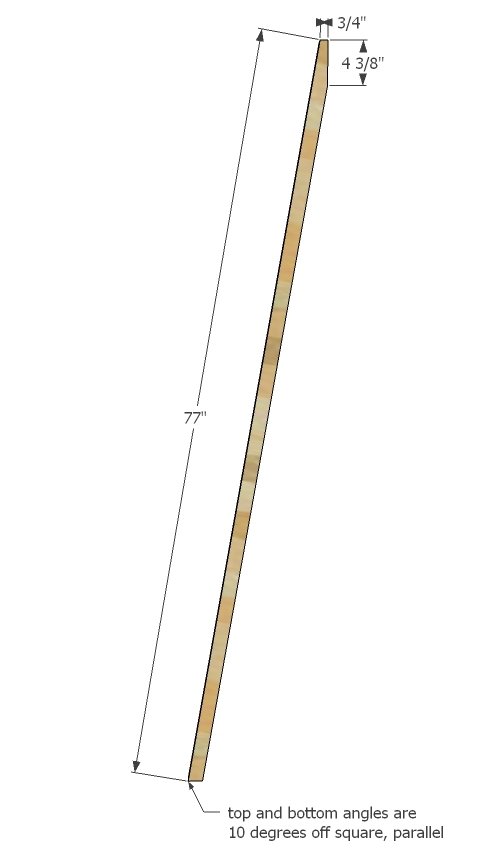
2 - 2x2 @ 77" long - both ends cut at 10 degrees off square, ends parallel, long point to short point measurement
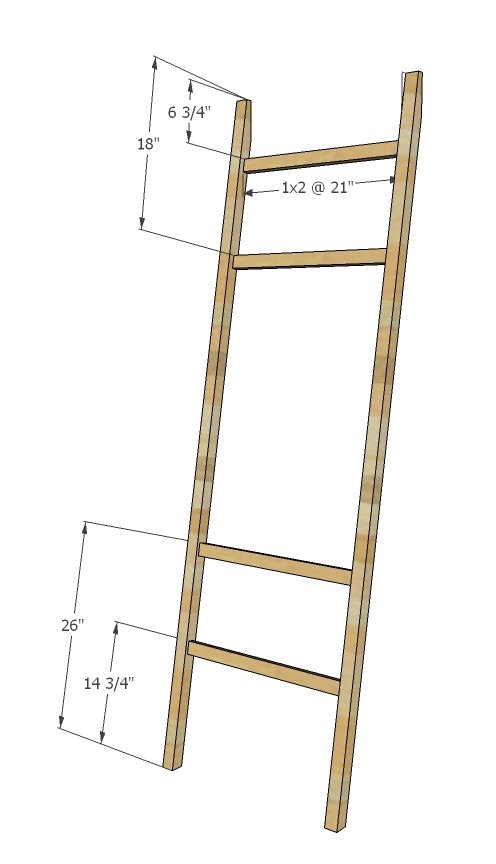
4 - 1x2 @ 21"
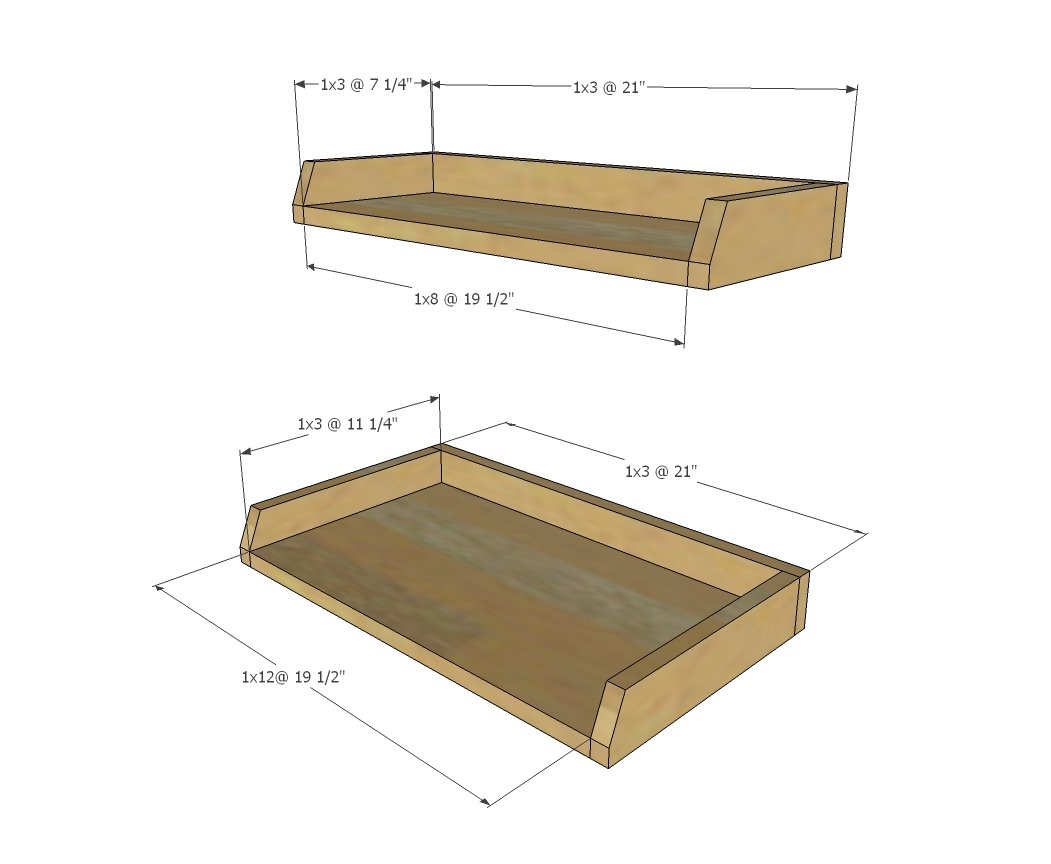
1 - 1x8 @ 19-1/2"
1 - 1x12 @ 19-1/2"
2 - 1x3 @ 21"
2 - 1x3@ 7-1/4"
2 - 1x3 @ 11-1/4"
Tools
- measuring tape
- square
- safety glasses
- hearing protection
- kreg-jig
- jigsaw
- compound miter saw
- sander
- level
Step-by-step Instructions
Step 1
Cut the 2x2 legs with the compound miter saw set to 10 degrees off square. Then use the speed square to mark the top of the leg perpendicular as shown in the photo. Cut off with a cirucular saw or jigsaw.
Step 2
Drill two 3/4" pocket holes on each end of the 1x2s. Attach flush to backs of legs with 1-1/4" pocket hole screws and glue.
Step 3
Cut the shelf pieces with a compound miter saw. Use either pocket holes or 1-1/4" brad nails to attach trim to shelves. OPTIONAL: Use a jigsaw to cut top corners off of the shelves to soften edges.
Step 4
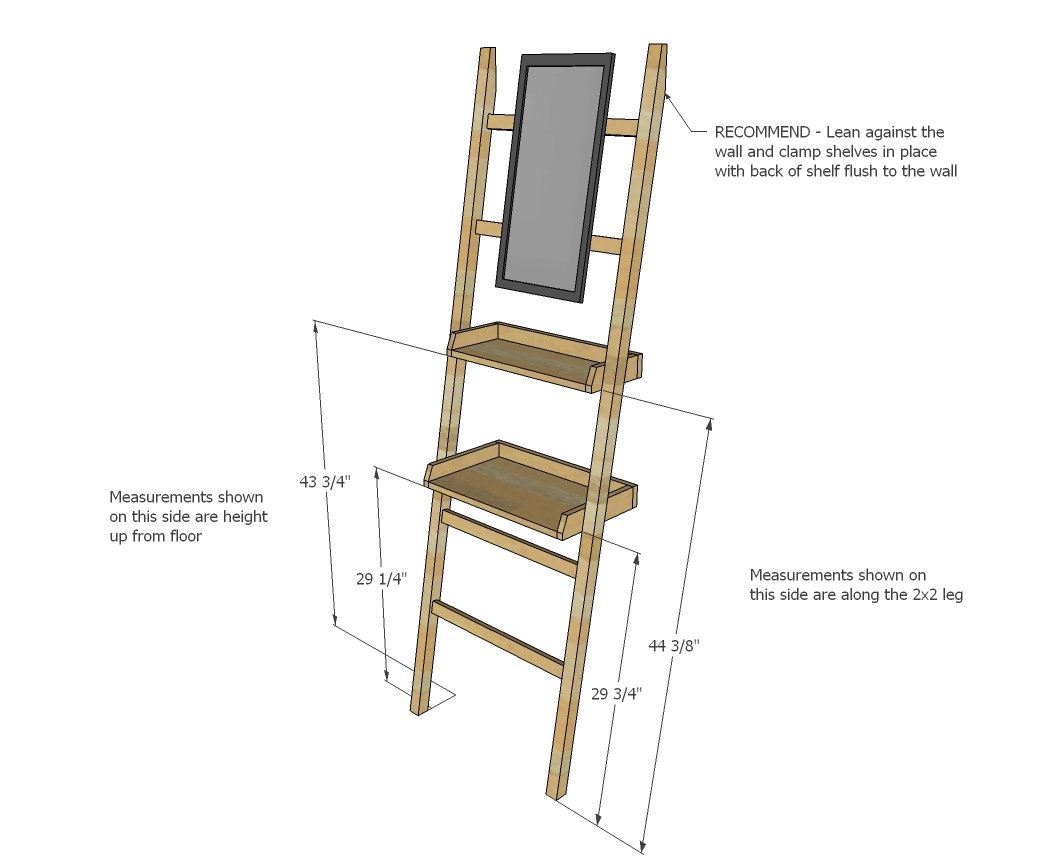
Lean ladder against wall. Position shelves as shown and clamp in place. Attach shelves to legs with 2" screws and wood glue. TIP: Use a level to make sure the shelves are attached level.
Finishing
Sand all surfaces, starting with a medium grit and finishing with fine. Wipe off the dust, fill any holes or gaps with wood filler, and sand smooth once dry. Apply primer if you're painting, then finish with your choice of paint or stain and seal with a durable clear topcoat. For outdoor projects, use exterior-rated primer, paint or stain, and sealer so the piece stands up to the weather.
Source (temporary): https://www.ana-white.com/woodworking-projects/diy-leaning-shelf-mirror-entryway-dropzone-or-vanity