Mirrored & Pin‑Board Changing Screen
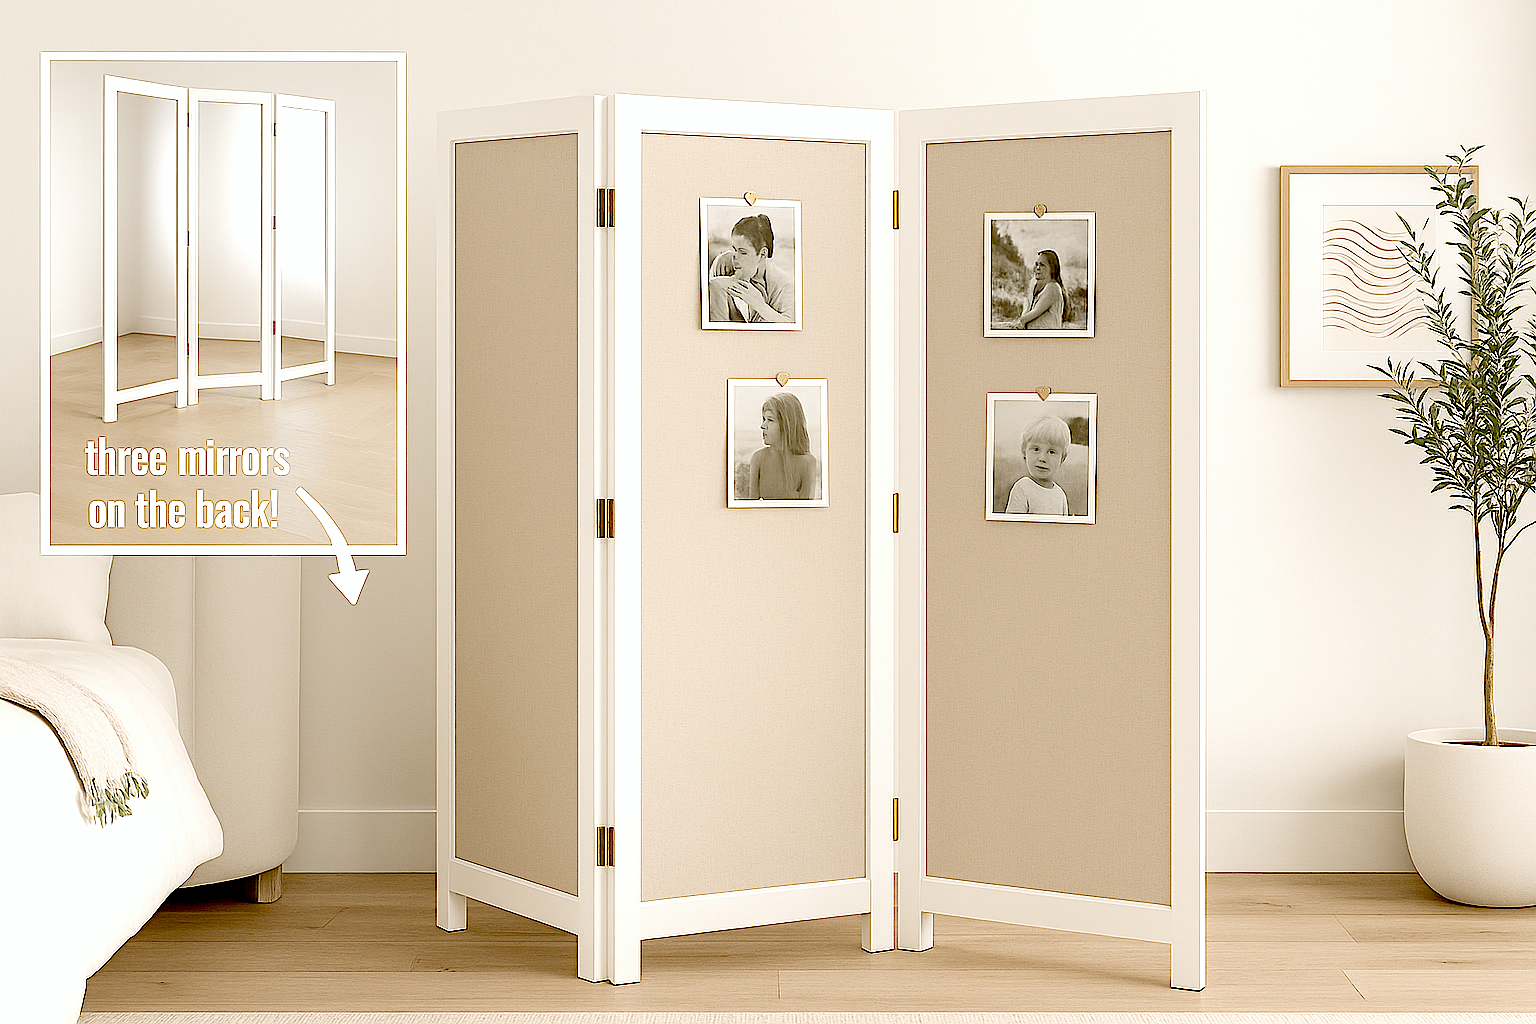
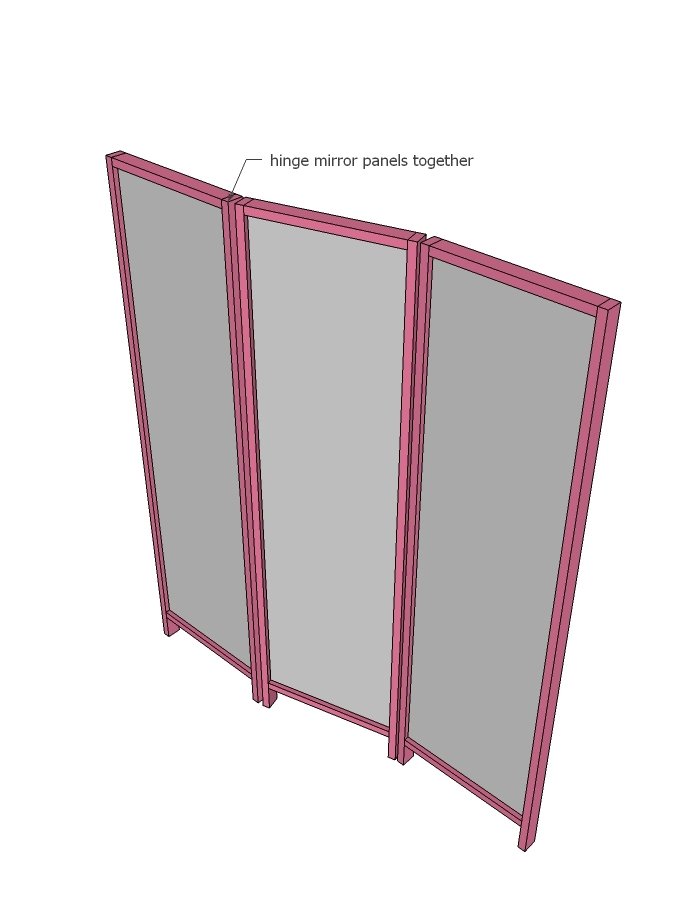
Transform three simple wall mirrors into a free‑standing, three‑panel screen with dual functionality: the front features a linen‑covered pin‑board (perfect for photos, mementos or announcements), and the back has full‑length mirrors for a sleek, practical touch. With clear plans and basic materials, you’ll have a modern farmhouse‑style room divider ready to make a statement.
Specifications
| Project type | Home DIY |
|---|---|
| Room | Teens |
| Style | Cottage Style Furniture Plans |
| Difficulty | Intermediate |
| Estimated cost | $50 - $100 |
Dimensions
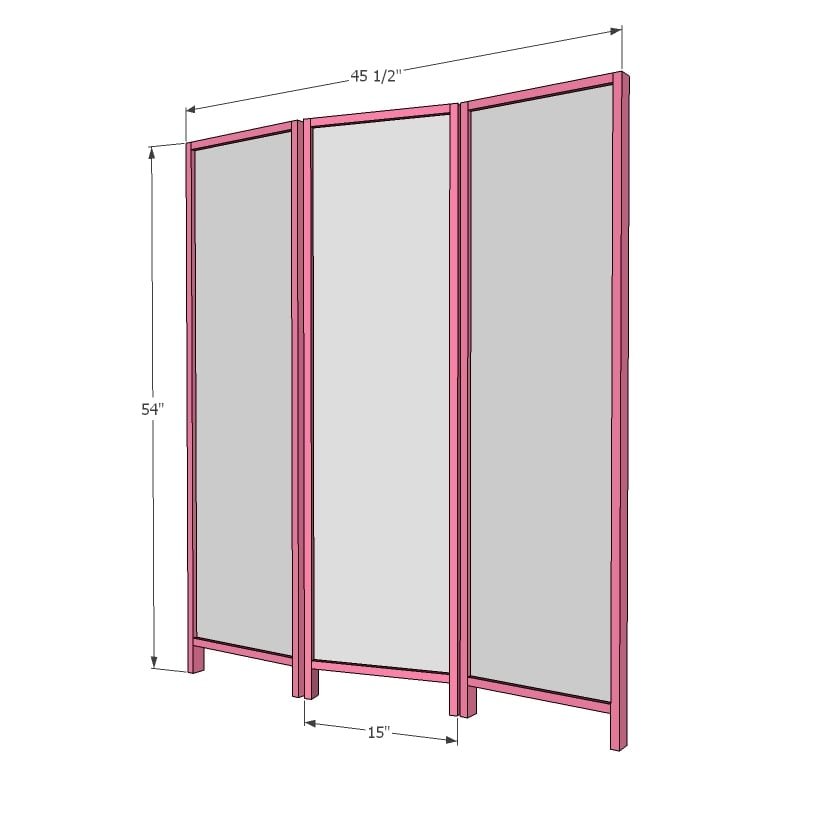
Use the size-specific shopping and cut lists below.
Shopping List
- 7 - 1x2x10
- 3 - vertical door mirrors
- cardboard
- 1 - tube construction adhesive
- 4 - 2” hinges
- 1 - crib size batting
- fabric
- staples
- 1 1/4” brad nails
- 1 1/4” pocket hole screws
Cut List
INNER FRAMES
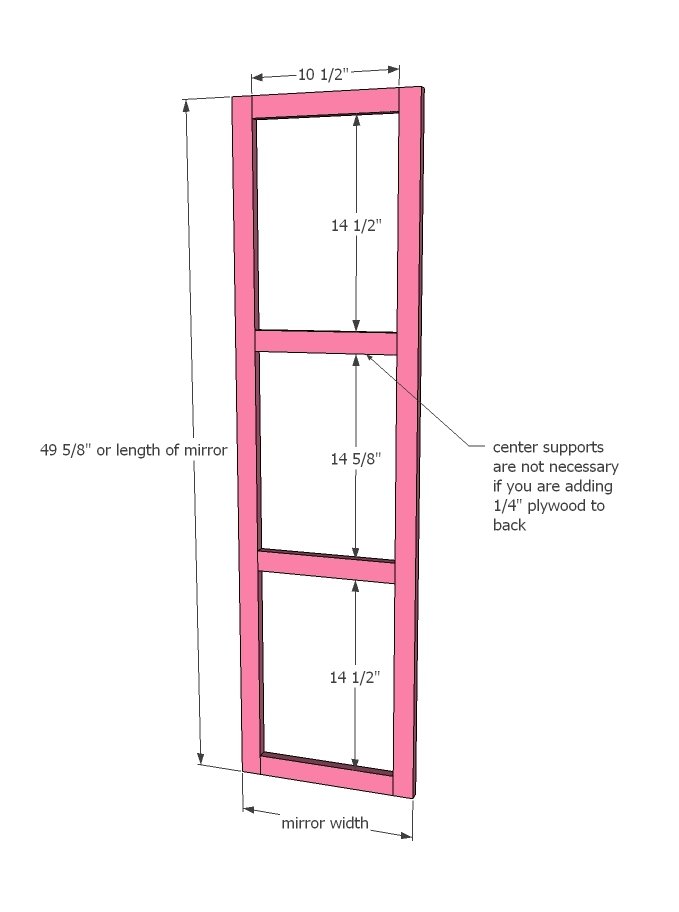
- 6 - 1x2 @ 49-5/8"
- 12 - 1x2 @ 10-1/2"
OUTER FRAMES
- 6 - 1x2 @ 54"
- 6 - 1x2 @ 13-1/2"
Tools
- measuring tape
- square
- pencil
- safety glasses
- hearing protection
- kreg-jig
- drill
- compound miter saw
- nailer
- staple gun
Step-by-step Instructions
Step 1
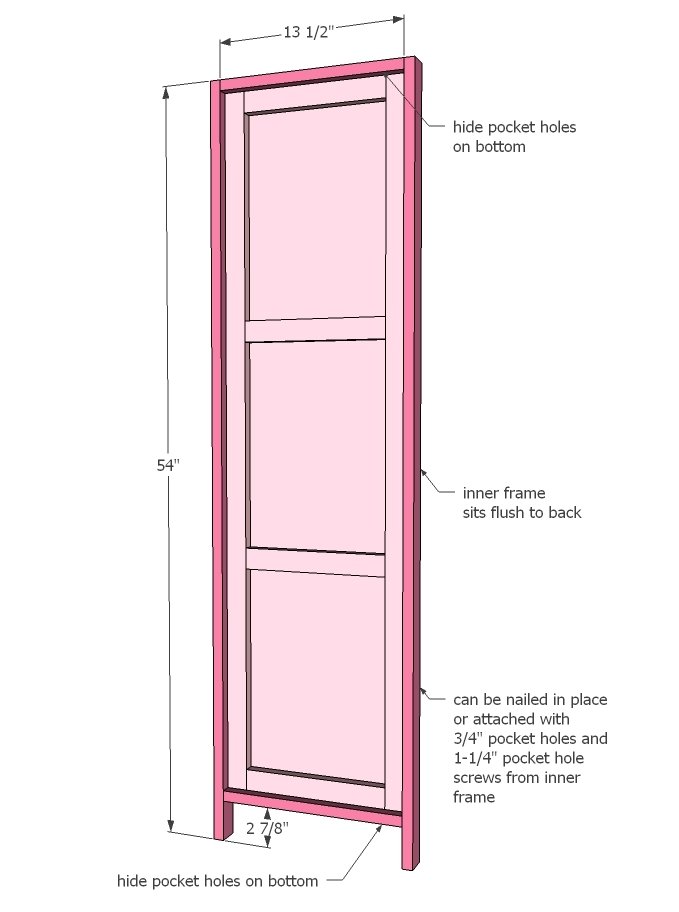
Drill 3/4" pocket holes with your Kreg Jig on each end of the 10-1/2" long 1x2s. Attach with glue to the 49-5/8" long 1x2s. This inner frame should be the same size as the mirrors. To attach the outer frame in later steps, drill 3/4" pocket holes facing outward on the frame.
Step 2
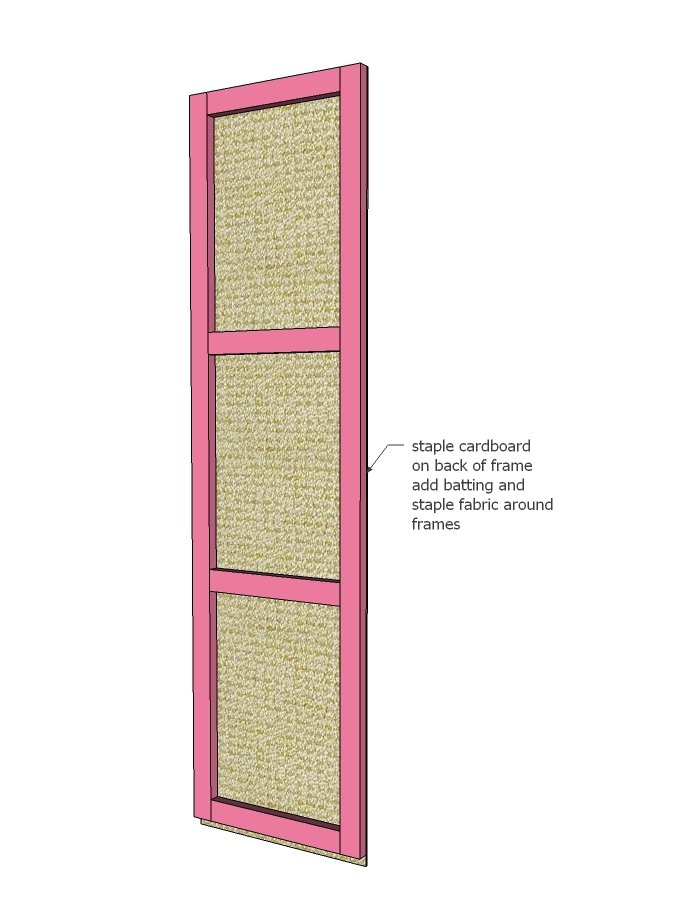
Staple cardboard over the back of the mirror frame. Add batting to the back, and then wrap the entire back with fabric and staple to the mirror side of the frame.
Step 3
Build the outer frame with 3/4" pocket holes and 1-1/4" pocket hole screws. Place inner frame inside and attach through the pocket holes you drilled in step 1 (or you can attach from outside with 1-1/4" nails).
Step 4
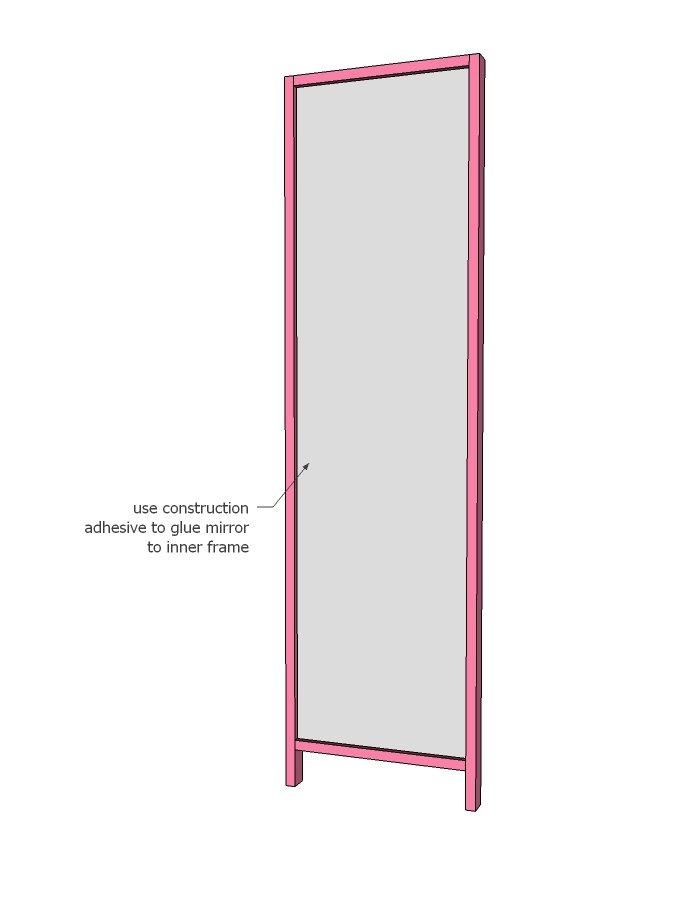
Apply construction adhesive to the inner frame on the mirror side and place mirror inside. Let fully dry.
Step 5
Finishing
Sand all surfaces, starting with a medium grit and finishing with fine. Wipe off the dust, fill any holes or gaps with wood filler, and sand smooth once dry. Apply primer if you're painting, then finish with your choice of paint or stain and seal with a durable clear topcoat. For outdoor projects, use exterior-rated primer, paint or stain, and sealer so the piece stands up to the weather.
Source (temporary): https://www.ana-white.com/woodworking-projects/diy-mirrored-pin-board-changing-screen-build-your-own-stylish-divider