Mission Bed (Twin Size)
Build your own mission bed frame with our step by step tutorial and off the shelf lumber and minimal tools. We love the classic mission style, the easy construction, and the sturdy final product, sure to last and last. Boxsprings are optional. Free woodworking.
Specifications
| Project type | Beds and Bed Frames |
|---|---|
| Room | Bedroom |
| Difficulty | Beginner Projects |
| Estimated cost | $50 - $100 |
Dimensions
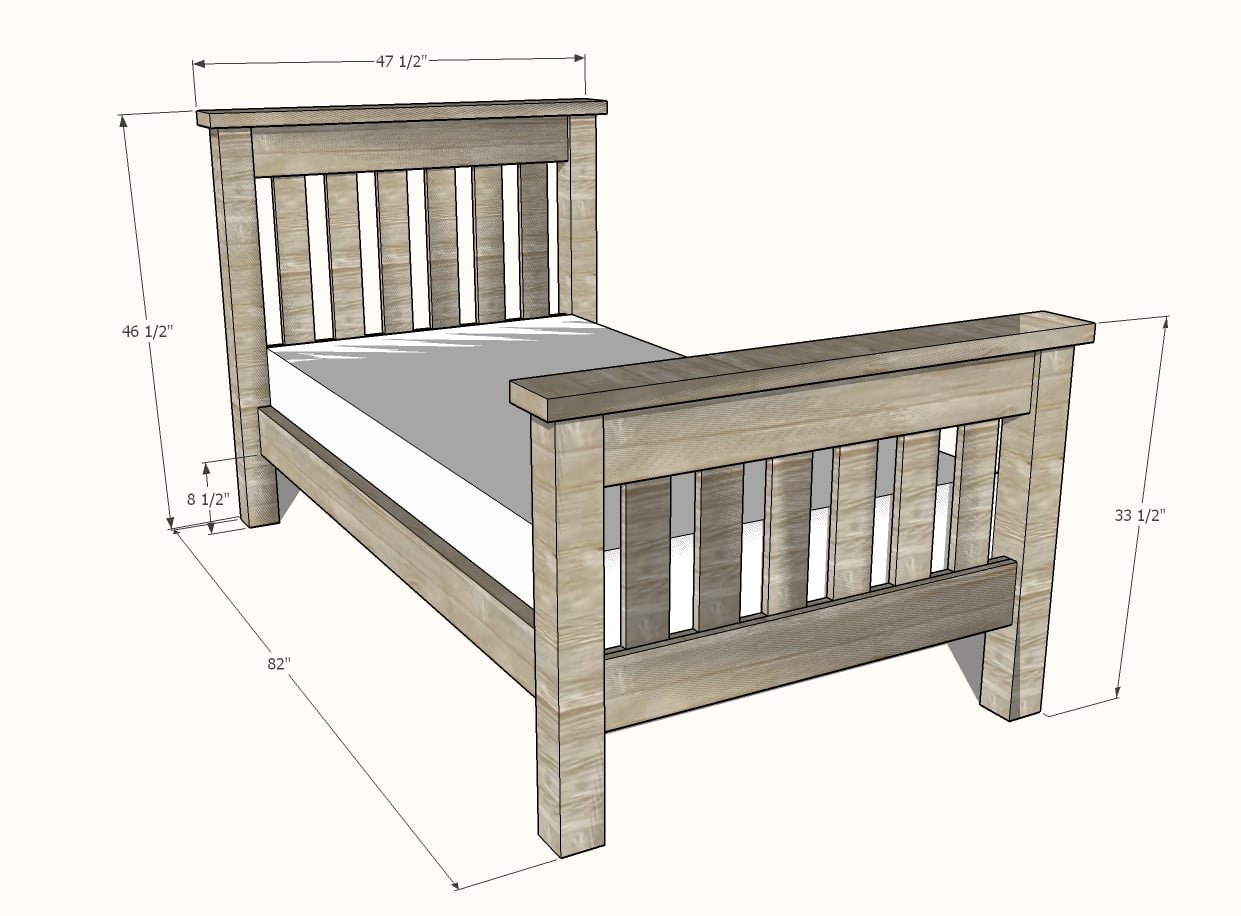
Use the size-specific shopping and cut lists below.
Shopping List
3 - 1x6 @ 8 feet long
4 - 1x4 @ 8 feet long
1 - 4x4 @ 8 feet long (for headboard posts)
1 - 4x4 @ 6 feet long (for footboard posts)
4 - 2x6 @ 8 feet long
2 - 2x4 @ 8 feet long
7 - 1x3 @ 8 feet long (or similar for bed slats)
1 - 1/4" long brad nails (a couple hundred)
16 - 5" long self tapping wood screws OR 2-1/2" pocket hole screws if you have a Kreg Jig
40 - 2-1/2" long self tapping wood screws
Cut List
HEADBOARD
- 2 - 1x6 @ 38-1/2"
- 14 - 1x6 @ 2-1/2"
- 6 - 1x4 @ 30"
- 2 - 4x4 @ 45"
- 1 - 2x6 @ 47-1/2"
FOOTBOARD
- 3 - 1x6 @ 38-1/2"
- 14 - 1x6 @ 2-1/2"
- 6 - 1x4 @ 23-1/2"
- 2 - 4x4 @ 32"
- 1 - 2x6 @ 47-1/2"
BED FRAME
- 2 - 2x4 @ 79-3/4"
- 2 - 2x6 @ 75" (cut to fit)
- 14 - 1x3 @ 38-1/2" - slats
Tools
- measuring tape
- square
- pencil
- safety glasses
- hearing protection
- drill
- circular saw
- nailer
- sander
Step-by-step Instructions
Headboard Construction
Lay out headboard panel as shown in diagram. Glue and nail from the back side to hide nail holes. The final small piece should be cut to fit for a perfect fit. NOTE: If you plan to join the headboard panel to the legs with pocket holes, carefully place nails at the outer edges of the board to allow room for drilling pocket holes in next step.
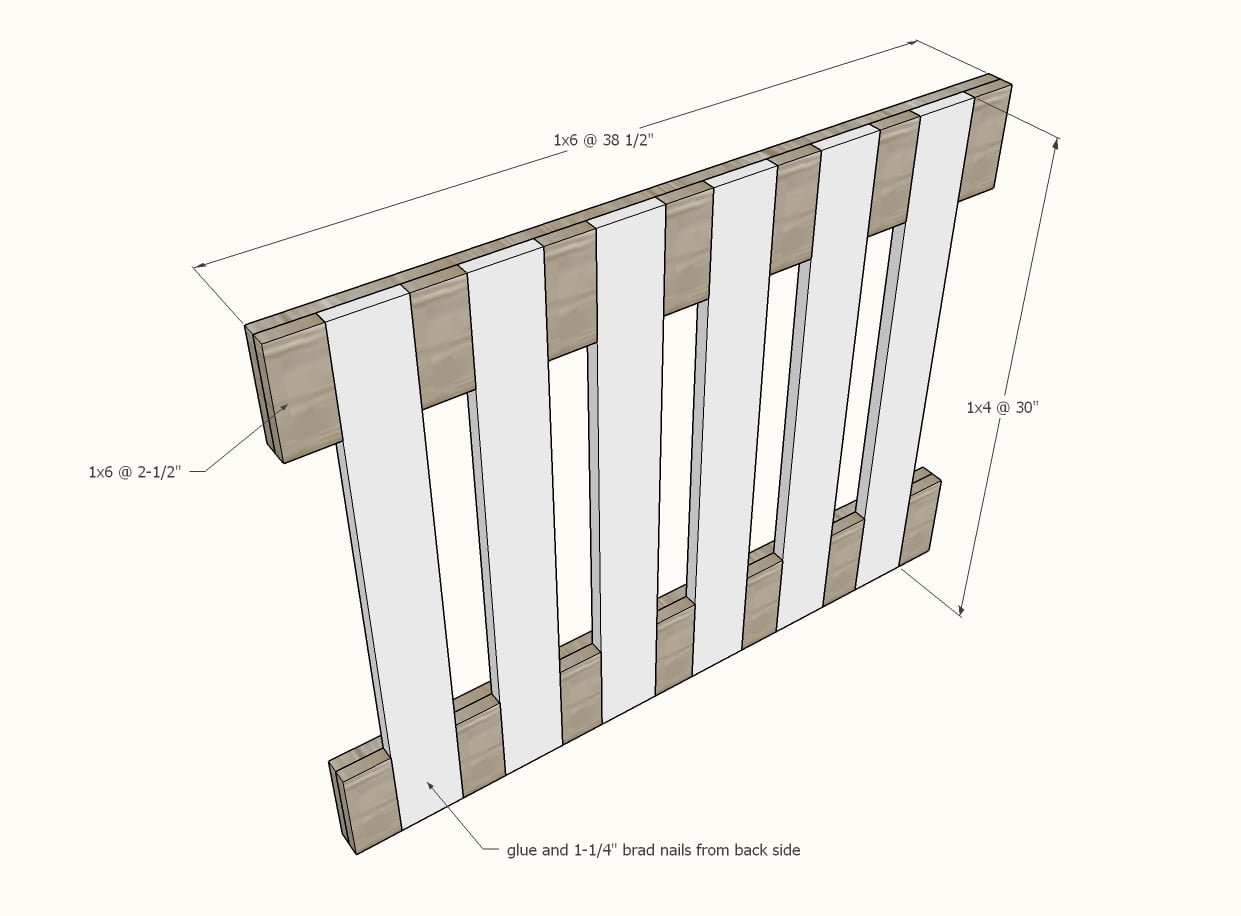
Headboard Construction
Attach the headboard panel to the legs with either 1-1/2" pocket holes and 2-1/2" pocket hole screws (most recommended since holes will be hidden) or use screws from outside of 4x4 legs drilled into panel (fill with wood filler for final finish).
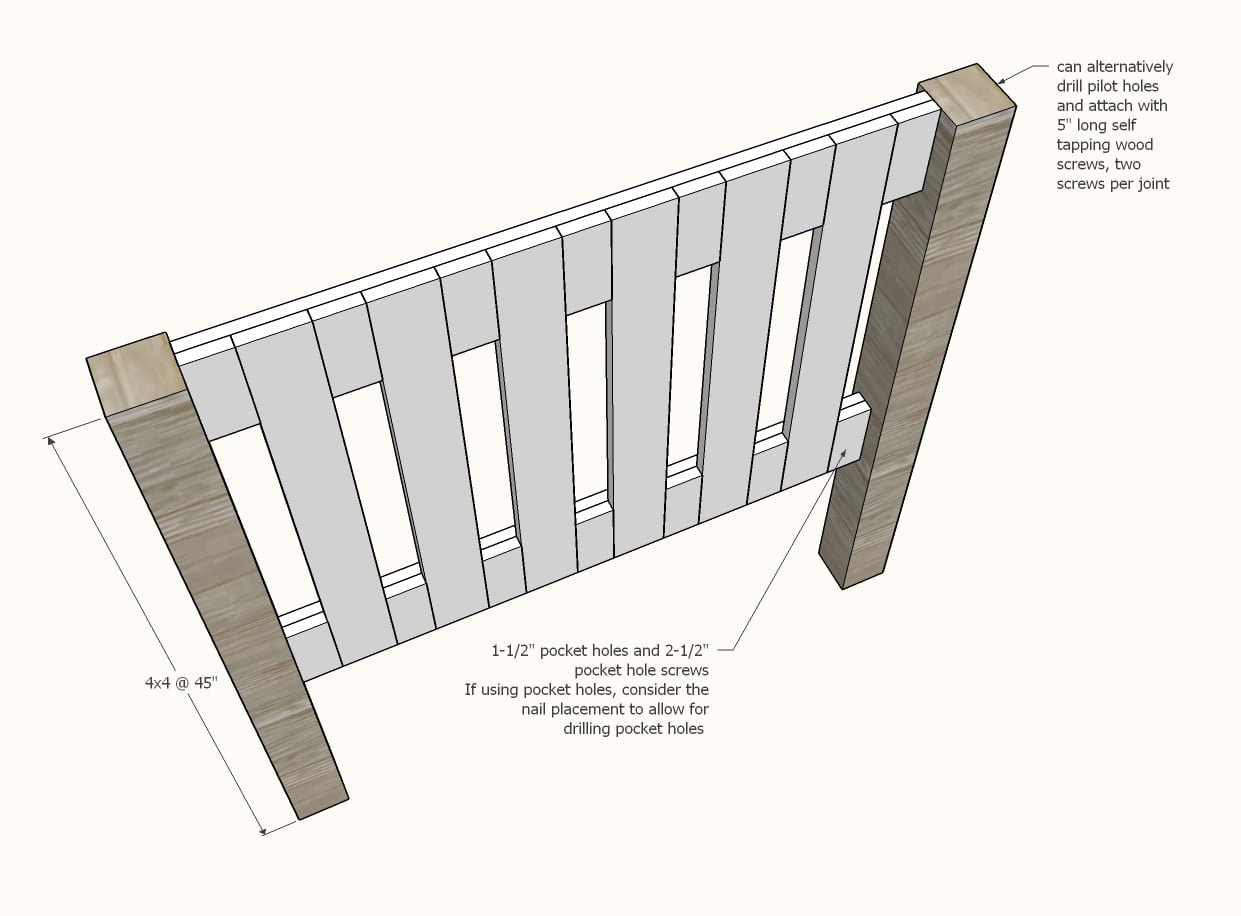
Headboard Construction
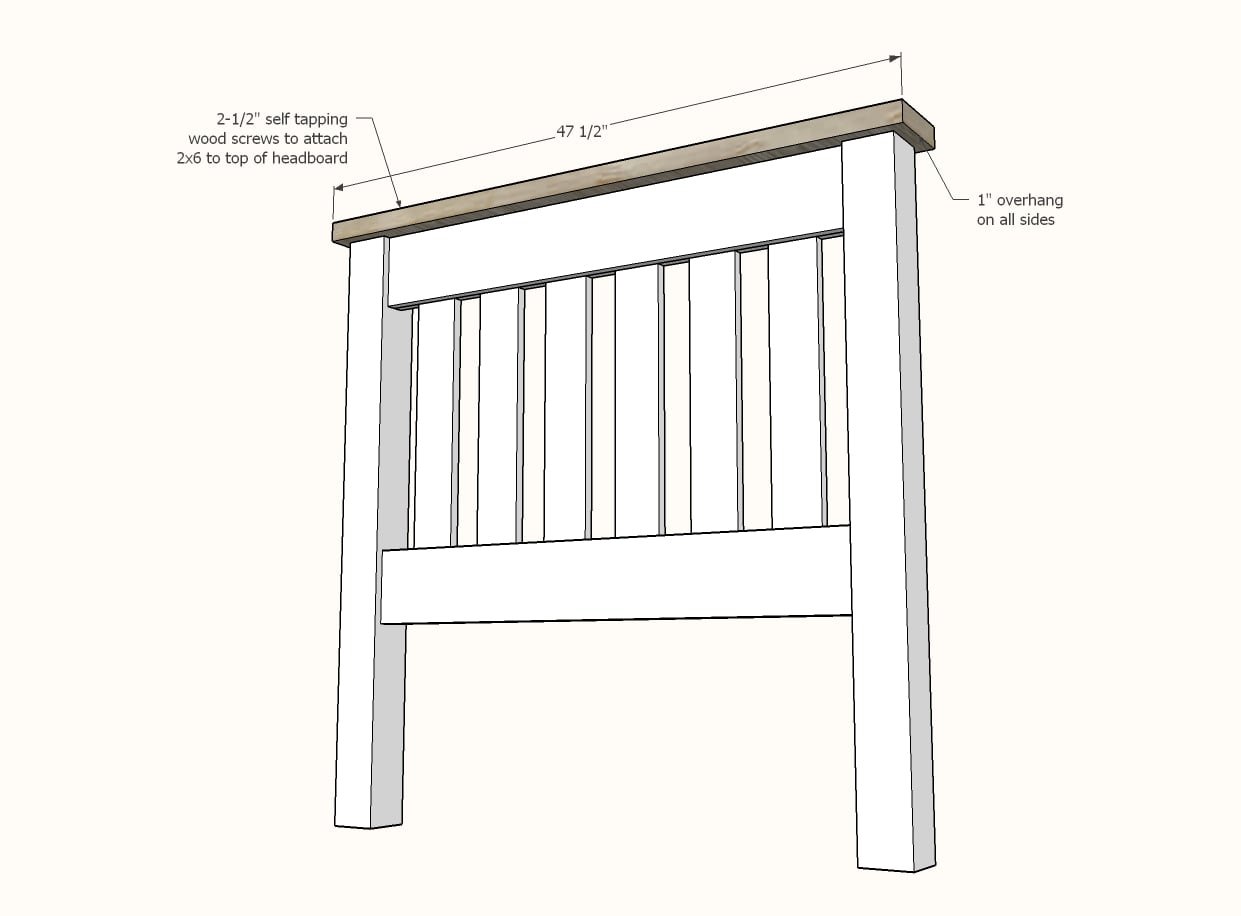
Attach top 2x6 to headboad with 2-1/2" self tapping wood screws and glue.
Footboard Construction
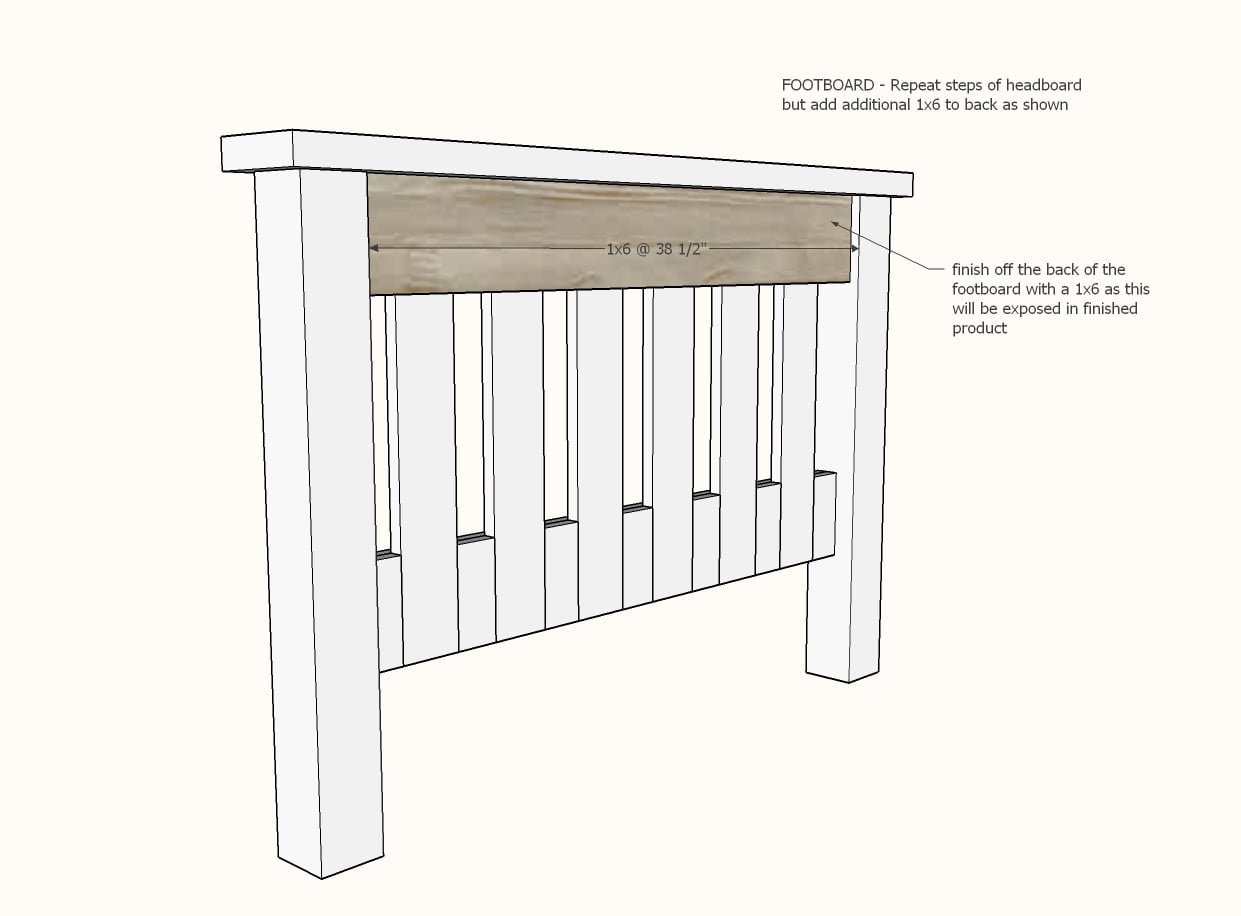
Build the footboard as you did the headboard, but finish the back side of the top of the footboard with remaining 1x6 as this will be exposed in the final product.
Siderail Construction
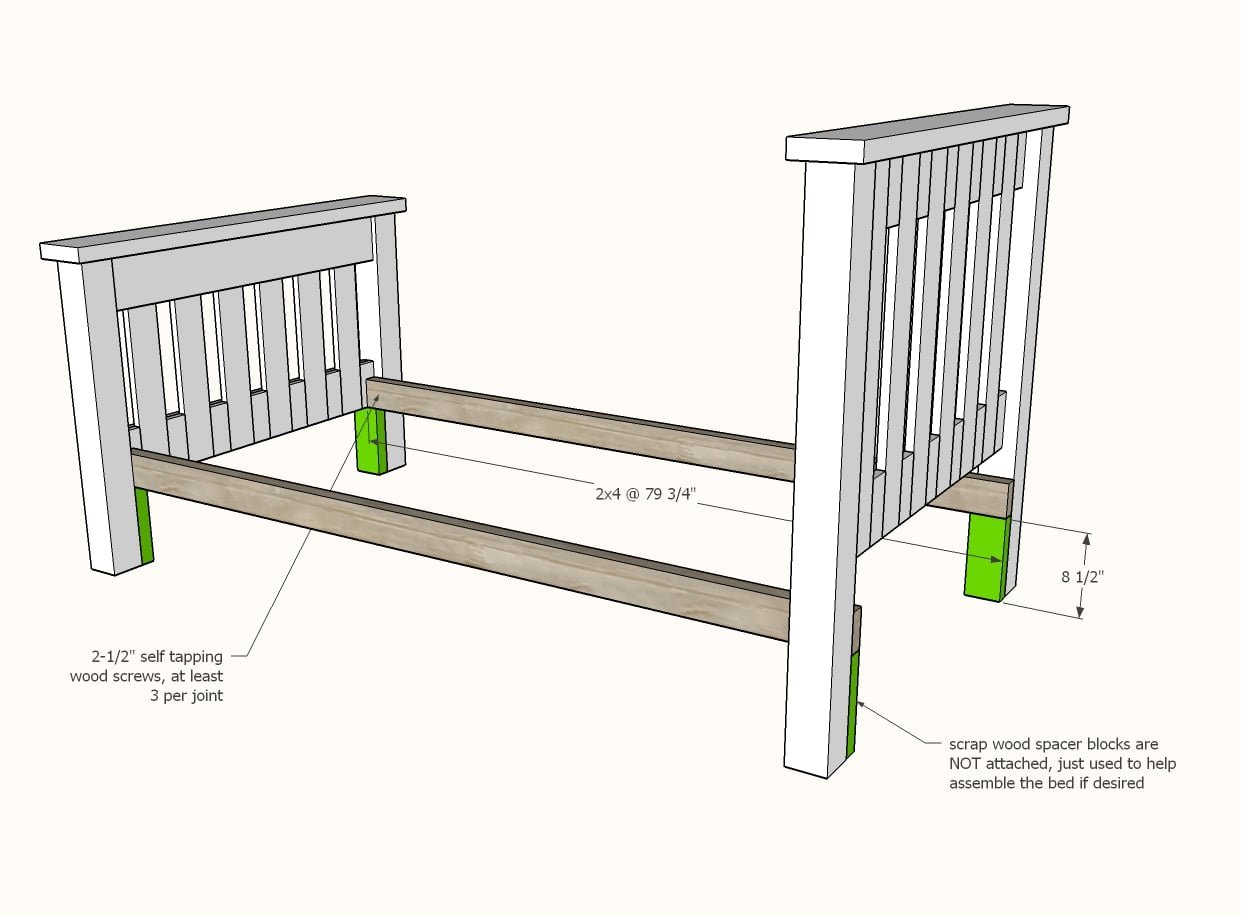
Attach 2x4 siderail cleats to the 4x4 legs with 2-1/2" screws. The green blocks shown in the diagram can be used to help assemble the bed but are NOT attached to the bed.
Step 6
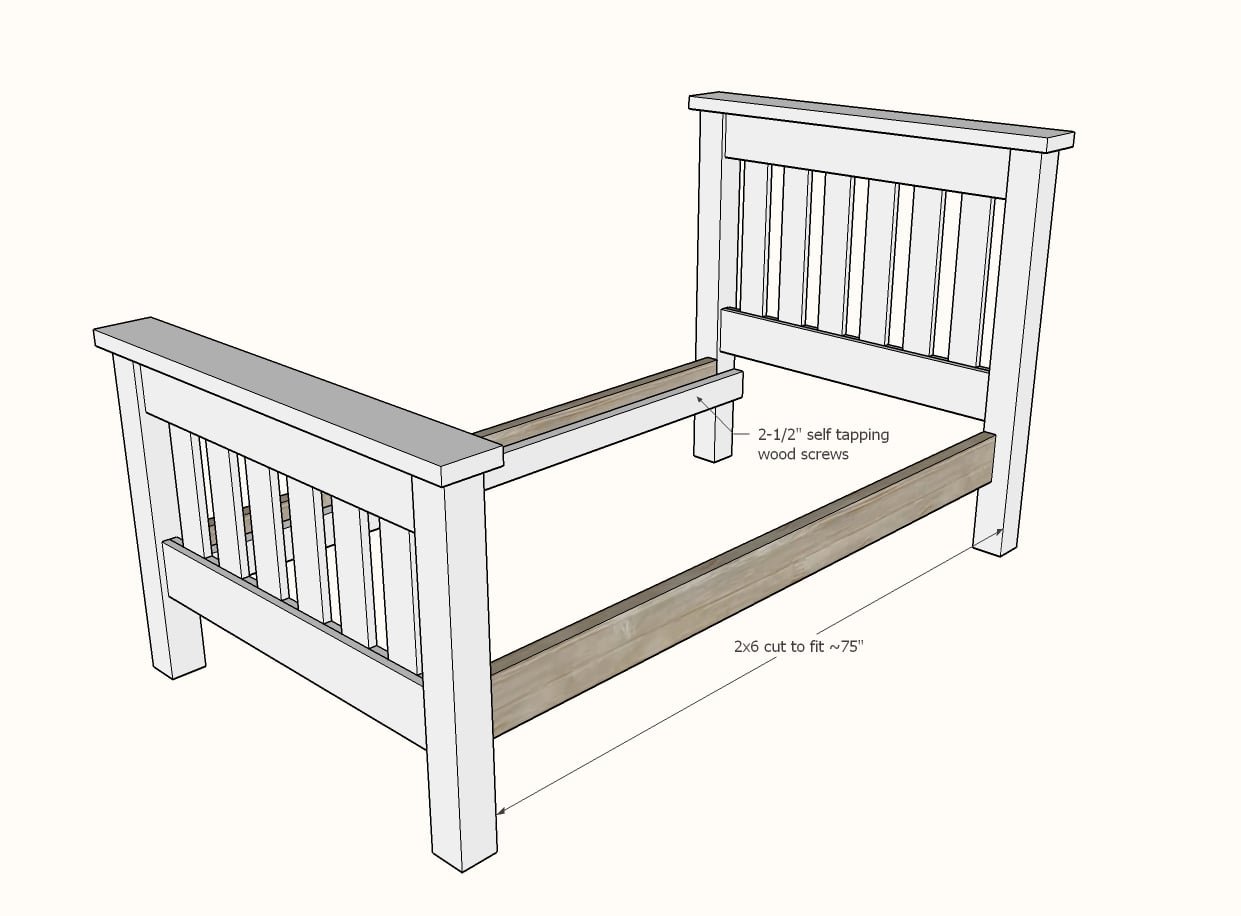
Add the siderails to the cleats to finish the bed.
Step 7
Slats should be per mattress recommendations. You can use scrap wood, plywood or other materials. As shown, we use 1x3s cut to fit.
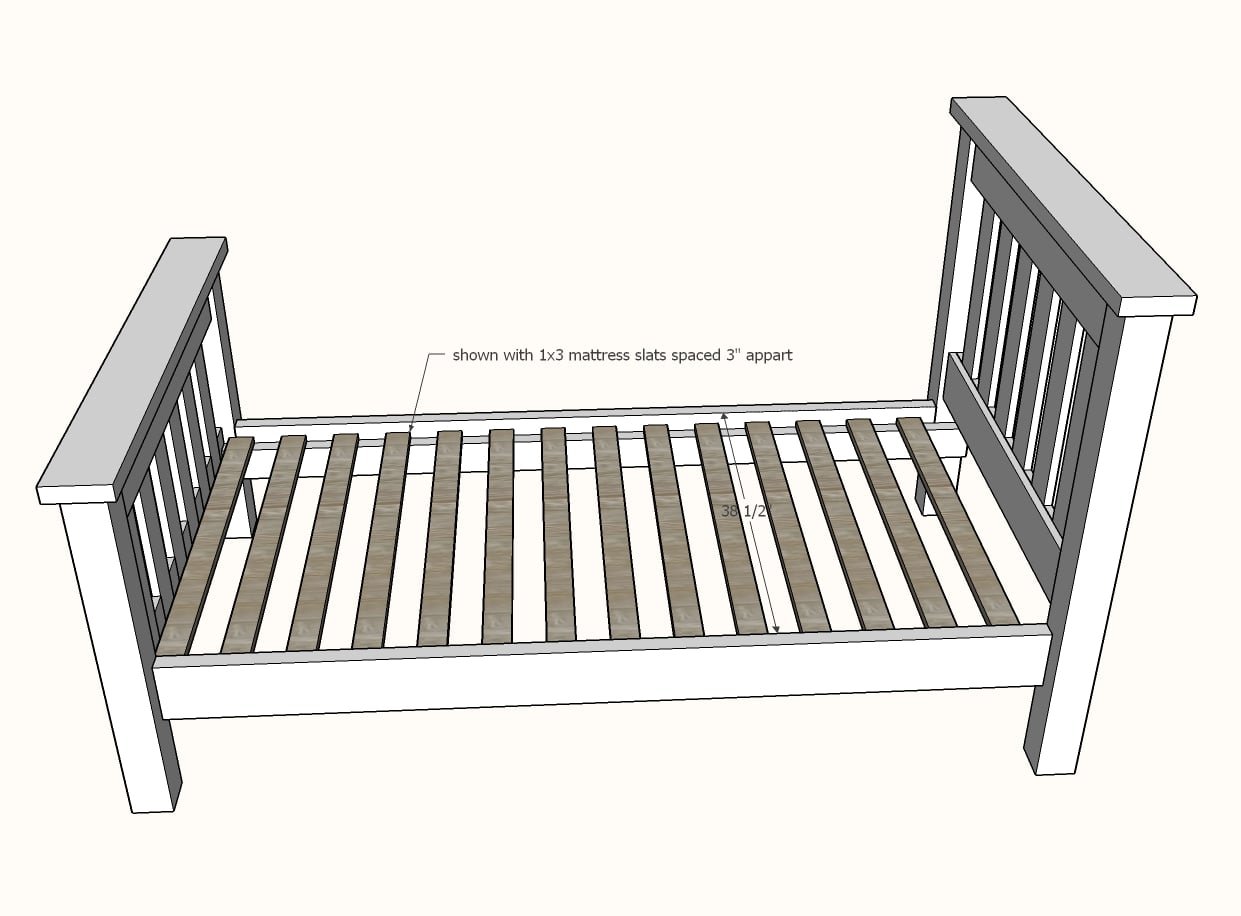
Step 8
Fill all holes with putty and sand and finish as desired. You can choose to assemble the bed (as in step 6) after the bed is finished and moved into the room. Just make sure you do a test fit first.
Finishing
Sand all surfaces, starting with a medium grit and finishing with fine. Wipe off the dust, fill any holes or gaps with wood filler, and sand smooth once dry. Apply primer if you're painting, then finish with your choice of paint or stain and seal with a durable clear topcoat. For outdoor projects, use exterior-rated primer, paint or stain, and sealer so the piece stands up to the weather.
Source (temporary): https://www.ana-white.com/woodworking-projects/diy-mission-bed-free-plans-twin-size