Mudroom System with Towers and Bench
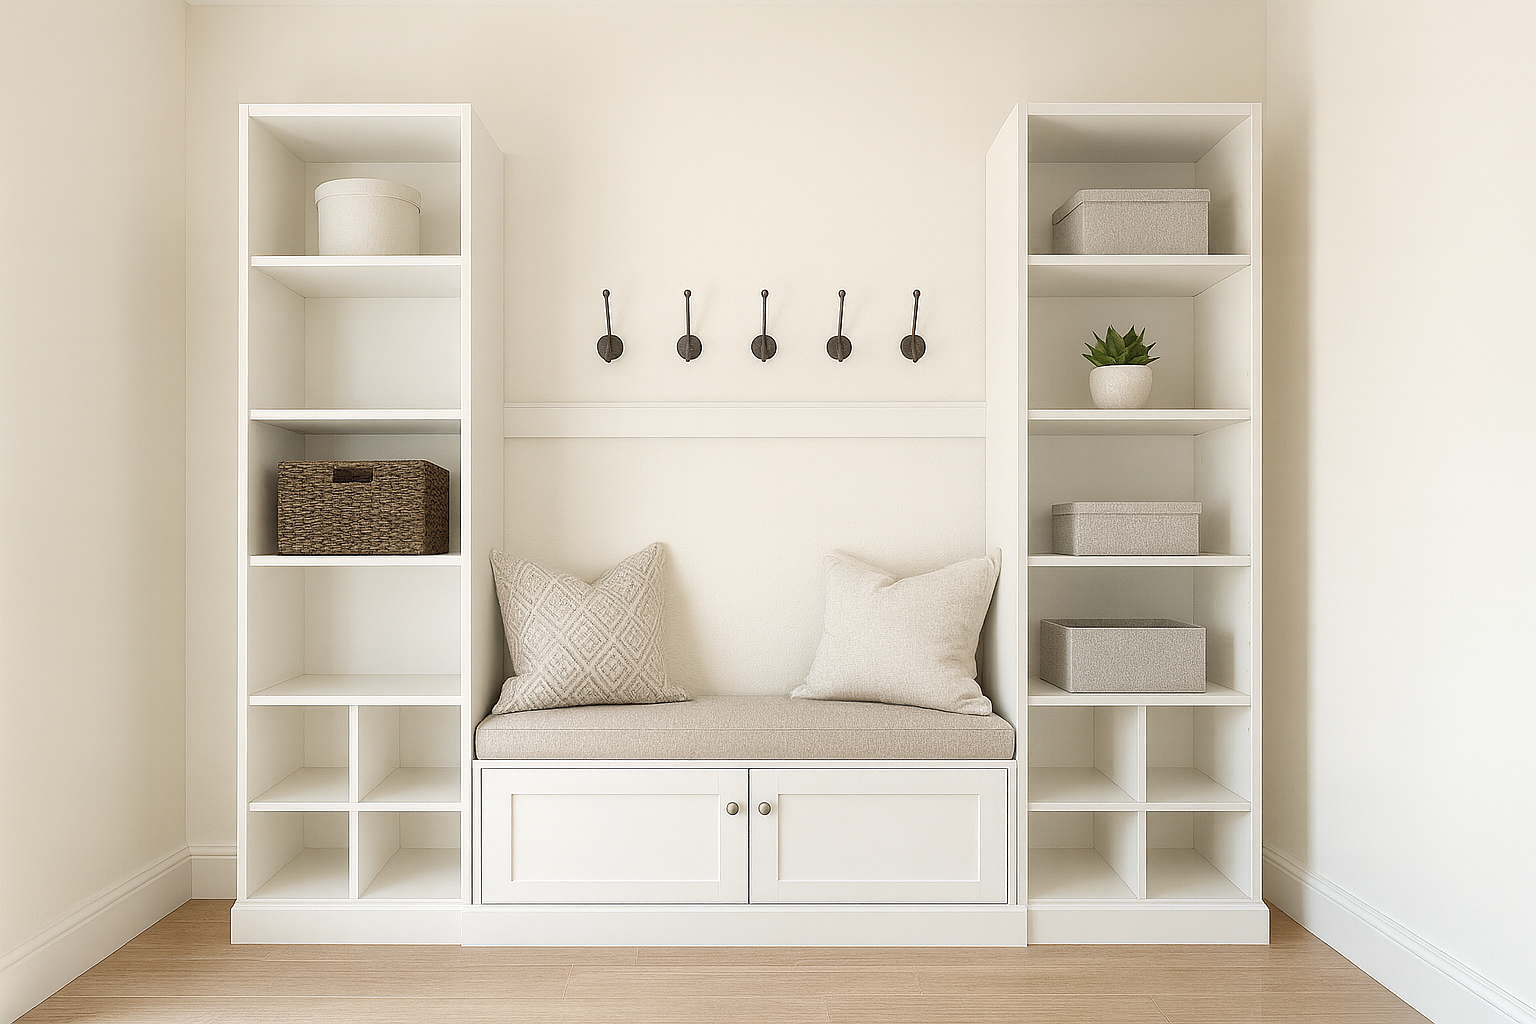
Free DIY Mudroom System Plans – Perfect for a Visible, High-Traffic Entryway Bring order and style to your entryway with this beautifully designed mudroom system. Featuring symmetrical open shelving, a comfortable cushioned bench, and functional coat hooks, this piece combines storage, seating, and display in one sleek unit. Its clean, white finish and timeless lines make it ideal for spaces where your mudroom is in plain view—keeping the area looking intentional and welcoming. With cubbies for shoes, baskets for accessories, and upper shelves for décor or seasonal storage, it’s as practical as it is attractive. The open design makes it easy to grab what you need on the way out, while the central bench provides a convenient spot to sit and put on shoes. These free, detailed woodworking plans guide you step-by-step so you can build your own custom-fit unit—saving money while creating a piece tailored to your space. Whether you’re organizing a busy family’s drop zone or styling a small entryway, this mudroom system delivers functionality without sacrificing style.
Specifications
| Project type | Lockers |
|---|---|
| Room | Entryway and Mudroom |
| Style | Cottage Style Furniture Plans |
| Difficulty | Intermediate |
| Estimated cost | $150 - $200 |
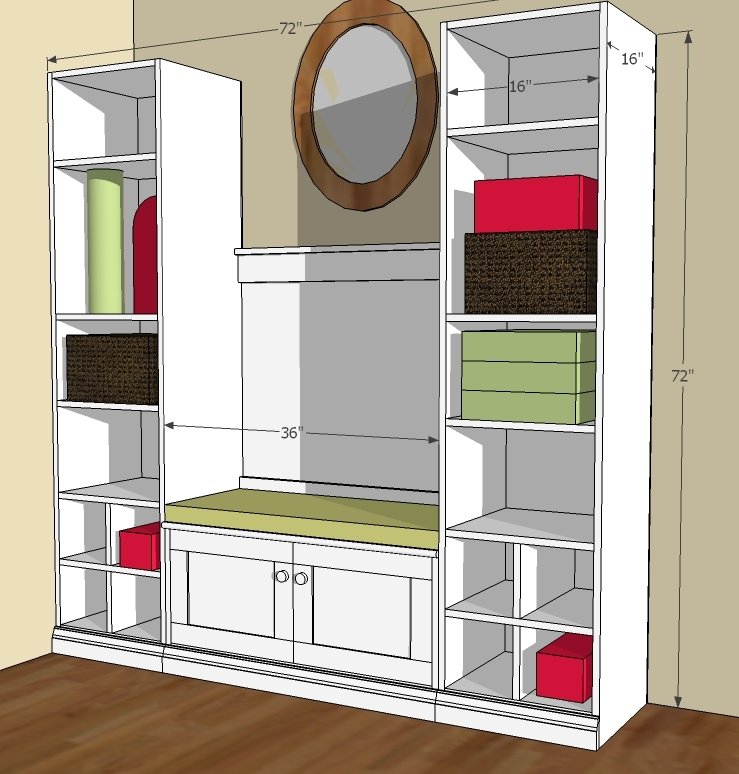
Dimensions
Use the size-specific shopping and cut lists below.
Shopping List
- 3 - Sheets of 3/4" Plywood, MDF or Particle Board cut into 15 3/4" x 8 foot long strips
- 1 - sheet 1/4" plywood or hardboard
- 1 - 7' long piece 3 1/4" base moulding
- 1 - 36" long piece 3/4" edge moulding
- 2 Knobs or Handles
- 2 Sets of Hinges
Cut List
Towers (for 2 Towers)
- 4 - 3/4" plywood 15-3/4" wide @ 72"
- 14 - 3/4" plywood 15-3/4" wide @ 16"
- 4 - 3/4" plywood 15-3/4" wide @ 7 5/8"
- 2 - 1/4" Plywood @ 17 1/2" x 72"
- 2 - 3 1/4" Base Moulding @ 17 1/2" Bench
- 1 - 3/4" plywood 15-3/4" wide @ 36"
- 1 - 3/4" plywood 15-3/4" wide 6 @ 34 1/2"
- 2 - 3/4" plywood 15-3/4" wide @ 17 1/4"
- 1 - 3 1/4" Base Moulding @ 36"
- 1 - 3/4" Edge Moulding @ 36"
- 1 - 1/4" Plywood @ 18" x 36" Doors cut to Fit
Tools
- measuring tape
- square
- pencil
- safety glasses
- hearing protection
- kreg-jig
- drill
- circular saw
- nailer
- sander
- level
- countersink drill bit
Step-by-step Instructions
Step 1
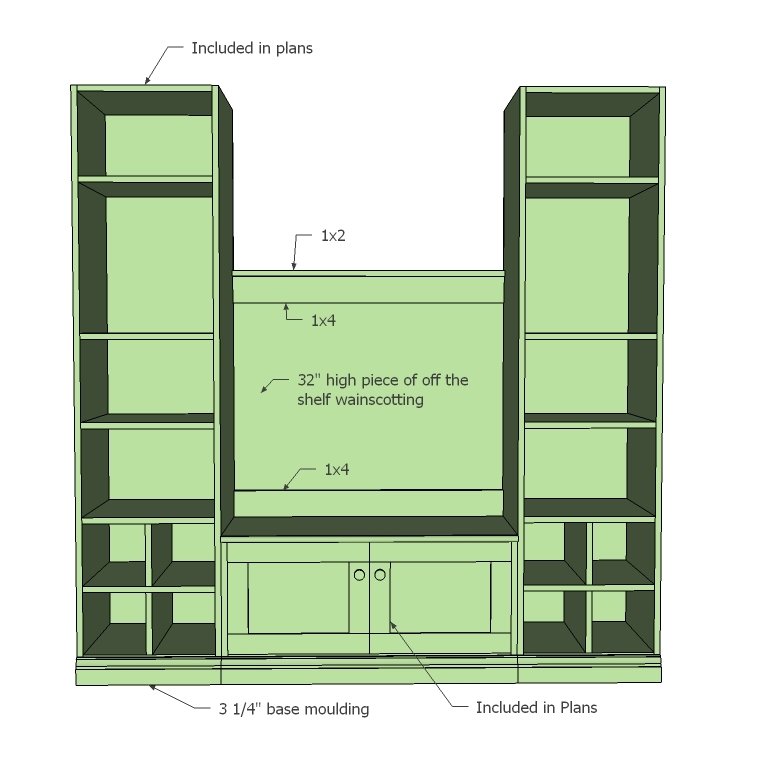
We'll just be going through the plans for the bookshelves and the seat base, but wanted to give you a quick diagram on the other components. You could also do a quick Board and Batten Wall Treatment on the back to save time and money.
Step 2
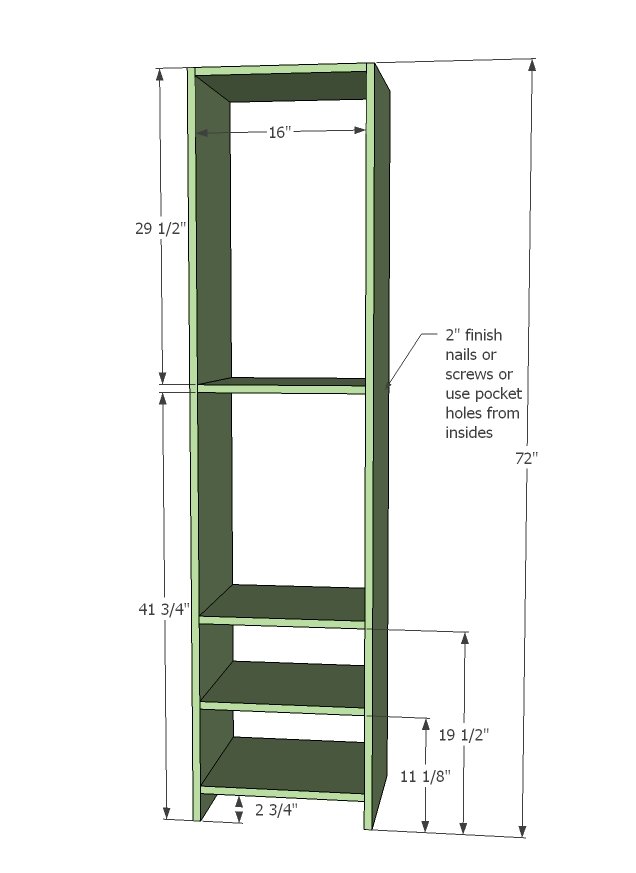
Build the towers as shown above. You are going to want some fixed shelves because it keeps the towers sturdy - at least one in the center. But by all means, you could simply use shelf pins to make all other shelves adjustable.
Step 3
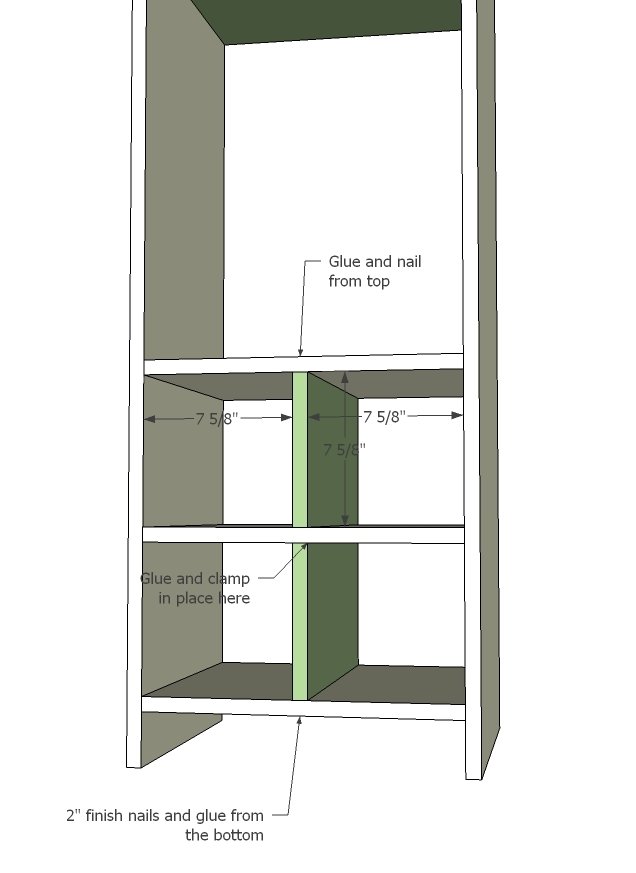
I have cubbies in my closet and love them for shoe storage, so took the time to make the extra step to show you how to do that. For those of you who have a Kreg Jig, you could simply build the + and slide it in so it's removeable.
Step 4
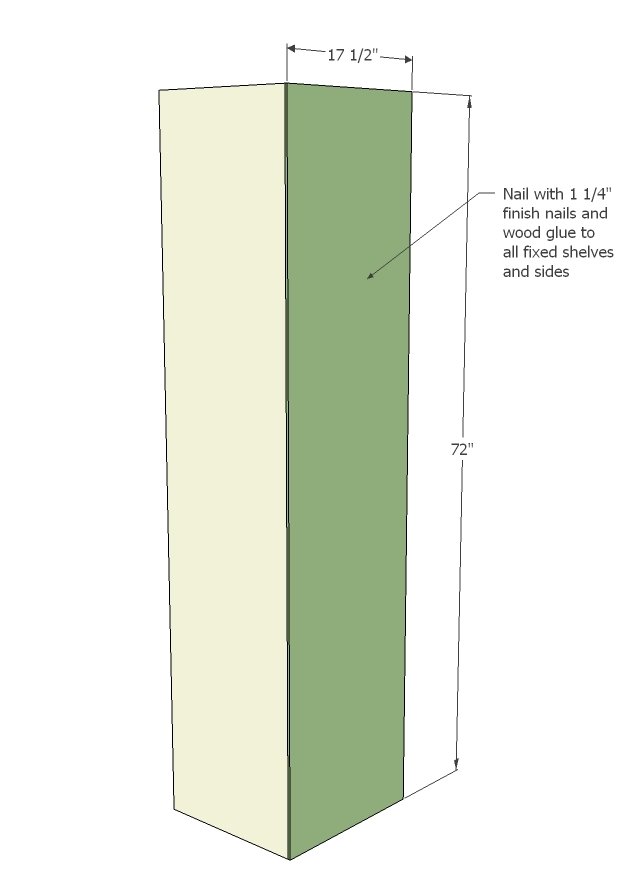
Now add a back. I highly encourage you to back your towers because it will keep them square, as these towers are frameless.
Step 5
Step 6
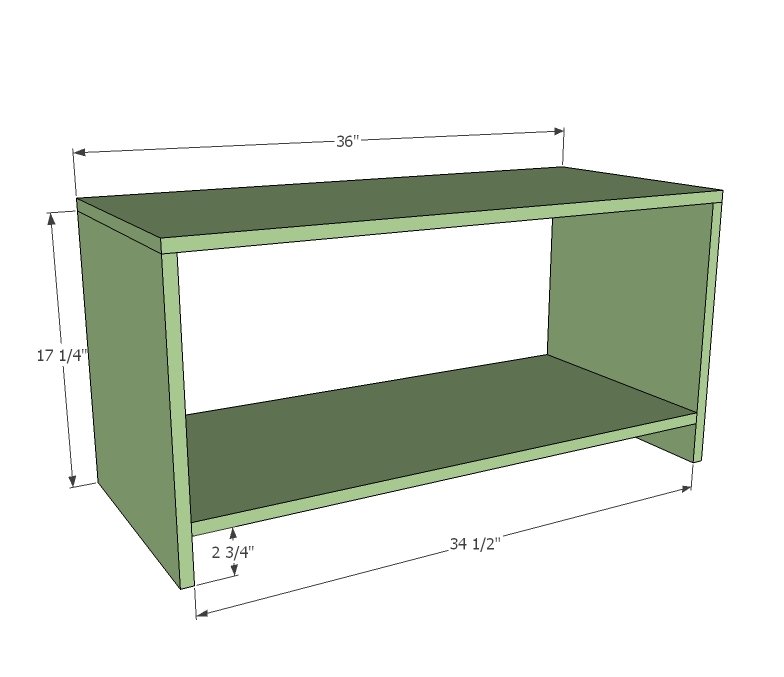
Now the bench is really simple too, but a word of warning... don't go any wider without some center partitions on the bench to avoid sagging. Build your box, you can use pocket holes or 2" screws or nails.
Step 7
Add a back. This is really important because the back will keep it all square.
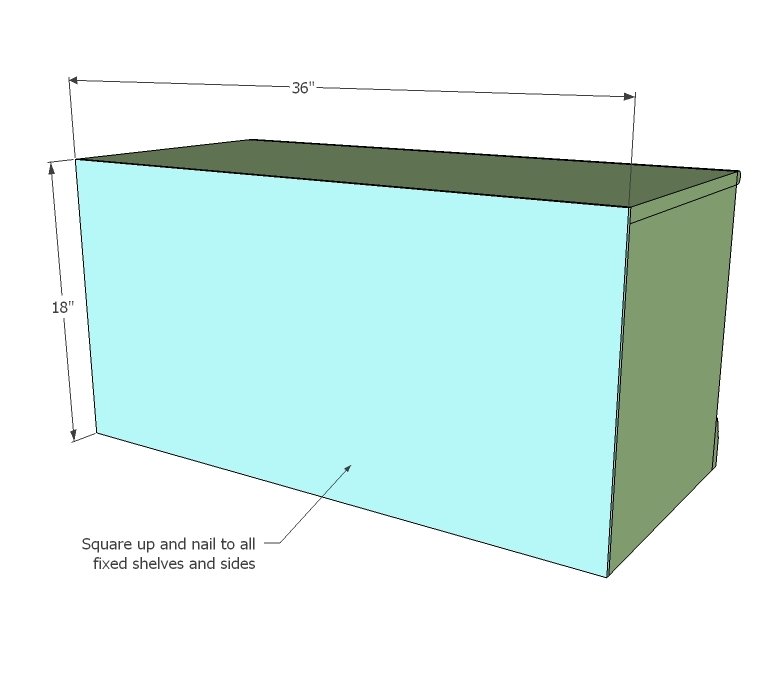
Step 8
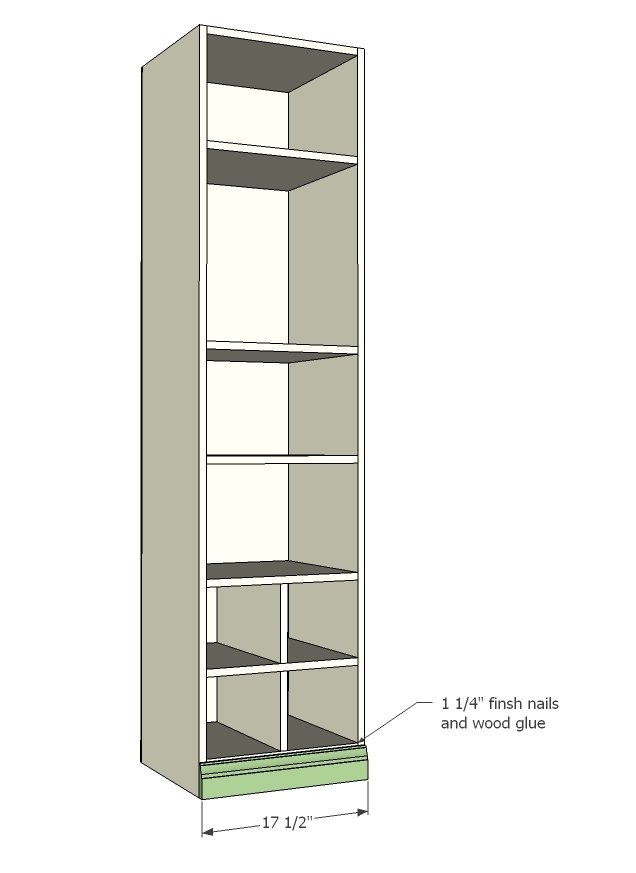
Now the base moulding. I personally would ad edge moulding as shown (as opposed to edge banding) because this is a high wear area.
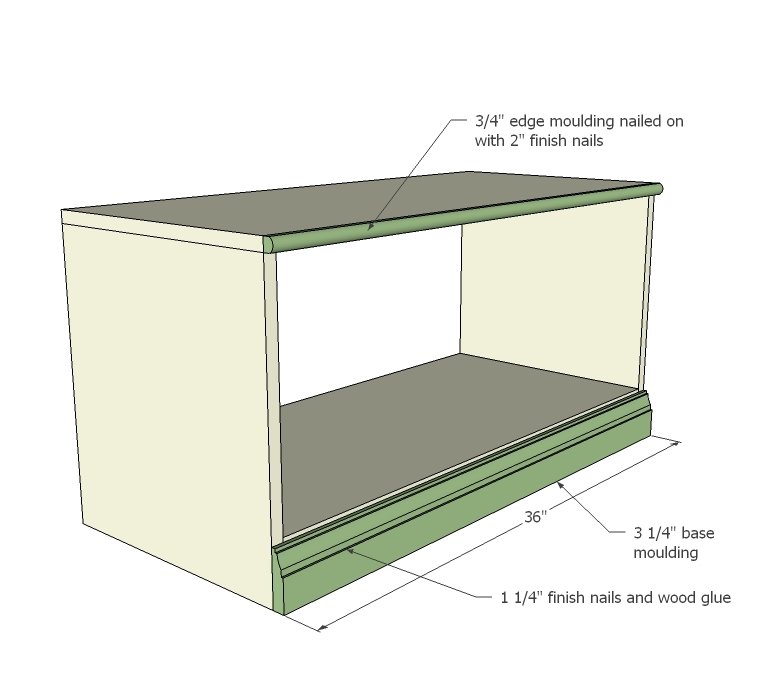
Step 9
And now doors. Simply take some leftover 1x16 material and cut down to size for doors. Fit in the openings, leaving 1/8" gaps all the way around. When you are happy with the fit, add some decorative 1/4" x 2 1/2" hobby stock to dress up the doors and some pretty knobs.
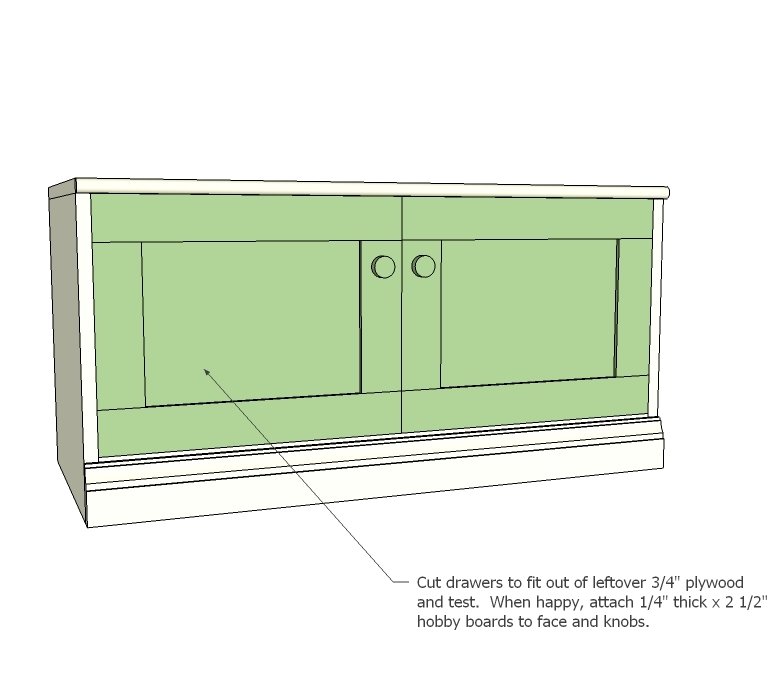
Step 10
But if doors intimidate you (or cubbies are your preference) simply place a center divider in there with 2" finish nails and wood glue.
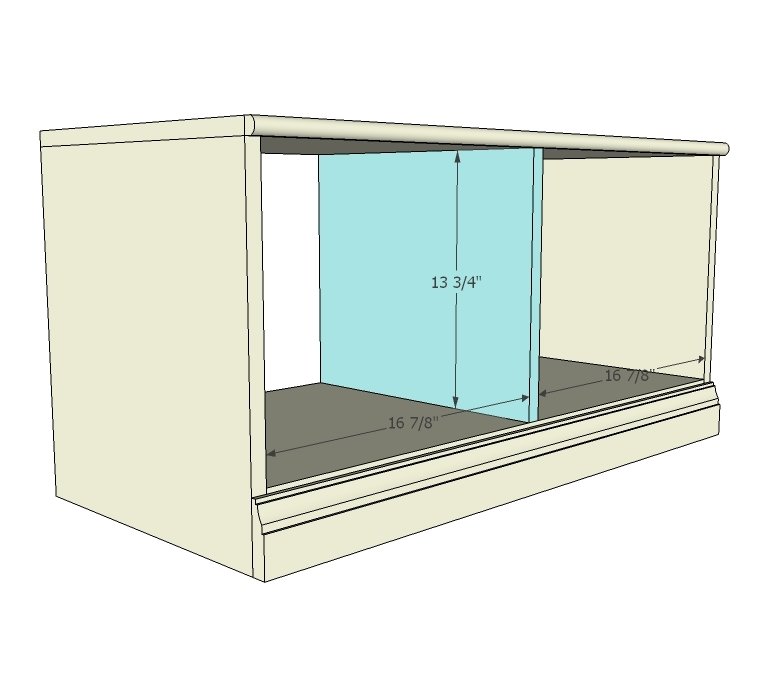
Finishing
Sand all surfaces, starting with a medium grit and finishing with fine. Wipe off the dust, fill any holes or gaps with wood filler, and sand smooth once dry. Apply primer if you're painting, then finish with your choice of paint or stain and seal with a durable clear topcoat. For outdoor projects, use exterior-rated primer, paint or stain, and sealer so the piece stands up to the weather.
Source (temporary): https://www.ana-white.com/woodworking-projects/diy-mudroom-system-towers-and-bench