Narrow End Tables
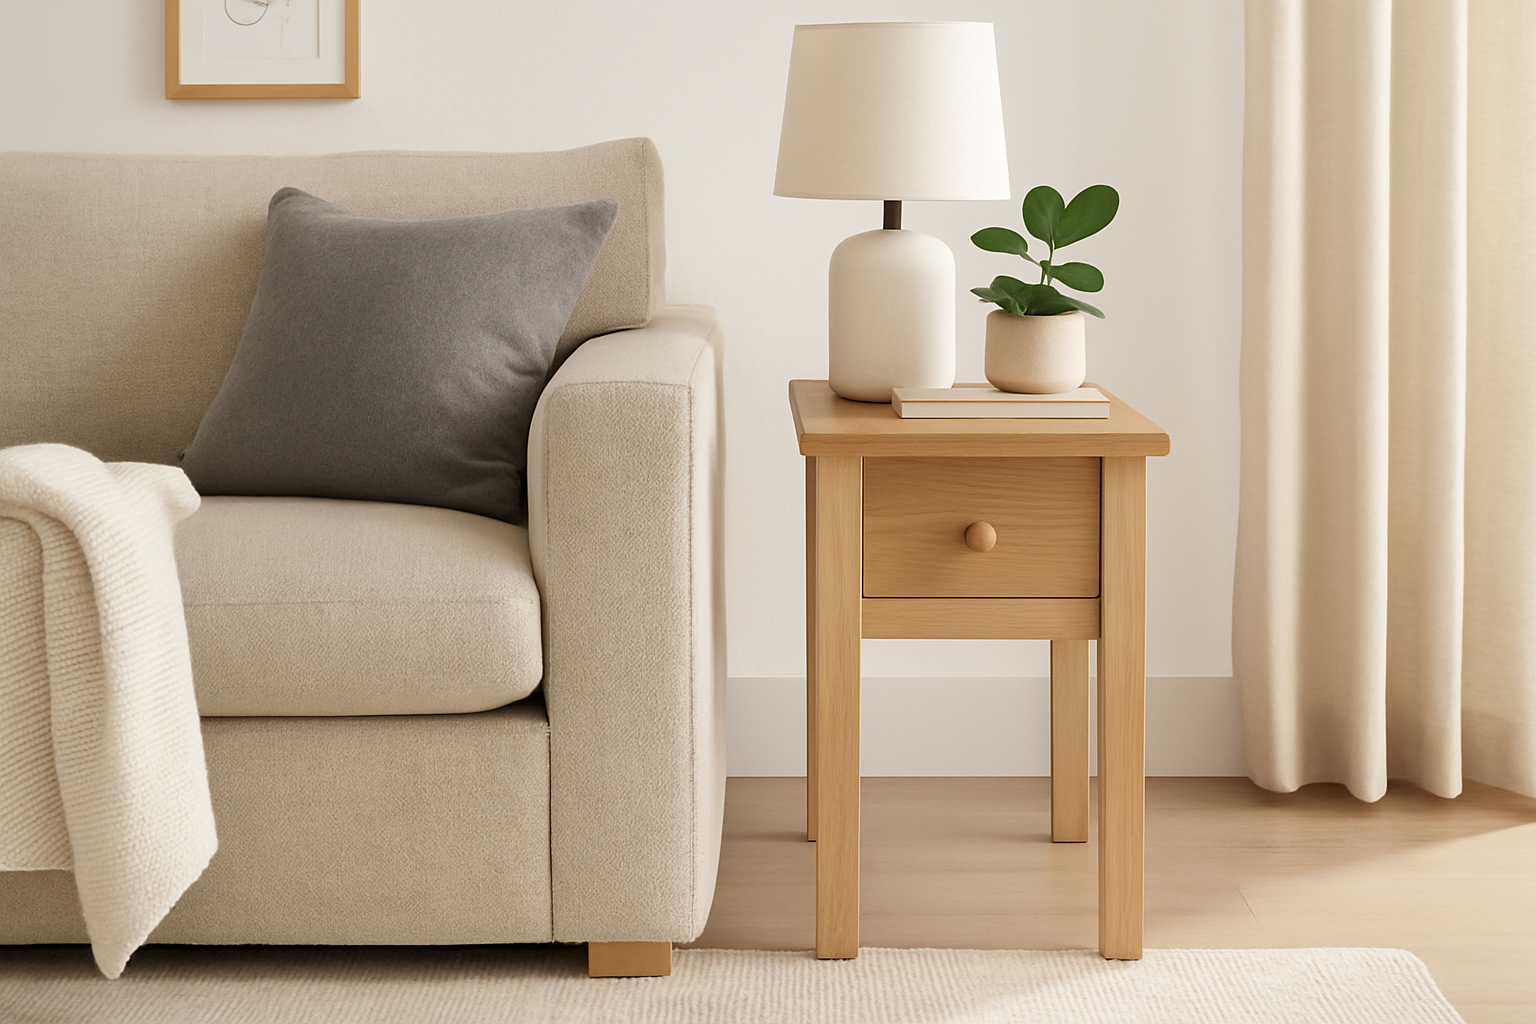
ree Narrow End Table Woodworking Plans – Perfect for Small Spaces Need an end table but working with limited space? This free DIY narrow end table plan is the perfect solution. Designed for tight corners and small rooms, this space-saving side table offers functionality without bulk. Whether you're furnishing a small living room, apartment, or cozy nook, this slim table fits seamlessly beside sofas, chairs, or beds. Features: • with detailed cut list and instructions • Slim profile – ideal for apartments, dorms, or small living rooms • Includes drawer for concealed storage • Beginner-friendly construction using plywood and dimensional lumber • Clean, classic design complements modern farmhouse and minimalist décor • Paint or stain to match your style Maximize style and function in a compact footprint. Download your free narrow end table plans today and start building a piece that works perfectly in even the smallest of spaces!
Specifications
| Project type | Side and End Table Plans |
|---|---|
| Room | living room |
| Style | Cottage Style Furniture Plans |
| Difficulty | Intermediate |
| Estimated cost | $20 - $50 |
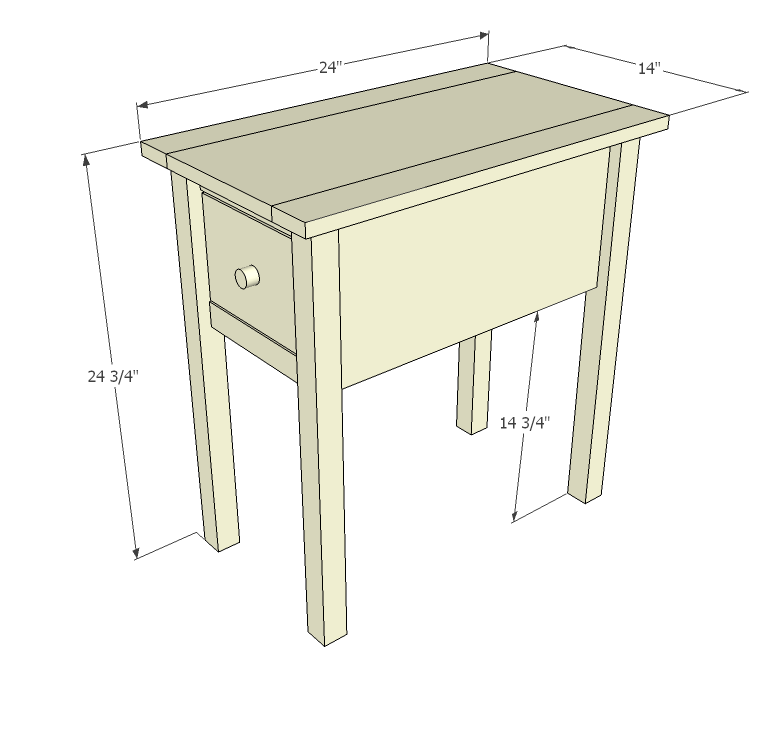
Dimensions
Use the size-specific shopping and cut lists below.
Shopping List
- 1 - 2x2 @ 8 feet long (grab 2 if you don't have a pocket hole jig)
- 1 - 1x10 @ 8 feet long
- 1 - 1x4 @ 4 feet long
- 1 - 1x3 @ 4 feet long
- 1 - 1x2 @ 2 feet long
- 1/4" plywood scrap (for bottom of drawers)
- 1 - knob or handle
- 1 set 16" drawer slides, the white euro ones that fasten on the bottom corners
Cut List
- 1 - 1x10 @ 24" (Top)
- 2 - 1x3 @ 24" (Top Trim)
- 2 - 1x10 @ 19" (Sides)
- 1 - 1x10 @ 9 1/4" (Width of 1x10)
- 2 - 1x2 @ 9 1/4" (Width of 1x10)
- 4 - 2x2 @ 24" (Legs)
- 3 - 2x2 @ 9 1/4" (Width of legs, use if you do not have a pocket hole jig)
- Drawer cut list given in plan
Tools
- measuring tape
- square
- pencil
- safety glasses
- hearing protection
- kreg-jig
- drill
- circular saw
- sander
- level
- countersink drill bit
Step-by-step Instructions
Step 1
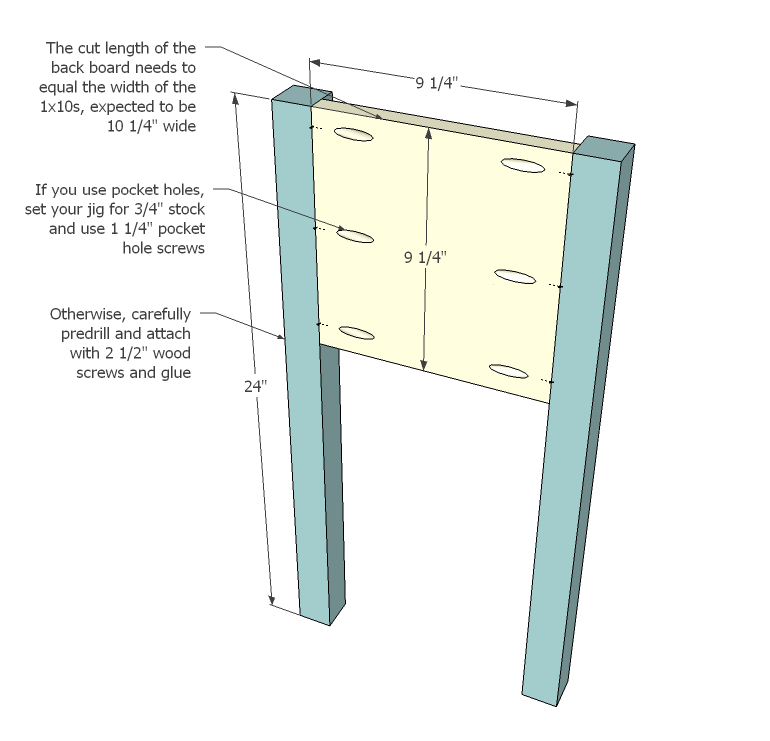
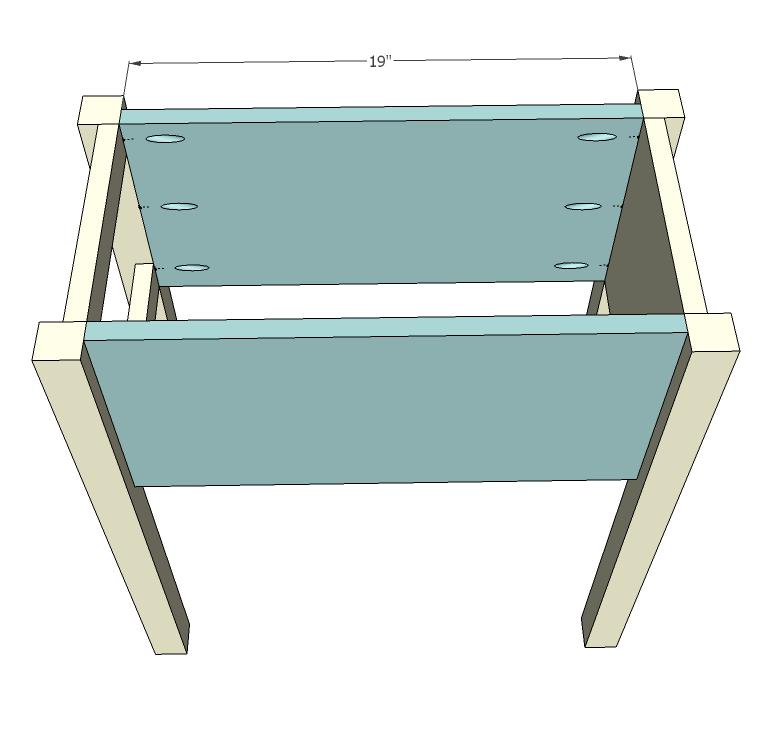
This narrow cottage style end table can be made with either the Kreg Jig or countersunk screws. The great thing about the Kreg Jig is your joints will be precise and square - super important when you are building with drawers. Your drawer won't fit right if your box is not perfectly square, so take great care to check for square after each step. Build the back first. I did things in this order so you can get your drill in for pocket holes. Note that the end apron needs to be cut to the width of your 1x10s, expected to be 9 1/4" but dimensional lumber can vary in width.
Step 2
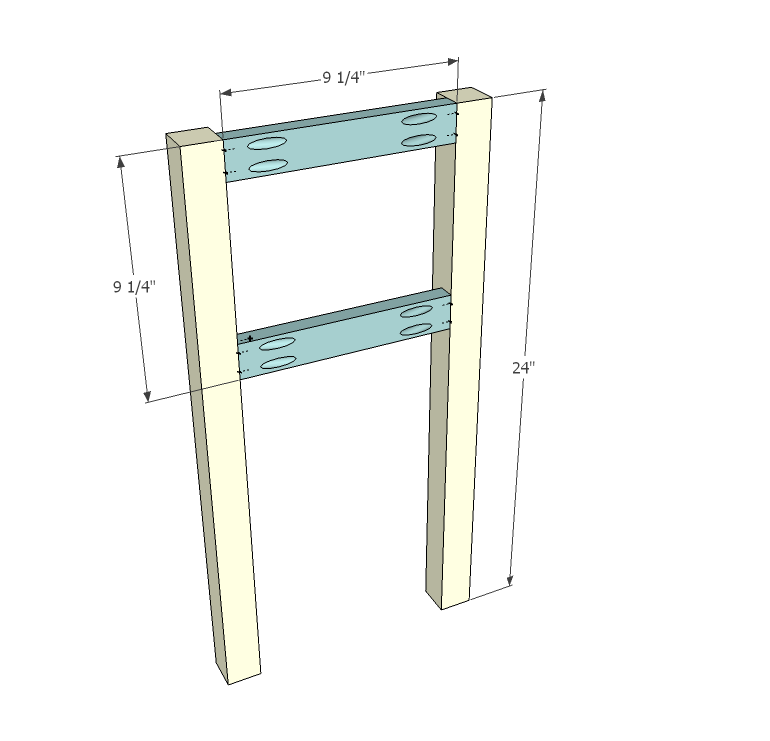
Now build the front, using the 1x2s as shown here. If you are not using pocket holes, you will need to very carefully predrill holes and use 2 1/2" screws and glue, predrilling from the outsides of the legs. Note these boards need to be cut to the width of your 1x10s.
And now attach the sides to the front and back.
NOTE: You may wish to attach drawer slides to side aprons before attaching side aprons to end/front due to lack of clearance for your drill. Slide bottom will sit 2" from bottom of side aprons. See last step.
Step 4
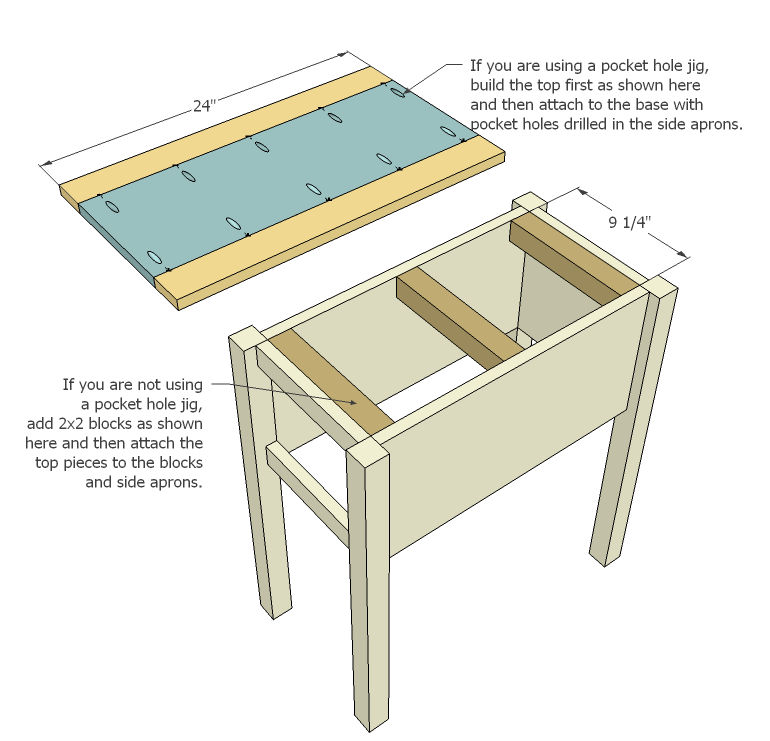
If you have a Kreg Jig, build your top as shown in the diagram. Otherwise, add blocking with 2x2s and attach the top to the blocks with either finish nails from the top, or 2" screws from the underside. The 1x10 will fit in the center, not crossing the side aprons. Put the 1x10 on first, followed by the 1x3 side trim.
Step 5
Step 6
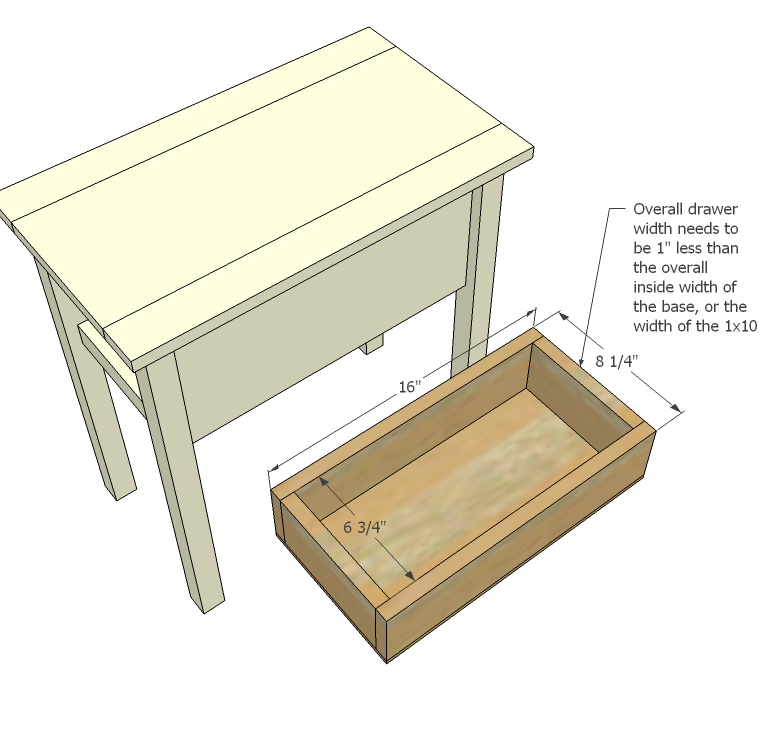
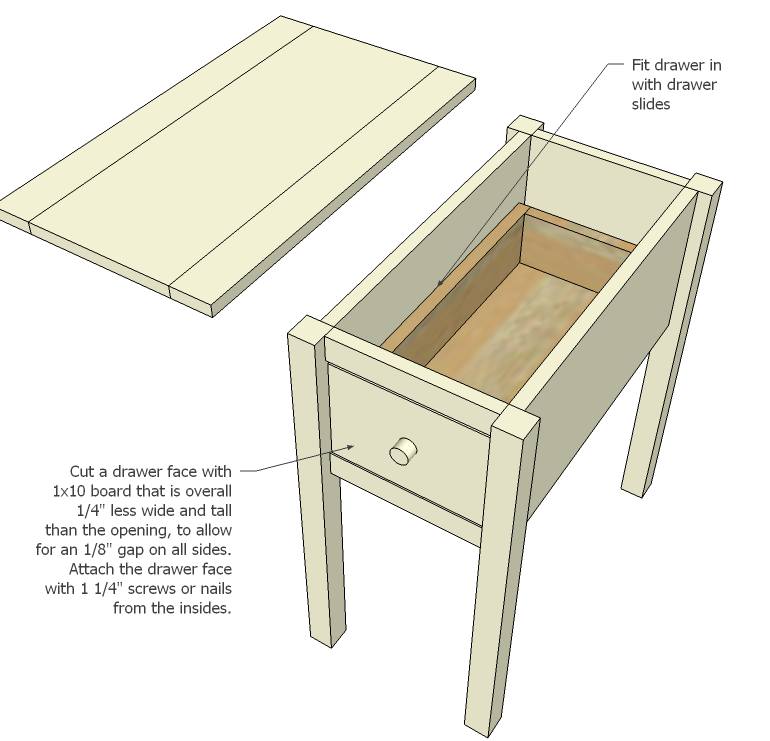
Fit the drawer box in the drawer, with the fronts of slides starting at the legs, and the bottom of the slides (the long flat part of the box members) attached 2" up from the side apron bottoms. Once you are happy with the drawer slides, cut a face for the drawer from the 1x10s, and fit so an even 1/8" gap rests on all sides, and attach with 1 1/4" screws or finish nails from insides.
Finishing
Sand all surfaces, starting with a medium grit and finishing with fine. Wipe off the dust, fill any holes or gaps with wood filler, and sand smooth once dry. Apply primer if you're painting, then finish with your choice of paint or stain and seal with a durable clear topcoat. For outdoor projects, use exterior-rated primer, paint or stain, and sealer so the piece stands up to the weather.
Source (temporary): https://www.ana-white.com/woodworking-projects/diy-narrow-end-tables-easy-build-small-spaces