Octagon Picnic Table
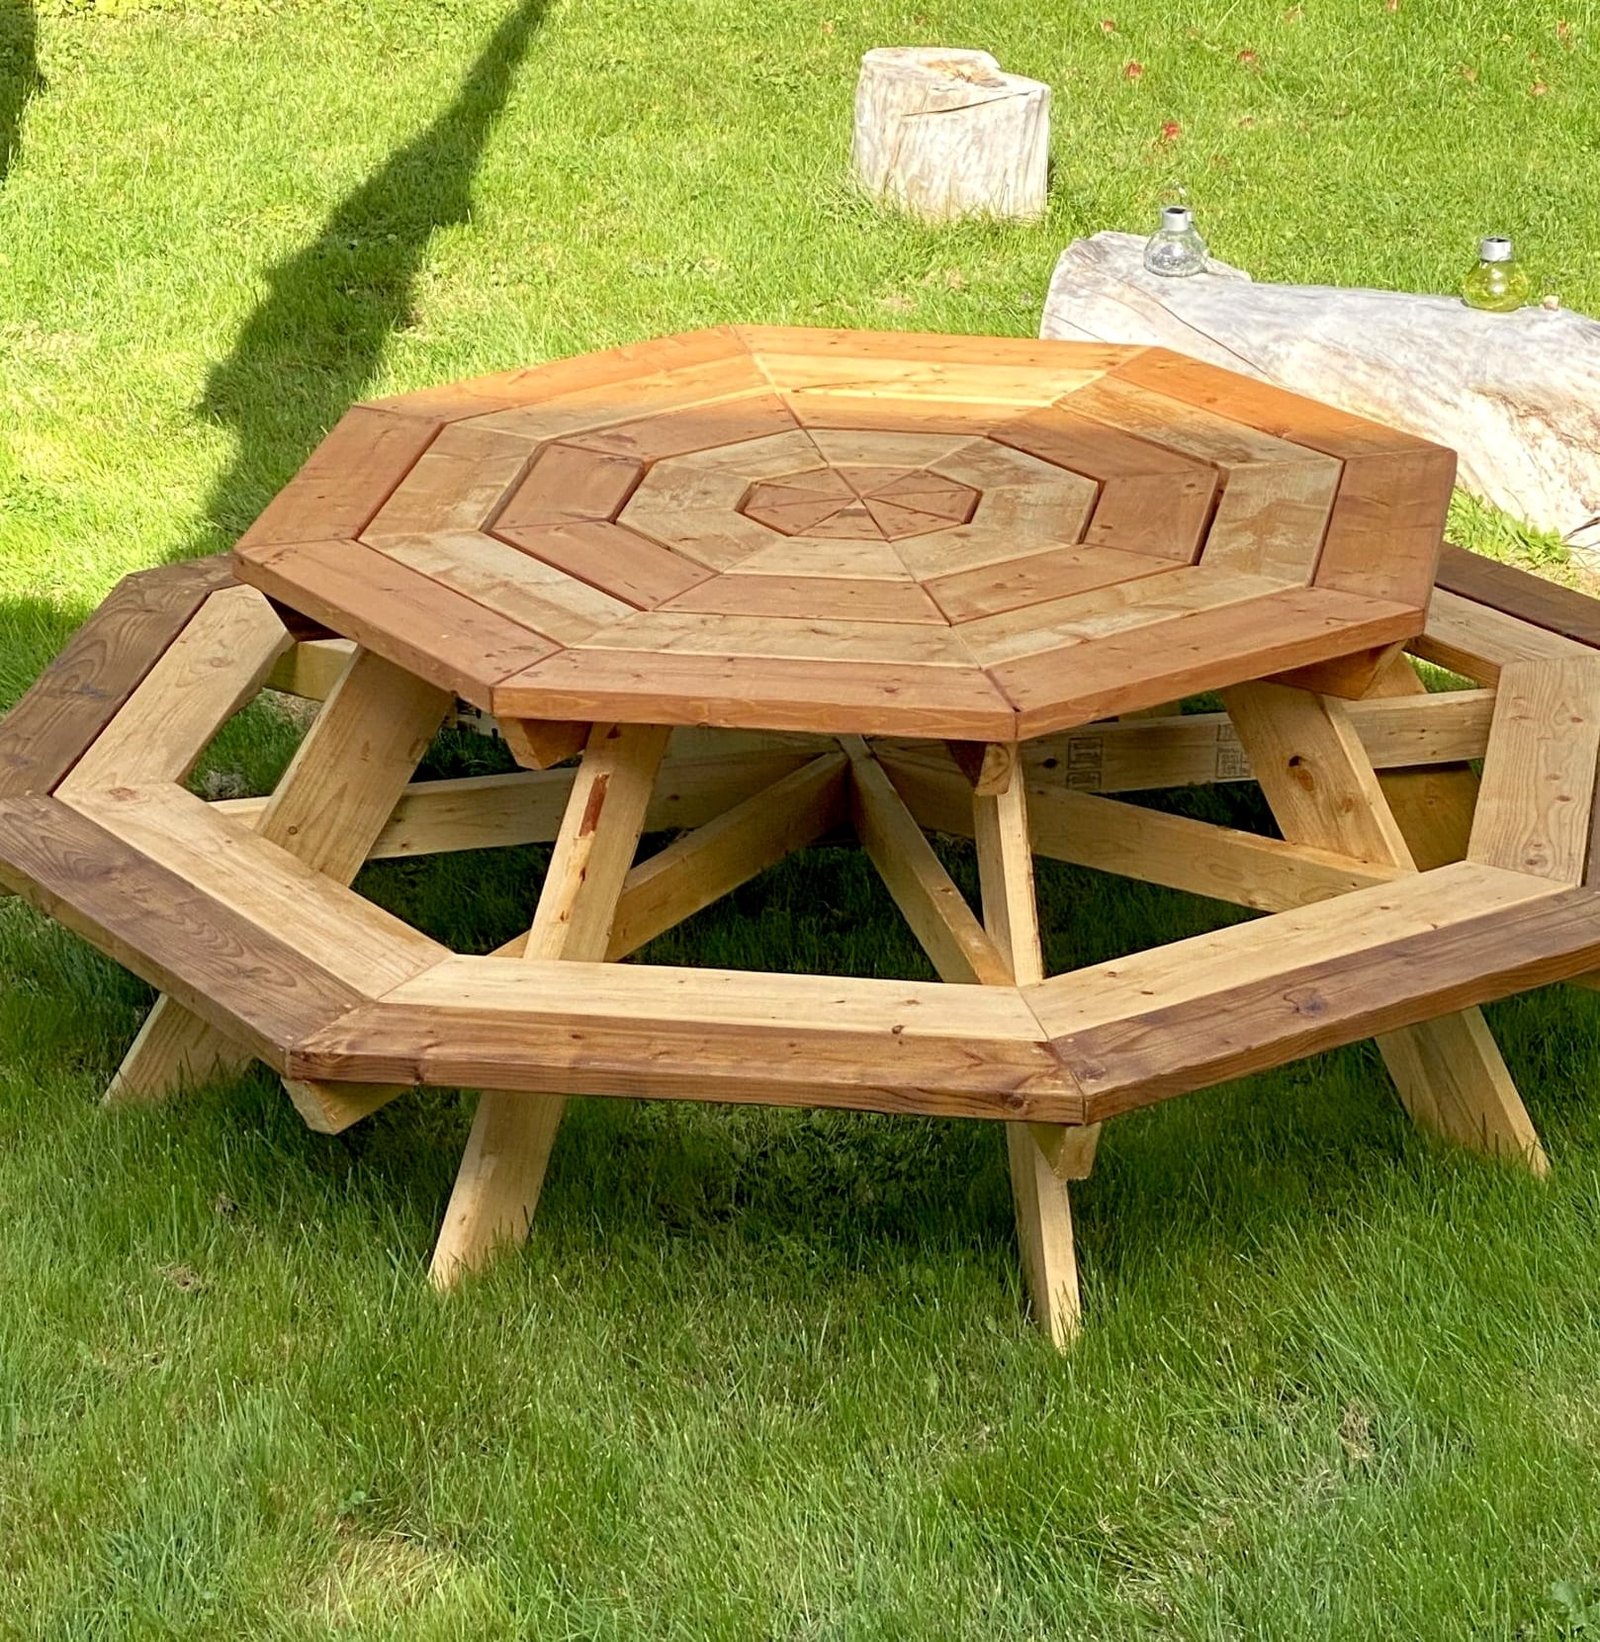
Build your own eight-sided (octagon) picnic table with this completely! This round-style picnic table offers a unique, space-efficient design that seats up to 8 people—perfect for outdoor dining, family gatherings, and backyard events. With step-by-step instructions, shopping and cut lists, and beginner-friendly guidance, you can build this eye-catching table in a weekend using basic tools and materials. A sturdy, stylish project that’s made to last!
Specifications
| Project type | Picnic Tables and Outdoor Dining |
|---|---|
| Room | Outdoor |
| Style | Farmhouse Furniture |
| Difficulty | Advanced |
| Estimated cost | $100-$150 |
Dimensions
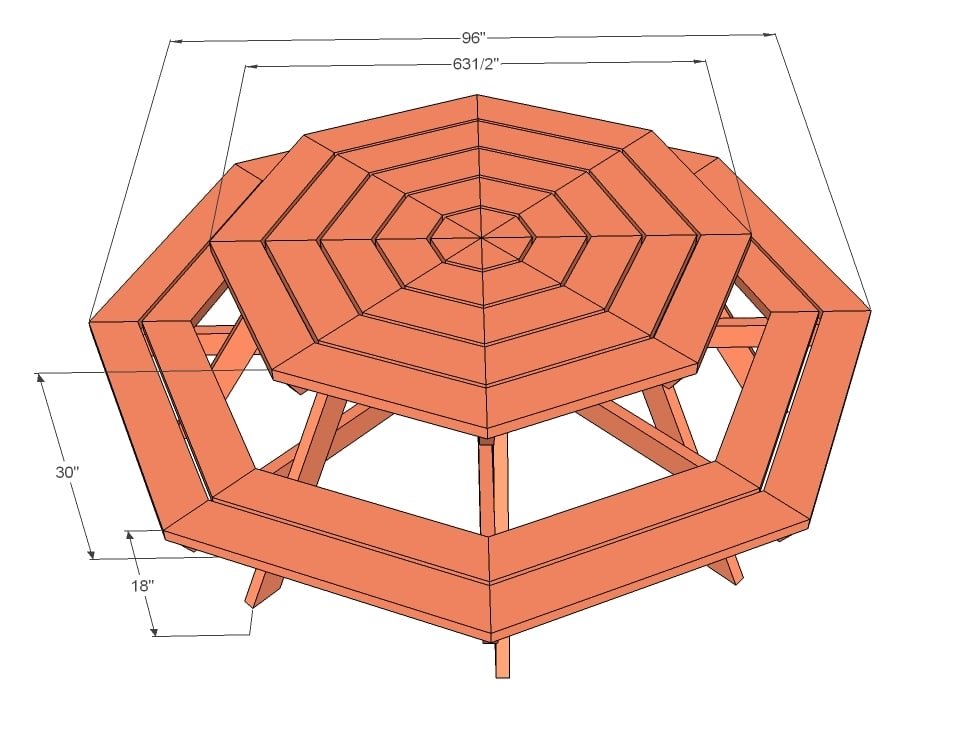
Use the size-specific shopping and cut lists below.
Shopping List
- 10 - 2x4 @ 8 feet long
- 15 - 2x6 @ 8 feet long
- 2-1/2" to 3" long self tapping star bit exterior screws (About 200)
- Medium grit sandpaper
- Exterior finish suitable for fences
Cut List
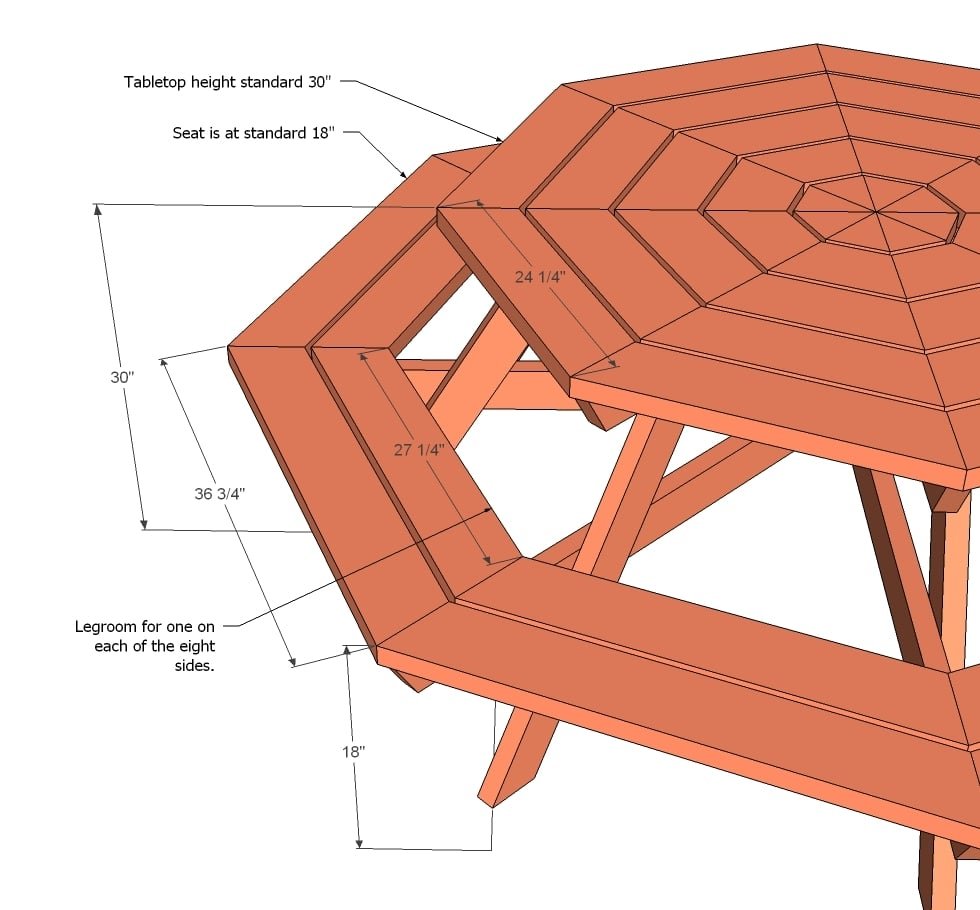
UPDATE: One of our readers built this table and felt it could use a little more leg room. He suggested extending out the seat 2x4 boards (marked by *) by 4" all the way around, and removing the inner seat board and adding a seat board to the outside to increase leg room - the seat boards marked with ** should be measured and cut as you go.
It is recommended that you cut as you go, as boards can vary in width - especially the tabletop and seat boards.
Table Framing
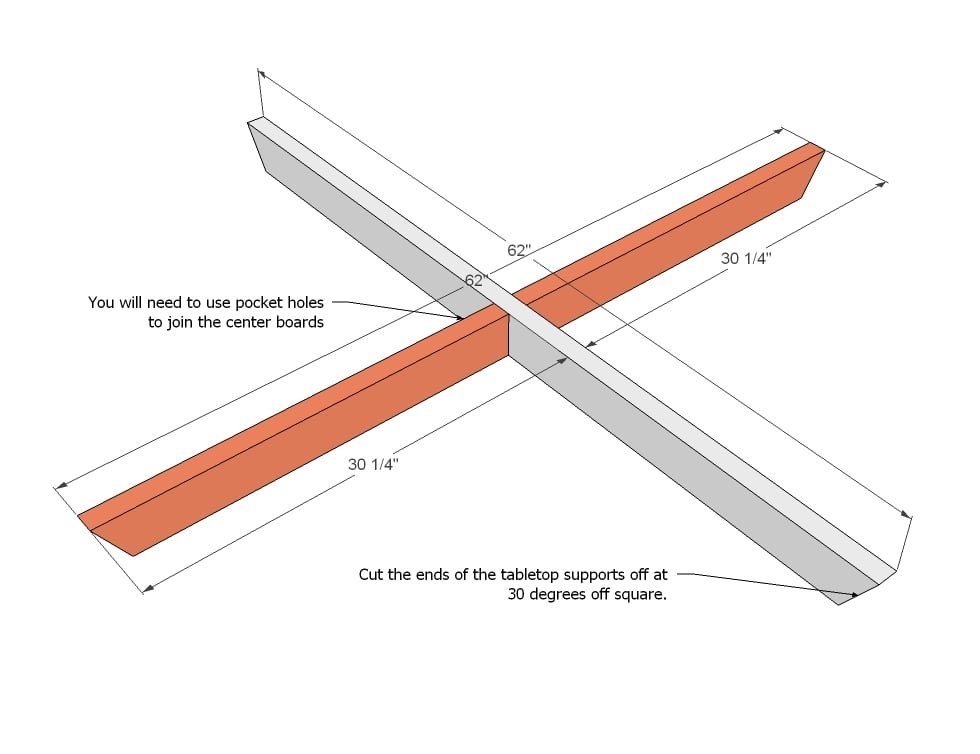
- 1 - 2x4 @ 62" (Longest Point - Both ends tapered back at 30 degrees off square, NOT parallel to each other)
- 2 - 2x4 @ 30 1/2" (Longest Point - One end at 30 degrees off square)
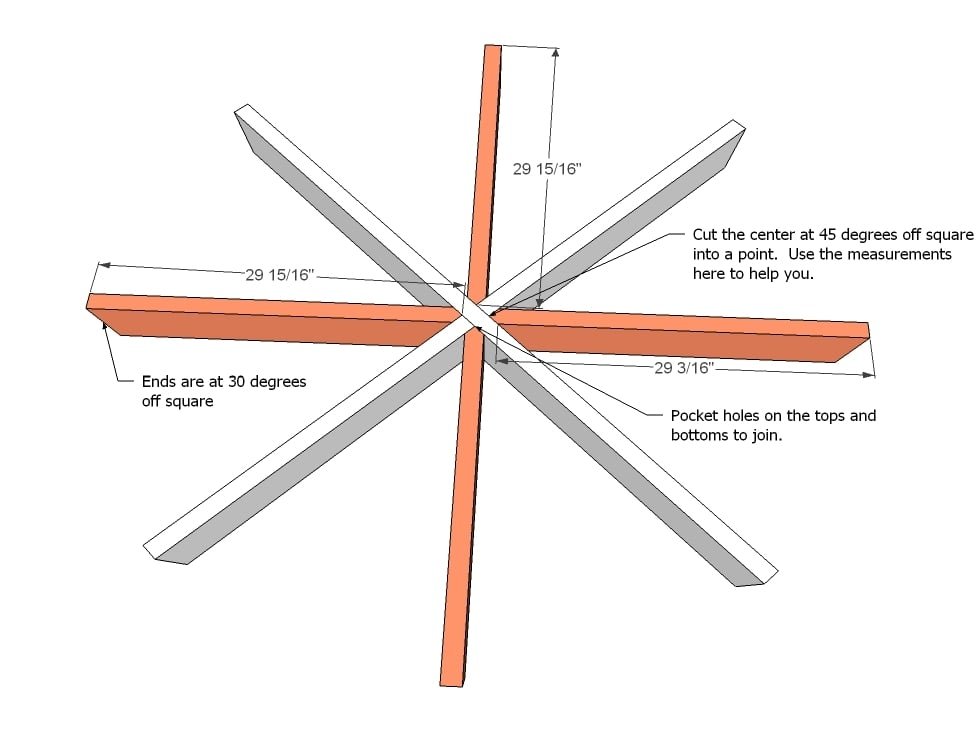
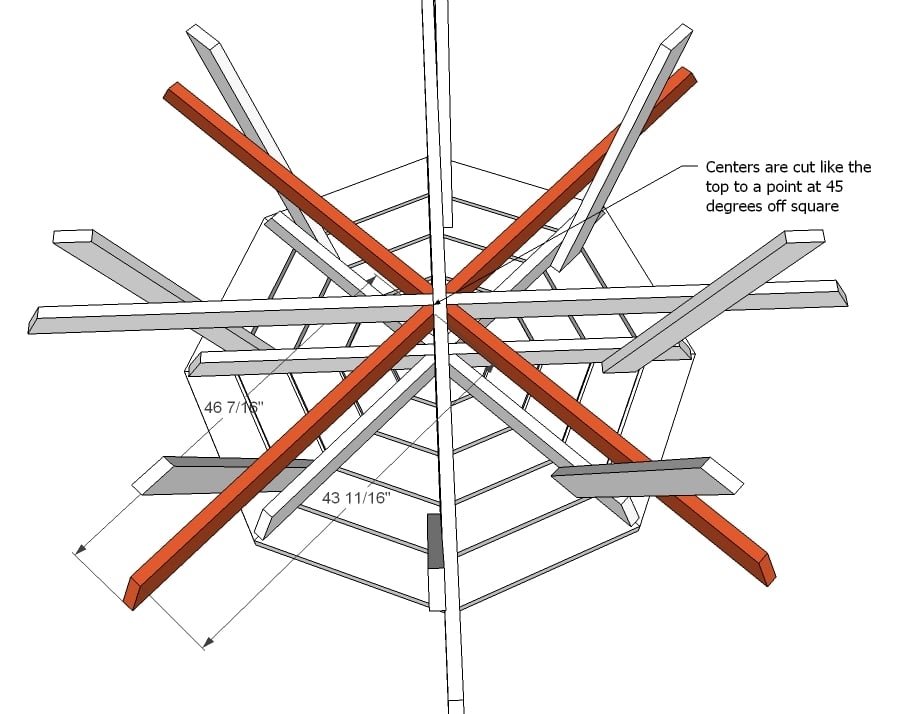
- 4 - 2x4 @ 29 15/16" (Longest Point - One end at 30 degrees off square, other end at a point, 45 degrees off square)
Tabletop Boards
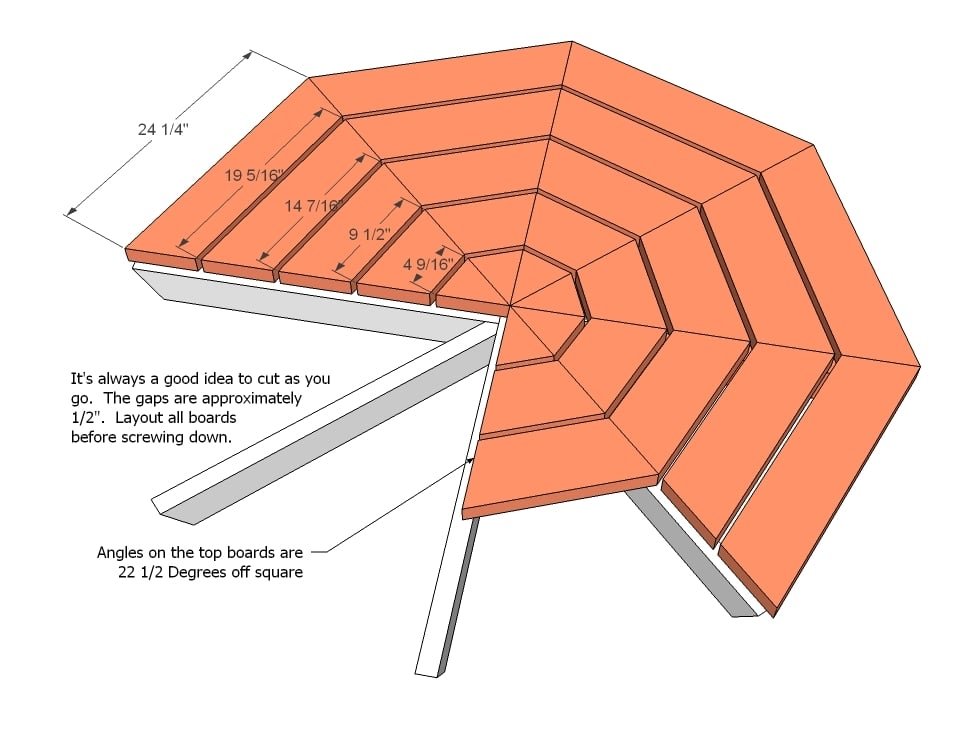
- 8 - 2x6 @ 4 9/16" (Longest Point - Both ends at 22 1/2 degrees off square)
- 8 - 2x6 @ 9 1/2" (Longest Point - Both ends at 22 1/2 degrees off square)
- 8 - 2x6 @ 14 7/16" (Longest Point - Both ends at 22 1/2 degrees off square)
- 8 - 2x6 @ 19 5/16" (Longest Point - Both ends at 22 1/2 degrees off square)
- 8 - 2x6 @ 24 1/4" (Longest Point - Both ends at 22 1/2 degrees off square)
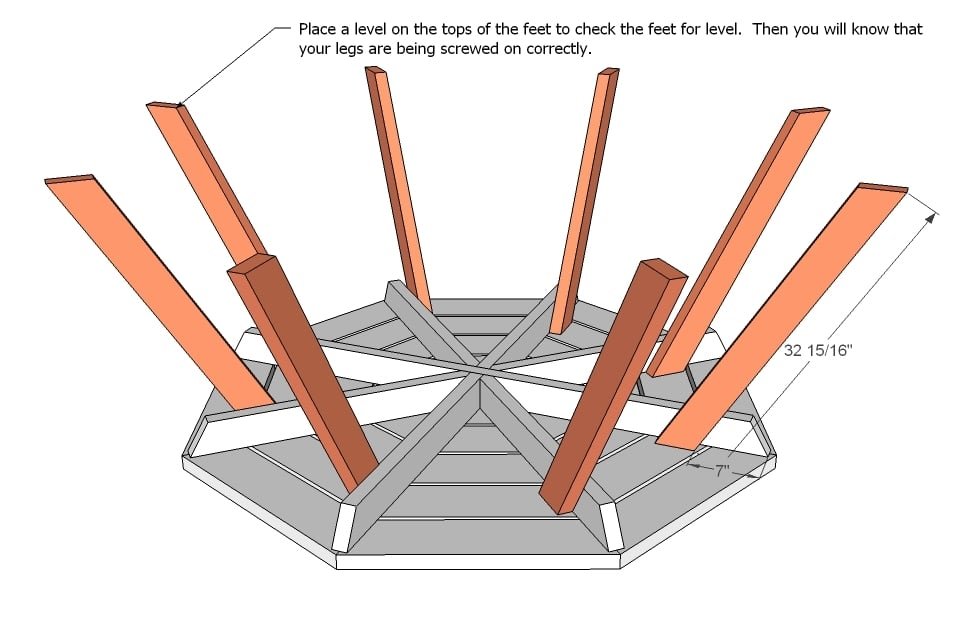
- 8 - 2x6 @ 32 15/16" (Both ends at 30 degrees off square, parallel to each other)
Seat Framing
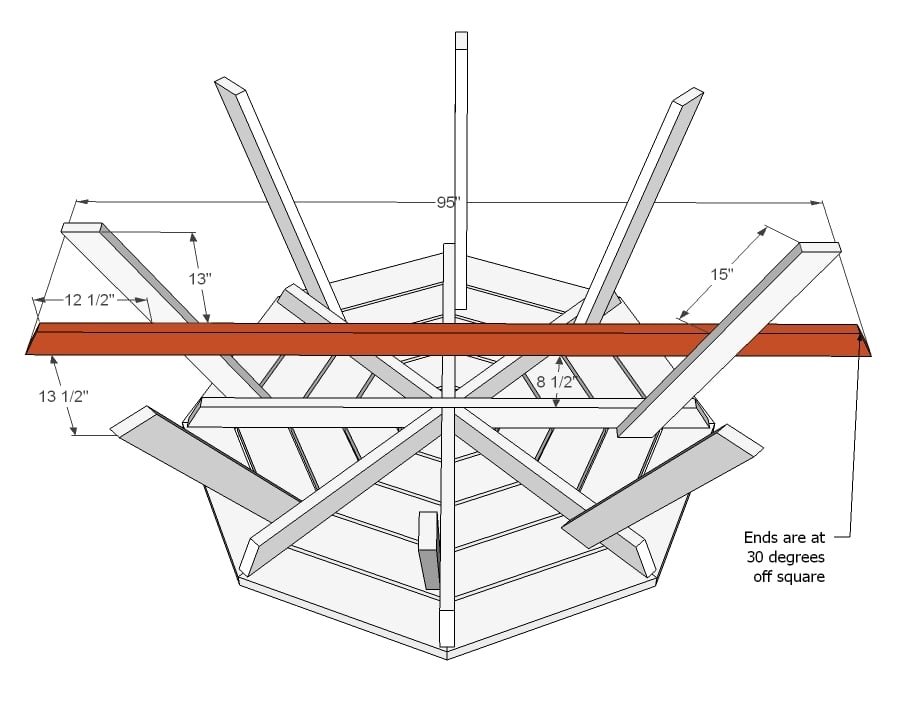
- 1 - 2x4 @ 95" (Longest Point - Both ends tapered in at 30 degrees off square)*
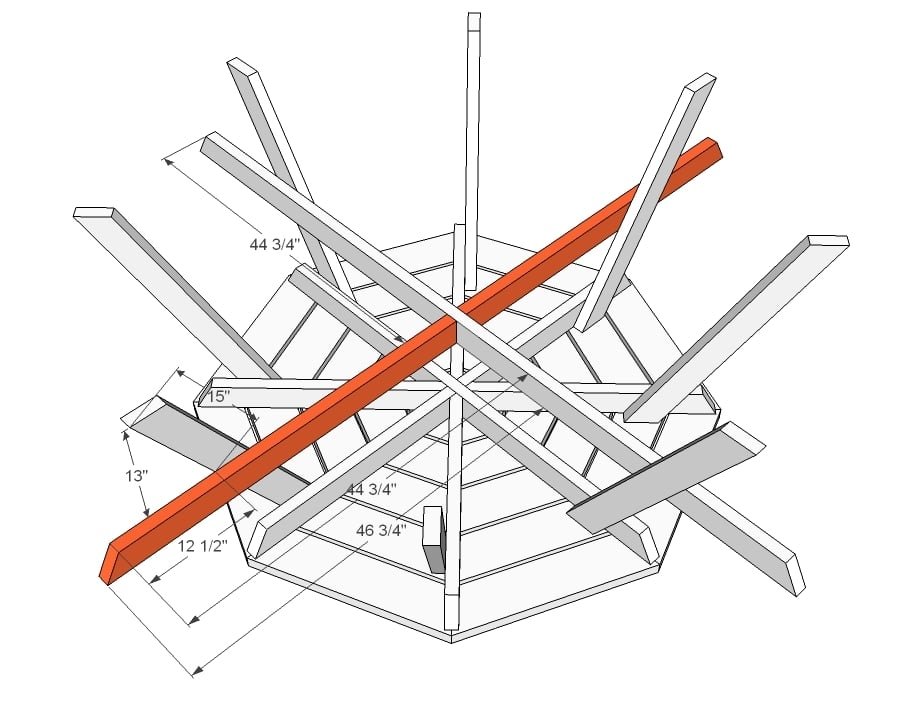
- 2 - 2x4 @ 46 3/4" (Longest Point - One end at 30 degrees off square)*
- 4 - 2x4 @ 46 7/16" (Longest Point - One end at 30 degrees off square, other end at a point, 45 degrees off square)*
Seat Boards
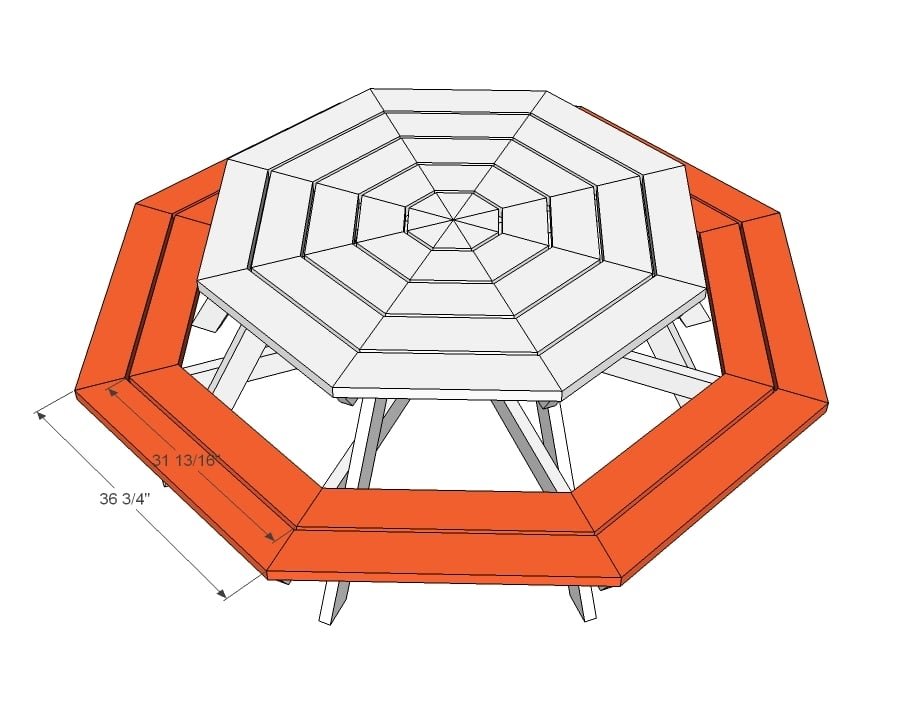
- 8 - 2x6 @ 31 13/16" (Longest Point - Both ends at 22 1/2 degrees off square)**
- 8 - 2x6 @ 36 3/4" (Both ends at 30 degrees off square, parallel to each other)**
NOTE: 2x6 are seat boards and tabletop boards, 2x4 are internal framing boards
Tools
- measuring tape
- square
- pencil
- hammer
- safety glasses
- hearing protection
- kreg-jig
- drill
- compound miter saw
- sander
- level
- countersink drill bit
Step-by-step Instructions
Step 1
I wanted to add a diagram so that you can take measurements of the leg room.
Step 2
It starts with a big X. Be sure you are working on a very flat, level surface. Use pocket hole screws and glue to joint in the center as shown above. You could also use metal straps or plates but you can only place the metal plates on the bottom side.
Step 3
You will then need to carefully cut the remaining supports as shown above (click for a larger view) and add, with 22 1/2 degree angles between the "spokes". Pocket holes or metal brackets.
Step 4
Layout all of the tabletop boards first and adjust as necessary. The tabletop boards should meet in the center of the "spokes". Screw down, two screws per board, predrilled.
Step 5
Step 6
Mark all of your legs as shown above. Start by adding the longest remaining support as shown above. TIP: For added strength, rotate the full length support to 90 degrees from the full length tabletop support. This is shown incorrectly above.
Step 7
Then add the two supports cut straight on one end as shown above.
Step 8
As you did the tabletop, add the remaining lower supports.
Step 9
Flip the table back over and screw down the seat boards as shown above. This time, start to the outside and work your way inward.
Finishing
Sand all surfaces, starting with a medium grit and finishing with fine. Wipe off the dust, fill any holes or gaps with wood filler, and sand smooth once dry. Apply primer if you're painting, then finish with your choice of paint or stain and seal with a durable clear topcoat. For outdoor projects, use exterior-rated primer, paint or stain, and sealer so the piece stands up to the weather.
Source (temporary): https://www.ana-white.com/woodworking-projects/diy-octagon-picnic-table-free-plans-step-step-instructions